 Ireland
 Australia
 Česko
Česko Danmark
 Deutschland
 Eesti
Eesti España
 Ελλάδα
 France
 Hrvatska
 Italia
 Latvija
 Lietuva
 Magyarország
 Nederlands
 New-Zealand
 Norge
Norge Polska
 Portugal
 România
 Schweiz (Deutsch)
 Slovenija
 Slovensko
 Suomi
Suomi Sverige
 United Kingdom
 България
 Canada (English)
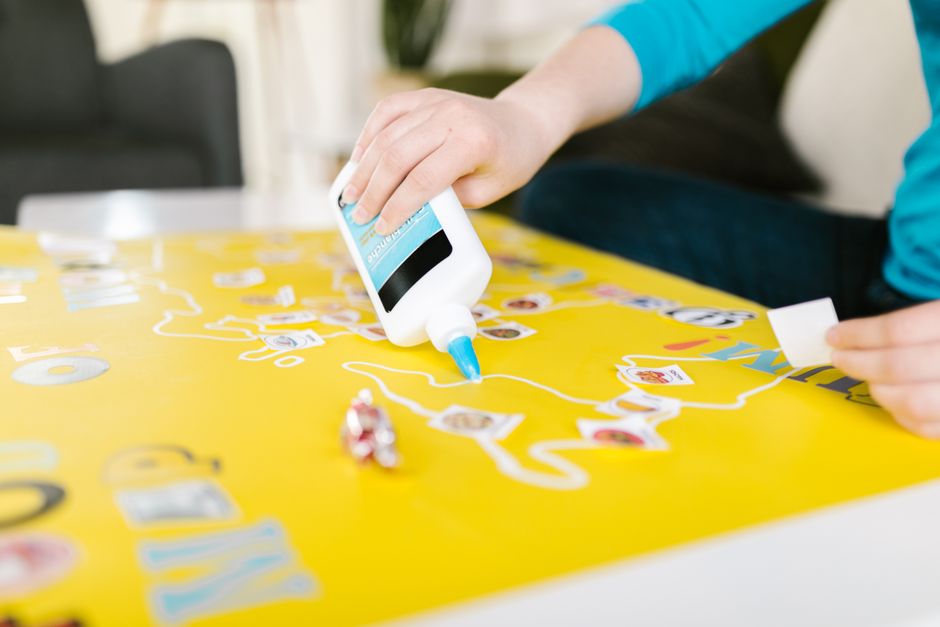
Gluing paper onto a window sounds like a simple task, but anyone who has tried it without the right materials knows how quickly things can go wrong. Bubbles form under the paper, the edges peel off within days, moisture seeps in and ruins the design, or the adhesive leaves a sticky residue on the glass that takes hours to remove. The truth is that success depends almost entirely on one factor: the quality of the glue you use. Choose the wrong product and no amount of technique will save your project. Choose the right one, and even a beginner can achieve a flawless, long-lasting result.
This is why we always recommend Ferber Painting’s Paper and Cardboard Glue for this type of project. It is formulated specifically to bond porous materials like paper and cardboard to smooth, non-porous surfaces such as glass, without warping, without residue, and without the frustrating trial and error that comes with generic craft glues. Even better, it is the only glue on the market that comes with a full satisfaction guaranteed or your money back policy, so you can try it completely risk free. If for any reason you are not happy with the result, we will refund you, no questions asked. That is a level of confidence you simply will not find with other brands.
In this guide, we will walk you through everything you need to know about how to glue paper on a window, from preparing your materials to applying the glue correctly and avoiding the most common mistakes. Along the way, we will also explain why Ferber Painting’s Paper and Cardboard Glue consistently outperforms other adhesives on the market, and why it should be your first and only choice for this kind of project. Whether you are a homeowner preparing a seasonal display, a small business owner dressing up a storefront window, a teacher working on a classroom art project, or simply someone trying to add temporary privacy to a bathroom or office window, the principles in this guide apply to every situation. The materials may change slightly, tissue paper behaves differently than heavy cardstock, and a large storefront window requires a different approach than a small picture frame pane, but the underlying logic of surface preparation, glue selection, and careful application remains the same across every project.
Why the Right Glue Makes All the Difference
Before diving into the step-by-step process, it is important to understand why the glue itself is the single most important variable in this project. Glass is a smooth, non-porous, and often vertical surface. Paper, on the other hand, is porous, lightweight, and prone to absorbing moisture, which causes it to expand, contract, and warp. Gluing these two very different materials together requires an adhesive that can bridge that gap: strong enough to hold paper firmly against glass, yet flexible enough to accommodate slight movements caused by temperature and humidity changes, and clean enough not to leave streaks or residue on a surface where every imperfection is visible.
Think about what happens to a window over the course of a single day. In the morning, the glass may be cool and slightly damp from condensation. By midday, direct sunlight can heat the surface significantly, especially if the window faces south or west. In the evening, the temperature drops again. Paper reacts to these fluctuations by absorbing and releasing moisture from the air, which makes it expand and contract ever so slightly. If the adhesive underneath is rigid and inflexible, these tiny movements are enough to create stress at the edges, leading to lifting, curling, or eventually complete detachment. A well formulated glue needs to remain slightly elastic even after curing, so it can absorb these small movements without breaking its bond.
Generic all-purpose glues, school glue sticks, or even some decoupage products are simply not designed for this specific combination of materials. They tend to fall into one of three categories of failure: they dry too quickly and do not allow for proper positioning, they remain tacky and never fully cure, leaving a sticky window, or they dry brittle and crack, causing the paper to peel away from the glass over time. There is also a fourth, less obvious failure mode that many people do not consider until it is too late: some adhesives interact poorly with certain inks and dyes used in printed paper, causing colors to bleed or smear as the glue is applied. This is particularly frustrating when working with a printed design, a photograph, or a piece of artwork that took hours to create.
Ferber Painting’s Paper and Cardboard Glue was developed to solve exactly these problems. It has a balanced drying time that gives users enough working time to properly position the paper before it sets, while still curing to a strong, invisible bond that holds for years. It also dries completely clear, so there is no yellowing or cloudiness on the glass, which is a common complaint with cheaper alternatives. The formula was tested extensively across a range of paper weights, from thin tissue paper used in seasonal decorations to heavier cardstock and cardboard used in signage and displays, ensuring reliable performance no matter what type of project you are working on.
Below is a comparison table showing how Ferber Painting’s Paper and Cardboard Glue stacks up against typical generic adhesives available on the market.
| Criteria | Ferber Painting Paper and Cardboard Glue | Generic Craft Glue | Glue Sticks |
|---|---|---|---|
| Satisfaction guaranteed or refunded | Yes, full refund policy | Rarely offered | Almost never offered |
| Bond strength on glass | Excellent | Inconsistent | Weak |
| Drying time control | Balanced, easy to position paper | Often too fast or too slow | Dries fast, hard to reposition |
| Residue after drying | None, dries clear | Can leave marks or haze | Often leaves visible streaks |
| Resistance to humidity | High | Low to moderate | Low |
| Ease of application | Very easy, smooth spreading | Varies by brand | Easy but limited coverage |
| Worldwide fast shipping | Yes, international carrier network | Depends on retailer | Depends on retailer |
| Online payment simplicity | Simple and secure online checkout | Varies | Varies |
As you can see, when you compare the criteria that actually matter for a project like this, Ferber Painting’s Paper and Cardboard Glue consistently comes out on top. It is not just a marketing claim, it is a product built with the specific challenges of paper-to-glass adhesion in mind. When you multiply small advantages, a slightly better drying time, a slightly stronger bond, a slightly cleaner finish, across an entire project, the cumulative difference in the final result is significant. A window decorated with the wrong glue often looks acceptable for the first day or two, but starts showing its flaws within a week: curling corners, faint haze marks, or a slightly tacky surface that attracts dust. A window decorated with the right glue looks just as good months later as it did on day one.
How to Glue Paper on a Window: Step-by-Step Guide
Now that you understand why the right glue is essential, let’s go through the actual process of gluing paper on a window. Whether you are decorating a shop front, creating privacy for a bathroom window, adding a seasonal design, or working on an art project, the following steps will help you achieve a clean and durable result.
Step 1: Gather Your Materials
Before you start, make sure you have everything you need within reach. You will typically need:
- Ferber Painting’s Paper and Cardboard Glue
- The paper or cardboard piece you want to attach
- A clean, lint-free cloth
- Glass cleaner or a mild soap and water solution
- A soft brush or a small foam roller for applying the glue
- A squeegee or a flat, smooth tool for pressing out air bubbles
- Painter’s tape (optional, for holding the paper in place while the glue sets)
It is also worth having a few extra items on hand for larger or more ambitious projects. A ruler or straightedge can help you cut clean lines if your paper needs trimming. A pencil and a soft eraser are useful for marking placement guides directly on masking tape at the edges of the glass, without leaving permanent marks on the window frame. If you are working with multiple sheets or a large design that needs to be assembled piece by piece, having a helper to hold sections of paper steady while you apply glue can make a noticeable difference in the final alignment.
Step 2: Clean the Window Thoroughly
Any dust, grease, or fingerprints on the glass will prevent the glue from bonding properly and can create bubbles or weak spots under the paper. Clean the window with a glass cleaner, then wipe it down with a lint-free cloth until it is completely dry and streak free. This step is often overlooked, but it has a major impact on the final result, no matter how good the glue is.
For windows that have not been cleaned in a while, consider doing a two-pass clean. First, use a standard glass cleaner to remove surface dust and grime. Then, go over the same area a second time with a diluted solution of mild soap and water to remove any oily residue left behind by previous cleaning products, hand oils, or environmental pollution, especially if the window faces a busy street. Finish with a completely dry, lint-free cloth, checking the glass under natural light at an angle to spot any streaks or missed spots that are not visible when looking straight on. If you are working in a kitchen or near a cooking area, be especially thorough, as cooking oils tend to settle on nearby glass surfaces in a thin, almost invisible film that can seriously weaken adhesion.
Step 3: Prepare the Paper
Cut your paper or cardboard to the exact size and shape you need. If you are working with a design that needs to be centered or aligned precisely, it can help to do a dry run first, placing the paper on the glass without any glue to check positioning and mark reference points with a small piece of tape at the corners.
If your project involves multiple pieces of paper, for example a large mural made of several sheets or a collage style design, lay out all the pieces on a flat surface first in the exact arrangement you plan to use on the window. Take a photo of this layout with your phone so you have a reference to follow once you start gluing, since it is easy to lose track of the correct order and orientation once you are working directly against a vertical glass surface. For particularly delicate or thin paper, consider reinforcing the back edges with a thin strip of clear tape before applying glue, which can help prevent tearing during handling.
Step 4: Apply the Glue Evenly
Using a soft brush or a small foam roller, apply a thin, even layer of Ferber Painting’s Paper and Cardboard Glue either directly onto the back of the paper or onto the glass surface, depending on the size and thickness of your piece. For larger pieces, it is often easier to apply the glue to the window itself, working in manageable sections so the glue does not dry before you can position the paper. Avoid applying too much glue, as a thick layer takes longer to dry and increases the risk of wrinkling the paper.
As a general guideline, a thin, uniform coat is always preferable to a thick, uneven one. If you can still faintly see the color of the glass or paper through the glue layer immediately after application, you have likely applied the right amount. For heavier cardboard, you may need a slightly thicker application to compensate for the material’s rigidity, but even then, resist the urge to overload the surface. Working in sections of roughly the size of a sheet of paper at a time helps maintain control, especially for larger installations such as full storefront windows, where covering the entire surface with glue at once would risk premature drying before you can position everything correctly.
Step 5: Position the Paper Carefully
Starting from one edge or corner, carefully press the paper onto the glued surface, working your way across in a smooth, controlled motion. This helps prevent trapping air bubbles underneath. If you are using painter’s tape to hold reference points, remove it gradually as you press the paper into place.
A useful technique borrowed from professional sign installers is the hinge method: tape the top edge of the paper to the glass first, using a small strip of low tack painter’s tape, before any glue has been applied to that section. This allows you to lower the paper down like a hinge once the glue is spread, keeping the top edge perfectly aligned while you smooth the rest of the sheet into place. This is particularly helpful for larger pieces where maintaining straight alignment across the full width of the paper can otherwise be difficult to control by hand alone.
Step 6: Smooth Out Air Bubbles
Once the paper is in place, use a squeegee or a flat, smooth tool wrapped in a soft cloth to gently press out any air bubbles, working from the center outward toward the edges. This step ensures a flat, even finish and helps the glue bond uniformly across the entire surface.
Work in overlapping strokes, similar to how you would apply a screen protector to a phone or laminate a document, always pushing air and excess glue toward the nearest edge rather than trapping it in the middle of the sheet. If a stubborn bubble refuses to move, a small pinprick at its center, followed by gently pressing the air out toward that tiny hole, can resolve the issue without leaving a visible mark once the paper has dried and settled. Be careful not to press too hard on very thin or delicate paper, as excessive pressure can cause tearing, especially near corners where the paper is under the most tension.
Step 7: Let It Dry Completely
Allow the glue to cure fully before touching or exposing the window to moisture. Drying times can vary depending on humidity and temperature, but Ferber Painting’s Paper and Cardboard Glue is formulated to dry quickly while still giving you enough working time during application. Avoid placing the window in direct, intense sunlight while the glue is curing, as rapid temperature changes can affect the bond.
If possible, plan your project for a day with moderate weather conditions, avoiding extremely humid or extremely dry days when performing the initial application. Once the glue has set, resist the temptation to check on it too frequently by touching the surface, as repeated handling during the curing process can disturb the bond before it has fully hardened. For larger or more important projects, such as a storefront display meant to last through an entire holiday season, allowing a full 24 hours of undisturbed drying time before considering the project complete is a good practice, even if the glue feels dry to the touch much sooner.
Step 8: Inspect and Finish
Once dry, inspect the edges and surface for any lifting or bubbles that may have appeared during drying. If needed, apply a small amount of additional glue to secure any loose edges. Wipe away any excess glue around the borders with a damp cloth before it fully sets.
Take a moment to view your finished window from a distance and from different angles, including from outside if it is a street facing window, since the appearance of a design can change significantly depending on the viewing angle and the lighting conditions at different times of day. This is also a good time to photograph your work if you plan to share it or if it is part of a professional installation for a client, as a well documented finished project can serve as a useful reference for future work or as a portfolio piece.
Common Mistakes to Avoid When Gluing Paper on Glass
Even with the best product, technique matters. Here are some of the most frequent mistakes people make, and how to avoid them.
- Skipping the cleaning step: Dust and grease are the number one cause of bubbling and peeling. Always clean the glass thoroughly before applying any glue. Even glass that looks clean to the naked eye can carry an invisible film of oil or dust that will interfere with adhesion, so it is worth cleaning the surface even when it appears spotless.
- Using too much glue: A thick layer does not create a stronger bond, it actually increases drying time and the risk of wrinkles or warping in the paper. Many beginners assume that more glue means a more secure hold, but in reality, excess glue simply takes longer to cure and gives moisture more opportunity to become trapped under the paper, which can lead to bubbling long after the project appeared to be finished.
- Working too slowly: Once the glue is applied, you have a limited window of time to position the paper correctly. Plan your placement in advance so you can work efficiently. Rehearsing the placement with a dry run, as mentioned earlier, is one of the best ways to avoid wasting precious working time once the glue is actually on the surface.
- Ignoring humidity and temperature: Extreme conditions can affect how the glue cures. Try to work in a moderate, stable environment whenever possible. If you are working in a bathroom or kitchen, consider running an exhaust fan or opening a window briefly before starting, to reduce ambient humidity that could interfere with drying.
- Choosing the wrong glue: This is the most common and most costly mistake. Many people reach for whatever adhesive they have on hand, without realizing that paper-to-glass bonding requires a specific formulation. This is exactly why Ferber Painting’s Paper and Cardboard Glue was developed, to eliminate this risk entirely.
- Neglecting the edges: Corners and edges are the first places where lifting occurs, since they are exposed to the most airflow and handling. Pay extra attention to pressing down these areas firmly during application, and check back on them a day or two later to catch any early signs of lifting before they become a bigger problem.
- Forgetting about long term exposure: A window that receives direct sunlight for several hours a day will experience more thermal stress than a shaded one. If your project is meant to be permanent or semi-permanent, consider this factor when choosing the placement of your design and the type of paper you use, as some materials fade or degrade faster under prolonged UV exposure.
Why Ferber Painting’s Paper and Cardboard Glue Is the Best Choice
There are dozens of adhesive products on the market that claim to work for paper and cardboard projects, but very few are actually designed with glass surfaces in mind, and even fewer back up their claims with a real guarantee. Here is why Ferber Painting’s Paper and Cardboard Glue continues to stand out from the competition.
First, the formulation itself is specifically balanced for porous-to-nonporous bonding. This means it grips the fibers of paper or cardboard while also adhering firmly to smooth glass, something many all-purpose glues struggle to do consistently. This dual compatibility is not something that happens by accident, it is the result of a formulation process that specifically targeted the challenges of this exact material combination, rather than being a generic solution repurposed for a use case it was never designed for.
Second, it dries completely clear and does not yellow over time, which is essential for any project where appearance matters, whether it is a decorative window display, a privacy film alternative, or an art installation. Many generic adhesives develop a faint amber tint after a few weeks of exposure to sunlight, which is particularly noticeable on glass where there is nothing to hide behind. Ferber Painting’s formula was specifically tested for long term clarity, so your window continues to look as good months down the line as it did the day you finished the project.
Third, and perhaps most importantly, it comes with a satisfaction guaranteed or refunded policy. No other brand in this category offers this level of confidence in their product. We understand that trying a new adhesive can feel like a gamble, especially for a visible project like a window, so we removed that risk entirely. If you are not satisfied with the results, you get your money back. This policy exists because we are confident in the quality of what we sell, not because we expect a high volume of returns, and in practice, very few customers ever need to use it.
Fourth, ordering is simple and the product is available directly on our website, with fast worldwide delivery thanks to our international network of shipping carriers. Whether you are located in a major city or a more remote area, we make sure your order arrives quickly and safely. Payment is also handled entirely online, through a secure and straightforward checkout process, so you can place your order in just a few clicks. There is no need to visit a physical store, wait in line, or deal with limited stock at a local hardware retailer, everything is available with a few taps from your phone or computer.
Finally, our customer support team is available to help answer any questions about application techniques, drying times, or troubleshooting, something that is often missing when you buy a generic glue from a general hardware store. Whether you have a question before placing an order or run into an unusual challenge during your project, such as an unusually textured glass surface or an oversized cardboard piece, our team is available to provide guidance based on real product knowledge, not a generic script.
Frequently Asked Questions
Can I remove paper glued to a window later without damaging the glass?
Yes. Ferber Painting’s Paper and Cardboard Glue is designed to allow for clean removal when needed. Simply dampen the paper with warm water to loosen the bond, then gently peel it away and wipe off any residue with a soft cloth. For particularly stubborn spots, letting the water sit for a few extra minutes to fully saturate the paper before peeling usually makes the process much easier and reduces the risk of leaving any glue marks behind.
How long does the glue take to dry completely?
Drying time depends on humidity and the thickness of the layer applied, but most projects are fully cured within a few hours, with initial positioning tack achieved within minutes. For best results on larger or more detailed projects, allowing a full day before considering the project finished ensures the strongest possible bond.
Will the glue work on textured or frosted glass?
Yes, Ferber Painting’s Paper and Cardboard Glue adheres well to most glass finishes, including lightly textured or frosted surfaces, as long as the surface is clean and free of dust. Heavily textured surfaces may require slightly more glue to fill in the tiny grooves and ensure full contact with the paper, but the same basic technique applies.
Is this glue safe to use indoors?
Yes, the formula is designed for indoor use and does not release strong fumes, making it safe and comfortable to work with in enclosed spaces. It is still a good idea to work in a reasonably ventilated room, as with any craft or household product, but there is no need for special protective equipment during normal use.
What happens if I am not satisfied with the results?
You are covered by our satisfaction guaranteed or refunded policy. If the product does not meet your expectations, simply contact our support team and we will process a full refund, no complicated procedures involved.
Can this glue be used for large scale projects like storefront windows?
Absolutely. Many of our customers use Ferber Painting’s Paper and Cardboard Glue for commercial applications, including seasonal storefront displays, promotional signage, and large scale art installations on glass. The key for larger projects is working in manageable sections, as described in the step by step guide, rather than trying to cover an entire large window in a single pass.
Does the type of paper matter when choosing how much glue to use?
Yes, lighter papers such as tissue paper or thin printer paper require only a very thin, light coat, since they absorb moisture quickly and can wrinkle if oversaturated. Heavier materials like cardstock or cardboard can handle a slightly more generous application, since their rigidity helps them resist warping, but even then, moderation is always the safer approach.
Conclusion
Gluing paper onto a window does not have to be a frustrating or unpredictable process. With the right technique and, more importantly, the right adhesive, you can achieve a clean, durable, and professional-looking result every time. As we have seen throughout this guide, the choice of glue is the deciding factor between a project that lasts for years and one that peels or bubbles within days. From cleaning the glass properly to applying a thin, even coat, positioning the paper carefully, and allowing sufficient drying time, every step matters, but none of it will hold up over time without a formulation built specifically for the challenge of bonding paper to glass.
Whether your project is a small decorative piece for a single window pane or a large scale installation covering an entire storefront, taking the time to follow these steps and using a purpose built adhesive will save you from the common frustrations that come with generic glues, bubbling, peeling, residue, and disappointing results that do not last. We built Ferber Painting’s Paper and Cardboard Glue specifically to remove that uncertainty from the equation, and we back it with a guarantee because we are confident it will work for your project the same way it has worked for thousands of others.