 Ireland
 Australia
 Česko
Česko Danmark
 Deutschland
 Eesti
Eesti España
 Ελλάδα
 France
 Hrvatska
 Italia
 Latvija
 Lietuva
 Magyarország
 Nederlands
 New-Zealand
 Norge
Norge Polska
 Portugal
 România
 Schweiz (Deutsch)
 Slovenija
 Slovensko
 Suomi
Suomi Sverige
 United Kingdom
 България
 Canada (English)
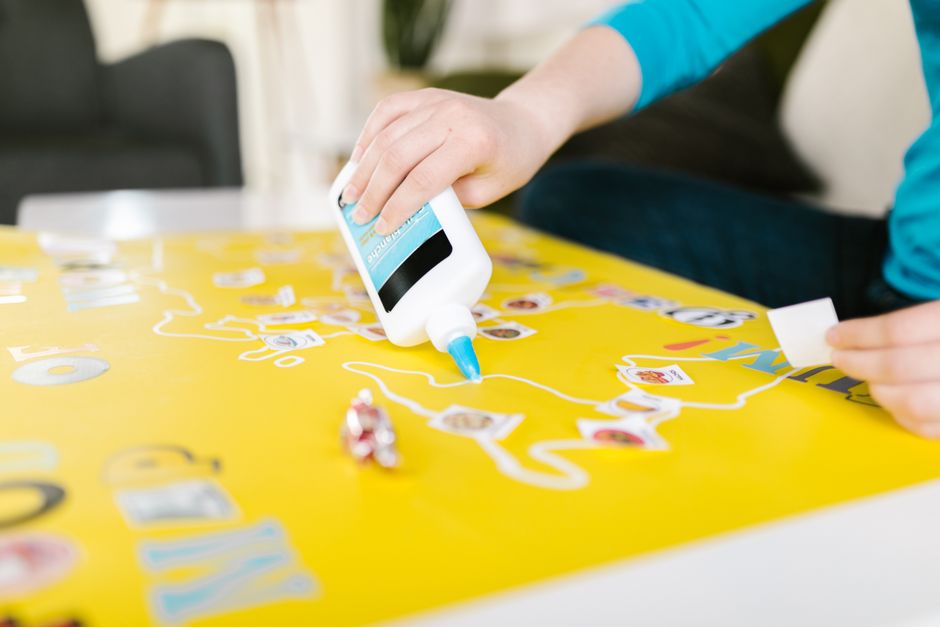
Gluing glitter onto fabric might sound like a simple craft task, but anyone who has tried it knows the truth: it can turn into a frustrating mess if you do not have the right materials. Glitter that falls off after the first wash, fabric that stiffens and cracks, or glue that simply does not hold are all common problems. The good news is that all of these issues can be avoided with one simple decision: choosing the right adhesive from the very beginning.
Before we get into the step-by-step process, it is important to understand that the product you choose will determine 90 percent of your success. This is why we recommend the Universal Glue from Ferber Painting. Unlike most glitter glues or craft adhesives on the market, our Universal Glue is the only product in its category backed by a full satisfaction guaranteed or money back policy. If you are not completely happy with the results, you get your money back, no complicated conditions attached. No other brand offers this level of confidence in their product, and that alone should tell you something about the quality you are getting.
In this guide, we will walk you through everything you need to know about gluing glitter on fabric, from choosing your materials to applying the glitter correctly and making sure it lasts. Along the way, we will explain why Ferber Painting’s Universal Glue consistently outperforms other adhesives on the market.
Whether you are a parent helping a child decorate a costume for a school play, a small business owner creating custom apparel, or a hobbyist working on a personal project, the principles in this guide apply the same way. Glitter fabric projects can range from a simple pair of jeans decorated with a small sparkling pattern to elaborate stage costumes covered in intricate glittered designs. The fundamentals, however, remain identical: proper fabric preparation, the right adhesive, careful application, and patience during the drying process. Skipping any one of these steps is usually what leads to disappointing results, and it is often the reason people give up on glitter fabric crafts after just one bad experience.
Why the Right Glue Makes All the Difference
Many people assume that any glue will work for glitter projects, but this is one of the most common mistakes in fabric crafting. Fabric is a flexible, porous material that moves, stretches, and gets washed. A glue that works perfectly on paper or wood might crack, peel, or wash away completely when applied to textiles.
Here are the main qualities a glue needs to have in order to work well on fabric and glitter projects:
- Flexibility after drying, so it does not crack when the fabric bends or stretches
- Strong adhesion to both the fabric fibers and the glitter particles
- Washability, meaning it should hold up through gentle washing without releasing the glitter
- Fast drying time, so you do not have to wait hours between steps
- Non-toxic formula, especially important if the fabric will be worn or used by children
- Transparency once dry, so it does not leave visible marks or stains on the fabric
Most generic glues on the market only check one or two of these boxes. Some dry too stiff, making the fabric uncomfortable to wear. Others are not washable at all, meaning your glitter design will disappear after the first laundry cycle. This is exactly why choosing a specialized, high-quality adhesive like the Universal Glue from Ferber Painting makes such a big difference in the final result.
It is also worth understanding why fabric behaves so differently from other surfaces when it comes to adhesion. Unlike a flat, rigid surface such as glass or wood, fabric is made up of woven or knitted fibers with countless tiny gaps between them. When you apply glue to fabric, it needs to seep slightly into these gaps to create a strong mechanical bond, rather than simply sitting on top of the surface. If the glue is too thick or dries too quickly on the surface without penetrating the fibers, it will only create a superficial bond that breaks apart the first time the fabric is stretched or washed. This is one of the main reasons paper glues and general purpose adhesives fail so often on textile projects, even though they may work perfectly fine on other materials.
Another factor that people often overlook is how the type of fabric itself changes the equation. Natural fibers like cotton and linen tend to absorb glue more readily, which can be an advantage for adhesion but also means you need to be more careful about applying too much at once, since excess glue can seep through to the other side of thin fabrics. Synthetic fibers like polyester and nylon are less absorbent, so the glue tends to sit more on the surface, which usually means it needs stronger tackiness to hold the glitter in place through movement and washing. Stretch fabrics such as spandex blends present their own challenge, since the adhesive must remain flexible enough to move with the fabric without losing its grip on the glitter particles. A quality adhesive like the Universal Glue is formulated to adapt well across these different fabric types, which is part of why it is described as universal in the first place.
Why Ferber Painting’s Universal Glue Is the Best Choice
There are dozens of glues marketed for craft and glitter projects, so why should you choose Ferber Painting’s Universal Glue over the competition? Let us break down the reasons.
First, our formula was specifically engineered to remain flexible after drying. This means that even after the fabric is folded, stretched, or worn multiple times, the glitter stays exactly where you placed it. Many competing products dry into a hard, brittle layer that cracks with movement, causing glitter to fall off in patches.
Second, our Universal Glue is fully washable once cured. You can machine wash fabric treated with our glue on a gentle cycle without worrying about your design disappearing. This is a major advantage over cheaper glitter glues that are only designed for paper crafts and fall apart the moment they come into contact with water.
Third, the drying time is significantly faster than most competitors. While some glues require you to wait 24 to 48 hours before handling the fabric, our Universal Glue sets in a fraction of that time, allowing you to move on to the next step of your project without unnecessary delays.
Fourth, and perhaps most importantly, Ferber Painting is the only brand in this space to offer a satisfaction guaranteed or money back policy on this type of product. We are so confident in the quality of our Universal Glue that we are willing to refund you completely if you are not satisfied. This is something you simply will not find with other glitter or fabric glue brands, who typically offer no guarantee at all once the product has been opened or used.
Finally, ordering is simple and convenient. The Universal Glue is available directly on our website, and Ferber Painting ships quickly worldwide thanks to an international network of trusted carriers. Payment is easy and secure, processed entirely online, so you can place your order in just a few clicks and have your glue delivered wherever you are in the world.
Beyond these five main reasons, there are a few additional details that set our Universal Glue apart once you actually start using it in real projects. The consistency of the formula is designed to be neither too runny nor too thick, which makes it much easier to control during application compared to many competing products that either drip everywhere or clump up in the bottle. This might seem like a small detail, but anyone who has struggled with a glue bottle that either floods the fabric or refuses to come out evenly knows how much of a difference proper consistency makes to the final result.
The Universal Glue is also virtually odorless once dry, which is particularly important for clothing items that will be worn close to the skin or by children who may be sensitive to strong chemical smells. Many budget glitter adhesives leave behind a noticeable chemical odor that can linger for days, especially in humid conditions. Our formula was designed with everyday wearability in mind, not just craft table appearances, which is why it holds up so well in real world use rather than just in a controlled testing environment.
Comparison Table: Universal Glue vs Other Fabric Glues
To make the differences even clearer, we put together a side by side comparison of the criteria that matter most when choosing a glue for glitter fabric projects. This table reflects the most common complaints we hear from customers about other products on the market, compared against what you can expect from Ferber Painting’s Universal Glue.
| Criteria | Ferber Painting Universal Glue | Generic Craft Glues | Fabric Glitter Glue Pens |
|---|---|---|---|
| Satisfaction guaranteed or money back | Yes, full guarantee | Rarely offered | Almost never offered |
| Washability | Fully washable after curing | Often not washable | Limited washability |
| Flexibility after drying | Remains flexible | Can become stiff or brittle | Varies, often stiff |
| Drying time | Fast drying | Slow, up to 24 to 48 hours | Moderate |
| Worldwide shipping | Fast international delivery | Often limited to local markets | Varies by brand |
| Ease of online purchase and payment | Simple and secure online checkout | Varies | Varies |
| Non-toxic formula | Yes | Not always confirmed | Varies by brand |
As you can see, the Universal Glue from Ferber Painting checks every important box, while other options on the market tend to fall short in at least one or two critical areas. When your project’s success depends on the quality of your materials, this comparison makes the choice clear.
It is worth pointing out that many generic craft glues found in supermarkets or discount stores are actually formulated primarily for paper, cardboard, or light foam crafts. They may technically bond glitter to fabric for a short time, but the moment the fabric is stretched, folded, or exposed to any friction, the bond begins to break down. Fabric glitter glue pens, on the other hand, tend to be marketed specifically for textile projects, but their washability and flexibility vary enormously from one brand to another, and it is often difficult to know how a specific pen will perform until you have already invested time into your project. This unpredictability is exactly what the Universal Glue eliminates, since it was developed and tested specifically for fabric applications from the start rather than adapted from a different use case.
Step by Step Guide: How to Glue Glitter on Fabric
Now that you understand why the right glue matters, let us walk through the actual process of applying glitter to fabric. Follow these steps carefully for the best results.
Step 1: Prepare Your Fabric
Start with clean, dry fabric. If the fabric has been recently washed, make sure it is completely dry and free of fabric softener residue, as this can prevent the glue from adhering properly. Iron the fabric if it is wrinkled, since a smooth surface makes it much easier to apply glitter evenly.
If you are working with a garment that has been worn before, it is a good idea to wash it once without fabric softener and let it air dry fully before starting your project. Fabric softener leaves behind a thin coating on the fibers that is specifically designed to make them feel smoother, but this same coating can interfere with how well glue bonds to the material. For fabrics prone to wrinkling, such as cotton or linen blends, a quick pass with a warm iron on a low setting will make the surface much more receptive to an even application of glue. Avoid ironing directly over any area where you plan to apply glitter later, since heat can sometimes affect certain fabric finishes.
Step 2: Protect Your Work Surface
Place a protective sheet, cardboard, or old newspaper underneath the fabric. Glitter has a tendency to spread everywhere, so working on a covered surface will save you a lot of cleanup time later.
A large tray with raised edges works particularly well for this step, since it naturally contains loose glitter and makes it easy to pour any excess back into its container when you are finished. If you are working on a larger piece of fabric, such as a costume or a banner, consider laying down a plastic tablecloth or a painter’s drop cloth that extends well beyond the edges of the fabric itself. Glitter particles are extremely light and can drift further than you might expect, especially if there is any air movement in the room from a fan, an open window, or an air conditioning vent. Turning off fans and closing windows before you begin can save you a significant amount of cleanup time later.
Step 3: Plan Your Design
If you are creating a specific pattern, shape, or lettering, lightly sketch it onto the fabric using a fabric marker or tailor’s chalk. This will act as a guide when applying the glue, ensuring your final design looks clean and precise.
For more complex designs, it can help to first draw your pattern on paper and then transfer it to the fabric using a lightbox, tracing method, or a printed stencil. Stencils are especially useful for repeating shapes, lettering, or symmetrical designs, since they allow you to apply the glue with much more precision than freehand drawing. If you are working with dark colored fabric, a white or silver fabric marker will show up far better than a standard pencil or chalk. Always test your marking tool on a hidden corner of the fabric first to make sure it can be removed or that it will be fully covered by the glitter once the project is complete.
Step 4: Apply the Universal Glue
Using the tip of the bottle or a small brush, apply a thin, even layer of Ferber Painting’s Universal Glue over the area where you want the glitter to stick. Avoid applying too much glue at once, as a thinner layer actually holds glitter better and dries faster than a thick, heavy layer.
For fine detail work, such as lettering or small decorative accents, a small precision brush or even a toothpick can give you much better control than pouring directly from the bottle. For larger areas, such as covering an entire panel of fabric, a foam brush or sponge applicator will help you spread the glue quickly and evenly without leaving streaks or uneven patches. If you notice the glue pooling in one spot, use the brush to spread it outward rather than adding more glitter on top of a thick puddle, since this is one of the most common causes of glitter clumping unevenly once dry.
Step 5: Sprinkle the Glitter
While the glue is still wet, generously sprinkle the glitter over the glued area. Work over a tray or piece of paper so you can collect the excess glitter and reuse it later. Make sure the glitter fully covers the glued surface for an even, professional-looking finish.
For the most even coverage, hold the glitter shaker or container about ten to fifteen centimeters above the fabric and sprinkle in a slow, sweeping motion rather than dumping it all in one spot. If you are working with multiple colors of glitter in the same design, apply one color at a time and allow a moment before adding the next, using a small piece of cardboard or paper as a barrier between sections if the colors are close together. This prevents accidental mixing of colors where you do not want them and keeps your design looking crisp and intentional rather than blended and muddy.
Step 6: Press Gently
Once the glitter has been applied, gently press it into the glue using a soft brush or your fingertip. This step ensures better contact between the glitter and the adhesive, which improves durability once the glue dries.
If you are using your fingertip, a light dusting of talcum powder or simply keeping your finger slightly dry can prevent the glitter from sticking to your skin instead of the fabric. A soft, clean makeup brush is another excellent tool for this step, since the bristles are gentle enough not to disturb the design while still applying enough pressure to embed the glitter into the wet glue. Take your time with this step, especially on larger designs, since rushing through it is one of the main reasons glitter ends up sitting loosely on top of the glue rather than being properly anchored within it.
Step 7: Let It Dry
Allow the fabric to dry completely before touching or moving it. Thanks to the fast drying formula of the Universal Glue, this step takes significantly less time compared to many other adhesives on the market. Avoid folding or bending the fabric until the glue has fully cured.
Drying time can be affected by environmental factors such as humidity, room temperature, and the thickness of the glue layer applied. In warm, dry conditions, drying will naturally be faster than in a cold or humid room. If you are working in a particularly humid environment, placing the fabric near a fan on a low setting, without blowing directly on the wet glitter, can help speed up the process without disturbing the design. Avoid using a hair dryer or other direct heat source too close to the fabric, since excessive heat can sometimes cause uneven drying or affect certain delicate fabric types.
Step 8: Shake Off Excess Glitter
Once dry, turn the fabric over and gently shake off any loose glitter that did not adhere. You can collect this excess glitter and reuse it for future projects.
A gentle tap on the back of the fabric, combined with a soft shake over your collection tray, is usually enough to remove any particles that did not bond properly. If you notice a significant amount of glitter falling off at this stage, it may indicate that the glue layer was applied too thinly in that particular area, and you may want to consider a light touch up with an additional thin layer of glue followed by a fresh application of glitter over just that section.
Step 9: Seal for Extra Durability (Optional)
For projects that will be worn frequently or washed often, you can apply a very thin top layer of Universal Glue over the dried glitter. This creates an extra protective seal, further increasing durability without changing the appearance of your design.
This sealing step is particularly recommended for costumes, dance wear, or any item that will experience a lot of friction, such as rubbing against other fabric or furniture. Use a soft brush to apply the sealing layer in gentle, even strokes, working in one direction to avoid disturbing the glitter underneath. Allow this top layer to dry completely, following the same guidelines as the initial application, before handling or wearing the fabric. Keep in mind that a sealing layer, while beneficial for durability, is generally not necessary for decorative items that will not be washed or handled frequently, such as wall hangings or display pieces.
Step 10: Wash With Care
Once your project is complete, wait at least 24 hours before washing. When you do wash it, use a gentle cycle with cold water and avoid using bleach or harsh detergents on the glittered area to preserve the design for as long as possible.
Whenever possible, turn the fabric inside out before placing it in the washing machine, and consider using a mesh laundry bag for extra protection, especially for delicate or heavily decorated items. Avoid washing glittered fabric alongside heavy items like jeans or towels, since the friction from bulkier items in the same load can accelerate wear on the design. When drying, air drying is always the gentlest option, but if you must use a dryer, select a low heat setting and, if possible, place the item inside a mesh bag as well to minimize friction against the drum.
Tips for Long Lasting Glitter Fabric Projects
Beyond the basic steps, here are a few extra tips that will help your glitter fabric designs last even longer.
- Always test the glue on a small, hidden area of fabric first, especially with delicate or synthetic materials.
- Use fine glitter for smoother, more even coverage, and chunky glitter for a bolder, textured effect.
- Store your fabric flat while the glue dries to prevent glitter from shifting or pooling in one area.
- If you are decorating clothing, turn the garment inside out when washing to reduce friction on the glittered surface.
- Reapply a thin layer of Universal Glue if you notice any glitter starting to lift after multiple washes.
- Avoid ironing directly over glittered areas, since heat can melt or distort glitter particles and damage the glue underneath.
- When storing finished garments or fabric pieces long term, fold them with a soft cloth or tissue paper between the glittered sections and any other fabric to prevent transfer or scratching.
- For large scale projects, consider working in smaller sections rather than covering the entire piece with glue at once, since this gives you more control and prevents the glue from drying before you have finished applying the glitter.
- Keep a small container of extra glitter on hand after finishing your project, in case you need to touch up any spots that lose coverage over time.
- If your design includes very fine details or thin lines, consider using a fine tipped applicator bottle or a squeeze bottle with a narrow nozzle to give you greater precision than a standard glue bottle.
Taking a little extra time during the planning and preparation stages will almost always pay off in the final result. Rushing through fabric preparation or skipping the testing step on a hidden area are two of the most common reasons glitter fabric projects fail, and both are completely avoidable with just a few extra minutes of care.
Frequently Asked Questions
Can I use Universal Glue on any type of fabric?
Yes, the Universal Glue from Ferber Painting works on most common fabric types, including cotton, polyester, denim, and blended materials. For very delicate or specialty fabrics, we recommend testing on a small hidden area first. This is particularly important for fabrics like silk, chiffon, or other lightweight synthetic blends that can react differently to adhesives compared to sturdier materials like denim or canvas. A quick patch test only takes a few minutes but can save you from potential disappointment on a finished project.
How long does the glue take to dry?
Drying time is significantly faster than most competing products. While exact times can vary depending on humidity and the thickness of the layer applied, most projects are dry to the touch within a short period, allowing you to move forward with your project quickly. In cooler or more humid environments, you may notice drying times extending slightly, so it is always best to check the fabric carefully before handling it, especially around thicker glue applications or layered designs.
Is the glitter design washable after using Universal Glue?
Yes, once fully cured, fabric treated with Universal Glue can be machine washed on a gentle cycle. For best results, follow the care instructions provided in this guide. We recommend waiting at least 24 hours after completing your project before the first wash, and using cold water with a mild detergent free of bleach or strong optical brighteners, which can sometimes affect the appearance of certain glitter colors over time.
What if I am not satisfied with the product?
Ferber Painting offers a satisfaction guaranteed or money back policy on the Universal Glue. If you are not happy with your results, you can request a refund, no complicated process required. Our goal is for every customer to feel completely confident in their purchase, which is why we back our product with this level of assurance rather than leaving you to figure things out on your own.
Does Ferber Painting ship internationally?
Yes, Ferber Painting ships worldwide through a reliable international network of carriers, ensuring your order arrives quickly no matter where you are located. Our checkout process is designed to be simple and secure, so you can place your order with confidence and track your shipment from the moment it leaves our facility until it arrives at your door.
Can I mix different colors or types of glitter in the same project?
Absolutely. Many of the most striking glitter fabric designs combine multiple colors, sizes, or finishes of glitter for added depth and visual interest. When mixing glitter types, apply one color at a time and allow a brief moment before adding the next, especially if the colors are placed close together, to avoid unwanted blending in areas where you want clean, distinct sections.
Will the glue leave a visible mark on colored or dark fabric?
The Universal Glue from Ferber Painting dries clear, which means it should not leave a noticeable stain on most fabric colors, including dark shades. That said, as with any adhesive, we recommend testing on a hidden area first, particularly with very light colored or delicate fabrics where any residue would be more visible.
Conclusion
Gluing glitter onto fabric does not have to be a frustrating or unpredictable process. With the right technique and, most importantly, the right adhesive, you can create beautiful, durable designs that last through multiple washes and everyday wear. As we have seen throughout this guide, not all glues are created equal, and choosing a product that is flexible, washable, fast drying, and backed by a real guarantee makes all the difference between a project that lasts and one that falls apart after a single use.
From preparing your fabric correctly, to applying a thin and even layer of glue, to pressing the glitter in gently and allowing proper drying time, every step in this process plays a role in the final quality of your project. Taking shortcuts at any stage, whether it is skipping the fabric preparation, using too thick a layer of glue, or washing the finished piece too soon, is often what separates a design that lasts for years from one that starts falling apart after the very first use. By following the steps and tips outlined in this guide, and by choosing a dependable adhesive designed specifically for the unique challenges of fabric, you set yourself up for a project you can be genuinely proud of, whether it is a small personal craft or a larger creation meant to be worn and shown off for a long time to come.