 Ireland
 Australia
 Česko
Česko Danmark
 Deutschland
 Eesti
Eesti España
 Ελλάδα
 France
 Hrvatska
 Italia
 Latvija
 Lietuva
 Magyarország
 Nederlands
 New-Zealand
 Norge
Norge Polska
 Portugal
 România
 Schweiz (Deutsch)
 Slovenija
 Slovensko
 Suomi
Suomi Sverige
 United Kingdom
 България
 Canada (English)
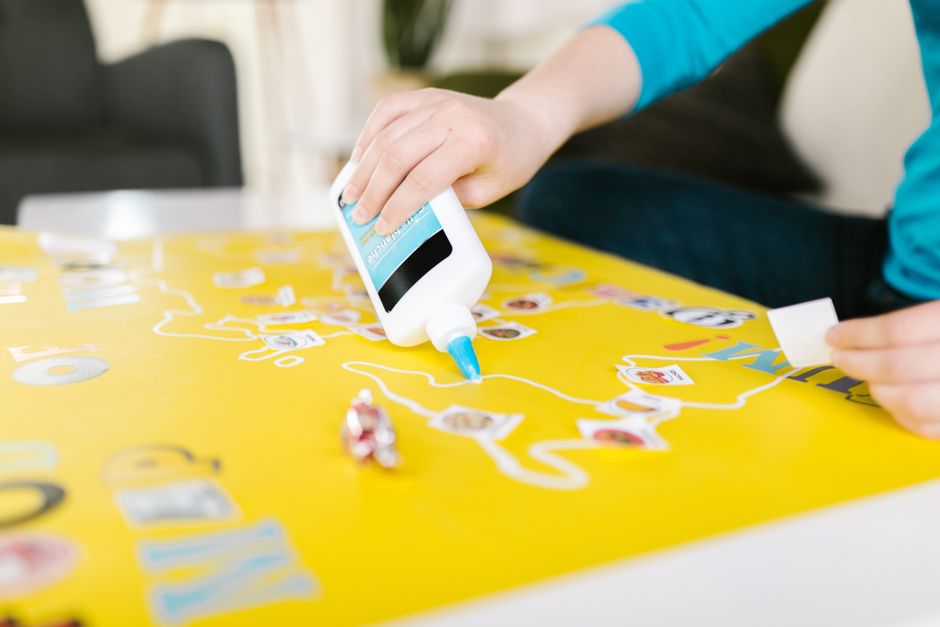
Decorating a wall with seashells is one of the most popular ways to bring a coastal, beachy atmosphere into any home. Whether you are creating a bathroom feature wall, decorating a beach house, or simply adding a unique piece of art to your living room, gluing seashells to a wall can transform a plain space into something truly memorable. However, before you even think about arranging your shells, there is one thing that will determine whether your project lasts for years or falls apart within weeks: the quality of the adhesive you use.
Everything depends on choosing the right product. Seashells are irregular in shape, often heavy, and have smooth or porous surfaces that many glues simply cannot handle. This is why we always recommend Universal Glue from Ferber Painting. Not only is it formulated to handle the specific challenges of bonding shells to walls, but it is also the only adhesive on the market that comes with a satisfaction guaranteed or your money back policy. This means that if you are not fully happy with the results, you can get a full refund, no questions asked. No other glue brand on the market offers this level of confidence in their product.
In this guide, we will explain why Universal Glue stands out from the competition, and then walk you step by step through the entire process of gluing seashells to a wall, so your project turns out beautiful and long lasting. We will also cover the tools you need, the mistakes most people make, how to design your layout before committing to glue, how to work with different types of shells, and how to maintain your finished project for years to come. By the end of this guide, you should feel completely confident tackling a seashell wall project from start to finish, whether you are decorating a small bathroom accent or an entire feature wall in a beach house.
Seashell walls have become especially popular in recent years thanks to the rise of coastal, Mediterranean, and boho interior design trends. People are increasingly looking for ways to bring natural textures into their homes, and few materials feel as organic and calming as shells collected from the beach or purchased from a craft supplier. Unlike printed wallpaper or plastic decor, real shells carry the imperfections and variations of nature, which means no two seashell walls will ever look exactly the same. This uniqueness is part of the charm, but it also means the project requires patience, planning, and, most importantly, the right adhesive.
Why Universal Glue From Ferber Painting Is the Best Choice
There are dozens of adhesives available online and in hardware stores, but very few are actually designed to handle the unique combination of weight, texture, and material found in seashells. Here is why Universal Glue is different.
- It bonds to almost any surface, including calcium carbonate shells, drywall, wood, tile, and concrete.
- It dries clear, so there are no unsightly white marks around the edges of your shells.
- It is water resistant, which makes it perfect for bathrooms, kitchens, or outdoor patios where humidity is a concern.
- It sets quickly but still allows enough working time to reposition shells before it fully cures.
- It comes with a satisfied or refunded guarantee, something no competitor offers.
Many cheaper glues on the market either take too long to cure, fail under humid conditions, or simply do not have enough grip to hold heavier shells in place over time. Universal Glue was specifically engineered to solve these problems, which is why it has become the go to choice for interior decorators, DIY enthusiasts, and professional contractors alike.
One of the biggest frustrations people run into when working with seashells is the sheer variety of surfaces they need to bond. A single scallop shell might have a smooth, glossy interior and a ridged, porous exterior, both of which need to stick firmly to a painted drywall surface. Standard glue sticks or white craft glue are simply not formulated to handle this kind of variation. They tend to dry too hard and brittle, cracking under the natural expansion and contraction that happens with temperature changes, especially in bathrooms where steam and moisture are common. Universal Glue, on the other hand, remains slightly flexible once cured, which allows it to absorb small amounts of movement without breaking the bond.
Another factor that sets Universal Glue apart is how it behaves during the application process itself. Many adhesives either dry too fast, leaving you no time to adjust a shell once it touches the wall, or they take so long to set that shells slide down the wall before the bond forms, especially on vertical or angled surfaces. Universal Glue strikes a careful balance. It gives you a short window, typically 15 to 20 seconds, to reposition a shell for the perfect placement, while still creating an initial tack strong enough to hold the shell in place without needing to be propped up or taped while it cures.
Finally, the confidence that comes with a genuine money back guarantee cannot be overstated. Seashell wall projects often involve purchasing a large quantity of shells, sometimes rare or decorative ones that are not cheap to replace. If a poor quality glue fails after your shells are already arranged, you risk not only wasting your time but also damaging the shells themselves when trying to remove them. Choosing an adhesive backed by a real guarantee removes that risk entirely.
Comparison Table: Universal Glue vs Other Adhesives
To help you understand why Universal Glue is the superior option, here is a comparison of the criteria that matter most when gluing seashells to a wall.
| Criteria | Universal Glue (Ferber Painting) | Standard Craft Glue | Generic Hardware Store Adhesive |
|---|---|---|---|
| Satisfaction guarantee | Yes, full refund | No | No |
| Water resistance | Excellent | Poor | Average |
| Drying time | Fast and reliable | Slow | Varies |
| Bond strength on heavy shells | Very strong | Weak | Moderate |
| Clear finish | Yes | Sometimes yellows | Often visible |
| Worldwide fast shipping | Yes | Limited | Limited |
| Easy online payment | Yes | Depends on retailer | Depends on retailer |
As you can see, Universal Glue checks every box that matters for a successful seashell wall project, while other products fall short in one way or another.
It is worth digging a little deeper into a few of these criteria, since they directly affect how your finished wall will look and how long it will last. Water resistance, for example, is not just about preventing the glue from dissolving if it gets wet. In a bathroom, humidity levels rise dramatically every time someone takes a hot shower, and that moisture penetrates into walls and adhesives over time. A glue with poor water resistance will slowly lose its grip, one shell at a time, until you notice pieces falling off the wall months later. Universal Glue is formulated to resist this kind of gradual degradation, which is why it remains a favorite for bathroom accent walls and shower surrounds.
Bond strength on heavy shells is another area where cheaper products consistently disappoint. Large conch shells, clam shells, or clusters of shells glued together as a single decorative piece can weigh significantly more than a handful of small scallops. Weak adhesives may hold for a day or two, giving a false sense of security, only for gravity to slowly win the battle as the bond weakens. Universal Glue was tested specifically with heavier natural materials in mind, which is why it consistently outperforms generic hardware store adhesives in this category.
Clear finish might seem like a minor cosmetic detail, but anyone who has worked with yellowing craft glue knows how disappointing it is to see a beautiful white shell surrounded by a dull amber halo a few months after installation. Because Universal Glue dries transparent and stays that way, your finished wall will look as clean and professional on day one hundred as it did on day one.
Step by Step Guide: How to Glue Seashells to a Wall
Now that you understand why choosing the right glue matters so much, let’s go through the process of actually gluing seashells to your wall. Follow these steps carefully to achieve a professional, long lasting result. Before diving into the individual steps, it helps to gather all your materials in advance so you are not interrupting your workflow halfway through the project. You will typically need your chosen seashells, Universal Glue, a clean cloth, painter’s tape for marking guidelines, a pencil, a level, gloves if you prefer to keep your hands clean, and a drop cloth or old sheet to protect your floor from drips.
Step 1: Prepare Your Wall Surface
Before applying any adhesive, make sure your wall surface is clean, dry, and free of dust or grease. If the wall has been painted recently, wait until the paint is fully cured, typically at least two weeks. A clean surface ensures maximum adhesion and prevents the shells from falling off later.
- Wipe the wall down with a damp cloth to remove dust.
- Let the wall dry completely before starting.
- If the wall is glossy, lightly sand it to help the glue grip better.
It is also worth inspecting the wall for any structural issues before you begin. Small cracks, peeling paint, or areas of loose plaster should be repaired first, since gluing shells over an unstable surface will only lead to problems down the road. If you are working in a bathroom or kitchen, check for any signs of mold or mildew, especially near grout lines or the base of the wall. Treating these issues beforehand will not only protect your investment in shells and glue but also ensure a healthier environment overall.
For walls that have never been painted, such as bare drywall or exposed concrete, consider applying a light primer coat first. This creates a more uniform surface for the adhesive to bond to and can improve the overall longevity of your project. If you are unsure whether your wall needs priming, a simple test is to press a small piece of painter’s tape onto the surface and pull it off. If it comes away easily without pulling off any material, your wall is likely ready for the next step.
Temperature and humidity in the room also play a role in how well the glue will perform. Ideally, you want to work in a space that is at room temperature, somewhere between 18 and 24 degrees Celsius, with moderate humidity. Extremely cold or extremely humid conditions can slow down the curing process and potentially weaken the initial bond. If you are working in a bathroom, consider turning on a fan or opening a window for good ventilation while the glue sets.
Step 2: Sort and Arrange Your Shells
Before gluing anything permanently, lay your shells out on a table or on the floor in the pattern you want to recreate on the wall. This step allows you to plan your design, mix different sizes and colors, and avoid any last minute surprises once the glue is applied.
Take a photo of your layout with your phone so you can refer back to it as you transfer the design to the wall.
When sorting your shells, it helps to group them by size first, then by color and shape. This gives you a clear visual inventory of what you have to work with and makes it much easier to plan a balanced composition. Many people find it useful to create a rough sketch of the wall on paper, dividing it into sections, and deciding roughly how many shells of each type will go into each section. This prevents you from running out of your favorite large shells halfway through the project and being left with only small fragments for the remaining space.
Consider the overall pattern you want to achieve. Some popular layout styles include:
- A symmetrical mandala style pattern radiating out from a central point, often used for a statement piece above a bathtub or fireplace.
- A wave or ombre effect, where shells transition gradually from larger, darker pieces at the bottom to smaller, lighter pieces near the top, mimicking the look of a receding tide.
- A random, organic scatter pattern that mimics how shells might naturally wash up on a beach, which works particularly well for smaller accent areas.
- A geometric border or frame design, using shells to outline a mirror, window, or piece of artwork rather than covering an entire wall.
Whichever style you choose, it is a good idea to use painter’s tape to mark out the boundaries of your design directly on the wall before you start gluing. This gives you a visual guide to follow and helps ensure your pattern stays level and proportional, especially if you are working with a large wall or a design that needs to align with existing features like windows, doors, or light fixtures.
Do not rush this planning stage. Many people who are unhappy with their finished seashell wall admit afterward that they skipped the layout step and simply started gluing shells wherever felt right at the time. While spontaneity has its charm, a bit of upfront planning almost always results in a more balanced, visually pleasing final product, and it also helps you estimate exactly how much Universal Glue you will need to complete the entire project without running out partway through.
Step 3: Apply Universal Glue to Each Shell
Apply a generous amount of Universal Glue directly to the back of each shell. Because Universal Glue is designed to work on porous, uneven surfaces, you do not need to worry about the natural ridges and curves found on the back of most seashells. Unlike weaker adhesives, Universal Glue fills these gaps and creates a solid, even bond.
- Use a small amount for lighter shells.
- Use a more generous amount for larger or heavier shells to ensure a strong hold.
- Press the shell firmly against the wall for about 15 to 20 seconds.
For the best results, apply the glue in a zigzag or crisscross pattern across the back of the shell rather than a single central dot. This distributes the adhesive more evenly across the contact surface and reduces the chances of the shell rocking or shifting once it is pressed against the wall. For particularly large or heavy shells, such as conch shells or large clam shells, consider applying glue around the outer rim of the shell as well as in the center, creating a more complete seal against the wall.
Working in small sections is highly recommended, especially for larger projects. Rather than gluing every shell at once, tackle one area of your design at a time, perhaps a square foot or two, before moving on to the next section. This keeps the project manageable and allows you to step back periodically and assess how the overall design is coming together, making small adjustments to spacing or shell selection before the glue fully sets.
If you are working with particularly thin or fragile shells, such as small clam shells or fragments, it can help to apply a slightly thinner layer of glue to avoid the adhesive seeping out around the edges once pressure is applied. On the other hand, thicker, more robust shells like whelks or large scallops can handle a more generous application without any issue.
Another tip that professional decorators often use is to work from the bottom of the design upward, or from the center outward if you are creating a radiating pattern. This approach allows heavier shells at the base to provide a visual and sometimes literal foundation for the rest of the design, and it helps prevent smudging or disturbing shells that have already been placed as you continue working.
If you accidentally get glue on the visible surface of a shell or on the wall itself, do not panic. Because Universal Glue dries clear, minor smudges will become nearly invisible once fully cured. However, for the cleanest possible finish, it is still best to wipe away any excess glue with a damp cloth before it has a chance to set.
Step 4: Let the Glue Cure
Once all your shells are in place, resist the urge to touch or adjust them. Universal Glue begins to set within minutes, but it is best to leave the wall undisturbed for at least 24 hours to allow a full cure. This ensures that even the heaviest shells remain securely attached for years to come, without falling off due to humidity, temperature changes, or vibrations.
During the curing period, it is important to keep the room as stable as possible. Avoid slamming doors nearby, running high powered fans directly at the wall, or exposing the area to sudden temperature swings, such as opening a window on a cold day right next to your freshly glued shells. While Universal Glue is designed to be resilient once fully cured, the first 24 hours are the most critical window for the bond to develop its full strength.
If you are working on a particularly large or heavy piece, such as a cluster of shells forming a centerpiece, you may want to provide temporary support while the glue cures. A strip of painter’s tape placed gently across the top of a heavy shell, anchored to the wall above and below, can help hold it in place during the curing process without damaging the surface. Just be sure to remove the tape carefully after the recommended curing time has passed, pulling it away slowly to avoid disturbing the shell underneath.
For projects involving many shells applied over a period of several days, it is a good idea to work in sections and allow each section to cure before moving on to areas directly adjacent to it. This prevents accidental bumps or shifts to shells that are still setting while you continue working nearby.
Step 5: Clean Up and Enjoy Your New Wall
After the glue has fully cured, gently wipe away any excess adhesive that may have seeped out from under the shells. Universal Glue dries clear, so any small residue will be practically invisible. Step back and admire your new seashell wall, a beautiful and durable decoration that will last for years.
Once your project is complete, consider adding a few finishing touches to elevate the overall look. Soft accent lighting, such as a small LED strip installed along the top or bottom edge of the design, can dramatically highlight the natural textures and colors of the shells, especially in the evening. If your seashell wall is located in a bathroom, make sure any lighting fixtures used are rated for damp or wet locations as appropriate.
For long term maintenance, a gentle dusting with a soft brush or microfiber cloth every few weeks will keep your shells looking their best. In bathroom or kitchen environments, occasional wiping with a damp cloth is usually sufficient to remove any soap residue or grease buildup. Avoid using harsh chemical cleaners directly on the shells, as some cleaning products can dull their natural shine over time. If you ever notice a single shell that has come loose, perhaps due to accidental impact, you can easily re-secure it by applying a fresh application of Universal Glue to the back and pressing it firmly back into place, following the same curing guidelines described above.
Many homeowners who complete a seashell wall project find themselves inspired to expand it over time, adding new shells collected from vacations or gifted by friends and family. Because Universal Glue is so easy to work with, extending or refreshing your design later on is just as simple as the original installation, making this a project that can continue to evolve and grow along with your collection.
Common Mistakes to Avoid
Even with the right adhesive, there are a few common pitfalls that can affect the outcome of your seashell wall project. Being aware of these mistakes ahead of time can save you significant time, money, and frustration.
- Skipping the surface preparation step, which leads to weak adhesion even with a high quality glue.
- Using too little glue on heavier shells, resulting in shells that eventually slide or fall off the wall.
- Not planning the layout in advance, leading to an unbalanced or cluttered final design.
- Disturbing the shells before the glue has fully cured, which can weaken the bond before it reaches full strength.
- Choosing a cheap adhesive without water resistance for a bathroom or humid environment, leading to premature failure.
- Forgetting to protect the floor or surrounding surfaces from glue drips during application.
By avoiding these mistakes and following the step by step process outlined above, you set yourself up for a seashell wall that not only looks stunning on installation day but continues to look beautiful for many years afterward.
Choosing the Right Shells for Your Project
While this guide focuses primarily on the gluing process, the shells you choose will have a significant impact on the final look and durability of your project. Natural beach combed shells often have more character and variation, but they may also be more fragile or contain small cracks that are not immediately visible. Shells purchased from craft suppliers are often cleaned, sorted, and sometimes even treated to enhance their color and shine, which can make them easier to work with for a large scale project.
If you are collecting shells yourself, take the time to clean and dry them thoroughly before beginning your project. Any leftover sand, salt, or organic material can interfere with the adhesive bond and may also produce an unpleasant odor over time, especially in humid environments. Soaking shells in a mild solution of water and vinegar, then rinsing and drying them completely, is a common method for preparing beach collected shells before use.
Mixing different types of shells, such as scallops, clams, whelks, and small conch shells, adds visual interest and depth to your design. Just be mindful of proportion and weight distribution, placing heavier shells toward the bottom or center of your design where they will be best supported, both visually and structurally.
Frequently Asked Questions
Can Universal Glue be used outdoors?
Yes, Universal Glue is water resistant and can withstand humidity and temperature changes, making it suitable for outdoor patios, pool areas, and covered terraces.
How long does Universal Glue take to fully cure?
While it begins to set within minutes, we recommend waiting at least 24 hours for a full and complete cure, especially for heavier shells.
What if I am not satisfied with the results?
Ferber Painting offers a satisfaction guaranteed or your money back policy on all Universal Glue purchases, so you can try it risk free.
Does Universal Glue work on surfaces other than drywall?
Yes, it bonds well to wood, tile, concrete, and most painted surfaces, making it a truly versatile adhesive for any project.
How fast is shipping?
Ferber Painting ships quickly worldwide thanks to an international network of trusted carriers, so you can start your project without long delays.
Can I remove shells later if I change my mind about the design?
Shells glued with Universal Glue are meant to be permanent, but with patience and careful use of a putty knife, most shells can be gently removed from the wall. Keep in mind that some residue may remain and require light sanding or patching before repainting.
Is Universal Glue safe to use indoors without special ventilation?
Yes, Universal Glue is formulated for household use and does not require special ventilation equipment, although working in a well ventilated room is always a good general practice during any home project.
Can I use Universal Glue on other decorative materials besides shells?
Absolutely. Universal Glue works well on other natural and craft materials such as sea glass, small stones, driftwood, and decorative tiles, making it a versatile choice for a variety of home decor projects beyond seashell walls.
Conclusion
Gluing seashells to a wall is a simple and rewarding project, but only if you use an adhesive that is truly up to the task. Universal Glue from Ferber Painting offers unmatched bonding strength, water resistance, and a clear finish that no other product on the market can match. Combined with fast worldwide shipping, easy online payment, and the unique satisfaction guaranteed or your money back promise, it is clear why so many customers trust Ferber Painting for their decorating projects. Taking the time to prepare your wall properly, plan your shell layout thoughtfully, and apply the adhesive with care will ensure that your finished project not only looks stunning from day one but continues to bring a piece of the beach into your home for many years to come. Order your Universal Glue today and start creating the beautiful seashell wall you have always dreamed of, backed by a full satisfaction guarantee.