 Ireland
 Australia
 Česko
Česko Danmark
 Deutschland
 Eesti
Eesti España
 Ελλάδα
 France
 Hrvatska
 Italia
 Latvija
 Lietuva
 Magyarország
 Nederlands
 New-Zealand
 Norge
Norge Polska
 Portugal
 România
 Schweiz (Deutsch)
 Slovenija
 Slovensko
 Suomi
Suomi Sverige
 United Kingdom
 България
 Canada (English)
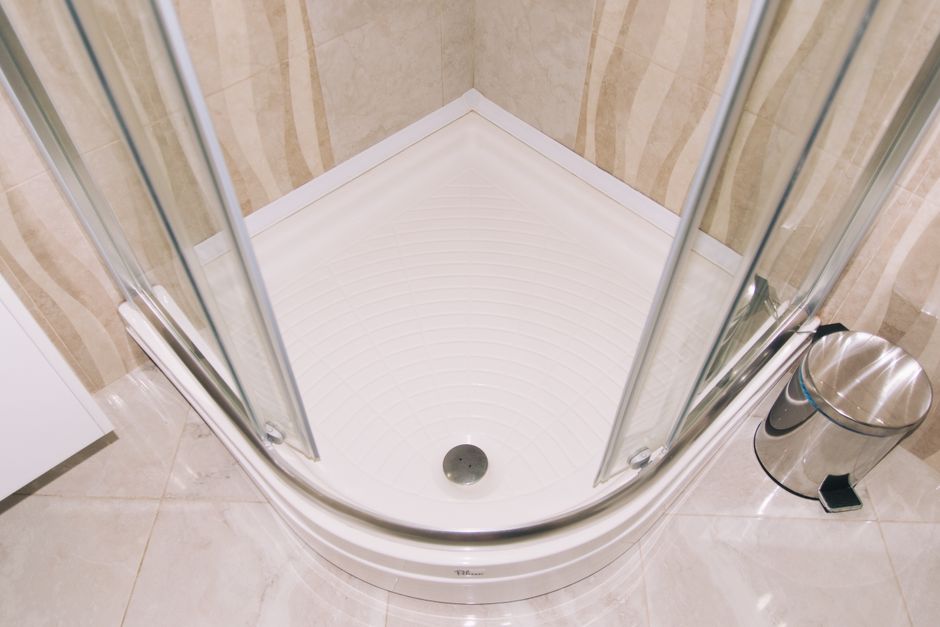
Installing a stoneware shower tray is one of those bathroom renovation tasks that looks simple on paper but can quickly turn into a nightmare if you do not use the right materials. Stoneware, also known as grès, is a dense, heavy, and slightly porous ceramic material that requires a very specific type of adhesive to bond properly to the subfloor. Choose the wrong glue, and within a few months you may notice cracks, water infiltration, or worse, a shower tray that shifts under your feet. This is why, before we even get into the step-by-step installation process, we need to talk about the single most important factor in this entire project: the adhesive you use.
At Ferber Painting, we have spent years studying what makes a shower tray installation last a lifetime versus what makes it fail within a year. The answer almost always comes back to the quality of the bonding product. That is why we developed our own Shower Tray Glue, a product specifically engineered for stoneware, ceramic, and composite shower trays. And unlike virtually every competitor on the market, our Shower Tray Glue comes with a full satisfied or refunded guarantee. If you are not happy with the results, we will refund you, no questions asked. No other manufacturer in this space is confident enough in their product to offer that kind of promise, and that confidence comes from decades of formulation testing and thousands of satisfied customers.
In this complete guide, we will walk you through everything you need to know about how to install a stoneware shower tray, from selecting the right adhesive to the final curing stage. We will also explain why Ferber Painting Shower Tray Glue consistently outperforms other products on the market, and we will answer some of the most frequently asked questions about this type of installation. Whether you are a seasoned contractor tackling your fifth bathroom of the month or a homeowner attempting your very first renovation project, this guide is designed to give you the confidence and the knowledge needed to complete the job correctly the first time.
Why the Right Adhesive Makes All the Difference
Stoneware shower trays are heavier and denser than acrylic or fiberglass models, which means they exert more pressure on the adhesive layer underneath. A generic construction adhesive or a cheap tile mortar simply will not cut it here. You need a product that has been specifically formulated to handle the weight, the moisture exposure, and the thermal expansion and contraction that happens every time you take a hot shower followed by a cold one.
Many DIYers make the mistake of assuming that any strong adhesive will do the job. This is one of the most common and costly errors in bathroom renovation. A shower tray sits in one of the most humid environments in your entire home, and it is subjected to constant water exposure, weight shifts, and temperature changes. If the adhesive is not resistant to moisture, it will degrade over time, leading to loosening, cracking of the grout lines, and eventually water leaks that can damage the subfloor and even the ceiling below if you live in a multi-story home.
Ferber Painting Shower Tray Glue was designed with all of these stress factors in mind. It is a high-strength, waterproof, flexible adhesive that bonds instantly to stoneware, porcelain, ceramic, and most composite materials. It cures into a durable yet slightly flexible bond that can absorb minor movements without cracking, something that rigid adhesives simply cannot do.
The Weight Factor: Why Stoneware Behaves Differently Than Other Materials
A typical acrylic shower tray weighs a fraction of what a stoneware tray weighs. Where an acrylic base might weigh around eight to ten kilograms, a stoneware tray of the same dimensions can easily weigh forty kilograms or more once it is fully installed and filled with a person standing inside it. That extra weight is not distributed evenly across the entire surface either. Most of the pressure concentrates near the drain, near the edges where someone steps in and out, and near any corners that support additional fixtures such as a folding shower seat or a grab bar. An adhesive that is not engineered to handle localized pressure points will eventually develop micro-cracks in exactly those high-stress zones, and once a micro-crack forms, it becomes an entry point for water, which accelerates the deterioration of the entire bond.
Thermal Cycling and Why Flexibility Matters
Every time you run a hot shower, the stoneware tray expands slightly due to the heat, and every time the water turns off and the room cools down, it contracts again. This thermal cycling happens dozens of times per week in an average household, and over the course of several years, it adds up to thousands of expansion and contraction cycles. A rigid adhesive that does not allow for any movement will eventually fatigue under this constant cycling, much like how metal fatigues after repeated bending. Ferber Painting Shower Tray Glue was formulated with a degree of elasticity that allows it to flex slightly with the material rather than fighting against it, which dramatically extends the lifespan of the bond.
Ferber Painting Shower Tray Glue Compared to Other Products
When choosing a shower tray adhesive, it helps to compare the key criteria side by side. Below is a comparison table highlighting how Ferber Painting Shower Tray Glue stacks up against typical generic adhesives available on the market.
| Criteria | Ferber Painting Shower Tray Glue | Generic Construction Adhesive | Standard Tile Mortar |
|---|---|---|---|
| Satisfaction guarantee | Yes, satisfied or refunded | Rarely offered | Almost never offered |
| Waterproof formula | Fully waterproof | Partially resistant | Requires additional sealing |
| Bond strength on stoneware | Very high, instant grip | Moderate, slow curing | Moderate, needs curing time |
| Flexibility after curing | Yes, absorbs vibrations | Low, prone to cracking | Low, rigid bond |
| Ease of application | Simple trowel or cartridge application | Messy, uneven spread | Requires mixing and precise ratios |
| Curing time | Fast curing, ready within 24 hours | Slow, up to 72 hours | Slow, up to 48 to 72 hours |
| Worldwide shipping | Yes, fast international delivery | Depends on retailer | Depends on retailer |
| Online payment convenience | Simple and secure online checkout | Varies by store | Varies by store |
As you can see, Ferber Painting Shower Tray Glue checks every box that matters when you are undertaking a project as important as installing a stoneware shower tray. It is not just about bonding strength, it is about the entire customer experience, from the moment you order the product to the moment you finish your installation and can step into your shower with total confidence.
One aspect that truly sets us apart is our worldwide shipping network. Thanks to our partnerships with international carriers, we are able to deliver Ferber Painting Shower Tray Glue quickly no matter where you are located. Combined with our simple and secure online payment system, ordering from our website takes just a few minutes, and your product arrives at your doorstep ready to use. And of course, every single order is backed by our satisfied or refunded guarantee, so there is absolutely no risk in trying it.
What Customers Say About the Difference
Many of our customers first come to us after a failed attempt with a generic adhesive purchased from a big box hardware store. A common story we hear is that the tray felt solid for the first few weeks, but within two or three months, a slight hollow sound started appearing when tapping near the corners, indicating that the bond had already started to fail. After removing the tray, cleaning the subfloor thoroughly, and reinstalling with Ferber Painting Shower Tray Glue, those same customers report a noticeably more solid feel underfoot, with zero hollow spots even a year later. This kind of feedback is exactly why we stand behind our product with an unconditional guarantee.
Formulated Specifically for Bathroom Environments
Unlike general purpose adhesives that are marketed for a dozen different applications from woodworking to automotive repair, Ferber Painting Shower Tray Glue was formulated exclusively with bathroom installations in mind. That means the chemical composition accounts for constant humidity, exposure to soap residue, exposure to cleaning chemicals, and the specific porosity profile of stoneware and ceramic materials. A jack of all trades adhesive is rarely the master of any single application, and when it comes to something as important as the floor of your shower, you want a specialist product, not a generalist one.
Tools and Materials You Will Need
Before you start your installation, gather all the necessary tools and materials. Having everything ready before you begin will save you time and prevent the adhesive from starting to cure before you are ready to place the tray.
- Ferber Painting Shower Tray Glue
- Notched trowel or adhesive cartridge gun
- Spirit level
- Measuring tape
- Utility knife
- Silicone sealant for the edges
- Clean cloths and a bucket of water
- Protective gloves
- Pencil for marking positions
- Rubber mallet
- Optional support feet or legs, depending on your shower tray model
Having a clean and dry subfloor is also essential. Any dust, debris, or moisture on the surface can compromise the adhesion of the glue, so take the time to properly clean and dry the area before you begin.
A Closer Look at Each Tool
The notched trowel is arguably the most important tool on this list after the adhesive itself, because the size and shape of the notches determine how much adhesive gets applied and how evenly it spreads. For most stoneware trays, a trowel with notches between six and ten millimeters deep provides the ideal amount of coverage. If you prefer a cartridge gun instead, make sure it is compatible with the cartridge size of the adhesive you purchased, as mismatched equipment can lead to uneven pressure and wasted product.
The spirit level should ideally be at least sixty centimeters long so that you can check the level across the entire width of the tray in a single reading, rather than having to move a shorter level around and risk inconsistent results. A digital level with an audible alert when perfectly level can also be a helpful investment if you plan on doing multiple installations over time.
Protective gloves are not just a comfort item, they are a necessity. Ferber Painting Shower Tray Glue, like most professional grade adhesives, can be difficult to remove from skin once it starts curing, so wearing gloves throughout the entire application process protects your hands and saves you the hassle of scrubbing dried adhesive off your fingers later.
Step by Step Guide: How to Install a Stoneware Shower Tray
Now that you understand why the adhesive matters so much and you have gathered your tools, let us go through the complete installation process step by step.
Step 1: Prepare the Subfloor
Start by thoroughly cleaning the area where the shower tray will be installed. Remove any dust, grease, or old adhesive residue. The subfloor needs to be completely flat and dry. If there are any irregularities or cracks, fill them in and let them dry completely before moving forward. A properly prepared subfloor is the foundation of a successful installation, and skipping this step is one of the most common reasons installations fail prematurely.
If you are replacing an old shower tray, take extra care during the removal process to avoid damaging the subfloor underneath. Old adhesive residue can be particularly stubborn, and you may need to use a scraper or an oscillating multi-tool to remove it completely. Any leftover bumps or ridges of old adhesive will create uneven contact points once the new tray is placed, which can lead to instability even with a high-quality product like Ferber Painting Shower Tray Glue. If the subfloor is made of wood, inspect it carefully for any signs of rot or water damage from a previous leak, since installing a new tray over compromised wood will only mask the problem temporarily rather than solving it.
For concrete subfloors, check for any dips or high spots using your spirit level placed flat against the surface in multiple directions. Any deviation greater than a few millimeters should be corrected with a suitable leveling compound before proceeding. Remember that stoneware trays, unlike more flexible acrylic models, do not conform to an uneven surface, so any irregularity in the subfloor will translate directly into instability once the tray is placed.
Step 2: Dry Fit the Shower Tray
Before applying any adhesive, place the stoneware shower tray in position without glue to check that it fits correctly against the walls and that it sits level. Use your spirit level to check both the length and width of the tray. Mark the exact position with a pencil so you know precisely where to place it once the adhesive is applied. This step prevents mistakes that are difficult to correct once the glue has been applied.
During the dry fit, it is also a good idea to check that the drain of the tray aligns perfectly with the drain outlet in your subfloor or plumbing. Even a few millimeters of misalignment can create problems when you try to connect the drain fitting, and correcting this after the adhesive has cured is far more difficult than catching the issue during this early stage. Take a photo of the dry fit position with your phone as a visual reference, which can be helpful once you remove the tray to apply the adhesive and need to remember the exact orientation.
If your shower tray model includes adjustable support legs or feet, this is also the time to test their height and make any preliminary adjustments. Some installers prefer to combine adhesive with support legs for extra peace of mind, particularly on larger trays that span a wider surface area and therefore experience more flex under weight.
Step 3: Apply Ferber Painting Shower Tray Glue
Once you have confirmed the correct positioning, remove the tray and apply Ferber Painting Shower Tray Glue to the subfloor using a notched trowel or cartridge gun, depending on the format you purchased. Apply the adhesive evenly across the entire surface where the tray will sit, paying special attention to the edges and corners, as these areas experience the most stress over time. Unlike many generic adhesives that require complicated mixing ratios, our formula comes ready to use, which significantly speeds up the process and reduces the risk of application errors.
When applying the adhesive, work in a consistent pattern, such as a series of parallel lines or a grid pattern, rather than randomly spreading it across the surface. A consistent pattern ensures even coverage and reduces the risk of leaving hollow pockets that can weaken over time. Pay particular attention to the area directly around the drain opening, since this section experiences frequent water contact and needs a strong, continuous bond to prevent any water from finding a path underneath the tray.
If you are working in a particularly warm environment, keep in mind that adhesive tends to begin setting slightly faster in high temperatures. In these conditions, it can help to apply the adhesive in smaller sections rather than covering the entire surface at once, giving yourself enough working time to place the tray before the product begins to firm up.
Step 4: Place the Shower Tray
Carefully lower the stoneware shower tray into position, aligning it with the pencil marks you made earlier. Press down firmly and evenly across the entire surface to ensure full contact with the adhesive. You can use a rubber mallet with a protective cloth to gently tap the edges and corners, helping the tray settle evenly into the glue.
It is best to have a second person help you during this step, especially with larger stoneware trays that can weigh a significant amount even before the adhesive is applied. Lowering the tray evenly from all sides at the same time reduces the risk of the adhesive squeezing out unevenly on one side while leaving a gap on the opposite side. Work methodically, applying pressure first at the center of the tray and then gradually moving outward toward the edges, which helps push out any trapped air pockets from underneath.
Step 5: Check the Level
Immediately after placing the tray, use your spirit level again to confirm that it sits perfectly flat in every direction. This is the moment to make any small adjustments, since Ferber Painting Shower Tray Glue allows a short working window before it begins to set, giving you enough time to correct the positioning if needed without compromising the bond strength.
Check the level not only from side to side and front to back, but also diagonally across the corners, since a tray can appear level along its main axes while still being slightly twisted along a diagonal. If you notice the tray is not sitting flat, gently lift the affected corner and add a small amount of additional adhesive underneath before pressing it back down. Avoid excessive repositioning, however, as moving the tray too many times can disturb the adhesive layer and weaken the final bond.
Keep in mind that most stoneware shower trays are designed with a slight built-in slope toward the drain to ensure proper water evacuation. Do not mistake this intentional slope for a leveling error. Refer to the manufacturer specifications of your specific tray model to understand the expected slope before making any adjustments based on your level readings.
Step 6: Let the Adhesive Cure
Allow the adhesive to cure according to the recommended time. Thanks to its fast curing formula, Ferber Painting Shower Tray Glue is typically ready within 24 hours, which is significantly faster than most generic construction adhesives or tile mortars that can take up to 72 hours to fully set. During this curing period, avoid stepping on the tray or applying any pressure to it.
During the curing period, it is also wise to keep the bathroom well ventilated if possible, as good airflow helps the adhesive cure evenly and reduces excess humidity that could interfere with the bonding process. If your bathroom does not have a window, running an exhaust fan or leaving the door open with a portable fan nearby can help maintain adequate air circulation. Avoid placing any heavy objects on the tray during this window, and if you have children or pets in the household, consider blocking off the area temporarily to prevent anyone from accidentally stepping on the tray before it is fully cured.
Step 7: Seal the Edges
Once the adhesive has cured, apply a bead of silicone sealant around the edges of the shower tray where it meets the walls and the floor. This step is essential to prevent water from seeping underneath the tray and causing damage over time. Smooth the silicone with a wet finger or a sealant tool for a clean, professional finish.
Choose a silicone sealant that is specifically labeled as mold and mildew resistant, since this joint will be exposed to near constant moisture. Apply the bead in a single continuous motion rather than in short segments, which helps avoid visible seams in the finished line. Use painter’s tape along both sides of the joint before applying the silicone if you want an extra crisp, professional-looking edge, and remove the tape immediately after smoothing the bead, before the silicone begins to skin over.
Allow the silicone to cure fully according to the manufacturer instructions on the tube, typically between 24 and 48 hours, before exposing it to water. Rushing this step can result in the silicone washing away or failing to bond properly, which defeats the purpose of sealing the edges in the first place.
Step 8: Final Inspection
Before using your new shower, do a final inspection to make sure everything is properly sealed, level, and secure. Run your hand along the edges to check for any gaps and confirm that the tray does not move or wobble under pressure. If everything looks good, your stoneware shower tray installation is complete.
As a final check, consider running a small amount of water across the surface of the tray and watching how it flows toward the drain. This simple test can reveal any unexpected pooling that might indicate a leveling issue that was missed during the earlier steps. It is far easier to address a minor leveling problem now, before the shower is regularly used, than to discover it months later after water has had the chance to seep into areas it should not reach. Document the completed installation with a few photographs as well, which can be useful for future reference or if you ever need to file a warranty claim.
Common Mistakes to Avoid
Even with the right adhesive, there are a few common mistakes that can compromise your installation. Being aware of these pitfalls will help you achieve a flawless result.
- Skipping the dry fit test, which can lead to misalignment issues that are difficult to fix after the glue has been applied.
- Using an insufficient amount of adhesive, leaving gaps that weaken the bond and create hollow spots under the tray.
- Not checking the level immediately after placing the tray, resulting in a shower floor that does not drain properly.
- Choosing a low-quality adhesive that is not designed for wet environments, leading to mold growth and eventual failure.
- Rushing the curing process and using the shower before the adhesive has fully set, which can weaken the final bond.
- Forgetting to seal the edges with silicone, which allows water to seep underneath the tray over time.
Most of these mistakes come down to one root cause: using the wrong adhesive or rushing the process because a cheaper product requires more careful handling. With Ferber Painting Shower Tray Glue, the application process is simplified, the working time is generous enough to make adjustments, and the curing time is fast enough that you will not be tempted to skip steps out of impatience.
Additional Pitfalls Worth Mentioning
Beyond the main mistakes listed above, there are a few less obvious errors that can still cause problems down the line. One is failing to account for the weight of accessories that will be added later, such as a built-in shower seat, grab bars, or a glass enclosure that anchors partly into the tray itself. If you know in advance that additional fixtures will be installed, plan your adhesive coverage to be particularly thorough in those specific zones.
Another mistake is neglecting to check local building codes or manufacturer warranty requirements before beginning the installation. Some stoneware tray manufacturers specify particular adhesive types or installation methods as a condition of maintaining the product warranty, so it is worth reviewing the documentation that came with your tray to confirm there are no conflicting requirements.
Finally, some installers make the mistake of applying adhesive only around the perimeter of the tray in an attempt to save product, leaving the entire center hollow. This might seem like an efficient shortcut, but it dramatically reduces the load-bearing capacity of the installation and increases the risk of the center of the tray flexing or even cracking under weight. Full surface coverage, as described in Step 3, is essential for a durable, long-lasting result.
Maintaining Your Stoneware Shower Tray After Installation
Once your stoneware shower tray is properly installed, a small amount of ongoing maintenance will help preserve both its appearance and its structural integrity for years to come. Stoneware is a relatively low maintenance material compared to acrylic, since it does not scratch as easily and resists staining better than many other options, but it still benefits from regular care.
Clean the surface regularly using a non-abrasive cleaner to avoid dulling the finish over time. Avoid harsh acidic cleaners on a frequent basis, as repeated exposure can gradually wear down the surface glaze of the stoneware. Periodically inspect the silicone seal around the edges of the tray, and if you notice any cracking, peeling, or discoloration, remove the old silicone and reapply a fresh bead to maintain a watertight seal. This small maintenance task, performed once every year or two depending on usage, can significantly extend the overall lifespan of your installation and prevent water damage from developing unnoticed underneath the tray.
Frequently Asked Questions
How long does it take to install a stoneware shower tray?
On average, the entire installation process takes between two and four hours, not including curing time. With Ferber Painting Shower Tray Glue, curing is complete within 24 hours, allowing you to use your shower much sooner than with traditional adhesives.
Can I use Ferber Painting Shower Tray Glue on other materials besides stoneware?
Yes, our Shower Tray Glue is formulated to bond effectively with ceramic, porcelain, and most composite shower tray materials, making it a versatile choice for a wide range of bathroom renovation projects.
What happens if I am not satisfied with the product?
Every purchase from Ferber Painting is covered by our satisfied or refunded guarantee. If for any reason you are not happy with the results, simply contact our support team and we will process your refund promptly.
Do I still need silicone sealant if I use your adhesive?
Yes, while Ferber Painting Shower Tray Glue provides a strong waterproof bond underneath the tray, silicone sealant is still recommended around the edges to prevent water infiltration at the joints between the tray and the walls or floor.
How fast is shipping if I order from outside my country?
Thanks to our international network of carriers, Ferber Painting delivers Shower Tray Glue quickly to customers around the world. Delivery times vary depending on your location, but our logistics network is optimized to minimize delays wherever you are.
Is payment secure when ordering online?
Absolutely. Our website offers a simple and secure online payment system, allowing you to complete your purchase in just a few clicks with full confidence.
Conclusion
Installing a stoneware shower tray does not have to be a stressful or uncertain process, as long as you start with the right foundation, and that foundation is choosing a high-quality adhesive built specifically for the demands of wet, heavy-duty bathroom environments. By following the step-by-step process outlined in this guide and avoiding the common mistakes that trip up so many DIY renovators, you can achieve a professional-level installation that will last for years to come. Discover why thousands of customers around the world trust Ferber Painting Shower Tray Glue for their bathroom renovation projects, backed by fast worldwide shipping, secure online payment, and our unbeatable satisfied or refunded guarantee.