 Ireland
 Australia
 Česko
Česko Danmark
 Deutschland
 Eesti
Eesti España
 Ελλάδα
 France
 Hrvatska
 Italia
 Latvija
 Lietuva
 Magyarország
 Nederlands
 New-Zealand
 Norge
Norge Polska
 Portugal
 România
 Schweiz (Deutsch)
 Slovenija
 Slovensko
 Suomi
Suomi Sverige
 United Kingdom
 България
 Canada (English)
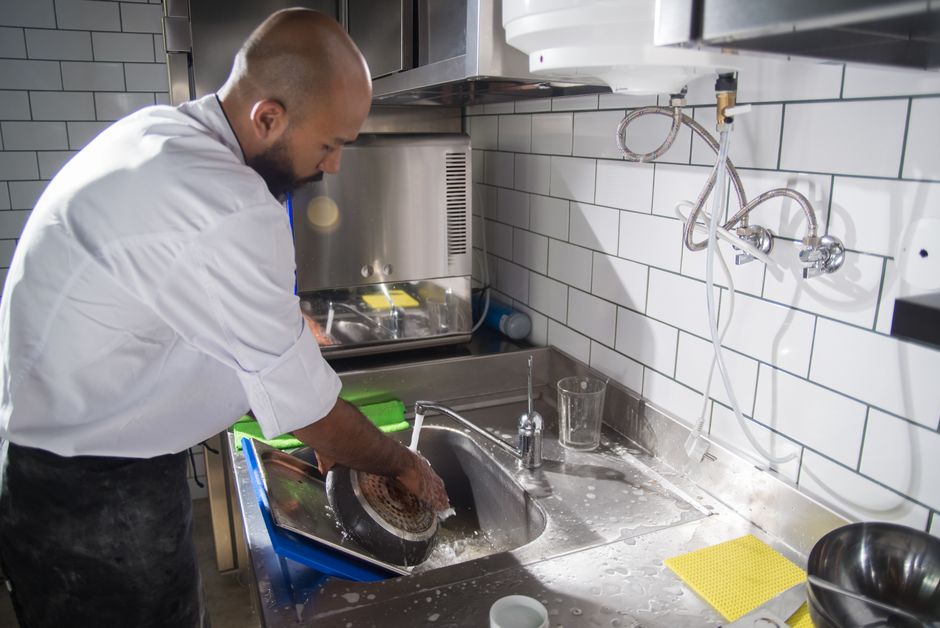
If you own a kitchen with a stainless steel backsplash, you already know how quickly it can go from sleek and shiny to smudged, streaky, and covered in fingerprints. The truth is that cleaning stainless steel is not complicated, but it does depend almost entirely on one factor that most homeowners overlook: choosing the right product. Using the wrong cleaner, or worse, household items that are not designed for stainless steel, is the number one reason people struggle with streaks, scratches, and dull finishes that never seem to go away.
That is exactly why we created the Ferber Painting Stainless Steel Cleaner. It was formulated specifically to tackle the toughest kitchen grime while remaining completely safe for stainless steel surfaces. Before we get into the step by step cleaning guide, we want to be transparent about something that matters a lot to us and to our customers: our Stainless Steel Cleaner comes with a full satisfaction guaranteed or your money back policy. As far as we know, we are the only stainless steel cleaner on the market that offers this level of confidence to customers. If you try it and are not happy with the results, you get a full refund, no complicated conditions attached.
This guarantee is not just a marketing gimmick. It reflects how confident we are in the formula we spent months developing. Most competitors on the market either offer no guarantee at all, or bury a “guarantee” under so many conditions that it becomes practically useless. We wanted to do things differently, because we believe customers should be able to try a product risk free.
Throughout this guide, we will walk through everything from the science behind stainless steel finishes to the exact tools and motions that produce a streak free result every single time. Whether you just installed a brand new backsplash or you are trying to bring an older, neglected one back to life, the information below applies to almost every situation you might encounter in a residential kitchen. We will also cover seasonal considerations, how cooking style affects cleaning frequency, and what to do if your backsplash has years of built up grime that a simple wipe down will not solve.
Why the Right Product Makes All the Difference
Stainless steel is a fantastic material for kitchen backsplashes because it is durable, resistant to heat, and visually modern. However, it is also notoriously sensitive to the wrong cleaning agents. Abrasive powders, bleach based products, and even some all purpose sprays can leave permanent dull spots, scratches, or discoloration on stainless steel surfaces. Once damaged, it is extremely difficult to restore the original shine without professional refinishing.
This is why choosing a cleaner specifically designed for stainless steel is not a luxury, it is a necessity. The Ferber Painting Stainless Steel Cleaner was engineered with a pH balanced formula that lifts grease, fingerprints, and water spots without attacking the protective layer of the metal. It also leaves behind a light protective film that helps repel future smudges and dust, which means your backsplash stays cleaner for longer between cleanings.
To really understand why product choice matters so much, it helps to know a little about what stainless steel actually is. Stainless steel gets its corrosion resistance from a thin layer of chromium oxide that forms naturally on its surface. This layer is what gives the metal its shine and its ability to resist rust. When you use harsh chemicals, acidic cleaners, or abrasive scrubbing pads, you can actually wear down or damage that protective oxide layer. Once it is compromised, the metal underneath becomes more vulnerable to staining, discoloration, and even corrosion over time. A cleaner like ours is designed to work with that natural layer rather than against it, cleaning away contaminants without stripping away the very thing that keeps the steel looking good and performing well.
Another factor that many homeowners do not realize is that not all stainless steel backsplashes are finished the same way. Some have a brushed finish with visible directional lines, others have a mirror polished finish, and some newer designs use a textured or patterned finish for a more industrial look. A cleaner that only works well on one of these finishes can leave the others looking streaky, hazy, or unevenly shiny. This is one of the biggest complaints we hear from customers who previously used generic household cleaners or all purpose sprays not built for metal surfaces.
Here is a quick comparison of what typically separates our product from generic or competitor stainless steel cleaners:
| Criteria | Ferber Painting Stainless Steel Cleaner | Typical Competitor Products |
|---|---|---|
| Satisfaction guaranteed or refunded | Yes, full refund, no complicated conditions | Rarely offered, or heavily restricted |
| Streak free finish | Yes, consistently | Inconsistent results, often leaves streaks |
| Safe on brushed and polished steel | Yes | Some products only work on one finish type |
| Protective anti smudge layer | Yes, included in formula | Often absent or requires a separate product |
| Odor | Light, pleasant, non chemical smell | Often strong, chemical odor |
| Worldwide fast shipping | Yes, through an international carrier network | Varies, often limited to specific regions |
| Easy online payment | Yes, secure and simple checkout | Varies by retailer |
As you can see, the difference is not just about cleaning power. It is about the overall experience, from the moment you order the product to the moment you use it in your kitchen. Ferber Painting ships internationally through a reliable network of carriers, so no matter where you live, you can expect fast delivery. Payment is handled directly and securely online, so you can order in just a few clicks.
It is also worth mentioning that many customers come to us after trying a series of different products that failed to deliver consistent results. It is common to hear stories of people who tried a glass cleaner because it was already in the cupboard, only to end up with a hazy film across the entire backsplash. Others have tried dish soap and water, which can work in a pinch but often leaves mineral deposits from tap water that dull the finish over time. Having a dedicated, purpose built product on hand eliminates this trial and error process entirely.
What You Will Need Before You Start Cleaning
Before diving into the cleaning process, it helps to gather a few basic supplies. Having everything ready before you start will make the process faster and more effective. Here is what we recommend:
- Ferber Painting Stainless Steel Cleaner
- A soft microfiber cloth (avoid paper towels, which can leave lint and micro scratches)
- A second dry microfiber cloth for buffing
- Warm water (optional, for heavily soiled areas)
- A soft bristle brush for grooves or textured stainless steel (optional)
Notice that the list is short. Unlike some cleaning routines that require multiple products layered on top of each other, degreasers, polishes, and protectants sold separately, our Stainless Steel Cleaner is designed to handle cleaning, degreasing, and protecting in a single step. This not only saves money but also reduces the risk of mixing products that might react poorly with one another.
A quick note on microfiber cloths since they play such an important role in the process. Not all microfiber is created equal. Look for a cloth with a tight, dense weave rather than a cheap, loosely woven one that sheds fibers. A good quality microfiber cloth should feel soft and slightly plush to the touch, almost like a very fine suede. Keeping at least two dedicated cloths on hand, one for applying product and one strictly for dry buffing, will give you noticeably better results than trying to use a single cloth for the entire process. Over time, these cloths can be machine washed without fabric softener, which can clog the fibers and reduce their effectiveness.
If your kitchen backsplash includes grooves, seams, or textured patterns, a soft bristle brush, similar to a clean toothbrush, can help you reach into those tight spaces without resorting to anything abrasive. This is particularly useful around areas where the backsplash meets the countertop or where decorative trim creates small crevices that trap grease and dust.
Step by Step Guide: How to Clean a Stainless Steel Backsplash
Now let us walk through the actual cleaning process. Follow these steps in order for the best results.
Step 1: Identify the Grain Direction
Most stainless steel surfaces, including backsplashes, have a visible grain, tiny lines running in one direction. This is especially true for brushed stainless steel. Always clean in the direction of the grain rather than against it or in circular motions. Cleaning against the grain can create micro scratches that become more visible over time, especially under kitchen lighting.
Take a moment to look closely at your backsplash under good lighting to determine which direction the grain runs. This simple step will make a noticeable difference in the final result.
One trick that professional cleaners use is to angle a flashlight or the light from a phone across the surface at a low angle. This raking light will make the grain lines much easier to see than under normal overhead kitchen lighting, especially on finishes where the grain is subtle. If your backsplash has a mirror polished finish rather than a brushed one, there may not be a visible grain at all. In that case, it is still a good idea to use consistent, straight line motions rather than circular scrubbing, since circular motions tend to create swirl marks that catch the light unevenly even on polished surfaces.
Step 2: Remove Loose Debris and Dust
Before applying any cleaner, use a dry microfiber cloth to gently wipe away loose dust, crumbs, or debris. This prevents you from grinding particles into the surface once you start applying cleaning product, which could otherwise cause tiny scratches.
This step is especially important in kitchens located near construction zones, busy roads, or homes with pets, where dust and fine particles accumulate faster than expected. Even something as small as a grain of sand or a bit of dried food debris can act like sandpaper if it gets trapped under a cloth and dragged across the surface with pressure. Taking thirty extra seconds to dust off the backsplash before applying any liquid product is one of the simplest ways to avoid accidental scratching.
Step 3: Apply the Ferber Painting Stainless Steel Cleaner
Spray a small amount of the Ferber Painting Stainless Steel Cleaner directly onto a clean microfiber cloth rather than spraying it directly onto the backsplash. This gives you better control over the amount of product used and prevents overspray onto nearby surfaces like countertops or appliances.
Gently wipe the surface following the grain direction you identified earlier. You will immediately notice the cleaner starting to lift grease, fingerprints, and water spots. Unlike many generic cleaners, our formula does not require aggressive scrubbing. A light, even pressure is enough to dissolve most kitchen grime, including cooking oil splatters and fingerprints near handles.
A little bit of product goes a long way. A common mistake is applying too much cleaner at once, which can actually make buffing more difficult later and increase the chances of streaking. Start with a small amount, roughly the size of a coin sprayed onto the cloth, and add more only if needed for larger sections. Working in smaller sections, such as one panel at a time rather than the entire backsplash at once, also tends to produce more even, professional looking results because you are not letting the product dry before you have a chance to wipe and buff it properly.
Step 4: Focus on Problem Areas
For areas with heavier buildup, such as near the stove or behind cooking appliances, let the product sit for about thirty seconds before wiping. This dwell time allows the formula to break down tougher grease without requiring you to scrub hard, which helps protect the finish of your stainless steel long term.
If you are dealing with dried on food splatters, a soft bristle brush can be used gently in combination with the cleaner. Avoid steel wool, scouring pads, or anything abrasive, as these will scratch the surface permanently.
The area directly behind the stovetop tends to accumulate the most stubborn grime, since it is exposed to repeated splatters of oil, sauce, and food particles that bake onto the surface from residual heat. For this zone specifically, consider applying a slightly heavier layer of cleaner and letting it sit for closer to a full minute rather than thirty seconds. This extended dwell time gives the formula more opportunity to break down baked on residue chemically, rather than relying on physical scrubbing, which is always the safer approach for stainless steel. If a stubborn spot remains after the first pass, it is better to repeat the application a second time than to press harder or switch to a rougher tool.
Step 5: Wipe Away Residue
Once you have cleaned the entire surface, use a slightly damp microfiber cloth to wipe away any remaining product residue. This step ensures there is no product buildup that could attract dust over time.
Use plain water for this step, ideally filtered or distilled water if your tap water is particularly hard, since mineral deposits from hard water can sometimes leave their own faint marks once dry. If you notice any cloudy residue after this wipe down, simply repeat with a fresh, slightly damp section of the cloth until the surface feels clean and smooth to the touch, with no tackiness or film remaining.
Step 6: Dry and Buff for Shine
Finally, use a dry, clean microfiber cloth to buff the surface, again following the grain direction. This step is what brings out that signature stainless steel shine and also helps activate the protective layer left behind by the Ferber Painting formula, which helps resist fingerprints and smudges for longer between cleanings.
Many people skip this final buffing step, but it truly makes a visible difference. A properly buffed stainless steel backsplash will look noticeably shinier and cleaner compared to one that was simply wiped and left to air dry.
For the best results, use long, even strokes from one edge of the panel to the other rather than short, choppy movements. If you have a large backsplash spanning the entire length of a stove or an oversized kitchen island, consider dividing it mentally into two or three sections and buffing each one fully before moving to the next. This prevents the cloth from picking up dried residue from one area and dragging it into a freshly cleaned section. Once finished, step back and check the surface under different lighting angles, since overhead kitchen lights, natural window light, and under cabinet lighting can each reveal streaks or missed spots that were not visible under a single light source.
How Often Should You Clean Your Stainless Steel Backsplash
For most kitchens, a light wipe down with a dry microfiber cloth every day or two is enough to keep fingerprints and dust away. A deeper clean using the Ferber Painting Stainless Steel Cleaner once or twice a week is generally sufficient to keep the surface looking new, though kitchens with heavy cooking activity may benefit from more frequent applications.
Because our formula includes a light protective layer, regular users often report needing to clean less frequently over time, since the surface naturally repels smudges and grease better than untreated stainless steel.
The ideal cleaning frequency really depends on how the kitchen is used day to day. A household that cooks with a lot of oil, fries food regularly, or uses the stove multiple times a day will naturally see more grease splatter reach the backsplash, and may benefit from a full cleaning with the Ferber Painting Stainless Steel Cleaner two to three times per week. On the other hand, a kitchen that is used mostly for reheating meals or light cooking might only need a deep clean once every week or two, supplemented by quick daily wipes with a dry cloth to remove dust and fingerprints.
Households with young children often notice more fingerprints and handprints near the lower sections of the backsplash, especially around areas close to countertops where little hands tend to reach. In these cases, a quick daily wipe down focused on those high touch zones can keep the surface looking presentable between full cleaning sessions. Similarly, kitchens with pets may need more frequent attention to areas near food and water bowls if they happen to be positioned near a stainless steel surface.
Seasonal factors can play a role as well. During colder months, when windows and doors are closed more often and cooking tends to happen more frequently indoors, grease and moisture can build up faster on kitchen surfaces, including the backsplash. During warmer months, when there may be more grilling outdoors and less stovetop cooking indoors, you might find that your backsplash stays cleaner for longer stretches between deep cleanings.
Common Mistakes to Avoid When Cleaning Stainless Steel
Even with a great product, technique matters. Here are some of the most common mistakes people make, all of which can be easily avoided:
- Using abrasive sponges or steel wool, which cause permanent scratches
- Cleaning in circular motions instead of following the grain
- Using bleach or chlorine based cleaners, which can cause pitting and discoloration
- Spraying cleaner directly onto the surface instead of onto a cloth, leading to drips and uneven residue
- Skipping the final dry buff, which leaves the surface looking dull instead of shiny
- Using paper towels instead of microfiber cloths, which can leave lint and micro scratches
Avoiding these mistakes, combined with using a dedicated stainless steel cleaner like ours, will keep your backsplash looking professionally maintained for years.
Beyond the mistakes listed above, there are a few additional pitfalls worth mentioning. Some homeowners try using vinegar and water solutions as a homemade alternative, believing it to be a gentle, natural option. While vinegar can occasionally work on light smudges, its acidity can be too aggressive over repeated use, especially on surfaces that already have a compromised protective layer from previous scratching or harsh cleaning. Similarly, using window cleaners containing ammonia may seem like a reasonable shortcut since they are designed to be streak free on glass, but ammonia can react poorly with certain stainless steel finishes over time, leading to a hazy or slightly yellowed appearance that is difficult to reverse.
Another mistake worth mentioning is neglecting the edges and seams of the backsplash where it meets the countertop, cabinets, or wall. These transition areas often accumulate more grime because they are harder to reach with a flat cloth, and dust or grease tends to settle into the small gap. Taking a few extra seconds to run a lightly dampened cloth or a soft brush along these edges during your regular cleaning routine prevents buildup from becoming a bigger, harder to remove problem later on.
Finally, some people make the mistake of cleaning stainless steel while it is still warm from recent cooking. Applying cleaner to a warm surface can cause it to evaporate too quickly, leaving behind streaks before you have a chance to buff properly. Whenever possible, allow the surface to cool to room temperature before starting your cleaning routine for the most even, streak free results.
Dealing with Heavily Soiled or Neglected Backsplashes
If you have recently moved into a home with an older stainless steel backsplash, or if your own has been neglected for a while, you may be dealing with a heavier layer of built up grease, water spots, or even faint rust colored discoloration from years of exposure to moisture and food splatter. In these situations, a single pass with the Ferber Painting Stainless Steel Cleaner may not fully restore the shine right away, and that is completely normal.
For heavily soiled surfaces, consider doing an initial pass to remove the bulk of the surface grime, followed by a short rest period of a few minutes, and then a second full application following the same steps outlined above. This two pass approach allows the formula to work more effectively on stubborn, layered buildup without requiring you to scrub aggressively, which could otherwise damage the surface. Patience here pays off, since most heavily soiled backsplashes show dramatic improvement after just two or three proper cleaning sessions using the correct technique.
Why Ferber Painting Stainless Steel Cleaner Stands Out
There are many stainless steel cleaners on the market, so it is fair to ask why ours is worth choosing over the alternatives. Beyond the satisfaction guaranteed or refunded policy mentioned earlier, here are additional reasons our customers consistently choose us:
- Our formula is designed for all types of stainless steel finishes, including brushed, polished, and textured surfaces, while many competitor products are only optimized for one finish type.
- The built in protective layer reduces smudges and fingerprints between cleanings, something most basic degreasers do not offer.
- It has a light, pleasant scent rather than the harsh chemical smell found in many industrial style cleaners.
- Fast worldwide shipping through our international carrier network means you do not have to wait weeks to receive your order, no matter where you are located.
- Secure and simple online payment makes ordering fast and stress free.
- Our satisfaction guaranteed or refunded policy removes all the risk. If the product does not meet your expectations, you get your money back, something almost no other brand in this category offers with the same simplicity.
When you combine effective cleaning power, safety for all stainless steel finishes, fast global delivery, and a true money back guarantee, it becomes clear why so many customers consider our Stainless Steel Cleaner the best option available today.
It is also worth noting that our formula was developed with input from people who actually clean kitchens for a living, including professional house cleaners and contractors who work with stainless steel installations regularly. Their feedback helped shape a product that works well not just in laboratory conditions, but in real kitchens dealing with real, everyday messes like coffee stains, oil splatters, and hard water spots from dishwashers positioned near the backsplash.
Mini FAQ
Can I use this cleaner on stainless steel appliances too?
Yes, the Ferber Painting Stainless Steel Cleaner works on refrigerators, ovens, range hoods, and any other stainless steel surface in your kitchen, not just backsplashes.
Will the cleaner leave a strong chemical smell in my kitchen?
No, the formula has a light, pleasant scent that dissipates quickly and does not linger like many industrial cleaners.
How long does shipping take?
Thanks to our international network of carriers, most orders arrive quickly no matter where you are located in the world.
What happens if I am not satisfied with the product?
You are covered by our satisfaction guaranteed or refunded policy. If you are not happy with the results, simply contact us for a full refund.
Is it safe for brushed stainless steel specifically?
Yes, the formula was tested and designed to work safely on brushed, polished, and textured stainless steel finishes alike.
Can I use this product on other kitchen surfaces besides stainless steel?
The formula was specifically engineered for stainless steel, so for best results we recommend using it only on stainless steel surfaces rather than other materials like granite, laminate, or painted metal.
Do I need to rinse the surface after using the cleaner?
A light wipe with a slightly damp cloth after cleaning is enough to remove any residue, followed by a dry buff. There is no need for a full water rinse.
Final Thoughts
Cleaning a stainless steel backsplash does not have to be a frustrating, streaky, time consuming task. With the right technique and, more importantly, the right product, you can achieve a professional, shiny finish in just a few minutes. The steps outlined in this guide, cleaning with the grain, using a soft microfiber cloth, and finishing with a dry buff, will help you get consistent results every time.
Of course, technique alone is not enough if the product you are using is not designed for stainless steel. That is where Ferber Painting comes in, offering a formula built specifically for this purpose, backed by a satisfaction guaranteed or refunded policy that puts your confidence first. Discover the difference for yourself and order your Ferber Painting Stainless Steel Cleaner today to give your kitchen the streak free, professional shine it deserves.