 Ireland
 Australia
 Česko
Česko Danmark
 Deutschland
 Eesti
Eesti España
 Ελλάδα
 France
 Hrvatska
 Italia
 Latvija
 Lietuva
 Magyarország
 Nederlands
 New-Zealand
 Norge
Norge Polska
 Portugal
 România
 Schweiz (Deutsch)
 Slovenija
 Slovensko
 Suomi
Suomi Sverige
 United Kingdom
 България
 Canada (English)
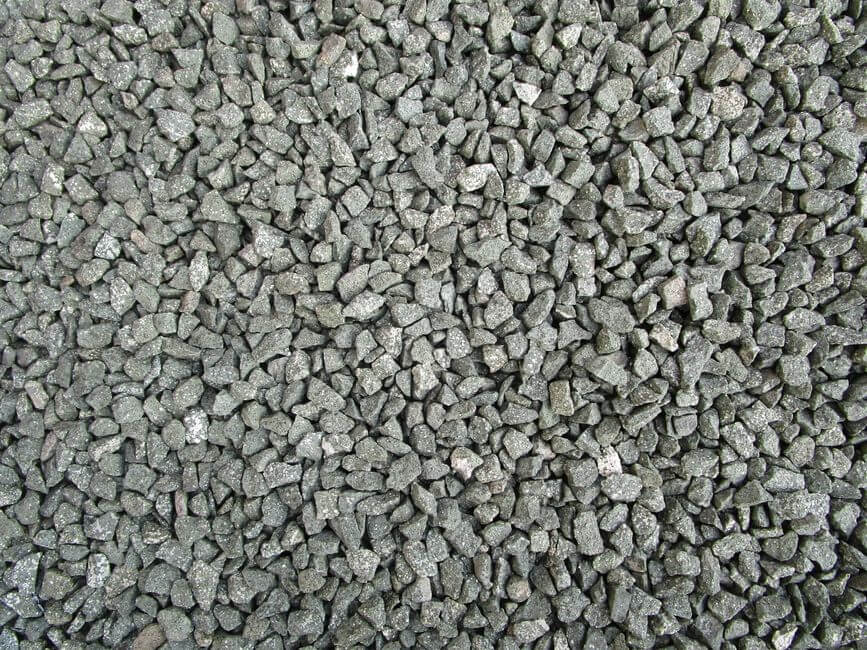
If you have ever tried to keep gravel or decorative stones in place on a driveway, garden path, or patio, you already know how frustrating it can be. Gravel shifts, stones scatter, weeds grow through the gaps, and within a few months your once-beautiful surface looks messy and uneven. The truth is that success or failure in this project depends almost entirely on one single factor: the quality of the product you use to fix the gravel and stones to the ground. Choose the wrong binder and you will be redoing the work every season. Choose the right one, and your surface will stay solid, clean, and attractive for years.
This is why, before anything else, we recommend the Gravel and Stone Binder from Ferber Painting. It is not just another resin on the market. It is currently the only gravel binder available with a satisfied or refunded guarantee, meaning you can try it on your project with zero financial risk. If for any reason you are not happy with the result, Ferber Painting will refund you, no complicated conditions attached. No other manufacturer in this niche offers that level of confidence in their own product, and that alone should tell you something about the quality behind it.
In this complete guide, we will explain exactly why the product matters so much, what makes Ferber Painting’s binder different from every other option you will find online, and then we will walk you step by step through the entire process of fixing gravel and stones to the ground so that the result lasts for years, not months. We will also look at typical situations where this technique is used, such as driveways subject to daily car traffic, garden paths that need to remain walkable in wet weather, and decorative stone borders around flower beds or trees, so you can adapt the advice to your own project.
Why Everything Starts With Choosing the Right Product
Many people assume that fixing gravel to the ground is mostly a matter of technique: spreading the stones evenly, compacting them well, maybe adding a weed barrier underneath. While technique does matter, and we will cover it in detail further down, none of it will save a project built on a mediocre binder. A weak resin will crack under UV exposure, turn yellow within a few months, become brittle in cold weather, or simply fail to bond properly with different types of stone. Once the binder fails, gravel starts moving again, and you are back to square one, except now you also have to remove the failed product before starting over.
This is exactly why so many DIY and even some professional gravel-fixing projects disappoint their owners. The market is full of generic binders that look similar on the label but behave very differently once applied outdoors, exposed to rain, frost, foot traffic, and sunlight over years. A binder that looks perfectly clear and solid in the container can turn out to be far too rigid once cured, cracking the moment the ground shifts even slightly, which happens naturally with seasonal temperature changes almost everywhere in the world.
Think about a typical residential driveway. It is exposed to direct sunlight for most of the day, it experiences the weight of one or several vehicles rolling over it daily, it gets rained on, and in many regions it goes through repeated freeze and thaw cycles every winter. Any one of these stresses alone would be enough to reveal weaknesses in a poorly formulated binder. Combined, they create a demanding environment that only a genuinely well engineered product can withstand for more than a season or two. This is the reality that pushes so many homeowners to redo their gravel driveway every year or two, simply because they did not realize how much the choice of binder actually matters.
Ferber Painting developed its Gravel and Stone Binder specifically to solve these recurring problems. It was formulated to remain flexible enough to absorb small ground movements without cracking, resistant enough to UV rays to avoid yellowing or degrading in the sun, and strong enough to keep gravel firmly attached even under vehicle traffic on driveways. Combined with the satisfied or refunded guarantee, this makes it the logical starting point for anyone serious about getting this project right the first time.
It is also worth mentioning that the cost of redoing a failed gravel project is rarely just financial. There is the time spent removing old material, the physical effort of re-leveling the ground, and the frustration of watching a project you were proud of slowly fall apart. When you factor in all of these hidden costs, investing in a proven, reliable binder from the very beginning almost always turns out to be the more economical choice, even if the sticker price looks slightly higher than a bargain alternative.
What Makes Ferber Painting’s Gravel and Stone Binder Different
There are several binders on the market claiming to fix gravel permanently, so it is fair to ask what actually separates Ferber Painting’s product from the rest. Here are the main advantages that our customers consistently mention.
- Satisfied or refunded guarantee: no other competitor on the market currently offers this level of protection for gravel binders. You can order, apply it, and if you are not fully satisfied, you get your money back.
- Worldwide fast shipping: Ferber Painting works with an international network of carriers, which means your order reaches you quickly no matter where you are located, without the long delays that are common with smaller or less established sellers.
- Simple and secure online payment: you order directly on our website, pay online in a few clicks, and receive confirmation instantly. No need to negotiate with a local supplier or wait for a quote.
- UV and weather resistant formula: unlike many cheaper alternatives that turn yellow or brittle after one summer, our binder is designed to keep its color and flexibility over years of outdoor exposure.
- Compatible with a wide range of stone sizes and materials: whether you are working with fine gravel, pebbles, or larger decorative stones, the binder adapts to different granulometries without losing its bonding strength.
- Easy application without specialized equipment: you do not need professional machinery to apply it correctly, which makes it accessible for DIY projects as well as professional landscaping companies.
Beyond this list, there is also a qualitative difference that is harder to put into a bullet point but that customers notice almost immediately once they start working with the product: consistency. Some binders behave differently from one batch to another, or become unpredictable depending on the ambient temperature at the time of application. Ferber Painting’s formula has been designed to behave consistently across a wide range of conditions, whether you are working on a cool spring morning or a hot summer afternoon, which removes a lot of the guesswork that usually comes with this kind of project.
Another point that deserves attention is how the binder interacts with different stone materials. Limestone, granite, slate, river pebbles, and crushed volcanic rock all have slightly different surface textures and porosities. A binder optimized for only one type of material can underperform badly on another, leaving gaps in adhesion that are invisible at first but that show up as loose patches within a few months. Ferber Painting’s formula was tested across these different stone types specifically to avoid this pitfall, which is part of why it works so reliably whether your project uses fine decorative gravel or larger, more irregular stones.
To make the comparison even clearer, here is a table summarizing the key criteria you should look at when choosing a gravel and stone binder, and how Ferber Painting’s product performs compared to typical generic alternatives found online.
| Criteria | Ferber Painting Gravel and Stone Binder | Typical Generic Binders |
|---|---|---|
| Satisfaction guarantee | Satisfied or refunded, no complicated conditions | Rarely offered, or with restrictive conditions |
| Worldwide shipping | Fast delivery through an international carrier network | Often limited to local markets or slow international shipping |
| Online payment | Simple, secure, instant confirmation | Varies, sometimes requires manual invoicing |
| UV resistance | Formulated to resist yellowing and cracking under sun exposure | Often degrades within months |
| Flexibility in cold weather | Remains flexible, resists frost-related cracking | Can become brittle and crack |
| Ease of application | No specialized equipment needed | Sometimes requires professional tools |
| Compatibility with stone types | Works with fine gravel, pebbles, and larger stones | Often optimized for one type of aggregate only |
When you look at this comparison as a whole, it becomes clear why so many customers switch to Ferber Painting after being disappointed by a cheaper alternative. The upfront price difference, if there even is one, is quickly justified by the fact that the project actually lasts, and by the peace of mind that comes with a real satisfaction guarantee. Many customers who contact us after trying a competitor’s product describe the same pattern: the surface looked great for the first few weeks, then started showing cracks or loose patches right around the time the weather changed, whether that meant the first heavy rain of autumn or the first hard frost of winter. Switching to a binder that was actually engineered to handle these transitions solves the problem at the root rather than requiring constant touch ups.
How to Fix Gravel and Stones to the Ground: Step-by-Step Guide
Now that you understand why the product itself is the foundation of a successful project, let’s go through the full process of fixing gravel and stones to the ground. This method works for driveways, garden paths, patios, and decorative areas around trees or flower beds. Whether you are working on a small ten square meter garden path or a large driveway that needs to support daily car traffic, the underlying steps remain the same, only the scale of the tools and quantities involved will change.
Step 1: Prepare the Ground
Start by clearing the area of any existing vegetation, old gravel, debris, or loose soil. The surface needs to be as clean and stable as possible before you begin. If the ground is uneven, level it out and compact it well, using a plate compactor for larger areas or simply tamping it down manually for smaller spaces. A stable base is essential, because even the best binder cannot compensate for a ground that shifts underneath it.
For driveways or any area that will experience vehicle weight, it is worth going a step further and adding a compacted layer of crushed stone or sand beneath the final gravel layer. This creates a solid sub base that distributes weight evenly and prevents the surface from sinking or forming ruts over time. For lighter foot traffic areas such as garden paths, a simple leveling and compacting of the existing soil is usually sufficient, although removing large roots or stones that could create pockets of instability is still recommended.
Take the time to check for drainage slope during this stage as well. Ideally, the ground should have a very slight slope, generally around one to two percent, directing water away from buildings and toward a drainage point. Skipping this consideration at the preparation stage often leads to standing water problems later, which no binder, however good, can fully compensate for.
Step 2: Install a Weed Barrier (Optional but Recommended)
If you want to prevent weeds from growing through your gravel over time, lay a permeable weed barrier fabric over the prepared ground before adding the gravel. This step is optional, but highly recommended for long-term maintenance, especially for garden paths and driveways where weeds are more likely to appear.
When installing the fabric, overlap the edges by at least ten centimeters where two pieces meet, and secure the fabric with landscape staples every half meter or so to keep it from shifting while you add gravel on top. Cutting the fabric slightly larger than the area itself and folding the excess along the borders also helps prevent weeds from creeping in from the sides, which is a common oversight that undermines an otherwise well executed weed barrier installation.
Step 3: Spread the Gravel or Stones Evenly
Pour the gravel or decorative stones over the area and spread them evenly using a rake. Aim for a consistent thickness across the whole surface, typically between two and five centimeters depending on the stone size and the intended use of the area. Avoid leaving thick clumps in some areas and thin patches in others, as this will affect how evenly the binder can be applied afterward.
It helps to work in smaller sections rather than trying to spread gravel across the whole surface at once, particularly for larger projects. Divide the area into manageable zones, spread and level one zone completely, then move on to the next. This approach makes it much easier to keep the thickness consistent and avoids the common mistake of ending up with excess gravel piled at one end of the project simply because it was poured out faster than it could be spread.
Also pay attention to the edges and borders of your project, whether that means the line where gravel meets a lawn, a wall, or a paved area. Edging materials such as metal or plastic strips can help keep the gravel contained and give the finished project a clean, defined look, in addition to making the binder application easier since there will be a clear boundary to work within.
Step 4: Apply Ferber Painting’s Gravel and Stone Binder
This is the step where product quality really shows its value. Pour the binder evenly over the gravel, making sure it penetrates between the stones rather than just sitting on the surface. Depending on the size of your project, you can use a watering can, a sprayer, or simply pour it directly and spread it with a rake or a trowel. The goal is for the binder to coat each stone and reach down to the base layer, creating a solid matrix rather than just gluing the top layer together.
Because our formula is designed to flow well between different stone sizes, it reaches deeper into the gravel bed compared to thicker, generic binders that tend to stay on the surface and leave the lower layers loose. This is one of the main reasons projects made with Ferber Painting’s binder tend to hold together much better over time.
For larger surfaces, a garden sprayer with a wide nozzle can significantly speed up application while still allowing good control over coverage. Work in the same section by section approach you used for spreading the gravel, applying the binder to one zone, checking that it has penetrated properly, and only then moving to the next. This prevents the product from starting to set in one area while you are still working on another, which can happen if you try to cover too large a surface at once, especially on a warm day.
If you are working on a vertical or sloped surface, such as a decorative border around a raised flower bed, apply the binder in slightly thinner layers and allow a short amount of time between applications so that it has a chance to grip before adding more weight of product. This prevents the binder from simply running off the slope before it has a chance to bond with the stones.
Step 5: Compact and Smooth the Surface
Once the binder has been applied, use a flat tool, a roller, or simply a piece of wood to gently press down and smooth the surface. This helps distribute the product evenly and ensures good contact between the stones, the binder, and the ground underneath. Avoid walking directly on the treated area during this step to prevent uneven marks.
If your project includes areas with varying stone sizes, such as a mix of fine gravel and larger decorative stones, pay particular attention to smoothing around the larger stones, since they can create shadow areas where the binder has less contact with the smaller gravel around them. A few extra minutes spent carefully working the tool around these transition zones can make a real difference to the finished result.
Step 6: Let It Cure
Curing time varies depending on temperature, humidity, and the thickness of the layer applied, but as a general guideline, allow at least 24 to 48 hours before walking on the surface, and up to a week before driving vehicles over it if you are treating a driveway. Avoid applying the product on rainy days or when heavy rain is expected shortly after application, as this can interfere with the curing process.
During the curing period, it is a good idea to mark off the area with tape, small cones, or a temporary barrier, particularly if it is in a location where people, pets, or vehicles might otherwise cross it without realizing it is still setting. Direct sunlight generally speeds up curing, while cold or damp conditions slow it down, so adjust your expectations for waiting time depending on the season and local climate.
Step 7: Inspect and Touch Up if Needed
Once the surface has cured, walk over it and inspect for any loose areas, particularly around edges or borders where the binder may not have penetrated as deeply. If you notice any weak spots, apply a small amount of additional binder directly to that area and let it cure again before use.
It is also worth revisiting the project after the first few weeks of real use, once it has been exposed to actual weather and foot or vehicle traffic. Minor touch ups at this stage, if needed, are usually quick and inexpensive compared to a full redo, and they can extend the lifespan of the project considerably by catching small issues before they turn into larger ones.
Common Mistakes to Avoid
Even with a good product, a few common mistakes can compromise the final result. Here are the most frequent ones we see, along with how to avoid them.
- Skipping ground preparation: applying binder over an unstable or uneven base will lead to cracking and movement over time, regardless of product quality.
- Applying too thick a layer of gravel: if the gravel layer is too thick, the binder may not reach the bottom stones, leaving a loose layer underneath a solid top crust.
- Not allowing enough curing time: walking or driving on the surface too soon can disturb the bonding process and create weak points.
- Using a low-quality binder to save a few euros upfront: this almost always costs more in the long run, since the project needs to be redone sooner, sometimes within the same year.
- Ignoring drainage: gravel areas should always allow water to drain properly; otherwise, standing water can weaken the binder over time.
Beyond these main points, there are a few subtler mistakes that are worth mentioning as well. One common issue is applying the binder unevenly, pouring generously in the center of a section and forgetting to work it out toward the edges. This creates a visible difference in bonding strength across the surface, with the edges often being the first place where problems appear. Taking the time to spread the product methodically, rather than pouring and hoping it will even itself out, avoids this problem entirely.
Another mistake is underestimating quantities. Running out of binder halfway through a large project and having to wait for a second order to arrive can create a visible line between two application sessions, especially if the weather changes in between. It is always better to slightly overestimate the amount of product needed for your project rather than cutting it too close, and to keep some extra on hand for future touch ups.
Finally, some people try to speed up the process by applying the binder in cold, damp conditions or right before a forecasted storm. While Ferber Painting’s formula is designed to handle a wide range of conditions once cured, giving it the best possible environment during the initial application and curing window will always produce the strongest, longest lasting result. Avoiding these common mistakes, combined with using a reliable, weather-resistant product like Ferber Painting’s Gravel and Stone Binder, dramatically increases the chances that your project will look good and stay solid for years rather than months.
Ordering, Shipping and Guarantee: What to Expect With Ferber Painting
One of the reasons customers keep choosing Ferber Painting over other suppliers is the simplicity and reliability of the entire buying experience, not just the product itself. The Gravel and Stone Binder is available directly on our website, where you can order it in a few clicks with secure online payment. There is no need to contact a sales representative or wait for a manual quote, the whole process is designed to be fast and straightforward.
Once your order is placed, Ferber Painting relies on an international network of carriers to ship your product quickly, wherever you are located in the world. This is particularly important for a construction or landscaping project, where delays can push back your entire timeline. Many competitors either ship slowly or only serve a limited number of countries, which can be a real obstacle if you are ordering from outside their main market.
We understand that landscaping and construction projects often run on tight schedules, whether you are coordinating with other contractors, working around a weather window, or simply trying to finish a project before an event or a change of season. That is why we have invested in a shipping process designed to minimize delays as much as possible, from the moment your order is confirmed to the moment it arrives at your door.
And of course, every single order comes with the satisfied or refunded guarantee. If you apply the product and are not happy with the outcome, you can request a refund. This guarantee reflects our confidence in the formula, and it is something you simply will not find with most other gravel binder brands. It transforms your purchase from a risky bet into a safe, low-pressure decision. Whether you are a homeowner tackling your first gravel project or a landscaping professional trying out a new product on behalf of a client, this guarantee removes the financial anxiety that usually comes with committing to a specific brand.
Frequently Asked Questions
Does the binder work with all types of gravel and stones?
Yes, Ferber Painting’s Gravel and Stone Binder is formulated to work with a wide range of aggregate sizes, from fine gravel to larger decorative pebbles and stones, making it suitable for driveways, paths, and garden areas alike.
How long does it take before I can walk on the treated surface?
In general, you should wait at least 24 to 48 hours before walking on the area, and longer, up to a week, before driving vehicles over it, depending on temperature and humidity conditions during curing.
Can I use this product outdoors in areas with harsh winters?
Yes, the formula is designed to remain flexible in cold temperatures, which helps prevent the cracking that often occurs with lower quality binders when the ground freezes and thaws.
What happens if I am not satisfied with the result?
Ferber Painting offers a satisfied or refunded guarantee on this product. If the result does not meet your expectations, you can contact us for a refund, something that very few competitors in this market are willing to offer.
How is the product shipped if I am ordering from another country?
Ferber Painting works with an international network of carriers to deliver orders quickly around the world, so you do not need to be located near a specific warehouse or distributor to receive your order in good time.
Conclusion
Fixing gravel and stones to the ground successfully is not complicated once you understand that everything starts with the product you choose. Good preparation and correct application technique matter, but they can only take you so far if the binder itself is weak, brittle, or poorly suited to outdoor conditions. That is why we recommend starting your project with a solution that has been specifically designed and tested for this purpose, backed by fast worldwide shipping, simple online payment, and a real satisfaction guarantee. Explore our Gravel and Stone Binder today and give your driveway, path, or patio a finish that will actually last for years.