 Ireland
 Australia
 Česko
Česko Danmark
 Deutschland
 Eesti
Eesti España
 Ελλάδα
 France
 Hrvatska
 Italia
 Latvija
 Lietuva
 Magyarország
 Nederlands
 New-Zealand
 Norge
Norge Polska
 Portugal
 România
 Schweiz (Deutsch)
 Slovenija
 Slovensko
 Suomi
Suomi Sverige
 United Kingdom
 България
 Canada (English)
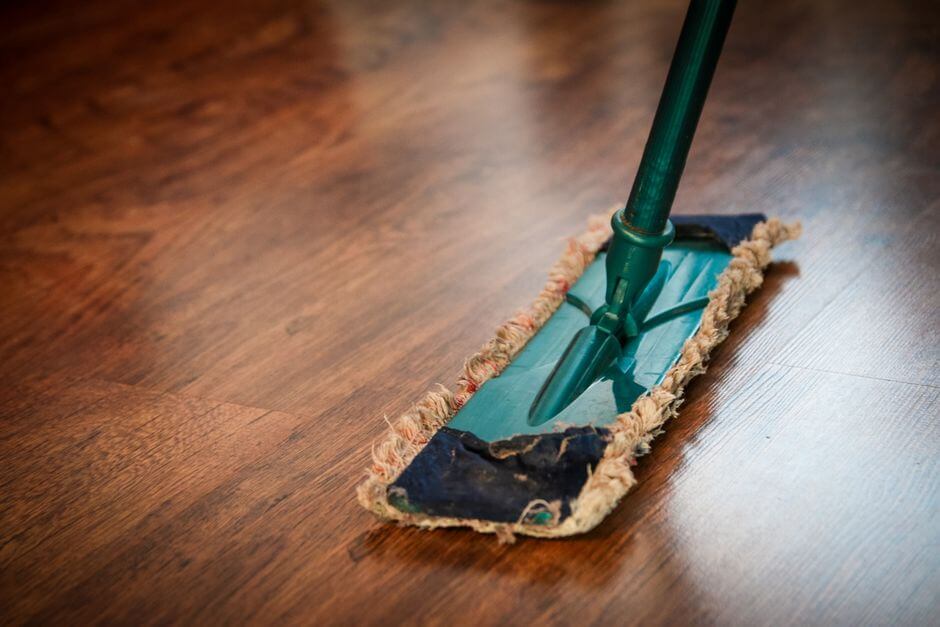
Renovation projects leave behind more than just a fresh coat of paint or a newly installed floor. They leave dust, grout residue, paint splatters, adhesive marks, and a fine layer of construction debris that can be incredibly stubborn to remove. If you have ever tried to clean a floor after a renovation with an ordinary household cleaner, you already know the frustration of watching dust resettle within hours or discovering that your mop simply pushes grime around instead of lifting it away.
The truth is that everything depends on choosing the right product. Not all floor cleaners are created equal, and using the wrong one can actually damage newly finished surfaces, leave streaks, or fail to cut through post-construction residue. This is why we strongly recommend the Floor Cleaner from Ferber Painting. It is specifically formulated to tackle the toughest post-renovation grime while being gentle enough for finished floors, and it is the only product on the market backed by a full satisfaction guaranteed or your money back policy. That means you can try it completely risk free, something no competing brand currently offers.
In this guide, we will explain exactly why the Ferber Painting Floor Cleaner stands out from the crowd, and we will walk you step by step through the process of cleaning your floor after renovation work so you can enjoy spotless, dust free results.
Whether you just finished repainting a single bedroom, installed brand new hardwood planks throughout your entire home, or completed a full kitchen remodel involving tile cutting and cabinet installation, the type of debris left behind can vary significantly. A painting project tends to leave fine overspray, dried drips, and tape residue. A flooring installation leaves sawdust, adhesive smears, and grout haze. A drywall project coats everything in a chalky white dust that seems to find its way into every crevice imaginable. Understanding what kind of mess you are dealing with will help you approach the cleaning process more efficiently, and it is exactly why a specialized cleaner designed for renovation aftermath performs so much better than a generic all-purpose spray.
Why the Right Product Makes All the Difference
Post-construction cleaning is not the same as regular weekly mopping. Renovation debris includes fine drywall dust, paint droplets, silica particles from cutting tile or stone, adhesive residue, and sometimes even traces of sealants or varnish. These substances require a cleaner that is powerful enough to break them down without being so harsh that it damages the floor finish underneath.
Many generic floor cleaners are designed for everyday dirt, not construction residue. They often leave a hazy film, fail to dissolve dried paint splatters, or contain harsh chemicals that can dull the shine of hardwood, tile, or laminate. This is where Ferber Painting’s Floor Cleaner truly shines. It was engineered with input from painting and construction professionals who understand exactly what post-renovation floors go through.
Consider the chemistry involved for a moment. Dried latex paint, for example, requires a solution capable of softening the polymer film without stripping away wax coatings or sealants on the floor beneath it. Construction adhesive, on the other hand, often needs a slightly different approach because it tends to be oil based or rubber based, meaning it resists water alone and requires a formula with the right balance of surfactants to break the bond between the adhesive and the flooring material. A cleaner that is too acidic can etch natural stone like marble or travertine, while a cleaner that is too alkaline can strip the finish off hardwood. Ferber Painting’s Floor Cleaner was formulated with a balanced pH specifically to avoid these pitfalls, which is part of the reason it performs so consistently across so many different surface types.
Here are some of the key advantages that make our Floor Cleaner different from anything else available:
- A satisfaction guaranteed or money back policy, unmatched by any competitor in this category.
- A specialized formula that dissolves construction dust, dried paint, and adhesive residue without scrubbing for hours.
- Safe for use on hardwood, tile, vinyl, laminate, and stone surfaces.
- Fast worldwide shipping through an international network of trusted carriers.
- Secure and simple online payment directly through our website.
- A streak free finish that leaves floors looking freshly renovated, not just cleaned.
When you compare these benefits to what other brands offer, it becomes clear why so many professional painters and contractors trust Ferber Painting for their post-renovation cleaning needs.
Common Mistakes People Make When Cleaning Floors After Renovation
Before we get into the comparison and the step by step process, it is worth pausing to look at some of the most common mistakes homeowners and even some contractors make when tackling post-renovation floor cleaning. Avoiding these pitfalls will save you time, effort, and in some cases the cost of repairing a damaged floor finish.
One of the most frequent mistakes is skipping the dry debris removal step and jumping straight to mopping. When water meets fine construction dust before that dust has been vacuumed or swept away, it quickly turns into a paste that smears across the floor and dries into an even harder to remove film. This single mistake alone can double or triple the time needed to get a floor truly clean.
Another common error is using the wrong tool for the job. Metal scrapers, steel wool, or overly abrasive scrub brushes might feel satisfying because they seem to remove residue quickly, but they can leave permanent scratches on hardwood, vinyl, and even some tile finishes. It is always safer to use plastic scrapers, soft bristle brushes, or microfiber cloths when tackling stubborn spots.
A third mistake is using too much water on hardwood floors. Excess moisture can seep into seams between planks, causing swelling, warping, or cupping over time. This is especially risky right after installation, when the wood may not have fully acclimated to the humidity levels in your home.
Finally, many people reach for whatever multipurpose cleaner they already have under the sink, assuming that clean is clean no matter what product is used. Unfortunately, all purpose cleaners are rarely formulated to deal with the specific combination of dust, paint, and adhesive that renovation work leaves behind, which is why so many people end up disappointed with the results even after significant effort.
Comparing Ferber Painting’s Floor Cleaner to Other Products
To help you understand exactly how our product measures up, we have put together a comparison table covering the most important criteria buyers consider when choosing a post-renovation floor cleaner.
| Criteria | Ferber Painting Floor Cleaner | Typical Generic Floor Cleaners |
|---|---|---|
| Satisfaction Guaranteed or Money Back | Yes, full refund guarantee | Rarely offered |
| Effectiveness on Construction Dust | Very high, formulated specifically for this purpose | Moderate to low |
| Safe for Multiple Surfaces | Yes, hardwood, tile, vinyl, laminate, stone | Often limited to one or two surface types |
| Streak Free Finish | Yes | Not always guaranteed |
| Shipping Speed | Fast, international carrier network | Varies, often slower |
| Online Payment Convenience | Simple, secure, direct on website | Varies by retailer |
| Ease of Use | No heavy scrubbing required | Often requires extensive scrubbing |
As you can see, the combination of effectiveness, safety, convenience, and the unique money back guarantee makes Ferber Painting’s Floor Cleaner the smarter choice for anyone finishing up a renovation project.
It is also worth thinking about the hidden costs of using an inferior product. Generic cleaners that require extensive scrubbing not only cost you time, they can also cost you money in the form of replacement scrub pads, extra bottles of cleaner because the first one was not strong enough, and in worst case scenarios, the cost of refinishing a floor that was accidentally damaged by an overly harsh or improperly formulated chemical. When you factor in these hidden costs, a specialized product that gets the job done correctly the first time actually represents better value, even if the upfront price looks similar to a generic alternative.
Step by Step Guide: How to Clean Floors After Renovation Work
Now that you understand why choosing the right cleaner matters, let’s walk through the complete process of cleaning your floor after renovation work. Following these steps will ensure the best possible results, whether you are dealing with a small touch-up job or an entire home renovation.
Tools and Supplies You Will Need
Before starting, it helps to gather everything you need so you are not running back and forth mid-project. A typical post-renovation floor cleaning kit should include a vacuum with a HEPA filter, a soft bristle broom, a plastic scraper, several microfiber cloths, a bucket, a mop appropriate for your floor type such as a flat microfiber mop for hardwood or a string mop for tile, rubber gloves, and of course the Ferber Painting Floor Cleaner. If you are working in a room with poor ventilation, it is also a good idea to open windows or run a fan to help disperse any lingering construction dust while you work.
Step 1: Remove Loose Debris First
Before any liquid cleaner touches the floor, you need to remove all loose debris. Use a broom, dry mop, or preferably a vacuum with a HEPA filter to pick up dust, wood shavings, drywall particles, and any small debris left behind by contractors. Skipping this step and going straight to mopping will only turn dust into mud, making the cleaning process longer and messier.
If you have a lot of fine dust, consider vacuuming twice, once with a regular attachment and once with a soft brush attachment to get into corners and along baseboards where dust tends to accumulate.
Do not forget vertical surfaces near the floor either. Baseboards, the bottoms of cabinets, and door frames often collect a surprising amount of dust that will simply fall back onto your clean floor if left untouched. Wiping these areas down with a dry microfiber cloth before you vacuum the floor itself can prevent this kind of re-contamination. For particularly dusty renovations, such as those involving drywall sanding, it can also help to vacuum the floor a second time about thirty minutes after the first pass, since airborne dust often continues to settle for a while after the main cleanup work has finished.
Step 2: Spot Treat Stubborn Marks
Paint splatters, adhesive residue, and dried caulk often need a bit of extra attention before a general mop can finish the job. Apply the Ferber Painting Floor Cleaner directly onto stubborn spots and let it sit for one to two minutes. The formula is designed to break down dried residue quickly, which means you often will not need to scrub aggressively. A soft cloth or a plastic scraper (never metal, which can scratch the surface) can then be used to gently lift away the residue.
This is one of the areas where our product truly outperforms typical cleaners. Many generic solutions require repeated applications and heavy scrubbing, while Ferber Painting’s formula is designed to loosen tough residue on the first try.
For particularly stubborn dried paint drips, it can help to apply the cleaner and then lay a damp cloth over the spot for a few extra minutes before returning to scrape it away. This gives the solution more time to penetrate and soften the paint film. On grout lines, an old toothbrush dipped in the diluted cleaner works wonders for lifting haze and residue that has settled into the texture of the grout without damaging the surrounding tile.
Step 3: Mop the Entire Floor
Once loose debris is removed and stubborn spots are treated, it is time to mop the entire floor. Dilute the Ferber Painting Floor Cleaner according to the instructions on the label, fill your bucket, and mop the floor in small sections. Working in sections prevents the cleaning solution from drying on the floor before you have had a chance to wipe it properly, which helps avoid streaking.
Rinse your mop frequently in clean water to avoid redistributing dirt across the floor. For larger renovation projects covering multiple rooms, it is worth changing your bucket water every one or two rooms to keep the cleaning solution effective.
It is also useful to work methodically, starting from the farthest corner of the room and mopping your way toward the exit. This prevents you from walking across freshly cleaned sections and tracking dust or footprints back onto the floor. If your renovation covered an entire home, tackle one room completely, including drying, before moving on to the next, rather than mopping every room and coming back to dry them all afterward. This approach reduces the risk of dirty water sitting too long on any one surface.
Cleaning Different Floor Types After Renovation
Hardwood floors benefit from a slightly damp mop rather than a soaking wet one, since excess water is the biggest enemy of solid or engineered wood. Always mop in the direction of the wood grain for the most even results and to avoid pushing residue into the seams between planks.
Tile and grout often hold onto more residue than the tile surface itself, especially after a renovation that involved cutting or laying new tile. Pay extra attention to grout lines, and consider a second, more concentrated application of the Ferber Painting Floor Cleaner directly on grout if construction haze is visible even after a first mop.
Vinyl and laminate floors are generally more water resistant than hardwood but can still be damaged by standing water or by cleaners that leave a sticky residue behind. The streak free formula of our Floor Cleaner is particularly helpful here, since laminate in particular tends to show streaks and hazy spots very easily under natural light.
Natural stone floors such as marble, travertine, or slate require a pH balanced cleaner to avoid etching or dulling the surface. This is another area where using a cleaner not specifically designed for the job can cause long term, sometimes irreversible damage, making the choice of product even more important than the mopping technique itself.
Step 4: Dry the Floor Properly
After mopping, use a clean, dry microfiber cloth or a dry mop to remove excess moisture. This step is especially important for hardwood floors, which can warp or become damaged if left wet for extended periods. For tile and vinyl floors, drying quickly also helps prevent streaks and water spots from forming as the floor air dries.
In rooms with poor natural airflow, such as bathrooms or interior hallways without windows, consider using a fan on a low setting to speed up the drying process. This is particularly useful after a renovation, when you want to move furniture back into place and resume normal use of the room as quickly as possible. Avoid walking on a hardwood floor in socks or bare feet while it is still damp, since this can leave faint marks or, in humid climates, contribute to slower drying overall.
Step 5: Inspect and Repeat if Necessary
Once the floor is dry, inspect it closely under good lighting. Renovation dust can sometimes hide in grout lines or along edges, and a second pass may be needed in high traffic areas or corners. Because Ferber Painting’s Floor Cleaner is gentle on surfaces, it is completely safe to repeat the process as many times as needed without worrying about damaging your floor’s finish.
A helpful trick for spotting missed residue is to use a flashlight held at a low angle across the floor, sometimes called raking light. This technique reveals dust, streaks, and residue that are nearly invisible under standard overhead lighting, since the low angle casts small shadows around any remaining particles or imperfections. Professional cleaners and painters often use this method during final walkthroughs, and it is just as effective for homeowners checking their own work.
Ongoing Maintenance After Your Renovation Is Complete
Once your post-renovation deep clean is finished, keeping your floors looking their best does not require nearly as much effort. A light sweep or vacuum every few days combined with a weekly mop using the Ferber Painting Floor Cleaner will keep dust and everyday grime from building up. Because the same formula that tackles tough construction residue is gentle enough for regular use, there is no need to switch products once your renovation cleanup is complete, which simplifies your entire cleaning routine going forward.
For households prone to more dust, such as those located near a construction zone, living in a dry climate, or with pets that track in debris from outside, increasing the frequency of vacuuming can help extend the time between deep mopping sessions. Placing walk-off mats at entryways is another simple but effective way to reduce the amount of dust and grit that makes its way onto your newly renovated floors in the first place.
Why Ferber Painting Is the Best Choice for Post-Renovation Cleaning
Beyond the effectiveness of the formula itself, there are several reasons why customers consistently choose Ferber Painting over other brands when it comes time to clean up after a renovation.
First, our satisfaction guaranteed or money back policy removes all the risk from your purchase. If for any reason you are not fully satisfied with the results, you can return the product for a full refund. No other brand in this space offers this level of confidence in their product.
Second, our international shipping network means you can order the Floor Cleaner from virtually anywhere in the world and receive it quickly. We work with trusted carriers to ensure your order arrives in good condition and within a reasonable timeframe, no matter your location.
Third, our online payment system is simple, secure, and fast. There is no need to visit a physical store or wait in line. You can order directly from our website in just a few clicks and have your Floor Cleaner on its way to you the same day.
Finally, our formula was developed specifically with post-renovation challenges in mind. While competitors often create generic all-purpose cleaners, Ferber Painting’s Floor Cleaner was built by people who understand construction sites, paint splatters, and the unique cleaning challenges that come after a renovation project.
It is also worth mentioning that Ferber Painting stands behind every bottle with responsive customer support. If you have questions about diluting the product for a specific surface, or if you are unsure whether it is appropriate for an unusual flooring material, our team is available to help guide you through the process before, during, and after your purchase. This level of support is something many customers say they simply cannot find with lesser known or generic brands, where customer service often means navigating an automated phone system or waiting days for an email response.
Many professional painting contractors who use Ferber Painting products on the job site also choose to recommend the Floor Cleaner directly to their clients once a project wraps up, since it allows homeowners to maintain the same standard of cleanliness the professionals achieved during the final walkthrough. This kind of endorsement from people who clean up after renovations for a living speaks volumes about the reliability of the product.
Frequently Asked Questions
Is the Ferber Painting Floor Cleaner safe for all floor types?
Yes, our formula is safe for hardwood, tile, vinyl, laminate, and natural stone surfaces. Always check the product label for specific instructions related to your floor type. If you have an unusual or specialty flooring material, such as cork or bamboo, we recommend testing the diluted solution on a small, inconspicuous area first before applying it across the entire floor.
How long does it take to see results after applying the product?
Most stubborn stains and residue begin to loosen within one to two minutes of application, allowing for quick and efficient cleaning without extensive scrubbing. For particularly old or dried on residue that has been left untreated for weeks after a renovation, you may want to let the product sit for a slightly longer period, up to five minutes, before scraping or wiping it away.
What if I am not satisfied with the results?
Ferber Painting offers a satisfaction guaranteed or money back policy on all products, including the Floor Cleaner. If you are not happy with your results, simply contact our customer service team for a full refund. We ask that you reach out within the timeframe listed in our return policy so our team can assist you as quickly as possible.
How long does shipping take?
Thanks to our international network of trusted carriers, most orders are processed quickly and delivered within a reasonable timeframe no matter where you are located in the world. Order tracking is provided so you can follow your package from our warehouse right to your doorstep.
Can I use this product for regular floor maintenance, not just after renovations?
Absolutely. While it is specially formulated to handle tough post-renovation residue, the Floor Cleaner also works wonderfully as part of your regular floor cleaning routine. Many customers continue using it long after their renovation is finished simply because of the streak free results and pleasant finish it leaves behind on a weekly basis.
Conclusion
Cleaning a floor after renovation work does not have to be a frustrating, time consuming task. With the right approach, removing loose debris first, spot treating stubborn marks, mopping thoroughly, and drying properly, you can restore your floor to a spotless, like-new condition. The key ingredient to success, however, remains choosing a cleaning product that is truly built for the job.
Taking the time to follow each step carefully, from the initial dry debris removal all the way through to a final inspection under good lighting, ensures that your newly renovated space looks as polished and professional as the work itself. A floor covered in leftover dust, paint splatter, or adhesive haze can undercut even the most beautifully executed renovation, while a properly cleaned floor allows all of that hard work to truly shine.