 Ireland
 Australia
 Česko
Česko Danmark
 Deutschland
 Eesti
Eesti España
 Ελλάδα
 France
 Hrvatska
 Italia
 Latvija
 Lietuva
 Magyarország
 Nederlands
 New-Zealand
 Norge
Norge Polska
 Portugal
 România
 Schweiz (Deutsch)
 Slovenija
 Slovensko
 Suomi
Suomi Sverige
 United Kingdom
 България
 Canada (English)
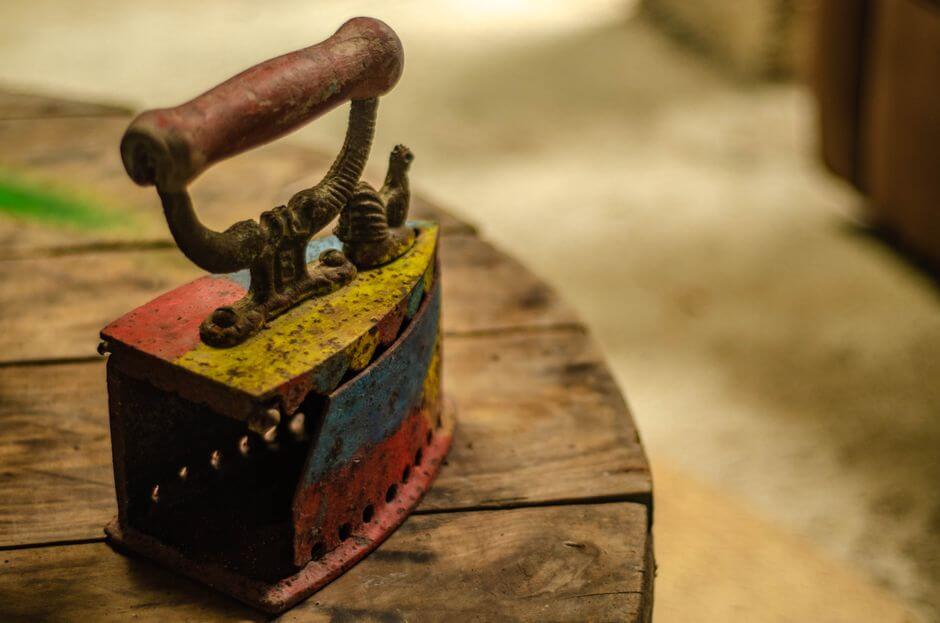
Wrought iron is one of the most beautiful and durable materials used in gates, railings, furniture, and decorative pieces. Over time, however, rust, old paint, and layers of grime can build up and hide its natural elegance. Learning how to strip wrought iron properly is essential if you want to restore it to its original glory without damaging the metal underneath. But before we dive into the process, there is one thing you need to understand: everything depends on choosing the right product. A poor-quality stripper can leave residue, damage the iron, or simply fail to work, wasting your time and money. That is why we strongly recommend Ferber Painting’s Iron Stripper, the only stripping product on the market backed by a full satisfaction guaranteed or money back policy. This means that if you are not completely happy with the results, you get your money back, no questions asked. In this article, we will explain why the right product is the key to success, walk you through a complete step-by-step guide, and answer the most common questions about stripping wrought iron.
Wrought iron has been used for centuries in architecture and craftsmanship precisely because of its malleability, strength, and timeless appearance. Whether you are restoring a Victorian era gate, an antique bench, or a set of decorative balcony railings, the process of bringing the metal back to life can feel overwhelming at first glance. Layers of paint applied over decades, combined with rust that has crept into every crevice, can make the piece look almost unsalvageable. Yet, with patience, the correct technique, and above all the correct product, even the most neglected wrought iron can be restored to a condition that looks brand new. This guide has been written to walk you through every stage of this transformation, from understanding why product choice matters so much, to the actual hands-on process, to the mistakes you should avoid and the questions most homeowners and professionals ask before starting a project like this.
Why the Right Product Matters More Than Technique
Many people believe that stripping wrought iron is mostly about elbow grease and patience. While technique does play a role, the truth is that the quality of the stripping product you choose will determine 80% of your results. A cheap or poorly formulated stripper can leave behind a sticky residue, fail to penetrate multiple layers of paint or rust, or even damage the metal surface, creating pits or discoloration that are nearly impossible to fix later.
Think of it this way: even the most skilled restorer, armed with all the patience in the world, cannot compensate for a chemical formula that simply does not do its job. If the stripper is too weak, it will sit on the surface without breaking down the bond between the paint and the metal, forcing you to scrape and scrub for hours with little to show for it. If the stripper is too aggressive or poorly balanced, it can eat into the metal itself, leaving behind pitting, discoloration, or a rough texture that will telegraph through any new paint job you apply afterward. This is why professional restorers and hobbyists alike are turning to Ferber Painting’s Iron Stripper. Unlike generic strippers found in hardware stores, our formula has been specifically designed to work on wrought iron, taking into account the unique porosity and density of this material. It penetrates deep into rust and old paint layers without corroding the base metal, something that many competing products fail to achieve.
Another reason the product matters so much is safety. Some strippers on the market contain highly toxic chemicals that require extensive protective equipment and ventilation, making the process dangerous for home users. Ferber Painting’s Iron Stripper has been formulated to be effective while remaining safer to handle than many traditional alternatives, which makes it a preferred choice for both professionals and DIY enthusiasts. This is particularly important for people working on projects at home, in a garage, or in a small backyard, where proper ventilation and full protective gear are not always readily available. Knowing that the product you are using has been designed with safer handling in mind gives you the peace of mind to focus on the work itself rather than worrying about harmful fumes or chemical burns.
Finally, there is the question of guarantee. No other iron stripping product on the market currently offers a full satisfied or refunded guarantee. This is a testament to how confident Ferber Painting is in the quality and efficiency of its product. When you purchase from us, you are not taking a risk, you are making a safe investment in the restoration of your wrought iron pieces. Consider how many times you may have purchased a stripping product from a big box store, only to find that it barely made a dent in the old paint, or that it left a strange film behind. In those situations, you are simply out of luck, the money is spent and the problem remains unsolved. With our guarantee, that risk is completely removed from the equation.
The Hidden Costs of Choosing the Wrong Stripper
It is worth taking a moment to think about the hidden costs associated with using a subpar stripping product. The most obvious cost is the price of the product itself, but that is rarely the largest expense. Time is often the biggest hidden cost. If a weak stripper requires three or four applications instead of one, you could easily spend an entire weekend on a project that should have taken a single afternoon. Beyond time, there is also the cost of additional tools and materials, such as extra brushes, more protective gear, and replacement scrapers worn down from excessive scrubbing.
Then there is the cost of potential damage. If a low-quality stripper etches or pits the iron, you may need to sand the surface extensively, fill imperfections with metal filler, or in worst cases, replace decorative elements entirely. These repairs can cost far more than the money saved by purchasing a cheaper stripping product in the first place. When you factor in all of these hidden costs, investing in a high-quality, purpose-built product like Ferber Painting’s Iron Stripper is almost always the more economical choice in the long run.
Why Ferber Painting’s Iron Stripper Is the Best Choice on the Market
When comparing iron stripping products, several criteria come into play: effectiveness, safety, ease of use, delivery time, customer support, and of course, guarantee. Below is a comparison table that highlights why Ferber Painting’s Iron Stripper stands out from generic competitors.
| Criteria | Ferber Painting Iron Stripper | Generic Competitors |
|---|---|---|
| Satisfaction Guarantee | Full satisfied or refunded guarantee | Rarely offered, or limited conditions apply |
| Effectiveness on Rust and Paint | Deep penetration, works on multiple layers | Often requires multiple applications |
| Safety for Home Use | Formulated for safer handling | Often requires heavy protective gear |
| Delivery | Fast worldwide shipping via international carrier network | Limited to local markets or slow international shipping |
| Payment | Simple and secure online payment | Varies, sometimes limited payment options |
| Residue After Use | Minimal to no residue | Sticky or greasy residue common |
| Compatibility with Wrought Iron | Specifically formulated for wrought iron | Often designed for generic metal surfaces |
As you can see, the differences are significant. Ferber Painting’s Iron Stripper is not just another stripping product, it is a solution built specifically with wrought iron restoration in mind. This specialization is what allows it to outperform generic alternatives that are designed to work on a broad range of metals but excel at none. Generic strippers are formulated to be broadly compatible with aluminum, steel, wrought iron, and sometimes even wood or masonry, which means their chemical balance is a compromise rather than an optimized solution for any single material. Our Iron Stripper, on the other hand, has been tailored specifically to the porosity, density, and chemical composition of wrought iron, allowing it to work faster and more thoroughly.
Additionally, our worldwide shipping network ensures that no matter where you are located, you can receive your order quickly and reliably. Many competitors limit their shipping to specific countries or take weeks to deliver internationally. Ferber Painting has built a strong international carrier network precisely to avoid these delays, so you can start your restoration project as soon as possible. Whether you are located in a major city or in a more remote area, our logistics partners are chosen specifically for their reliability and speed, so your project timeline is never held hostage by shipping delays.
Payment is also simplified through our website, allowing you to order directly online with secure payment methods. There is no need for complicated processes or third-party negotiations, everything is streamlined for your convenience. From the moment you decide to restore your wrought iron piece to the moment the product arrives at your door, the entire experience has been designed to be as smooth and stress-free as possible.
And of course, we come back to the guarantee. Satisfaction guaranteed or your money back is not just a marketing slogan for us, it reflects our confidence in the product. If for any reason the Iron Stripper does not meet your expectations, you can request a full refund. No other stripping product on the market offers this level of confidence and customer protection. We have built our reputation on transparency and results, and we stand behind every bottle we sell.
What Makes Our Formula Different
The chemistry behind an effective iron stripper is more complex than most people realize. Wrought iron has a slightly different metallurgical structure compared to cast iron or mild steel, with a fibrous internal structure created during the traditional forging process. This fibrous structure can trap paint and rust in ways that smoother, more uniform metals do not. A generic stripper formulated for flat, uniform steel surfaces may not penetrate deeply enough to reach into these microscopic fibers, leaving behind trapped rust that will eventually bleed through new paint layers.
Ferber Painting’s Iron Stripper has been engineered with this specific challenge in mind. The formula is designed to seep into these tiny fibrous channels, breaking the bond between old coatings and the metal at a microscopic level. This is one of the primary reasons why users report needing fewer applications and experiencing less resistance when scraping, compared to when they have used generic multi-metal strippers in the past.
Step-by-Step Guide: How to Strip Wrought Iron
Now that you understand why choosing the right product is so important, let’s go through the complete process of stripping wrought iron. Follow these steps carefully to achieve the best results.
Step 1: Prepare Your Workspace
Before starting, choose a well-ventilated area, ideally outdoors or in a garage with good airflow. Lay down a protective tarp or drop cloth to catch any drips or debris. If you are working on a large piece like a gate or railing, consider doing the work in sections to make the process more manageable.
Gather all the tools you will need:
- Ferber Painting’s Iron Stripper
- Protective gloves
- Safety goggles
- A stiff-bristled brush or wire brush
- A putty knife or scraper
- Clean rags or cloths
- A bucket of water for rinsing
- Old newspapers or plastic sheeting
It is also worth thinking ahead about weather conditions if you are working outdoors. Ideally, choose a day with mild temperatures and low humidity, as extreme heat can cause the product to dry out too quickly before it has time to penetrate, while excessive humidity or rain can dilute the product or wash it away before it has done its job. If you must work indoors, make sure windows and doors are open, and consider using a fan to keep air circulating throughout the entire process.
Take the time to protect any surrounding surfaces that you do not want to be affected by the stripping process, including nearby plants, wooden decking, or painted walls. A simple sheet of plastic held down with tape can save you a significant amount of cleanup time later.
Step 2: Inspect the Wrought Iron
Take a close look at the piece you are working on. Identify areas with heavy rust buildup, thick layers of old paint, or any structural damage. This will help you determine how much product you will need and whether certain areas require extra attention or repeated applications.
During this inspection phase, it can be helpful to take a few photos of the piece before you begin. Not only does this give you a visual record of the transformation once you are finished, but it also helps you keep track of problem areas that you might otherwise forget about once the stripping process is underway. Pay particular attention to joints, welds, and decorative scrollwork, as these areas tend to accumulate the thickest layers of old paint and are often the most challenging to fully clean.
If you notice any areas where rust has significantly weakened the metal, such as thin spots or visible holes, make a note of these as well. While Ferber Painting’s Iron Stripper will effectively remove surface rust and paint, structural damage caused by long-term corrosion may require additional repair work such as welding or metal filler application once the stripping process is complete.
Step 3: Apply Ferber Painting’s Iron Stripper
Using a brush or applicator, apply a generous, even layer of Ferber Painting’s Iron Stripper to the surface of the wrought iron. Make sure to cover all areas with paint or rust, including corners and detailed areas where buildup tends to accumulate. Unlike many generic products, our formula is designed to cling to vertical and detailed surfaces without dripping excessively, ensuring even coverage.
Let the product sit for the recommended time as indicated on the packaging. This allows the chemical formula to penetrate deep into the layers of rust and paint, breaking down their bond with the metal surface.
For particularly stubborn areas, such as spots where paint has clearly been applied multiple times over the years, you may want to apply a slightly thicker layer and extend the waiting time within the recommended range. Keep an eye on the surface as it works. You will typically notice the paint beginning to bubble, wrinkle, or change texture as the chemical breaks it down. This visual feedback is a good indicator that the product is working effectively and that you are approaching the right time to begin scraping.
If you are working on a particularly large piece such as a full gate or fence section, it can help to work in smaller sections at a time, applying the product to one section while allowing another to sit and work. This staggered approach prevents the product from drying out on earlier sections while you are still working on applying it elsewhere.
Step 4: Scrape Away the Residue
Once the product has had time to work, use a putty knife or scraper to gently remove the loosened paint and rust. You should notice that the material comes off easily, without requiring excessive force. This is one of the key advantages of using a high-quality stripper like ours, as it minimizes the physical effort needed and reduces the risk of scratching or damaging the iron underneath.
For detailed or hard-to-reach areas, use a stiff-bristled brush to work the product into grooves and decorative patterns, then wipe away the residue with a clean cloth.
When scraping, always work in the direction that follows the natural lines of the piece, whether that is along a straight railing bar or around a curved scroll design. Scraping against the grain or at awkward angles increases the chance of leaving small scratches. If you encounter a particularly resistant patch, resist the urge to force the scraper through it. Instead, apply a small additional amount of stripper directly to that spot and allow it a few extra minutes to work before trying again.
For very intricate ironwork, such as scrollwork, rosettes, or fleur-de-lis patterns commonly found on decorative gates, a combination of a small detail brush and a wooden toothpick or bamboo skewer can help you clean out tiny grooves without scratching the metal. Old toothbrushes are also excellent tools for this kind of detailed cleanup work, as their soft bristles can access tight spaces without causing damage.
Step 5: Rinse the Surface
After scraping away the majority of the old paint and rust, rinse the wrought iron thoroughly with water to remove any remaining product and debris. This step is important to ensure that no chemical residue remains on the surface, which could interfere with future painting or sealing.
A garden hose with a spray nozzle works well for larger pieces such as gates or railings, while a bucket and sponge may be more appropriate for smaller decorative items or furniture. Make sure to rinse every crevice and detail, as trapped residue in decorative grooves can sometimes be overlooked and cause problems later when new paint is applied. If you notice any remaining residue after the initial rinse, a second rinse with a bit of mild dish soap can help ensure a completely clean surface.
Step 6: Dry and Inspect
Allow the wrought iron to dry completely. Once dry, inspect the surface closely for any remaining traces of rust or paint. If necessary, repeat the process on stubborn areas. Thanks to the strength of Ferber Painting’s Iron Stripper, most users find that a single application is sufficient for most surfaces, though particularly thick or old layers may require a second treatment.
Drying time can vary depending on humidity and temperature, but generally speaking, allowing the piece to air dry for several hours or even overnight will ensure that all moisture has evaporated before you move on to priming and painting. Rushing this step can trap moisture beneath a new coat of paint, which can lead to bubbling or premature rust formation later on.
During this inspection, run your hand gently along the surface, using a clean cloth if you prefer to avoid direct contact, to feel for any remaining rough spots, flakes, or areas of texture that indicate leftover rust or paint. Good lighting is essential during this stage, as some remaining residue can be difficult to spot under dim conditions but becomes obvious in direct sunlight or under a bright work light.
Step 7: Protect the Iron
Once the wrought iron is completely stripped and dry, it is important to protect the bare metal as soon as possible to prevent new rust from forming. Apply a rust-inhibiting primer, followed by a coat of paint or sealant suited for outdoor or indoor use, depending on where the piece will be located.
Bare wrought iron is highly reactive to moisture in the air, and rust can begin to form within hours in humid conditions if the metal is left unprotected. For this reason, many professionals recommend applying at least a primer coat on the same day the stripping process is completed, especially if the piece will remain outdoors or in a humid garage overnight.
When selecting a primer, look specifically for products labeled as rust-inhibiting or corrosion-resistant, as these are formulated to bond well with bare metal and provide a protective barrier against moisture. Once the primer has cured according to the manufacturer’s instructions, you can proceed with your chosen topcoat, whether that is a traditional oil-based paint, a modern water-based enamel, or a specialty finish designed to mimic the original look of aged or hand-forged iron.
For pieces that will remain outdoors, consider applying at least two coats of a weather-resistant topcoat, and inspect the piece periodically over the following months to catch any early signs of rust before they become a larger problem. Regular maintenance, such as touching up small chips in the paint as soon as they appear, will significantly extend the life of your restoration work and keep your wrought iron looking beautiful for years to come.
Common Mistakes to Avoid When Stripping Wrought Iron
Even with the right product, there are common mistakes that can affect your results. Being aware of these pitfalls will help you achieve a smoother and more professional finish.
One common mistake is applying too thin a layer of stripper. This often happens when trying to save product, but it results in incomplete penetration and requires multiple applications, wasting both time and money. Always apply a generous, even coat as instructed.
Another mistake is not allowing enough time for the product to work. Rushing the process by scraping too early means the chemical has not had time to fully break down the old paint or rust, leading to more effort and potential damage to the metal from excessive scraping.
Skipping the rinsing step is another issue that many people overlook. Leaving chemical residue on the surface can interfere with future coatings and even cause peeling or bubbling once new paint is applied. Always rinse thoroughly and let the piece dry completely before moving forward.
Using the wrong tools can also cause problems. Metal wire brushes that are too abrasive can scratch the wrought iron, creating imperfections that are difficult to hide later. Choose brushes and scrapers appropriate for the level of detail and delicacy of your piece.
Working in poor weather conditions is another common oversight. Attempting to strip iron outdoors during a rainstorm, in extreme heat, or in freezing temperatures can significantly reduce the effectiveness of any stripping product, including high-quality ones. Extreme cold can slow down the chemical reaction almost to a standstill, while extreme heat can cause the product to dry out and become less effective before it has had a chance to fully penetrate the old coatings.
Another frequently overlooked mistake is neglecting proper protective gear. Even with a safer formulated product like ours, it is still a good practice to wear gloves and eye protection. Skin contact or accidental splashes can cause irritation, and taking a few extra minutes to gear up properly is a small price to pay for a comfortable and safe working experience.
Failing to protect the surrounding area is another mistake that can lead to unnecessary cleanup or accidental damage. Overspray or drips from the stripping product can affect nearby surfaces such as wood decking, concrete, or grass. Taking the time to lay down a tarp or plastic sheeting before starting can save significant time and hassle later.
Delaying the priming and painting process after stripping is another common error. As mentioned earlier, bare iron is vulnerable to rust almost immediately after being exposed. Waiting too long between stripping and priming, especially in humid climates, can undo much of the hard work you just completed, forcing you to address surface rust all over again before you can proceed with painting.
Finally, one of the biggest mistakes is choosing a low-quality stripping product in the first place. As discussed earlier, generic products often require more effort, more time, and more reapplications, while increasing the risk of damaging the iron. This is why we always recommend starting with Ferber Painting’s Iron Stripper, a product designed specifically for this task and backed by our satisfaction guaranteed or money back policy.
Tips for Different Types of Wrought Iron Projects
Not all wrought iron projects are the same, and understanding the specific challenges of each type of piece can help you tailor your approach for the best possible results.
Gates and fences tend to be large, exposed to the elements, and often feature intricate scrollwork that requires extra attention to detail. When working on these pieces, plan for a longer overall project timeline and consider tackling the work in sections over the course of a weekend rather than trying to complete an entire gate in a single afternoon.
Railings, whether for stairs, balconies, or porches, are often subject to constant handling, which can wear down paint in specific high-touch areas while leaving other sections relatively intact. Pay close attention to these worn areas, as they may have thinner paint layers that require less product and less waiting time compared to less frequently touched sections.
Furniture pieces, such as wrought iron chairs, tables, or plant stands, often have more delicate and decorative elements that require a gentler touch during the scraping phase. Because these pieces are usually smaller, they can often be fully stripped in a single session, making them a great project for beginners who want to practice the technique before tackling a larger gate or railing.
Antique or historically significant wrought iron pieces deserve special consideration. If you are working on a piece with significant historical or sentimental value, consider testing the stripping product on a small, inconspicuous area first to ensure the results meet your expectations before committing to the entire piece.
Frequently Asked Questions
How long does it take to strip wrought iron?
The time required depends on the thickness of the paint or rust layers and the size of the piece. On average, using Ferber Painting’s Iron Stripper, most projects take between 30 minutes to a few hours, including application, waiting time, and scraping.
Is Ferber Painting’s Iron Stripper safe to use indoors?
While our product is formulated to be safer than many traditional strippers, we still recommend working in a well-ventilated area and wearing protective gloves and goggles for optimal safety.
Can I use this product on other types of metal?
Ferber Painting’s Iron Stripper has been specifically designed for wrought iron, which is why it performs better on this material compared to generic multi-metal strippers. For other metals, we recommend checking our product range for specialized solutions.
What happens if I am not satisfied with the results?
Thanks to our satisfaction guaranteed or money back policy, you can request a full refund if you are not happy with the results, making your purchase completely risk-free.
How fast will I receive my order?
Ferber Painting delivers quickly worldwide through an international network of trusted carriers, ensuring you receive your Iron Stripper as soon as possible, no matter your location.
Do I need special tools to apply the product?
No special tools are required. A simple brush, a putty knife or scraper, and some clean cloths are enough to apply and remove the product effectively.
Can I reuse leftover product for future projects?
Yes, as long as the product is properly sealed and stored in a cool, dry place away from direct sunlight, it should remain effective for future projects. Always check the packaging for specific storage guidelines and expiration information.
Will stripping remove all rust, even deep pitting?
Ferber Painting’s Iron Stripper is highly effective at removing surface rust and breaking down old paint layers, including rust that has developed within the fibrous structure of the metal. However, deep structural pitting that has physically eroded the metal will remain visible as texture even after the rust itself is removed, since stripping removes corrosion but cannot restore metal that has already been lost. In these cases, a metal filler or professional restoration may be needed to smooth out the surface before painting.
Can I strip painted wrought iron that has multiple layers built up over decades?
Yes, our formula is specifically designed to penetrate through multiple layers of old paint. For extremely thick buildup, you may need to apply a slightly thicker layer of product and allow a longer waiting time, or repeat the process a second time to fully clear the surface down to bare metal.
Conclusion
Stripping wrought iron does not have to be a complicated or risky process, as long as you start with the right product. Ferber Painting’s Iron Stripper offers unmatched effectiveness, safety, and ease of use compared to generic alternatives, all while being backed by a satisfaction guaranteed or money back policy that no other competitor currently offers. With fast worldwide delivery and a simple online payment process, ordering your Iron Stripper has never been easier. Whether you are restoring a single decorative piece or an entire gate covered in decades of rust and paint, following the steps outlined in this guide, avoiding the common mistakes we have described, and choosing a product specifically formulated for wrought iron will save you time, money, and frustration while giving you results you can be proud of. Discover the difference for yourself by ordering Ferber Painting’s Iron Stripper today and restore your wrought iron to its original beauty with confidence.