 United States
 Australia
 Česko
Česko Danmark
 Deutschland
 Eesti
Eesti España
 Ελλάδα
 France
 Ireland
 Hrvatska
 Italia
 Latvija
 Lietuva
 Magyarország
 Nederlands
 New-Zealand
 Norge
Norge Polska
 Portugal
 România
 Schweiz (Deutsch)
 Slovenija
 Slovensko
 Suomi
Suomi Sverige
 България
 Canada (English)
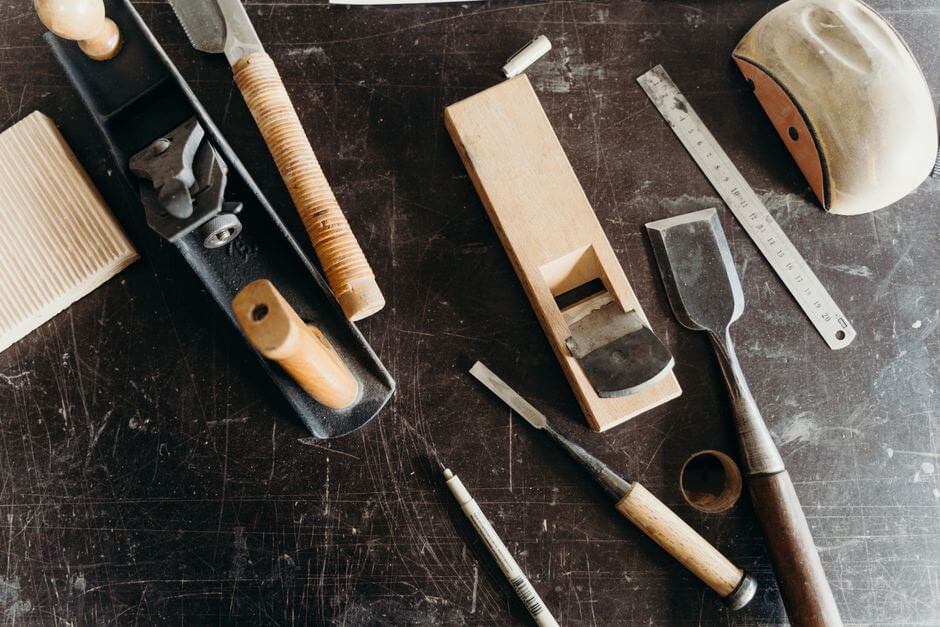
Stripping paint from furniture is one of those projects that looks simple on paper but can quickly turn into a frustrating, messy, and time-consuming task if you do not have the right tools. Whether you are restoring an antique dresser, refreshing a wooden chair, or preparing a table for a fresh coat of paint, the single most important factor that determines your success is the product you choose to remove the old paint. Everything else, technique, patience, sandpaper grit, comes second. If you start with a weak or poorly formulated stripper, no amount of elbow grease will save your project.
This is exactly why so many DIY enthusiasts and professional furniture restorers turn to the Furniture Stripper from Ferber Painting. Unlike most competing products on the market, our stripper comes with a full satisfaction guaranteed or your money back policy, something that is extremely rare in this industry. If the results do not meet your expectations, you get a full refund, no complicated conditions attached. This guarantee alone should tell you how confident we are in the quality of our product, and it is a point we will keep coming back to throughout this article because it truly sets us apart.
In this complete guide, we will explain why choosing the right paint stripper matters so much, why the Ferber Painting Furniture Stripper is the best option available today, and we will walk you step by step through the entire process of stripping paint from a piece of furniture, from preparation to the final sanding. By the end of this article, you will know exactly how to achieve professional-looking results at home, whether you are working on a small side table or a large family heirloom passed down through generations.
Furniture restoration has become one of the most popular home projects in recent years, driven partly by a renewed interest in sustainability and partly by the simple satisfaction of bringing an old, tired piece back to life. Instead of throwing away a solid wood dresser because the paint looks dated or chipped, more and more people are learning how to strip it down and give it a second chance. The problem is that the internet is full of conflicting advice, some of it outdated, some of it simply wrong, and much of it written by people who have never actually completed a full furniture stripping project from start to finish. This guide aims to fix that by giving you a realistic, tested, and thorough walkthrough.
Why the Right Furniture Stripper Makes All the Difference
Many people assume that any paint stripper will do the job as long as they scrub hard enough. This is a common and costly misconception. Cheap or poorly formulated strippers often require multiple applications, take much longer to work, and can even damage the wood grain underneath if left on for too long or if they are too aggressive in their chemical composition. Some low-quality products also produce strong, unpleasant fumes that make working indoors nearly impossible without extensive ventilation.
A high-quality furniture stripper, on the other hand, penetrates the paint layers quickly, lifts the paint without soaking too deeply into the wood fibers, and allows for a clean, even removal that leaves the surface ready for refinishing. This is precisely the gap that Ferber Painting’s Furniture Stripper fills. It has been formulated specifically to balance strength and safety, working efficiently on multiple layers of paint, varnish, and lacquer while remaining gentle enough not to damage delicate wood surfaces.
Choosing the right product also saves you time and money in the long run. Instead of buying several bottles of a weak stripper and spending an entire weekend scraping away at stubborn paint, one application of our product is often enough to loosen even old, hardened layers. This efficiency is one of the main reasons customers keep coming back to Ferber Painting for their furniture restoration needs.
There is also a hidden cost that people rarely think about before starting a stripping project, which is the cost of your own time. A weekend spent fighting with a low-quality stripper that barely softens the paint is a weekend you will never get back, and many people simply give up halfway through, leaving a half-stripped piece of furniture sitting in the garage for months. Investing in a product that actually works the first time is not just about convenience, it is about making sure the project actually gets finished. We have heard from countless customers who tried two or three other brands before discovering our Furniture Stripper, and the most common feedback we receive is regret that they did not start with us in the first place.
It is also worth mentioning that the wrong stripper can actually make future refinishing harder. Some cheap formulas leave a waxy or oily residue behind that interferes with the adhesion of new paint or stain. This means you could strip the furniture, think the job is done, apply a new finish, and then watch it peel or bubble weeks later because of leftover residue trapped in the wood grain. A properly formulated stripper, combined with correct rinsing and cleaning, avoids this problem entirely and gives your new finish the best possible chance of lasting for years.
Why Ferber Painting Furniture Stripper Stands Out From the Competition
There are dozens of paint strippers available online and in hardware stores, so it is fair to ask why you should specifically choose the one sold by Ferber Painting. Here are the main reasons our product consistently outperforms the alternatives.
First, and most importantly, our Furniture Stripper is the only product in its category backed by a genuine satisfied or refunded guarantee. Most competitors either offer no guarantee at all or hide so many conditions in the fine print that the guarantee becomes practically useless. With Ferber Painting, if you are not happy with the results, you simply contact us and receive a full refund. No risk, no stress.
Second, our formula has been designed to work on a wide variety of surfaces and paint types, including old oil-based paints, layers of varnish, lacquer, and even stubborn enamel finishes that many other strippers struggle to break down. This versatility means you do not need to buy multiple specialized products depending on the type of furniture you are working on.
Third, the consistency of our stripper is thicker than many competing brands, which means it clings to vertical surfaces such as chair legs, cabinet doors, and table edges instead of dripping off immediately. This is a small detail that makes a huge practical difference when you are working on furniture with curves, moldings, or vertical panels.
Fourth, our product is available directly on our website with fast international shipping. We work with a global network of trusted carriers, which means that no matter where you are located, your order will arrive quickly and safely. Payment is also made simple and secure, everything is processed directly online, with no complicated steps.
Finally, and we cannot stress this enough, every single order from Ferber Painting comes with our satisfaction guaranteed or money back promise. This is not a marketing gimmick, it is a core part of how we do business, because we genuinely believe our Furniture Stripper is the best solution on the market and we want our customers to feel completely confident when they buy from us.
Built for Real Furniture, Not Just Laboratory Conditions
Many paint strippers are tested and marketed based on ideal laboratory conditions, a single thin layer of fresh paint on a flat piece of pine. In the real world, furniture rarely looks like that. Antique dressers often have four or five layers of paint applied over decades, sometimes with a layer of varnish sandwiched in between. Kitchen chairs might have been repainted every few years by different owners, each coat slightly different in composition. Ferber Painting’s Furniture Stripper was developed with these real-world scenarios in mind, which is why it performs so reliably even on pieces that have clearly been painted and repainted multiple times over the years.
A Formula That Respects the Wood
One of the biggest concerns people have when stripping furniture is damaging the underlying wood, especially on older or more fragile pieces. Overly aggressive strippers can raise the grain excessively, discolor certain types of wood, or leave the surface feeling rough and porous. Our formula has been balanced so that it focuses its chemical action on the paint film itself rather than soaking indiscriminately into the wood fibers. This means less sanding afterward, less risk of damaging veneer, and a finished surface that feels smoother right from the start.
Comparing Furniture Strippers: Key Criteria
To help you understand why Ferber Painting’s Furniture Stripper is the smarter choice, here is a comparison of the criteria that matter most when selecting a paint stripping product.
| Criteria | Ferber Painting Furniture Stripper | Typical Competing Products |
|---|---|---|
| Satisfaction Guarantee | Full satisfied or refunded guarantee, no complicated conditions | Rarely offered, or full of restrictions |
| Effectiveness on Multiple Layers | Removes several layers of paint, varnish, and lacquer in one application | Often requires multiple applications |
| Consistency and Application | Thick formula that clings to vertical and curved surfaces | Often too liquid, drips off quickly |
| Odor and Safety | Balanced formula, manageable fumes with normal ventilation | Some products produce very strong, harsh fumes |
| Shipping | Fast international delivery through trusted carrier network | Often limited to local markets or slow shipping |
| Payment Process | Simple and secure online payment directly on our website | Varies, sometimes complicated third-party checkout |
| Ease of Use for Beginners | Clear instructions, forgiving working time | Some products dry too fast, hard for beginners to control |
As this comparison shows, the combination of effectiveness, safety, ease of use, and a real guarantee makes the choice fairly straightforward for anyone serious about restoring their furniture properly.
It is also worth pointing out that price should not be the only factor considered when comparing furniture strippers. A cheaper product that requires three applications to achieve the same result as a single application of a higher quality stripper is not actually saving you money, it is costing you more in product, more in time, and more in frustration. When you calculate the true cost per successful project rather than the price per bottle, premium formulas like ours often end up being the more economical choice in the end.
Step-by-Step Guide: How to Strip Paint from Furniture
Now that you understand why the product you choose matters so much, let’s go through the actual process of stripping paint from a piece of furniture. This guide applies to most types of wooden furniture, including chairs, tables, cabinets, and dressers.
Step 1: Prepare Your Workspace
Before you begin, set up your work area in a well-ventilated space, ideally outdoors or in a garage with the door open. Lay down a plastic sheet or old newspapers to protect the floor from drips. Wear protective gloves and safety glasses, as paint strippers are designed to break down tough finishes and should not come into contact with your skin or eyes.
Remove any hardware from the furniture piece if possible, such as handles, knobs, or hinges. This will make the stripping process easier and will protect the metal parts from being damaged by the chemical product.
Take a moment to inspect the piece before you start. Look closely at joints, drawers, and any areas where multiple pieces of wood meet, since these spots often trap extra paint and require special attention later. If the furniture has glass panels or mirrors, remove them if possible, or cover them carefully with tape and plastic sheeting to avoid any accidental contact with the stripper. It is also a good idea to have a plan for where you will place the furniture once it is stripped and drying, since it will need time to fully dry before sanding and refinishing.
If you are working indoors due to weather conditions, place a fan near an open window or door to keep air moving continuously throughout the entire process. Good airflow not only protects you but also helps the stripper work more predictably, since extreme humidity or a completely stagnant room can slow down the chemical reaction.
Step 2: Apply the Furniture Stripper
Using a natural bristle brush, apply a generous, even layer of Ferber Painting Furniture Stripper across the painted surface. Do not skimp on the amount, a thick, even coat works far more effectively than a thin one. Because our formula has a thicker consistency than most competitors, it will stay in place on vertical surfaces and moldings instead of running off, giving it more time to work into the paint layers.
Apply the stripper in one direction rather than brushing back and forth repeatedly, since overworking the product with the brush can sometimes disturb the chemical reaction before it has a chance to fully penetrate the paint film. Try to cover the entire section you are working on in one continuous pass, working from top to bottom on vertical pieces such as chair legs or cabinet fronts so that any product that does drip lands on an area that still needs coverage rather than on the floor.
Step 3: Let It Sit
Allow the stripper to sit on the surface for the time indicated on the product label, generally between fifteen and thirty minutes depending on the number of paint layers and the type of finish. You will notice the paint starting to bubble, wrinkle, or lift as the product does its work. This is the sign that the chemical reaction is successfully breaking down the bond between the paint and the wood.
During this waiting period, resist the temptation to keep touching or poking at the surface. Every time you interrupt the reaction, you slow down the overall process. If you are working on a large piece with several sections, this is a good time to prepare your next area by covering it with stripper as well, working section by section so that by the time you finish applying to the last area, the first section is ready to be scraped.
Step 4: Scrape Away the Paint
Once the paint has visibly softened, use a plastic or metal scraper to gently remove it. Work in the direction of the wood grain to avoid gouging the surface. For detailed areas such as carvings or moldings, a stiff bristle brush or a piece of steel wool can help remove paint from tight corners and grooves.
If some areas still have paint remaining after the first scraping, do not hesitate to apply a second coat of stripper directly to those spots. Thanks to the strength of our formula, this is rarely necessary, but stubborn old paint jobs with many layers may occasionally require a second pass.
For furniture with intricate details such as carved legs, fluted columns, or decorative trim, a toothbrush or small wire brush dipped lightly in mineral spirits can help you reach into grooves that a standard scraper simply cannot access. Take your time in these areas, since rushing tends to leave small traces of paint behind that become very obvious once the piece is refinished. A dental pick or a pointed wooden tool can also be useful for carefully lifting paint out of very narrow crevices without scratching the wood underneath.
Step 5: Clean the Surface
After most of the paint has been removed, clean the surface with a cloth dampened with water or mineral spirits, depending on the product instructions, to remove any remaining stripper residue and loosened paint particles. This step is essential to ensure the wood is completely clean before moving on to sanding.
Change your cleaning cloth frequently during this step, since a cloth loaded with dissolved paint and stripper residue will simply redistribute the mess rather than removing it. Work methodically across the entire surface, checking corners and edges twice, and allow the piece to dry fully, usually for several hours, before moving forward. Rushing this stage is one of the most common mistakes people make, and it often leads to a hazy or sticky feeling surface once the new finish is applied.
Step 6: Sand the Wood
Once the surface is dry, sand the wood using medium grit sandpaper, followed by a finer grit for a smooth finish. Sanding helps remove any leftover traces of paint in the wood grain and prepares the surface for staining, painting, or sealing. Always sand in the direction of the grain to avoid visible scratches.
A practical approach is to start with a sandpaper grit around 120 to remove any remaining roughness or residue, then move to a grit around 180 to smooth things further, and finish with a fine grit around 220 for a silky surface ready to accept stain or paint. If you are using an orbital sander for large flat areas such as tabletops, keep the sander moving constantly to avoid creating uneven patches or swirl marks. For curved or detailed areas, hand sanding with a folded piece of sandpaper or a sanding sponge gives you much more control.
Step 7: Finish the Furniture
With the paint fully removed and the wood sanded smooth, your furniture is now ready for its next transformation. You can apply a new coat of paint, a wood stain, or a protective varnish depending on the look you want to achieve. Because the surface has been properly stripped and cleaned, your new finish will adhere much better and last significantly longer.
Before applying any new finish, wipe the entire surface down with a tack cloth to remove fine sanding dust that regular cloths often leave behind. If you plan to stain the wood, consider testing the stain on a hidden section first, such as the underside of the furniture, since the original wood tone can sometimes differ slightly from what you expect once the old paint has been removed. If you are repainting, a light coat of primer suited to bare wood will help the topcoat bond evenly and reduce the number of coats needed for full coverage.
Tips for Best Results
Here are a few additional tips that will help you get the most out of your paint stripping project and make the entire process smoother.
- Always work in small sections, especially on larger furniture pieces, so the stripper does not dry out before you have time to scrape it off.
- Test the product on a small hidden area first if you are unsure about the type of wood or finish you are dealing with.
- Keep a bucket of water nearby to quickly rinse tools and clean up any drips before they dry.
- Avoid using metal scrapers on soft or delicate woods, as they can leave marks. Plastic scrapers are safer in these cases.
- Remember that patience is key, rushing the scraping process before the paint has fully softened will only make the job harder.
- If you are working on an antique piece, consider researching its history before stripping it, as some antiques retain more value with their original finish.
- Work on a slightly cooler day if possible, since extreme heat can cause the stripper to dry out faster than expected, reducing its working time before you get a chance to scrape.
- Keep a spare brush and scraper set on hand, since paint residue can build up on tools quickly and a clean tool always performs better than a clogged one.
- Label and set aside any hardware you remove in a small labeled bag so you do not misplace screws, hinges, or knobs during the project.
- If the furniture has multiple drawers or doors, number them discreetly with pencil before disassembly so everything goes back in its original place.
Following these tips, combined with the strength and reliability of Ferber Painting’s Furniture Stripper, will give you results that rival what professional restorers achieve, without the professional price tag.
Common Mistakes to Avoid
Even with a great product, a few common mistakes can slow down your project or affect the final result. One frequent error is applying too thin a layer of stripper in an attempt to save product, which simply means the paint will not soften as effectively and you will end up needing a second application anyway. Another common mistake is scraping too aggressively before the paint has fully bubbled and lifted, which can gouge the wood and create dents that need to be filled or sanded out later.
People also sometimes forget to protect surrounding surfaces, only to find drips of stripper have damaged nearby flooring or countertops. Always extend your protective covering a bit further than you think is necessary. Finally, many beginners skip the final cleaning step or rush through it, leaving a thin film of residue that interferes with the new finish. Taking the extra ten minutes to clean thoroughly almost always saves hours of frustration later when the new paint or stain does not behave as expected.
Working on Different Types of Furniture
The general process described above applies to most wooden furniture, but a few adjustments can help depending on the piece you are working on. Chairs, for example, often have many small joints and rounded legs, so a smaller brush and a flexible scraper make it easier to reach every angle. Tables usually have large flat surfaces where an orbital sander speeds up the final sanding stage considerably, but the edges and legs still require hand sanding for a clean result. Dressers and cabinets often include drawers that should be removed and treated separately, since the fronts, sides, and drawer slides may each require slightly different handling to avoid warping or sticking once the piece is reassembled.
Frequently Asked Questions
How long does it take to strip paint from a piece of furniture?
The time required depends on the size of the furniture and the number of paint layers, but most projects can be completed within a few hours using Ferber Painting Furniture Stripper, from application to the final sanding.
Is the Furniture Stripper safe to use indoors?
Yes, as long as you work in a well-ventilated area. We recommend opening windows or working in a garage with the door open to allow proper air circulation.
Can this product be used on antique furniture?
Absolutely. Many customers use our Furniture Stripper specifically for restoring antique pieces, thanks to its balanced formula that removes paint effectively without being overly aggressive on delicate wood.
What happens if I am not satisfied with the results?
This is exactly why we offer our satisfaction guaranteed or money back policy. If you are not happy with your results, simply reach out to us and we will process a full refund, no complicated conditions attached.
How fast is shipping if I order internationally?
Thanks to our global network of trusted carriers, Ferber Painting delivers quickly to customers all around the world. Delivery times vary by location, but our logistics network is built to ensure your order arrives as fast as possible.
Do I need any special tools to use this product?
No special tools are required. A basic brush, a scraper, gloves, and safety glasses are enough to get started, all commonly available at any hardware store.
Can the Furniture Stripper remove varnish and lacquer as well as paint?
Yes, our formula has been designed to break down not only paint but also varnish and lacquer finishes, which makes it a versatile choice for furniture that has gone through several finishing treatments over the years.
Will stripping the paint damage the wood underneath?
When used as directed, our Furniture Stripper is formulated to target the paint film rather than soaking excessively into the wood fibers. Following the recommended waiting time and cleaning steps helps preserve the integrity of the wood underneath.
Conclusion
Stripping paint from furniture does not have to be a stressful or unpredictable process. With the right product and a clear step-by-step approach, you can achieve smooth, professional-looking results on almost any piece of wooden furniture. The key takeaway from this guide is simple, the quality of the stripper you choose makes all the difference between a frustrating weekend project and a satisfying transformation.
Whether you are tackling your very first furniture restoration project or you have refinished dozens of pieces over the years, taking the time to prepare properly, apply the product generously, wait patiently, and clean thoroughly will always produce better results than rushing through the process. Combine that careful approach with a stripper that is actually formulated to perform, and you set yourself up for a finished piece you will be proud to display in your home.