 United States
 Australia
 Česko
Česko Danmark
 Deutschland
 Eesti
Eesti España
 Ελλάδα
 France
 Ireland
 Hrvatska
 Italia
 Latvija
 Lietuva
 Magyarország
 Nederlands
 New-Zealand
 Norge
Norge Polska
 Portugal
 România
 Schweiz (Deutsch)
 Slovenija
 Slovensko
 Suomi
Suomi Sverige
 България
 Canada (English)
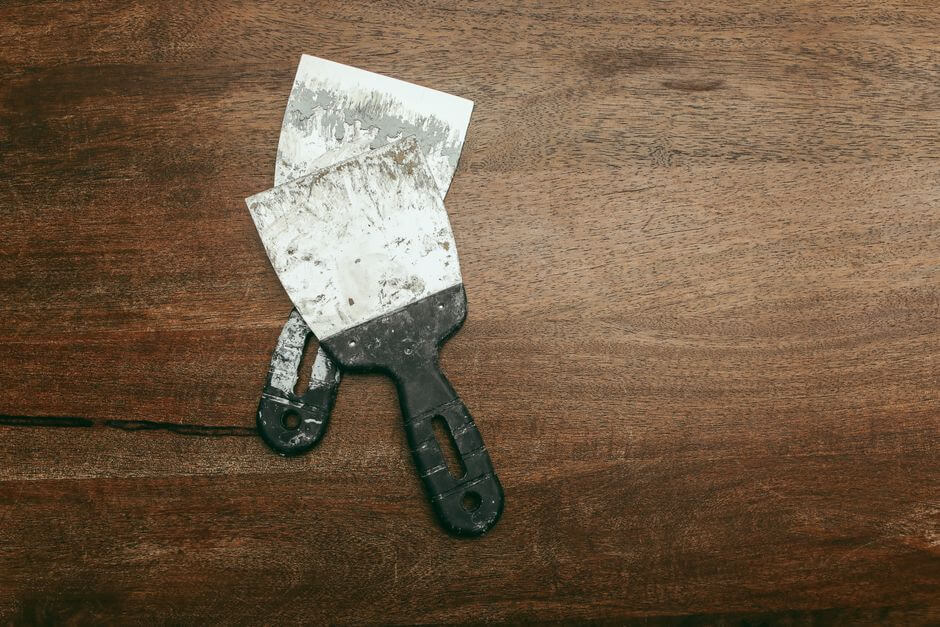
Stripping a wooden chair can completely transform an old, tired piece of furniture into something that looks brand new. Whether you inherited a chair from a relative, found a hidden gem at a flea market, or simply want to refresh a piece you already own, removing old paint or varnish is the first and most important step. But here is the thing that most people overlook: the entire success of your project depends on the quality of the product you use. Choose the wrong stripper and you will end up with a patchy, uneven surface, wasted hours of scrubbing, and possibly even damage to the wood grain underneath. Choose the right one, and the process becomes fast, clean, and satisfying.
This is exactly why we recommend the Wood Stripper from Ferber Painting. Unlike most competitors, our product is the only one on the market backed by a full satisfaction guaranteed or your money back policy. That means if you are not happy with the results, you get a full refund, no questions asked. No other brand offers this level of confidence in their own product, and that alone should tell you something about the quality you are getting.
In this complete guide, we will walk you through everything you need to know about stripping a wooden chair, from choosing the right product to the exact step by step process, common mistakes to avoid, and answers to the most frequently asked questions. We will also look at different chair types, different original finishes, and how your approach might need to change depending on what you are working with. By the time you finish reading, you should feel confident enough to tackle any wooden chair sitting in your garage, attic, or living room, no matter how many layers of old paint or varnish it might be hiding. Let’s get started.
Why the Product You Choose Makes All the Difference
Before we even get into the technique, it is essential to understand that no amount of skill or patience can compensate for a low quality wood stripper. Cheap products often contain weak formulas that barely penetrate old layers of paint or varnish, forcing you to apply multiple coats, wait longer, and scrub harder. This not only wastes your time but can also damage the wood fibers if you have to use excessive force with a scraper or sandpaper.
Think about the last time you tried a discount brand stripper on an old dresser or table leg. If you scrubbed for what felt like forever and only managed to remove half the finish, you already know the frustration we are describing. That kind of experience discourages a lot of people from ever attempting a furniture restoration project again, even though the actual technique is simple once you have a product that does its job properly. It is rarely the person’s fault when a stripping project goes badly. Far more often, it comes down to a formula that simply was not strong enough for the finish it was up against.
The Ferber Painting Wood Stripper was formulated specifically to cut through even the toughest layers of old paint, varnish, lacquer, and polyurethane finishes without harming the wood underneath. It works faster than most competing products, requires less elbow grease, and leaves a clean surface ready for refinishing. Whether you are dealing with a single thin coat of varnish from a modern chair or several decades of stacked paint layers on an antique piece, the formula is designed to penetrate deeply and lift the finish away from the wood rather than just softening the very top layer.
Here are the main reasons why our product stands out from everything else available on the market:
- It is the only wood stripper on the market with a satisfaction guaranteed or money back policy.
- It penetrates multiple layers of old finish in a single application, saving you time and effort.
- It has a thick, gel like consistency that clings to vertical surfaces like chair legs and backrests instead of dripping off.
- It is formulated to minimize strong fumes compared to many older generation strippers.
- It ships quickly worldwide thanks to our international network of carriers.
- Payment on our website is simple, secure, and fully online.
These advantages might seem small individually, but together they make a massive difference when you are working on a detailed piece of furniture like a chair, which has curves, joints, and tight corners that are notoriously difficult to strip evenly. A dining table top is mostly flat and forgiving. A chair, on the other hand, might have turned spindles, carved crest rails, curved arms, and tight joints where the seat meets the legs. Every one of those details is a spot where a weak or runny stripper will underperform, leaving you with patches of old finish that need to be sanded off by hand later, which takes far longer and risks uneven results.
Comparing Wood Strippers: What Really Matters
To help you understand why the Ferber Painting Wood Stripper is the best option, we put together a comparison table covering the criteria that matter most when choosing a stripping product.
| Criteria | Ferber Painting Wood Stripper | Typical Competitor Products |
|---|---|---|
| Satisfaction guaranteed or money back | Yes, always included | Rarely or never offered |
| Shipping speed | Fast worldwide delivery via international carrier network | Often slow, limited to certain regions |
| Ease of application | Thick gel formula, clings to vertical surfaces | Often thin and runny, drips off chair legs |
| Number of coats needed | Usually one coat for most finishes | Often requires two or three coats |
| Odor level | Reduced fumes formula | Can be very strong and unpleasant |
| Online payment process | Simple, secure, direct online checkout | Varies, sometimes complicated or third party only |
| Effectiveness on multiple finishes (paint, varnish, lacquer) | Works on all common finishes | Often limited to only one type of finish |
As you can see, the difference is not just marketing talk. Every single criteria that matters for a smooth, frustration free stripping project favors the Ferber Painting Wood Stripper. And remember, if for any reason the results do not meet your expectations, our satisfaction guaranteed or money back policy means you have nothing to lose by trying it.
It is worth taking a moment to think about what each of these criteria actually means in practice. Shipping speed matters more than people realize when you are in the middle of a project. If you run out of product halfway through a chair and have to wait two or three weeks for a reorder to arrive, your workspace sits half finished, the partially stripped wood is exposed to dust and moisture, and your motivation for the project can fade. A fast, reliable delivery network means you can plan your weekend project with confidence, knowing the product will show up when promised.
The number of coats needed is another detail that seems minor until you actually experience it firsthand. A product that requires three coats does not just triple your material cost, it also triples the amount of time you spend waiting for each coat to work, scraping, cleaning, and reapplying. On a small side table this might be a mild annoyance. On a chair with intricate spindles and carved details, having to repeat that process two or three extra times can turn a one afternoon project into an entire weekend of work.
What You Need Before You Start
Before diving into the stripping process, it is important to gather all the necessary tools and materials. Having everything ready before you begin will make the entire project go much more smoothly and prevent unnecessary interruptions once the stripper is applied.
- Ferber Painting Wood Stripper
- A pair of chemical resistant gloves
- Safety goggles
- An old paintbrush or applicator brush
- A plastic or metal scraper (plastic is gentler on delicate wood)
- Fine steel wool or an old toothbrush for detailed areas and joints
- Clean rags or paper towels
- A drop cloth or old newspaper to protect your work surface
- A well ventilated area, ideally outdoors or in a garage with open windows
- Sandpaper (medium and fine grit) for the finishing touches
Working outdoors or in a well ventilated space is always recommended when using any chemical stripping product, even one formulated to reduce fumes like ours. This protects your health and also allows the product to dry and work as intended.
It is also worth thinking ahead about a few extra items that many people forget to prepare. A second, smaller container to hold a portion of the stripper is handy so you are not repeatedly dipping your brush into the main can and risking contamination. A timer or your phone’s stopwatch app can help you track exactly how long the product has been sitting on the wood, since guessing tends to lead to scraping either too early or too late. If you are working on an antique chair with any kind of joinery held together with old animal glue, it is also wise to keep a bucket of warm water nearby, since prolonged exposure to stripper and moisture can sometimes soften old glue joints, and you may want to check on them periodically during the process.
Finally, consider your clothing before you begin. Old clothes you do not mind ruining are a smart choice, along with closed toe shoes. Stripper that drips onto skin can cause irritation, and drips onto fabric will often stain or damage the material permanently. A few minutes of preparation here can save you from an unpleasant surprise later in the project.
Step by Step Guide: How to Strip a Wooden Chair
Now that you understand why choosing the right product matters and you have gathered your materials, let’s go through the exact process of stripping a wooden chair from start to finish.
Step 1: Prepare Your Workspace
Lay down a drop cloth or old newspapers in a well ventilated area. If possible, work outside on a mild day without wind, as breezes can cause the stripper to dry too quickly or blow debris into the wet product. Place your chair upside down or on its side depending on which parts you are working on first, so gravity helps keep the product where you apply it.
Take a moment to walk around the chair and really look at it before you begin. Note where the thickest buildup of old finish seems to be, often around the seat edges or on the crest rail where hands and arms have rubbed over the years leaving extra coats of varnish or paint. Also check underneath the seat and inside any joints, since these areas are sometimes overlooked during previous refinishing attempts and may have thinner, more brittle finish that will respond differently to the stripper. Having this mental map of the chair before you start applying product will help you work more efficiently and avoid missing spots.
Step 2: Put on Protective Gear
Always wear chemical resistant gloves and safety goggles before opening the container. Even the gentlest wood strippers, including ours, are still chemical products designed to break down tough finishes, so skin and eye protection is essential.
It is a good habit to also keep a long sleeve shirt on, even in warmer weather, simply to minimize the amount of skin exposed to potential splashes. If you happen to get any product on your skin despite wearing gloves, rinse the area immediately with plenty of water. Keeping a hose or a bucket of clean water within arm’s reach during the entire process is a simple precaution that costs nothing but can prevent discomfort.
Step 3: Apply the Wood Stripper Generously
Using your applicator brush, apply a thick, even layer of the Ferber Painting Wood Stripper over the entire surface of the chair. Do not skimp on the amount, a thin layer will not penetrate deeply enough into old finishes. Thanks to the gel like consistency of our formula, it will stay in place on legs, spindles, and vertical surfaces instead of running off, which is one of the biggest advantages compared to thinner competitor products.
When applying the stripper, try to work in one direction with your brush strokes rather than scrubbing back and forth. This helps create an even coating and reduces the chance of leaving thin spots where the product might dry out too quickly. Pay particular attention to spindles and turned legs, rotating your brush around the entire circumference of each piece so that the gel coats all sides evenly. For chairs with caning or upholstery, be careful to keep the stripper away from those materials entirely, since the chemical will damage cane, rush, or fabric just as effectively as it removes old finish from wood. A piece of painter’s tape or a plastic sheet taped around the edge of the caning can serve as a simple barrier while you work.
Step 4: Let It Sit and Work Its Magic
Allow the product to sit for the time indicated on the label, usually somewhere between fifteen and thirty minutes depending on the thickness and age of the finish. You will start to notice the old paint or varnish bubbling and wrinkling, which is a clear sign that the stripper is doing its job. Avoid the temptation to scrape too early, patience here pays off with much easier removal later.
During this waiting period, resist the urge to keep touching or poking at the surface to check progress, since this can disturb the chemical reaction happening underneath. Instead, use the time productively by cleaning your work area, preparing your scraper and rags, or reviewing the next chair part you plan to tackle. If you are working in cooler weather, keep in mind that the stripper may need a few extra minutes to fully activate, since cold temperatures slow down the chemical process. In warmer weather, the opposite is true, and you may find the product works a bit faster than the label suggests, so check periodically rather than walking away for the entire suggested window.
Step 5: Scrape Off the Old Finish
Using your plastic or metal scraper, gently remove the softened finish. Work in the direction of the wood grain to avoid gouging the surface. For chairs, which often have curved or turned parts, a scraper alone will not reach every crevice, so this is where a toothbrush or fine steel wool becomes essential for grooves, joints, and carved details.
For flat surfaces like a chair seat, a wide putty knife style scraper will make quick work of the softened finish, letting you remove long ribbons of old paint or varnish in just a few passes. For curved backrests or arms, a flexible plastic scraper or even a shaped tool designed for moldings can follow the contour of the wood much more effectively than a rigid metal blade. Take your time around any carved details, since rushing through these areas is the most common cause of accidental gouges. If you find a particularly stubborn patch that is not lifting easily, resist the urge to press harder with the scraper. Instead, apply a small amount of fresh stripper directly to that spot, let it sit for a few extra minutes, and then try again.
Step 6: Clean the Surface
Once you have removed as much of the old finish as possible, wipe down the chair with a clean rag. Depending on the type of stripper used, you may need to rinse with water or a mild solvent to neutralize any remaining product residue. Always follow the specific instructions on the product label for this step.
This cleaning stage is more important than many people realize. Any leftover stripper residue on the wood can interfere with how new stain or paint adheres later, sometimes causing blotchy or uneven color once you apply your final finish. Take the time to wipe the chair down thoroughly, changing your rag frequently so you are not just smearing dissolved residue around the surface. For chairs with lots of detail work, a slightly damp rag wrapped around a thin tool like a small screwdriver can help you clean out grooves and carved lines that a flat rag cannot reach.
Step 7: Inspect and Repeat if Necessary
Check the chair carefully under good lighting. If there are still traces of old finish in certain spots, apply a smaller amount of stripper directly to those areas and repeat the scraping process. Thanks to the strength of the Ferber Painting formula, most users find that a single application is enough for the majority of the chair, with only small touch ups needed in stubborn corners.
Natural light is by far the best way to inspect your work, since artificial lighting in a garage or basement can hide subtle patches of remaining finish that become obvious the moment you carry the chair outside or near a window. If you do not have access to daylight, a bright work light held at an angle across the surface will cast shadows that reveal any bumps or uneven texture left behind by old finish. Do not be discouraged if you find a few spots that need a second round, this is completely normal, especially in tight joints or deep carvings where the original finish may have pooled thicker than on flat surfaces.
Step 8: Sand the Surface
Once the chair is completely free of old paint or varnish, let it dry fully. Then sand the entire surface starting with a medium grit sandpaper and finishing with a fine grit to achieve a smooth, even texture. This step prepares the wood for whatever finish you plan to apply next, whether that is new paint, stain, or a clear protective coat.
A good rule of thumb is to start around 120 grit for the initial pass, especially if there is any roughness or raised grain left from the stripping process, then move to 180 or 220 grit for a smoother finish, and finally finish with 320 grit if you plan to apply a stain or clear coat where surface smoothness really shows. For curved or turned parts like spindles, a sanding sponge that can wrap around the shape will give you far more even results than flat sandpaper alone. Always sand in the direction of the wood grain, never across it, since sanding against the grain creates tiny scratches that become very visible once stain is applied. Take breaks periodically to wipe away dust with a dry rag so you can actually see your progress rather than sanding blindly through a layer of dust.
Step 9: Wipe Down and Prepare for Refinishing
Use a clean, slightly damp rag to remove all sanding dust from the surface. Let the chair dry completely before applying any new finish. At this point, your chair should look like bare, clean wood, ready for its next transformation.
Many experienced furniture restorers recommend a final pass with a tack cloth, a slightly sticky cloth designed specifically to pick up fine dust particles that a regular rag might leave behind. This small extra step can make a noticeable difference in the smoothness of your final finish, especially if you are planning to apply a clear varnish or lacquer where any trapped dust particles would be visible under the topcoat. Store your freshly stripped chair in a dust free area while it dries, ideally away from direct sunlight which can sometimes cause uneven drying or subtle color changes in bare wood exposed to UV rays for extended periods.
Common Mistakes to Avoid When Stripping a Wooden Chair
Even with the best product, certain mistakes can slow down your progress or affect the final result. Here are the most common ones we see, and how to avoid them.
- Applying too thin a layer of stripper, which forces you to repeat the process multiple times.
- Not waiting long enough before scraping, which makes the finish harder to remove.
- Using metal tools too aggressively, which can scratch or gouge softer woods.
- Working in a poorly ventilated space, which can be uncomfortable and unsafe.
- Skipping the sanding step, which leaves the surface rough and uneven for the new finish.
- Choosing a low quality stripper that does not fully break down old finishes, leading to frustration and wasted materials.
This last point is worth repeating: so much of the frustration people experience when stripping furniture comes down to using an inferior product. With the Ferber Painting Wood Stripper, and its satisfaction guaranteed or money back promise, you are removing the biggest source of risk from the entire project.
Beyond these six common mistakes, there are a few more subtle errors that can trip up even experienced hobbyists. One is forgetting to protect nearby surfaces from splatter or drips, particularly if you are working near a car, a wall, or an outdoor deck. Stripper that lands on painted surfaces or certain plastics can cause damage just as effectively as it does on the furniture you intend to strip. Another common mistake is applying stripper on a windy day outdoors, which causes the product to dry out faster than expected and reduces its effectiveness, sometimes leaving you with a half finished reaction that requires reapplication.
Some people also make the mistake of trying to strip a chair that has an unknown finish without testing a small area first. While the Ferber Painting Wood Stripper is formulated to work on paint, varnish, lacquer, and polyurethane, testing an inconspicuous spot such as the underside of the seat or the inside of a leg can give you a preview of how the chair will respond and roughly how long the stripping process might take for the rest of the piece. Finally, a mistake that is easy to overlook is not accounting for the wood underneath once the finish is removed. Some woods, especially softer varieties like pine, absorb stain differently once stripped bare, so it can be worth doing a small test patch with your intended new stain or paint before committing to the entire chair.
Different Chair Types and How They Affect the Process
Not every wooden chair presents the same challenges, and understanding the specific type of chair you are working with can help you plan your approach more effectively. A simple ladder back chair with straight, flat slats will generally strip much faster than an ornately carved Victorian chair with elaborate crest rails and cabriole legs. If you are working with a chair that has significant carved detail, plan for extra time during both the application and scraping stages, and consider having a variety of small tools on hand, including dental picks or specialized carving tool substitutes, to reach into the tightest grooves.
Chairs with woven seats, whether cane, rush, or rattan, require extra caution since the stripper should never come into contact with these materials. In these cases, it often makes sense to remove the woven seat entirely before stripping the wooden frame, or at minimum to cover the woven area thoroughly with plastic sheeting and tape before you begin applying any product. Upholstered chairs present a similar challenge, and it is generally easier to remove the fabric and padding, at least temporarily, so you have full access to the wooden frame without risking damage to the upholstery.
Modern chairs with a factory applied polyurethane or lacquer finish can sometimes be more stubborn than older chairs with simple oil based varnish, since these finishes are engineered to be extremely durable and resistant to wear. If you are working on a newer chair and notice the finish is not softening as quickly as expected, do not assume the product is failing. Simply allow extra dwell time and consider applying a slightly thicker second coat directly on top of the first if the label instructions allow it, rather than scraping prematurely and having to start over.
Why Buy the Ferber Painting Wood Stripper
At this point you might be wondering why you should specifically choose our product over the many other options on shelves and online stores. Here is a summary of everything that makes it the smarter choice.
First, the satisfaction guaranteed or money back guarantee is not something you will find with other brands. Most companies expect you to take a risk on their product without any safety net. We believe so strongly in the effectiveness of our Wood Stripper that we offer a full refund if you are not completely satisfied.
Second, our formula was specifically engineered to handle multiple types of finishes, including paint, varnish, lacquer, and polyurethane, in a single application. This versatility means you do not need to buy different products depending on what type of chair or finish you are dealing with.
Third, the thick gel consistency of our stripper is a major practical advantage. Chairs are full of legs, spindles, and curved backrests, all of which are vertical or angled surfaces where thin liquid strippers simply run off before they have time to work. Our gel formula stays exactly where you put it.
Fourth, we ship worldwide through a reliable international network of carriers, meaning that no matter where you are located, you can get your hands on this product quickly. Combined with a simple, secure online payment system on our website, ordering has never been easier.
Finally, our reduced fume formula makes the entire experience more pleasant, especially if you are working indoors or in a smaller space like a garage or basement workshop.
Beyond these five main points, it is also worth mentioning the peace of mind that comes with working with a company that stands behind its product publicly and consistently. Furniture restoration, whether it is a hobby or a small side business, involves an investment of time that often matters more to people than the cost of the materials themselves. Spending an entire weekend on a project only to find that the stripper failed to perform is far more costly in terms of frustration than the price difference between a discount brand and a premium formula like ours. When you factor in the time saved from needing fewer coats, less scraping effort, and fewer touch up applications, the actual value proposition of the Ferber Painting Wood Stripper becomes even clearer.
Mini FAQ
How long does it take to strip a wooden chair?
On average, stripping a single chair takes between one and three hours, depending on the number of layers of old finish and the complexity of the chair’s design. Chairs with lots of carved details or turned spindles take longer than simple flat surfaced pieces.
Can I use the Ferber Painting Wood Stripper on any type of wood?
Yes, our product is safe to use on most common wood types used in furniture making, including oak, pine, maple, and walnut. As with any stripping product, we recommend testing on a small hidden area first if you are working with a particularly rare or delicate wood.
Do I need to sand after stripping?
Yes, sanding after stripping is highly recommended. Even after all the old finish has been removed, the surface can feel slightly rough or uneven. A quick pass with medium and then fine grit sandpaper will leave the wood smooth and ready for refinishing.
What if I am not satisfied with the results?
This is exactly why we offer our satisfaction guaranteed or money back policy. If for any reason the product does not meet your expectations, simply contact us and we will process a full refund.
How quickly will I receive my order?
Thanks to our international network of carriers, delivery times are generally fast no matter where you are located in the world. You can also track your order easily after checkout.
Is the payment process on your website secure?
Absolutely. All payments are processed directly and securely online through our website, making the ordering process quick and hassle free.
Do I need multiple coats for very old or thick finishes?
In most cases, a single generous application of the Ferber Painting Wood Stripper is enough to break through several layers of old paint or varnish at once. However, on chairs with decades of buildup or particularly stubborn factory finishes, a second smaller application directly on remaining spots can help finish the job without requiring you to recoat the entire chair.
Can I strip only part of a chair, such as just the legs or the seat?
Yes, it is entirely possible to strip only a specific section of a chair if that is all you need to refinish. Simply apply the product to the targeted area, protecting the surrounding surfaces you want to leave untouched, and follow the same steps outlined in this guide.
Conclusion
Stripping a wooden chair does not have to be a stressful or time consuming task. With the right preparation, the right technique, and most importantly, the right product, you can transform an old, worn out chair into a beautiful blank canvas ready for a fresh finish. As we have covered throughout this guide, the quality of the stripper you choose has a direct impact on how easy, fast, and successful your project will be. If you want a product that works on the first try, ships quickly worldwide, and comes with a full satisfaction guaranteed or money back promise, order the Ferber Painting Wood Stripper today and see the difference for yourself.