 United States
 Australia
 Česko
Česko Danmark
 Deutschland
 Eesti
Eesti España
 Ελλάδα
 France
 Ireland
 Hrvatska
 Italia
 Latvija
 Lietuva
 Magyarország
 Nederlands
 New-Zealand
 Norge
Norge Polska
 Portugal
 România
 Schweiz (Deutsch)
 Slovenija
 Slovensko
 Suomi
Suomi Sverige
 България
 Canada (English)
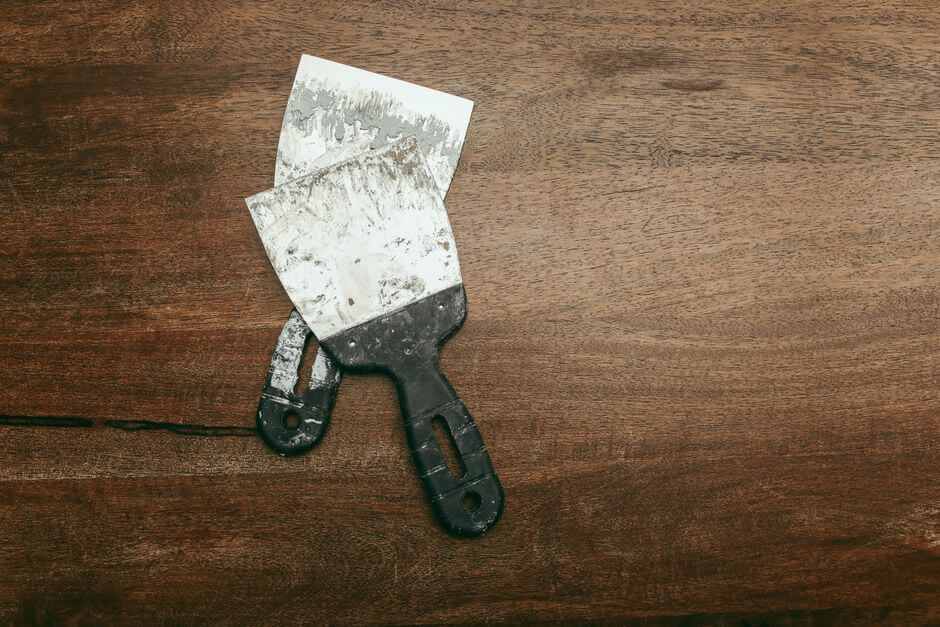
Stripping a wood window is one of those home improvement tasks that looks simple on paper but can quickly turn into a frustrating, messy ordeal if you do not have the right tools for the job. And when we say “right tools,” we mean, above all, the right product. Everything else, your scraper, your brushes, your patience, comes second. If the wood stripper you choose is weak, slow, or poorly formulated, you will spend hours fighting old paint and varnish instead of actually restoring your window. This is why choosing a high-quality wood stripper is the single most important decision you will make before starting this project.
That is exactly why we recommend the Wood Stripper from Ferber Painting. It is not just another chemical stripper sitting on a shelf. It is a carefully formulated product designed specifically to cut through old paint, varnish, and lacquer on wood windows without damaging the wood grain underneath. And unlike almost every other stripper on the market, our product comes with a full satisfaction guaranteed or money back policy. If you are not happy with the results, you get your money back, no complicated conditions, no hidden fine print. This alone sets Ferber Painting apart from every competitor we know of, because very few brands are confident enough in their formula to offer that kind of promise.
In this complete guide, we will explain why picking the right stripper matters so much, why the Ferber Painting Wood Stripper stands above the competition, and then walk you through a full step-by-step process on how to strip a wood window properly, safely, and efficiently. We will also cover the tools you need, the common mistakes people make, and answer the questions we hear most often from homeowners and painting professionals who are tackling this project for the first time or the fiftieth time.
Whether you are restoring a single window in a historic home, refinishing an entire set of double hung windows in a century old farmhouse, or simply trying to bring an old window frame back to life before repainting it, the fundamentals covered in this guide apply. Wood windows, especially older ones, often carry many decades of paint history. It is not unusual to peel back six, seven, or even ten layers of paint on a window that has been repainted every time the house changed owners. Understanding how to work through that history efficiently, without destroying the wood underneath, is the whole point of this article.
Why the Right Wood Stripper Makes All the Difference
Before diving into the technique, it is essential to understand why the product itself is the foundation of a successful wood stripping project. Many people assume that stripping paint off a wood window is mostly about elbow grease. In reality, the chemical formula of the stripper you use determines almost everything: how fast the paint softens, how many coats and layers you can remove at once, whether the wood underneath stays intact, and how much time you spend scraping versus waiting.
A poor quality stripper will only soften the top layer of paint, forcing you to apply multiple coats and wait for hours between each application. Some cheap strippers also contain overly aggressive solvents that can damage or discolor the wood fibers, leaving you with a window that looks worse than before you started. Others evaporate too quickly, meaning the product dries out before it has had time to fully penetrate the old finish.
Think about the physics of what is actually happening when a stripper is applied to an old, painted window. The chemical needs to travel down through every single layer of paint, break the molecular bond holding each layer to the one beneath it, and then break the bond between the bottom layer and the bare wood. If the product evaporates or dries out before it reaches that bottom layer, you are left scraping through half softened paint that clings stubbornly to the surface, tearing unevenly and leaving patches behind. This is the single most common complaint people have when they use a cheap, thin stripper on an old multi layered window: they end up doing the same section two, three, or four times because the product simply did not have the staying power to finish the job in one pass.
This is where the formulation quality of a wood stripper becomes critical. A well balanced product needs to:
- Penetrate deeply into multiple layers of old paint or varnish
- Stay active long enough to soften stubborn coatings without drying out too fast
- Protect the wood grain and prevent discoloration
- Be safe enough to use indoors and outdoors with proper ventilation
- Rinse off cleanly without leaving a sticky or oily residue
The Ferber Painting Wood Stripper checks every single one of these boxes. Its gel-like consistency clings to vertical surfaces such as window frames, which is a huge advantage because vertical stripping is notoriously difficult with thin, runny products that simply slide off the wood before they have time to work.
Another factor worth mentioning is temperature sensitivity. Many older, lower quality strippers perform inconsistently depending on the ambient temperature of your work area. In a cold garage during winter, some products barely activate at all, while in direct summer heat they can dry out within minutes of application, well before the chemical reaction has had time to fully soften the paint. A properly formulated gel stripper is designed to perform reliably across a broader range of working conditions, which matters a great deal if you are stripping windows outdoors, in a garage, or in a workshop that is not climate controlled.
Why Ferber Painting’s Wood Stripper Is the Best Choice on the Market
There are dozens of wood strippers available online and in hardware stores, so it is fair to ask why you should choose ours specifically. Here are the main reasons our customers consistently tell us they prefer the Ferber Painting Wood Stripper over other brands.
First, the satisfaction guaranteed or money back policy. We are the only brand in this category that offers this. If the product does not perform as expected on your project, you simply contact us and we refund you, no questions asked. This tells you something important: we trust our formula so much that we are willing to take on the financial risk ourselves instead of passing it onto you.
Second, our product is formulated to work on multiple layers of paint and varnish in a single application, which means less time waiting and less time scraping. Most competing products require two or three separate applications for old, thick layers of paint, which can be common on older wood windows that have been repainted many times over the decades.
Third, our thick gel formula stays where you put it. This is a night and day difference compared to thin, liquid strippers that drip down the frame and waste product, or worse, drip onto surfaces you did not intend to strip. Because window frames are mostly vertical or have detailed moldings, this clinging property is not a small bonus, it is essential.
Fourth, fast worldwide shipping. Ferber Painting has built an international network of carriers so that no matter where you are located, your order arrives quickly. Combined with an easy, secure online payment system directly on our website, ordering the Wood Stripper is a smooth, hassle free experience from start to finish.
Fifth, and this matters a lot for people working on old historic windows, our formula is designed to protect the wood underneath rather than damage it. Some aggressive chemical strippers can raise the wood grain or leave the surface rough and fuzzy, requiring extensive sanding afterward. Our product minimizes this issue significantly.
Sixth, our product is versatile enough for a wide range of woods commonly found in window construction, including pine, fir, oak, and mahogany. Different wood species react differently to chemical strippers, and a formula that is too harsh can leave dark blotches or uneven color on softer woods like pine, which is exactly the type of wood most commonly used in older double hung window sashes. Customers working on antique oak windows have also told us the formula does an excellent job of preserving the natural grain pattern, which matters a great deal if the plan is to stain the wood again rather than repaint it.
Seventh, our customer support team is available to answer questions before, during, and after your project. If you run into a particularly stubborn section of your window, or you are unsure how long to let the product sit given the number of layers you are dealing with, you can reach out and get practical, specific advice rather than a generic response copied from a manual.
Here is a quick comparison table summarizing how the Ferber Painting Wood Stripper stacks up against typical generic wood strippers you might find elsewhere.
| Criteria | Ferber Painting Wood Stripper | Typical Generic Wood Stripper |
|---|---|---|
| Satisfaction guaranteed or money back | Yes, full guarantee | Rarely offered |
| Formula consistency | Thick gel, clings to vertical surfaces | Often thin and runny |
| Number of layers removed per application | Multiple layers at once | Usually one layer, requires reapplication |
| Wood grain protection | Formulated to protect the grain | Can raise or damage grain |
| Shipping | Fast, worldwide, reliable carrier network | Varies greatly, often local only |
| Online payment ease | Simple, secure checkout | Depends on retailer |
| Ease of use for beginners | Straightforward instructions, forgiving formula | Can be tricky, unforgiving with timing |
As you can see, when you line up all the important criteria side by side, the Ferber Painting Wood Stripper simply offers more value, more safety, and more peace of mind than a typical off the shelf alternative. When you factor in the time saved by not having to reapply the product three or four times, plus the money saved by not having to buy replacement wood for sections damaged by an overly harsh formula, the value proposition becomes even clearer.
What You Will Need Before You Start
Before you begin stripping a wood window, gather all your supplies so you are not interrupting the process halfway through. Here is a checklist of what you will need.
- Ferber Painting Wood Stripper
- A plastic or metal putty knife or scraper
- Protective gloves, ideally chemical resistant
- Safety goggles
- A respirator mask or well ventilated work area
- An old paintbrush for applying the stripper
- Plastic sheeting or a drop cloth to protect surrounding surfaces
- Steel wool or fine sandpaper for detail work in corners and moldings
- A bucket of water or mineral spirits for cleanup depending on the formula
- Clean rags or paper towels
Having everything ready before you start will make the entire process go much faster and prevent you from having to stop mid-project to search for tools while the stripper is actively working on the wood surface.
It is also worth thinking ahead about where you will place the sash while the stripper is doing its work. Many people set up a dedicated stripping station on sawhorses in a garage or covered outdoor area, with the plastic sheeting taped down at the edges so it does not shift while you are working. If you are stripping multiple windows from the same house, it can be helpful to label each sash with tape and a marker before removing it, so you know exactly which frame goes back into which opening once the refinishing is complete. This small detail sounds trivial, but anyone who has ever had to guess which sash belongs to which window opening after stripping six of them at once will tell you it saves a lot of frustration later.
If you are working with old windows built before the 1980s, it is also worth testing for lead paint before you start scraping. Home test kits are inexpensive and widely available, and if lead is present, you will want to take extra precautions such as wearing an N95 or better respirator, working outdoors or with strong ventilation, and disposing of the paint chips and residue according to your local regulations rather than simply sweeping them into the trash.
Step-by-Step Guide: How to Strip a Wood Window
Now that you understand why the product matters and you have your supplies ready, let us walk through the full process of stripping a wood window from start to finish.
Step 1: Prepare Your Work Area
If possible, remove the window sash from its frame so you can work on it flat on a table or workbench. Working horizontally is much easier and safer than working on a vertical, installed window, although the Ferber Painting Wood Stripper is thick enough to be applied effectively even if you cannot remove the sash. Lay down plastic sheeting to catch drips and protect your floor or work surface. Make sure the area is well ventilated, open windows and doors, and if you are working indoors, consider using a fan to keep air circulating.
Take a moment before you start to inspect the window closely. Note any areas where the glass meets the wood, since you will want to protect the glass with painter’s tape before applying stripper nearby, especially if the glazing putty is old and brittle. Also check the hardware, hinges, sash locks, and pulleys, and remove what you can so you are not stripping paint around metal fittings that will simply get in the way.
Step 2: Put On Your Protective Gear
Wood strippers contain active chemical ingredients designed to break down old paint and varnish, so protecting your skin and eyes is essential. Put on your chemical resistant gloves and safety goggles before opening the container. If you are sensitive to fumes or working in a small space, wear a respirator mask as well.
Long sleeves and old clothing you do not mind getting stained are also recommended, since even careful application can result in the occasional drip or splash. If you have long hair, tying it back is a simple precaution that prevents accidental contact with the product while you are leaning over the window working on a detailed section.
Step 3: Apply the Wood Stripper Generously
Using your paintbrush, apply a thick, even coat of the Ferber Painting Wood Stripper over the entire painted or varnished surface of the window. Do not skimp here, a generous application will work much faster and more effectively than a thin layer. Because our formula is a thick gel, it will stay in place on vertical surfaces and detailed moldings without dripping away, which is one of the biggest advantages over thinner, generic products.
Work in manageable sections rather than trying to coat the entire window at once, especially if you are working on a large sash with many small panes. Applying the stripper to one half of the sash at a time, for example, lets you keep closer track of timing and ensures the product does not begin drying out on the first section before you have even finished applying it to the last.
Step 4: Let the Product Work
This is the step where patience pays off. Depending on how many layers of paint or varnish are on your window, let the stripper sit for the time indicated on the packaging, typically between fifteen minutes and a couple of hours for particularly stubborn, multi-layered surfaces. You will start to see the old paint bubble, wrinkle, and lift away from the wood surface. This visual change is your signal that the product is working and breaking the bond between the old finish and the wood underneath.
During this waiting period, resist the temptation to keep poking at the surface to check on progress. Every time you disturb the gel layer, you slightly reduce its ability to keep working evenly across the surface. Instead, use this time productively, prepare your next window, clean your tools, or set up the sanding station you will need later in the process.
Step 5: Scrape Away the Softened Paint
Once the paint has visibly softened and lifted, use your putty knife or scraper to gently remove it. Work in the direction of the wood grain to avoid gouging the surface. You should find that the old paint comes away in satisfying strips or curls rather than requiring aggressive scraping. This is exactly the result a high quality gel stripper is designed to produce.
For detailed areas like corners, muntins, or decorative moldings, switch to steel wool or a smaller detail scraper to get into tight spaces without damaging the wood. A pointed wooden or plastic pick can also be useful for getting into the tight channels around window glass, where a wide metal scraper simply will not fit without risking a cracked pane.
As you scrape, keep a container nearby to collect the removed paint waste. Not only does this keep your work area cleaner, it also makes disposal much easier at the end of the project, since many municipalities have specific rules about how old paint waste should be discarded, particularly if lead paint is suspected.
Step 6: Reapply If Necessary
Older windows sometimes have many layers of paint built up over decades. If you still see remnants of old finish after the first pass, apply a second coat of the stripper directly to the remaining areas and repeat the waiting and scraping process. Thanks to the strength of the Ferber Painting formula, most users find that one or two applications are enough to reach bare wood, compared to three or more applications often needed with weaker, generic products.
If you notice that certain small sections, particularly in deep grooves or tight corners, are taking much longer than the rest of the window, it can help to isolate just those areas for a targeted second application rather than recoating the entire sash. This saves product and speeds up the overall project.
Step 7: Clean the Surface
Once all the old paint and varnish have been removed, clean the wood surface according to the instructions on your product, typically using water or a recommended solvent to remove any remaining chemical residue. This step is important because leftover stripper residue can interfere with the adhesion of new paint, stain, or varnish later on.
A soft bristle brush dipped in water can help work residue out of textured or grainy areas of the wood, while a clean rag is usually sufficient for flat surfaces. Allow the window to dry completely, ideally overnight, before moving on to sanding, since sanding damp wood can clog your sandpaper quickly and produce an uneven finish.
Step 8: Sand the Wood
After the surface is clean and completely dry, lightly sand the wood with fine grit sandpaper. This smooths out any raised grain and prepares the surface for refinishing. Because the Ferber Painting Wood Stripper is formulated to protect the wood grain, you should find that this sanding step requires much less effort than it would after using an overly harsh, generic stripper.
Start with a medium grit paper if the surface still feels rough, then move to a finer grit for the final pass. Always sand in the direction of the grain, and wipe away dust with a tack cloth or slightly damp rag between passes so you can clearly see the wood surface and identify any spots that need extra attention.
Step 9: Inspect and Repeat If Needed
Take a close look at the entire window in good lighting. Check corners, edges, and detailed moldings for any spots you might have missed. If needed, spot treat these small areas with a bit more stripper before moving on to refinishing.
Running your hand gently over the surface, in addition to visually inspecting it, can help you catch small ridges of old finish that are easy to miss with the eye alone, especially in dim garage lighting. Natural daylight is the best way to do a final inspection, since it reveals color inconsistencies and leftover residue far more clearly than artificial light.
Step 10: Refinish the Window
With the wood now stripped clean and smooth, you are ready to apply a fresh coat of paint, stain, or varnish. Because you started with a high quality stripper that did not damage or discolor the wood, your new finish will adhere better and look more even and professional than if you had used a weaker product that left residue or damaged fibers behind.
Before applying any finish, consider a coat of appropriate primer if you plan to paint, or a wood conditioner if you plan to stain, particularly on softer woods like pine that can absorb stain unevenly. Taking this extra step after all the work you have put into stripping the window properly will ensure the final result truly reflects the effort invested throughout the whole process.
Common Mistakes to Avoid When Stripping Wood Windows
Even with the best product on the market, a few common mistakes can slow down your progress or affect your results. Here are the pitfalls to watch out for.
- Applying too thin a layer of stripper, which slows down the softening process significantly
- Not waiting long enough before scraping, leading to unnecessary effort and incomplete paint removal
- Scraping against the grain, which can gouge or scratch the wood surface
- Skipping protective gear, which increases the risk of skin or eye irritation
- Working in a poorly ventilated space
- Rushing the cleaning step, leaving chemical residue that interferes with the new finish
- Choosing a cheap, thin, generic stripper that drips off vertical window frames before it has time to work
Beyond this list, another mistake worth mentioning is using metal tools too aggressively on softer wood species. A putty knife pressed too firmly can leave permanent gouges, especially on pine, which is relatively soft compared to oak or mahogany. Using moderate pressure and letting the chemical do the heavy lifting, rather than relying on brute force with the scraper, will consistently produce cleaner results.
Skipping the lead paint test on older homes is another common oversight, particularly for anyone working on a property built before 1978. Taking a few extra minutes to test before starting is a small investment that protects your health and the health of anyone else in the home.
Finally, many people underestimate how much time the entire process takes from start to finish and try to rush through the drying and curing stages before refinishing. Applying paint or varnish over wood that has not fully dried after cleaning can trap moisture beneath the new finish, leading to bubbling or peeling down the road. Patience at every stage, not just during the stripping itself, is what separates a professional looking result from a rushed, disappointing one.
Avoiding these mistakes, combined with using a reliable, thick, effective gel formula like the Ferber Painting Wood Stripper, will make the entire process significantly faster and give you a much better final result.
Frequently Asked Questions
How long does it take to strip a wood window?
It depends on the number of paint layers and the type of stripper used. With the Ferber Painting Wood Stripper, most windows with several layers of old paint can be fully stripped in one to two applications, typically within a couple of hours including waiting time. Windows with a particularly thick paint history, sometimes ten or more layers built up over a century, may take a bit longer and benefit from a second targeted application on the most stubborn sections.
Do I need to remove the window sash before stripping it?
It is recommended for easier handling, but it is not strictly necessary. The thick gel consistency of our product allows it to be applied effectively even on vertical, installed window frames without dripping away. If you do choose to work with the sash still installed, just make sure to protect the surrounding wall, glass, and any nearby flooring with plastic sheeting or tape, since scraping in place can be a bit messier than working on a flat, removed sash.
Is the Ferber Painting Wood Stripper safe to use indoors?
Yes, as long as you follow standard safety precautions such as wearing gloves, goggles, and working in a well ventilated area. A respirator mask is recommended if you are sensitive to fumes or working in a small enclosed space. Opening windows on either side of the room to create cross ventilation, and running a fan if available, will further improve air circulation while you work.
What happens if I am not satisfied with the product?
Ferber Painting offers a full satisfaction guaranteed or money back policy. If the product does not meet your expectations, simply reach out to us and we will refund your purchase. This is a guarantee that very few competitors in this category offer.
Can I use this stripper on painted, stained, or varnished wood?
Yes, the formula is designed to break down paint, varnish, and lacquer finishes, making it versatile for different types of window refinishing projects. It works well whether you are dealing with a single coat of modern latex paint or many decades of layered oil based paint typical of older homes.
How fast will my order arrive?
Ferber Painting ships worldwide through an international network of reliable carriers, and orders placed directly on our website through our simple online payment system are typically processed and shipped quickly, so you can get started on your project without a long wait.
Conclusion
Stripping a wood window does not have to be a long, frustrating, or messy task, as long as you start with the right product. A thick, effective, well formulated stripper makes the difference between hours of scraping and a smooth, efficient process that leaves your window ready for a fresh, beautiful finish. As we have shown throughout this guide, choosing a high quality gel formula that clings to vertical surfaces, works on multiple paint layers at once, and protects the wood grain will save you time, effort, and disappointment.
Whether you are restoring a single cherished window in a family home or working through an entire house full of old, painted sashes, following the steps outlined in this guide, avoiding the common mistakes we described, and starting with a dependable product will set you up for a result you can be genuinely proud of. Wood windows are often one of the most character defining features of an older home, and taking the time to strip and refinish them properly, rather than replacing them, preserves that character while giving them a new lease on life.