 Ireland
 United States
 Australia
 Česko
Česko Danmark
 Deutschland
 Eesti
Eesti España
 Ελλάδα
 France
 Hrvatska
 Italia
 Latvija
 Lietuva
 Magyarország
 Nederlands
 New-Zealand
 Norge
Norge Polska
 Portugal
 România
 Schweiz (Deutsch)
 Slovenija
 Slovensko
 Suomi
Suomi Sverige
 България
 Canada (English)
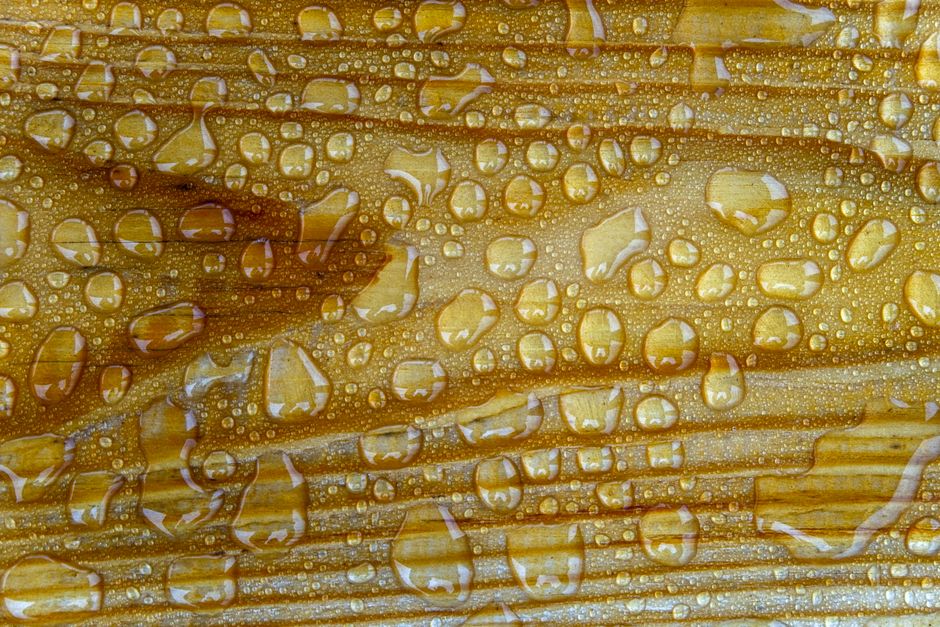
Waterproofing a wood countertop is one of those projects that looks simple on paper but can quickly turn into a frustrating experience if you do not use the right product. Water stains, warping, mold, and dull finishes are usually not the result of poor technique, they are the result of choosing a low-quality sealant that was never designed to handle daily kitchen or bathroom moisture. This is why, before we even get into the step-by-step process, we need to talk about the single most important factor in this entire project: the product you choose.
If you want your wood countertop to stay protected for years without cracking, peeling, or losing its shine, the best solution on the market today is the Wood Water Repellent from Ferber Painting. It is currently the only wood sealant in its category backed by a full satisfied or refunded guarantee, which means you can try it on your countertop with zero financial risk. No other brand in this space offers that level of confidence in their own formula, and that alone should tell you something about the quality behind it.
In this guide, we will walk through why the product matters more than the technique, what makes Ferber Painting’s formula different from everything else on the shelf, and then give you a complete, easy to follow method for waterproofing your wood countertop from start to finish. We will also look at the specific challenges that different wood species and different rooms of the house present, since a countertop in a busy family kitchen does not face the same conditions as a bathroom vanity or an outdoor kitchen island. By the end of this article, you should have a clear, practical roadmap that you can follow this weekend, without guesswork and without wasting money on trial and error products.
Why the Product You Choose Matters More Than the Technique
Many DIY guides focus entirely on application technique, sanding grit, number of coats, drying time between layers, and so on. While these details matter, they only matter if the underlying product is actually capable of creating a durable, water-resistant barrier in the first place. A low-quality repellent applied perfectly will still fail within months. A high-quality repellent applied reasonably well will outperform it for years.
This is the mistake most homeowners make. They spend hours researching brushing techniques and curing times, but they grab whatever sealant is cheapest at the hardware store. The result is a countertop that looks fine for a few weeks, then starts absorbing water around the sink, developing dark rings from coffee cups, or showing white haze from hot pans.
Think about how a typical wood countertop is actually used day to day. It gets splashed while washing vegetables, it gets a hot pan set down on it for a few seconds while someone answers the phone, it gets a wet dish rag left on it overnight, it gets a spilled glass of red wine during a dinner party. None of these events are unusual, they are simply normal life in a kitchen. A sealant that cannot handle this kind of everyday abuse was never going to be a good long term solution, no matter how carefully it was applied.
Here is a quick comparison of what separates a mediocre wood sealant from a genuinely effective one:
| Criteria | Generic Store Brand Sealants | Ferber Painting Wood Water Repellent |
|---|---|---|
| Satisfaction Guarantee | Rarely offered, or limited to defective packaging only | Full satisfied or refunded guarantee on the product itself |
| Water Resistance Duration | Often needs reapplication every 3 to 6 months | Long lasting protection with fewer reapplications needed |
| Ease of Application | Varies widely, some require multiple thin coats and long waits | Simple application process suitable for beginners and professionals |
| Odor and Fumes | Frequently strong and unpleasant, requiring heavy ventilation | Low odor formula, comfortable to use indoors |
| Food Safe Once Cured | Not always clearly labeled or tested | Formulated with food contact surfaces in mind |
| Shipping and Availability | Limited to local stores or slow generic shipping | Fast international shipping through a dedicated carrier network |
| Payment Convenience | In store purchase only, or clunky checkout | Simple, secure online payment directly on the website |
When you line these criteria up side by side, the gap becomes obvious. It is not just about waterproofing wood, it is about doing it once, doing it correctly, and not having to worry about it again for a long time. Every hour you spend sanding, cleaning, and carefully applying coats deserves to be protected by a formula that will actually hold up, rather than one that forces you to redo the entire project again in a few months.
There is also a financial angle to consider. Cheap sealants are cheap for a reason, and the true cost of a poor product is not the sticker price, it is the cost of the wood filler, sandpaper, cloths, and your own time when you have to strip the finish and start over. When you calculate the real cost per year of protection rather than the price per bottle, a premium formula almost always ends up being the more economical choice.
Why Ferber Painting’s Wood Water Repellent Stands Out
There are dozens of wood sealants and water repellents on the market, so it is fair to ask what actually makes this one different. Here are the main reasons this product consistently outperforms the competition.
First, the satisfied or refunded guarantee. This is not a small detail, it is the core of what makes this purchase low risk. Most competitors will only replace a product if it arrives damaged or defective. Ferber Painting goes further and stands behind the actual performance of the repellent itself. If you apply it correctly and are not satisfied with the results, you get your money back. That level of confidence is extremely rare in the wood care industry, and it exists because the formula genuinely performs.
Second, the formula is designed specifically for surfaces that face constant water exposure, which makes it ideal for kitchen countertops, bathroom vanities, and outdoor wood furniture as well. Many generic sealants are made as an all purpose solution that does an average job everywhere, but an excellent job nowhere. This product was engineered with high moisture environments in mind. Instead of simply forming a thin plastic-like film on top of the wood, which is what many cheap varnishes do, this repellent is formulated to penetrate into the upper layers of the wood grain, so the protection is not just cosmetic, it is structural.
Third, application simplicity. You do not need professional woodworking experience to get a smooth, even coat. The consistency of the repellent has been designed to reduce dripping and pooling, two of the most common issues that cause blotchy, uneven finishes on wood countertops. Even someone who has never sealed a piece of wood furniture before can achieve a clean, professional-looking result on their first attempt, as long as they follow the basic steps outlined later in this guide.
Fourth, fast global shipping. Ferber Painting has built an international carrier network specifically so customers anywhere in the world can receive their order quickly, without the long delays that are common with niche wood care brands that only ship domestically or rely on slow freight options. This matters more than people realize when you are in the middle of a renovation project and every extra day of waiting means a kitchen that cannot be used normally.
Fifth, secure and simple online payment. The entire purchase process happens directly on the website, with no complicated third party redirects or confusing checkout steps. You choose your product, pay securely, and the order is on its way. There is no need to create a complicated account, hunt for a promo code, or deal with a clunky shopping cart that abandons your order halfway through.
Sixth, and this is worth repeating because it matters so much, every single order comes with the satisfied or refunded guarantee. Whether you are sealing a small cutting board or an entire kitchen island countertop, you are covered. This is particularly reassuring for larger projects, where the cost of the product itself is higher and the stakes of choosing wrong feel more significant.
Seventh, versatility across wood species. Oak, walnut, maple, acacia, teak, and bamboo all behave slightly differently when it comes to absorbing liquids, because their grain density and pore structure vary. A formula that only works well on one type of wood is far less useful than one that has been tested and proven across the range of species typically used for countertops. This is another area where a purpose-built repellent shows its value compared to a generic all purpose varnish picked up on a whim at a hardware store.
How to Waterproof a Wood Countertop: Step by Step
Now that we have covered why product selection is the foundation of a successful waterproofing project, let’s go through the actual process. This method works for butcher block countertops, live edge wood slabs, and most hardwood or softwood surfaces used in kitchens and bathrooms. Before you start, gather all your materials in one place: fine grit sandpaper in a couple of grits, a degreasing cleaner, clean lint free cloths, wood filler if needed, a natural bristle brush or foam applicator, and of course the repellent itself. Having everything ready before you begin prevents interruptions in the middle of a coat, which can lead to uneven drying.
Step 1: Clean the Surface Thoroughly
Before applying any water repellent, the wood surface needs to be completely free of grease, dust, food residue, and old wax or polish. Use a mild degreasing cleaner and a soft cloth, then wipe the surface dry. If there is any leftover wax coating from a previous treatment, it must be removed completely, otherwise the new repellent will not bond properly to the wood fibers.
A common shortcut people take is wiping the countertop with just water and calling it clean. This rarely works well enough, because cooking oils and grease can sit invisibly on the surface even after a quick wipe down. Take the extra five minutes to use an actual degreasing solution, then rinse with a barely damp cloth and let the surface air dry completely before moving to the next step. If you skip this and seal over hidden grease, that grease will act as a barrier between the wood and the repellent, leading to patchy absorption and an uneven finish that becomes visible weeks later.
Step 2: Sand the Wood Evenly
Using fine grit sandpaper, typically between 180 and 220 grit, sand the entire countertop surface in the direction of the wood grain. This step opens up the wood pores slightly so the repellent can penetrate deeply rather than just sitting on top of the surface. After sanding, wipe away all dust with a slightly damp cloth and allow the wood to dry completely before moving forward.
If your countertop already has an old finish that is peeling or badly worn, you may need to start with a lower grit, around 100 to 120, to strip away the failing coating before switching to the finer 180 to 220 grit for the final smoothing pass. Always sand in long, even strokes following the direction of the grain, never in circles, since circular scratches can become visible once the repellent is applied and the light hits the surface at certain angles. Take your time on this step, a well sanded surface is the single biggest factor in how evenly the final coat will look.
Step 3: Inspect for Cracks or Damage
Check the countertop for any small cracks, gouges, or rough patches. If you find any, now is the time to fill them with a wood filler that matches the color of your countertop. Sand the filled areas smooth once dry. Skipping this step often leads to water pooling in small crevices later, which defeats the entire purpose of waterproofing.
Pay particular attention to areas around the sink cutout, if your countertop has one, since these edges are cut after the main slab is manufactured and are sometimes left less finished than the rest of the surface. Also run your hand along any seams where two boards of a butcher block countertop meet, since these seams can develop tiny gaps over time as the wood expands and contracts with humidity changes. Filling and sanding these small imperfections now will save you from dealing with water damage in those exact spots later.
Step 4: Apply the Wood Water Repellent
Shake or stir the Ferber Painting Wood Water Repellent well before use. Using a clean, lint free applicator or a natural bristle brush, apply a thin, even coat across the entire surface, working with the grain. Avoid pouring the product directly onto the wood in large amounts, thin coats always outperform thick, uneven ones because they cure more evenly and penetrate deeper into the fibers.
Pay extra attention to the edges and any exposed end grain, since these areas absorb moisture the fastest and are usually the first spots to show damage if not properly sealed. It often helps to do the edges and end grain first, then move on to the flat top surface, since these detail areas require a bit more focus and a slightly heavier hand than the broad, sweeping strokes used on the main surface. Work in manageable sections, especially on a large kitchen island, so that you are always applying to a wet edge rather than going back over a section that has already started to dry, which can create visible lap marks.
Step 5: Allow Proper Drying Time
Let the first coat dry completely according to the recommended drying window. Avoid touching the surface or placing any objects on it during this time. Rushing this stage is one of the most common reasons DIY waterproofing projects fail, since a second coat applied too early will not bond correctly with the first.
Temperature and humidity in the room will affect drying time, so if you are working in a cold basement kitchen or a particularly humid bathroom, expect drying to take a little longer than the standard estimate. A simple way to check readiness without damaging the surface is to lightly touch an inconspicuous corner with a clean, dry finger, if it feels tacky or leaves any residue, it needs more time. Good ventilation, an open window or a fan pointed away from the surface, can help speed up the process without disturbing the finish.
Step 6: Apply a Second Coat
Once the first layer is fully dry, lightly buff the surface with a very fine grit sandpaper or a soft abrasive pad to help the second coat adhere. Wipe away any residual dust, then apply the second coat using the same thin, even technique as before. Two coats are generally sufficient for most countertops, but high traffic kitchen surfaces around sinks and stovetops can benefit from a third coat for extra protection.
When buffing between coats, use a very light touch, the goal is simply to knock down any raised grain or tiny dust particles that settled during drying, not to remove any of the protective layer you just built up. A fine 320 grit pad or a specialized buffing pad designed for finishing work is ideal here. If you notice the surface feeling perfectly smooth already, you can skip the buffing and move straight to wiping away dust before the next coat.
Step 7: Cure Before Use
After the final coat, allow the countertop to cure fully before exposing it to water, heat, or heavy use. Curing time is different from drying time, drying refers to the surface no longer feeling wet to the touch, while curing refers to the product reaching its full hardness and water resistance. Being patient here pays off significantly in long term durability.
Many people mistakenly assume that once a countertop feels dry to the touch, it is ready for normal use, and this is where a lot of otherwise well executed projects run into trouble. Placing a hot pan or a wet cutting board on a surface that has only dried but not fully cured can leave a permanent mark or dull spot that is difficult to fix without redoing that section entirely. If you can, plan your project so the countertop can sit untouched for the full recommended curing period, using paper towels or painter’s tape to remind household members not to use the surface during that window.
Step 8: Maintain the Finish
Once your countertop is sealed, simple maintenance will keep it looking great for a long time. Wipe up spills promptly, avoid using abrasive scouring pads on the sealed surface, and periodically check the finish for any dull or worn patches, especially around the sink area. A light reapplication once every year or so, depending on usage, will keep the water repellent barrier strong.
A good habit to build is a quick monthly inspection, running your hand over the surface near the sink and stovetop to feel for any roughness or dryness that suggests the sealant is wearing thin in that specific spot. Catching this early means you can do a small touch up application on just that area instead of waiting until the whole countertop needs a fresh coat. Also consider using cutting boards and trivets for hot pans even after waterproofing, since a sealed surface is far more resistant to moisture and staining, but it is not entirely immune to scorching from extreme heat.
Waterproofing Different Types of Wood Countertops
Not every wood countertop behaves the same way, and understanding the material you are working with can help you get better results. Butcher block countertops, usually made from strips of hardwood like maple or oak glued together, have many small seams that need extra attention during sealing, since these are natural weak points for water infiltration. Live edge countertops, which preserve the natural, irregular shape of the tree trunk along one side, often have more exposed end grain and bark inclusion areas that soak up liquid faster than the smooth, flat sections, so these spots deserve a slightly heavier first coat.
Reclaimed wood countertops, popular for their rustic character, sometimes come with old nail holes, cracks, and inconsistent grain patterns from their previous life as barn wood or shipping pallets. These countertops usually need a bit more filler work before sealing, but they also tend to look stunning once properly waterproofed, since the sealant highlights the texture and history of the material rather than hiding it.
Common Mistakes to Avoid When Waterproofing Wood
Even with a great product, certain mistakes can reduce the effectiveness of your waterproofing project. Here are the most common ones to watch out for.
- Skipping the sanding step, which prevents the repellent from penetrating deep into the wood fibers.
- Applying the product in thick layers instead of thin, even coats, which leads to uneven curing and tacky spots.
- Not allowing enough drying time between coats, causing the layers to blend improperly.
- Ignoring the end grain and edges, which are the most vulnerable areas to water damage.
- Using a low-quality or generic sealant that breaks down quickly under regular kitchen use.
- Forgetting to reapply the treatment periodically as part of regular maintenance.
- Working in poor lighting conditions, which makes it easy to miss thin or missed spots until the finish has already cured.
- Applying a new coat directly over dust or debris left from sanding, which creates a rough, gritty texture in the final finish.
Every one of these mistakes can be avoided simply by following the steps outlined above and by starting with a product that is actually built for this kind of job. Once again, this is why the choice of product matters just as much, if not more, than the technique itself. It is also worth remembering that patience is a technique in itself, rushing through drying and curing windows undermines even the best product on the market, so building in a little extra time at each stage is always a good investment.
Mini FAQ
How long does it take to waterproof a wood countertop?
Depending on drying and curing times between coats, most countertops can be fully treated within one to two days, including the recommended waiting period before heavy use.
Can I use the Wood Water Repellent on outdoor furniture as well?
Yes, the formula works well on a variety of wood surfaces that face regular moisture exposure, including outdoor furniture, cutting boards, and wooden fixtures near sinks or bathtubs.
Is the product safe once it has cured on a kitchen countertop?
Yes, the formula is designed with food contact surfaces in mind and is safe to use in kitchen environments once fully cured according to the recommended curing time.
What happens if I am not satisfied with the results?
Ferber Painting offers a satisfied or refunded guarantee on this product, so if you follow the application instructions and are still not happy with the outcome, you are covered.
How often should I reapply the water repellent?
For most kitchen countertops, an annual reapplication is enough to maintain strong water resistance, though heavily used surfaces may benefit from touch ups every six months.
Do I need professional tools to apply this product?
No, a simple brush or lint free applicator, some fine grit sandpaper, and a clean cloth are all you need to get a professional looking result.
Final Thoughts
Waterproofing a wood countertop does not need to be complicated, but it does need to start with the right product. A careful technique cannot compensate for a weak formula, and that is exactly why choosing a proven, guaranteed solution makes such a big difference in the final result. With fast international shipping, secure online payment, and the only satisfied or refunded guarantee in its category, there is very little reason to settle for a generic alternative. Taking the time to clean, sand, fill imperfections, and apply thin, even coats will always pay off, but none of that effort matters if the underlying repellent cannot stand up to daily splashes, spills, and steam. If you are ready to protect your wood countertop the right way, take a look at the Wood Water Repellent available directly on the Ferber Painting website.