 Ireland
 United States
 Australia
 Česko
Česko Danmark
 Deutschland
 Eesti
Eesti España
 Ελλάδα
 France
 Hrvatska
 Italia
 Latvija
 Lietuva
 Magyarország
 Nederlands
 New-Zealand
 Norge
Norge Polska
 Portugal
 România
 Schweiz (Deutsch)
 Slovenija
 Slovensko
 Suomi
Suomi Sverige
 България
 Canada (English)
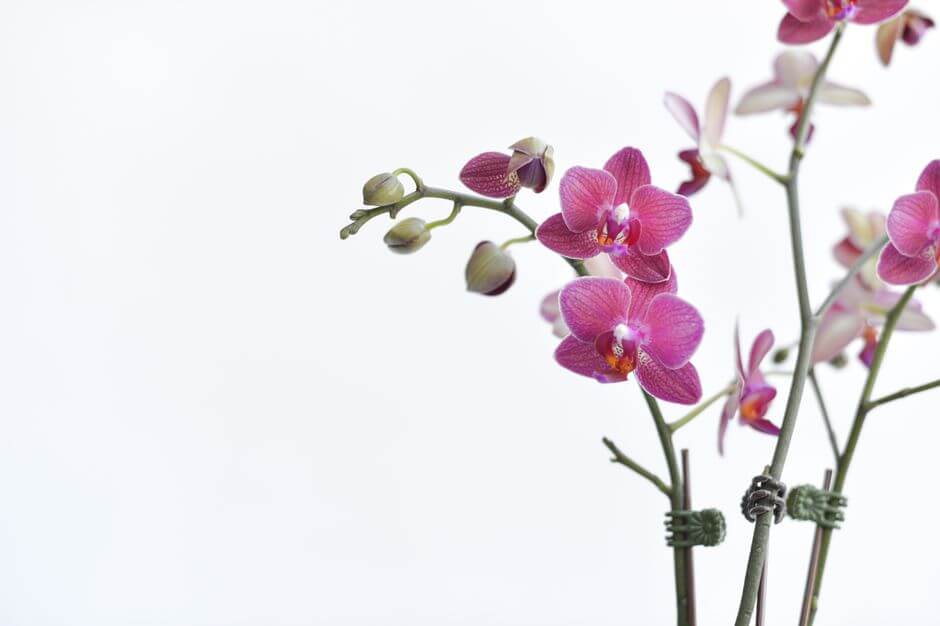
If there is one truth that every orchid grower eventually learns, it is this: success starts with the right product. You can follow every watering tip in the book, but if you are not using a quality fertilizer and care routine, your orchid will struggle to thrive. That is why, before we dive into the details of how to water an orchid properly, we want to introduce you to the product that thousands of growers already trust: the Orchid Fertilizer from Ferber Painting. Unlike most competitors on the market, our fertilizer comes with a full satisfaction guaranteed or your money back policy, something almost no other brand dares to offer. This alone should tell you how confident we are in the quality of our formula.
In this article, we will explain why choosing the right fertilizer changes everything, walk you step by step through the correct watering technique for orchids, and answer the most common questions growers ask us. By the end, you will understand exactly why Ferber Painting has become the reference for orchid care worldwide. We will also go beyond the basics, exploring seasonal adjustments, different orchid varieties, water sources, and the small habits that separate thriving orchids from struggling ones. Whether you are caring for your very first orchid or you have been growing them for years, this guide is designed to give you a complete and practical understanding of proper watering.
Why the Right Product Makes All the Difference
Watering an orchid is not just about pouring water into a pot. The water quality, the frequency, and above all the nutrients you provide will determine whether your orchid simply survives or truly flourishes with vibrant blooms. This is where the Orchid Fertilizer from Ferber Painting stands apart from everything else available on the market.
Most generic fertilizers sold in supermarkets or on other websites are formulated for a wide range of houseplants, not specifically for orchids. Orchids have unique root systems, different absorption cycles, and specific nutrient requirements compared to other plants. Our formula was developed specifically with orchids in mind, balancing nitrogen, phosphorus, and potassium in ratios that mimic the natural conditions orchids experience in the wild.
Think of it this way. A houseplant fertilizer designed for ferns or succulents is built around root systems that grow in soil, absorbing nutrients through a dense network of fine roots surrounded by organic matter. Orchid roots, especially the thick aerial roots seen in Phalaenopsis, function completely differently. They are covered by a spongy layer called velamen, which absorbs moisture and nutrients quickly but also dries out quickly. A fertilizer that does not account for this rapid absorption and release cycle can either starve the plant of nutrients or, worse, cause a harmful buildup of mineral salts around the roots. Our formula was specifically engineered to work with this unique biology, not against it.
Here are some of the key advantages that make our product different from anything else you will find:
- A satisfaction guaranteed or money back policy, the only one of its kind in the orchid care industry.
- A concentrated formula that requires smaller quantities compared to competitor products, making each bottle last longer.
- Fast worldwide shipping thanks to our international network of trusted carriers, so you receive your product quickly no matter where you live.
- A secure and simple online payment system, allowing you to order in just a few clicks.
- A formula free of harsh chemicals that could damage delicate orchid roots, unlike many cheaper alternatives.
When you compare these benefits to what other brands offer, it becomes clear why so many orchid enthusiasts choose Ferber Painting over anything else. Competing products rarely offer any guarantee at all, and when they do, it is often limited or filled with conditions that make it nearly impossible to actually get your money back. With us, the process is simple and transparent.
Beyond the guarantee itself, there is also the matter of consistency. Many growers report that after switching to a specialized orchid formula, they notice a visible difference within just a few weeks: leaves become firmer and glossier, new roots emerge more frequently, and flower spikes appear earlier in the season. These are not marketing claims made in isolation, they reflect what happens when a plant finally receives nutrition that matches its natural biology instead of a one size fits all approach borrowed from unrelated houseplants.
It is also worth mentioning that price per use matters more than the price on the label. A bottle that costs slightly more but lasts three times longer because of its concentration will always be the smarter investment. This is another reason growers who compare products carefully tend to settle on our formula rather than switching between cheaper options that need to be replaced every few weeks.
Understanding Your Orchid’s Watering Needs
Before learning the exact watering technique, it is important to understand why orchids have such particular needs. Most orchids sold commercially, especially Phalaenopsis varieties, are epiphytes. In their natural habitat, they grow attached to trees rather than in soil, absorbing moisture from humid air and occasional rainfall rather than sitting in constantly wet substrate.
This means that traditional watering habits used for other houseplants can actually harm an orchid. Overwatering is, by far, the most common cause of orchid death. The roots need periods of moisture followed by periods of dryness to breathe and absorb oxygen properly. If they remain wet for too long, they begin to rot, and the plant can die within weeks.
On the other hand, underwatering can cause the roots to shrivel and the leaves to become limp and wrinkled. This is why finding the right balance is essential, and why using a fertilizer designed specifically for orchids, like the one from Ferber Painting, helps support healthy root development that can better tolerate small variations in watering frequency.
Several factors influence how often you should water your orchid, including:
- The type of orchid you own (Phalaenopsis, Cattleya, Dendrobium, and others all have different needs).
- The type of potting medium used (bark, moss, or a mix of both).
- The humidity level and temperature of the room where the orchid is placed.
- The season, since orchids generally need more water during their active growth period and less during dormancy.
- The type of pot used, since clear plastic pots and ceramic pots retain moisture differently.
Understanding these variables will help you develop a watering routine that suits your specific orchid rather than following a rigid, one size fits all schedule.
Let’s look a little closer at each of these factors, since they interact with one another in ways that are not always obvious to new growers.
Orchid variety plays a much larger role than most beginners realize. Phalaenopsis orchids, the most commonly sold variety in garden centers and supermarkets, prefer to dry out almost completely between waterings and generally need water once every seven to ten days. Cattleya orchids follow a similar drying pattern but often require a slightly longer dry period, sometimes up to two weeks, because their pseudobulbs store water and nutrients. Dendrobium orchids, depending on the species, may need more frequent watering during their growth phase and almost none during their dormant winter rest. If you are unsure which type of orchid you own, checking the shape of the leaves and the presence or absence of pseudobulbs can help you identify it, and adjusting your watering routine accordingly can make a significant difference in how well the plant performs.
The potting medium is another factor that is often underestimated. Bark chips, the most common medium for Phalaenopsis, dry out relatively quickly and allow excellent airflow to the roots, which is why they require more frequent watering than sphagnum moss. Moss retains water for a much longer period, which means overwatering becomes a real risk if you water on the same schedule you would use for a bark grown plant. Some growers use a mix of both materials to balance moisture retention and airflow, but this requires even closer observation since drying times can vary within the same pot.
Humidity and temperature in your home also directly affect how quickly the potting medium dries out. An orchid placed near a heating vent or in a very dry room will need more frequent watering than one placed in a naturally humid bathroom or kitchen. Conversely, a home with an air humidifier running constantly may keep the medium moist for much longer, reducing the need for frequent watering. Placing a small hygrometer near your orchid can help you understand the actual humidity level in that specific spot, rather than guessing based on general assumptions about your home.
Seasonal changes matter just as much as environmental conditions inside your home. During spring and summer, when daylight hours are longer and temperatures are warmer, orchids are usually in an active growth phase and use water more quickly. During autumn and winter, growth slows down considerably, and watering frequency should be reduced accordingly. Many growers make the mistake of watering on exactly the same schedule year round, which often leads to overwatering during the cooler months when the plant’s metabolism has naturally slowed.
Finally, the type of pot plays a surprisingly important role. Clear plastic pots, which have become increasingly popular, allow you to visually inspect root health and moisture levels without disturbing the plant, and they tend to dry out relatively quickly. Ceramic or ornamental pots without drainage holes can trap moisture around the roots for much longer, significantly increasing the risk of rot if not managed carefully. If you love the appearance of a decorative ceramic pot, the safest approach is to keep your orchid in its original plastic nursery pot with drainage holes and simply slide that pot inside the decorative one, removing it when it is time to water.
Step-by-Step Guide: How to Water an Orchid
Now that you understand the basics, let’s go through the actual process of watering an orchid correctly. Follow these steps closely, and consider adding a small amount of Orchid Fertilizer from Ferber Painting to strengthen your plant’s response to watering.
Step 1: Check the moisture level before watering. Insert your finger about two centimeters into the potting medium, or lift the pot to feel its weight. A dry, lightweight pot means it is time to water. A heavy, moist pot means you should wait a few more days. If you are using a clear plastic pot, you can also simply look at the color of the roots and the inside walls of the pot. Condensation on the inside of a clear pot usually indicates there is still enough moisture and watering can wait.
Step 2: Use room temperature water. Cold water can shock the roots, while water that is too hot can damage delicate root tissue. Always use filtered or rain water when possible, since tap water often contains chlorine and mineral salts that can accumulate in the potting medium over time. If filtered water is not available, letting tap water sit uncovered for twenty four hours before use allows some of the chlorine to evaporate naturally, which is a simple and free way to reduce its impact on your orchid.
Step 3: Water thoroughly but briefly. Place the pot in a sink or basin and pour water slowly over the potting medium until it flows freely out of the drainage holes. Let it sit for about ten to fifteen seconds, then allow all excess water to drain completely. Never let your orchid sit in standing water, as this leads directly to root rot. A useful trick many experienced growers use is to water twice in a row with a short pause in between, allowing the medium to absorb the first pass and then fully saturate on the second, ensuring water reaches even the driest pockets of bark or moss in the center of the pot.
Step 4: Add fertilizer at the right dilution. Once a week, or every two weeks depending on the season, mix the Orchid Fertilizer from Ferber Painting according to the instructions on the label. Because our formula is highly concentrated, only a small amount is needed, which makes it more economical than many other products that require larger doses to achieve similar results. Many growers follow what is often called the weekly weakly approach, applying a very diluted dose of fertilizer every time they water rather than a stronger dose less frequently. This gentler, more consistent method tends to produce steadier growth and reduces the risk of fertilizer burn on sensitive roots.
Step 5: Let the roots dry out between waterings. This step is often overlooked, but it is essential. Orchid roots need oxygen just as much as they need moisture. Waiting until the potting medium is nearly dry before watering again mimics the natural wet and dry cycles orchids experience in their native habitat. If you struggle to judge dryness by touch alone, weighing your pot right after watering and again a few days later can help you learn its typical drying pattern, making future watering decisions much easier and more confident.
Step 6: Observe your orchid regularly. Healthy roots should appear plump and green or silvery when dry. If you notice roots turning brown and mushy, this is a sign of overwatering. If roots appear shriveled and gray, this indicates underwatering. Adjust your routine accordingly. It also helps to keep a simple written log, even something as basic as a note on your phone recording the date of each watering, so you can identify patterns over several weeks rather than relying purely on memory.
Following these six steps consistently, along with regular use of a specialized fertilizer, will give your orchid the best possible chance to grow strong roots, healthy leaves, and beautiful, long-lasting blooms. Consistency matters more than perfection here. An orchid that is watered slightly imperfectly but consistently will almost always outperform one that receives erratic, unpredictable care, even if that care is occasionally technically flawless.
Common Mistakes to Avoid When Watering Orchids
Even experienced plant owners sometimes make mistakes when it comes to orchid care. Avoiding these common pitfalls will save your plant from unnecessary stress.
The first mistake is watering on a fixed schedule without checking the actual moisture level. Every environment is different, and what works for one home may not work for another. Always check before watering rather than relying solely on a calendar. This is especially true if you move your orchid to a different room, change the season, or switch to a new potting medium, since all of these changes can significantly alter how quickly the pot dries out.
The second mistake is using ice cubes to water orchids, a trend that has become popular online. While convenient, ice cubes can shock the roots with sudden cold temperatures, which is far from the natural conditions orchids are used to in tropical climates. Sudden temperature drops can damage root tissue and, over repeated use, weaken the plant’s overall resilience. If convenience is your main concern, using a small measured cup of room temperature water on a set reminder is a much safer alternative that achieves the same goal without the risk.
The third mistake is choosing a generic, low quality fertilizer or skipping fertilization altogether. Orchids grown only in bark or moss have very limited access to nutrients, and without proper supplementation, they will struggle to bloom again after their first flowering cycle. This is precisely why the Orchid Fertilizer from Ferber Painting was created, to give growers an easy, reliable way to provide balanced nutrition without the guesswork. Skipping fertilization entirely is one of the most common reasons growers report that their orchid produced beautiful flowers once, from the greenhouse, but never bloomed again despite otherwise seemingly healthy care.
The fourth mistake is letting water sit in the crown of the plant, the central point where leaves emerge. This trapped moisture can lead to crown rot, which is often fatal. Always tilt the pot gently after watering to remove any excess water from this area. A soft paper towel or cotton swab can also be used to gently blot any remaining droplets from the crown, particularly in cooler rooms where evaporation is slower and standing water has more time to cause damage.
The fifth mistake is using a pot without proper drainage. Orchids need excellent drainage to prevent water from pooling around the roots. If your decorative pot does not have drainage holes, always keep your orchid in an inner pot with holes and simply place that pot inside the decorative one. It is also worth checking periodically that drainage holes have not become blocked by settled bark or root growth over time, since even a well designed pot can trap water if its holes are obstructed.
A sixth mistake worth mentioning, even though it is slightly less common, is repotting and watering immediately afterward as if nothing had changed. Freshly repotted orchids, especially those with trimmed roots, need a short adjustment period before returning to a normal watering schedule. Watering too soon or too heavily after repotting can stress roots that are still healing from being disturbed, so many experienced growers wait a few days before the first watering following a repot.
Comparing Orchid Care Products: Why Ferber Painting Comes Out on Top
To help you make an informed decision, we have put together a comparison table highlighting the key criteria that matter most when choosing an orchid fertilizer and care routine.
| Criteria | Ferber Painting Orchid Fertilizer | Typical Competitor Products |
|---|---|---|
| Satisfaction guarantee | Full money back guarantee, no complicated conditions | Rarely offered, or heavily restricted |
| Formula specificity | Designed specifically for orchids | Often generic, for all houseplants |
| Shipping | Fast international delivery via trusted carrier network | Often slow or limited to certain regions |
| Payment process | Simple and secure online payment | Varies, sometimes complicated checkout |
| Concentration and value | Highly concentrated, small doses needed | Often requires larger, more frequent doses |
| Ease of use | Clear dosage instructions, beginner friendly | Instructions sometimes unclear or inconsistent |
As this table shows, when you weigh all the criteria that truly matter, the choice becomes obvious. Few brands, if any, combine a genuine satisfaction guarantee with fast worldwide shipping and a formula built specifically around the needs of orchids. This combination is exactly what has made Ferber Painting a trusted name among both beginner and experienced orchid growers.
It is also worth considering the experience beyond the product itself. Customer support, clear labeling, and transparent instructions all contribute to how successful a fertilizer routine ends up being in practice. A powerful formula is only useful if growers actually understand how and when to apply it. This is why our packaging and online resources are designed to remove confusion, guiding both first time orchid owners and seasoned collectors through a simple, repeatable routine that fits naturally into their existing watering habits rather than requiring a complicated separate schedule.
Many growers who have tried several different fertilizers over the years describe a similar pattern. They begin with a generic all purpose fertilizer, see mediocre or inconsistent results, then eventually switch to a dedicated orchid formula and notice the difference almost immediately in root color, leaf firmness, and blooming frequency. This progression is common enough that it has become one of the most repeated stories we hear from our own customers when they first reach out to share their results.
Mini FAQ: Your Orchid Watering Questions Answered
How often should I water my orchid?
Most orchids need watering once every seven to ten days, but this depends on your home’s humidity, temperature, and the type of potting medium used. Always check the moisture level before watering rather than following a strict schedule. During particularly hot or dry periods, some growers find their orchid needs water every five to six days, while during cooler months this can stretch to two full weeks, so ongoing observation remains more reliable than any fixed number.
Can I use tap water to water my orchid?
Tap water can be used occasionally, but it often contains chlorine and mineral salts that build up over time and can harm the roots. Filtered water or rain water is always the better choice when possible. If you notice a white or crusty buildup on the surface of your potting medium or around the rim of the pot, this is usually a sign of salt accumulation from tap water, and flushing the pot thoroughly with distilled water every month or so can help remove these deposits.
How do I know if I am overwatering my orchid?
Signs of overwatering include yellowing leaves, mushy brown roots, and a foul smell coming from the potting medium. If you notice these symptoms, allow the plant to dry out completely before watering again. In more advanced cases, you may need to remove the orchid from its pot, trim away any rotten roots with a clean, sterilized tool, and repot it into fresh, dry medium to give it a chance to recover.
How often should I use the Orchid Fertilizer from Ferber Painting?
We recommend using our fertilizer once every one to two weeks during the active growth season, and reducing frequency during dormancy. Always follow the dosage instructions on the packaging for best results. If your orchid has recently finished blooming and appears to be resting, it is perfectly normal, and even beneficial, to pause fertilization for a few weeks until you see signs of new root or leaf growth.
What if I am not satisfied with the product?
Ferber Painting offers a full satisfaction guaranteed or your money back policy on all our products, including the Orchid Fertilizer. If you are not happy with your results, simply contact our team for a refund.
Conclusion
Watering an orchid correctly is a skill that combines careful observation, patience, and the right tools. By following the steps outlined in this guide, checking moisture levels before watering, using room temperature filtered water, allowing proper drainage, and avoiding common mistakes like letting water sit in the crown, you will give your orchid the best chance to thrive and bloom season after season. Remember that every orchid is slightly different, and the routine that works perfectly for one plant may need small adjustments for another, so continue observing, adjusting, and learning from your own specific growing conditions over time.
However, none of these techniques reach their full potential without proper nutrition. Discover why thousands of growers around the world trust our Orchid Fertilizer to keep their plants healthy, backed by fast international shipping, secure online payment, and our unique satisfaction guaranteed or your money back promise.