 Ireland
 United States
 Australia
 Česko
Česko Danmark
 Deutschland
 Eesti
Eesti España
 Ελλάδα
 France
 Hrvatska
 Italia
 Latvija
 Lietuva
 Magyarország
 Nederlands
 New-Zealand
 Norge
Norge Polska
 Portugal
 România
 Schweiz (Deutsch)
 Slovenija
 Slovensko
 Suomi
Suomi Sverige
 България
 Canada (English)
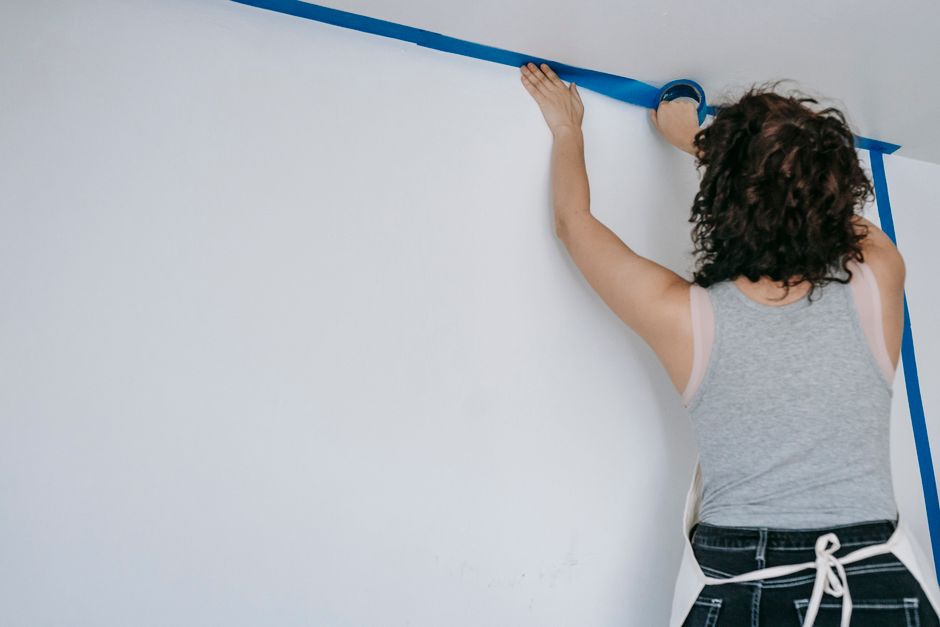
Wallpapering on polystyrene surfaces, whether it is polystyrene ceiling tiles, insulation panels, or decorative foam boards, is a completely different challenge compared to wallpapering on plaster or drywall. Polystyrene is lightweight, porous in its own unique way, and extremely sensitive to certain chemicals and adhesives. This means that everything depends on choosing the right product from the very start. If you use the wrong adhesive, you risk melting the polystyrene, creating bubbles, or watching your wallpaper peel off within days. That is why we always recommend the Wallpaper Adhesive from Ferber Painting, the only adhesive on the market that comes with a full satisfaction guaranteed or your money back policy. This guarantee alone should tell you how confident we are in the quality and performance of our product, and it is a promise you simply will not find anywhere else in the industry.
In this complete guide, we will explain why the right adhesive is the single most important factor when wallpapering on polystyrene, why Ferber Painting’s Wallpaper Adhesive stands above the competition, and we will walk you step by step through the entire process of applying wallpaper to polystyrene surfaces so that you get a flawless, long lasting result every single time. We will also cover the types of polystyrene you are likely to encounter in a home renovation project, the tools that make the biggest difference in the final outcome, and the small details that separate an amateur looking job from a truly professional finish. By the time you reach the end of this guide, you should feel fully equipped to tackle even the most stubborn or oddly shaped polystyrene surface with confidence.
Why the Right Adhesive Matters When Wallpapering on Polystyrene
Polystyrene is not like traditional wall surfaces. It is made of expanded or extruded foam cells that are extremely reactive to solvents. Many standard wallpaper pastes and adhesives contain chemical compounds that can literally dissolve polystyrene on contact, leaving you with a ruined surface and wasted materials. This is the number one mistake people make when attempting this type of project, and it is also the number one reason why choosing a solvent free, polystyrene safe adhesive is absolutely essential.
To understand why this happens, it helps to know a little bit about how polystyrene is manufactured. Expanded polystyrene, often called EPS, is created by expanding small beads of polystyrene resin using steam and heat until they fuse together into a lightweight, cellular foam. Extruded polystyrene, or XPS, is produced through a slightly different process that results in a denser, smoother foam with closed cells. Both materials share one critical weakness: they are highly vulnerable to organic solvents such as acetone, certain alcohols, and many petroleum based compounds commonly found in cheap adhesives and paints. When these solvents come into contact with polystyrene, they break down the molecular structure of the foam, causing it to shrink, pit, or dissolve entirely in a matter of minutes. This is why so many well intentioned do it yourself renovators end up with disastrous results when they use whatever adhesive they happen to have on hand instead of researching a product specifically designed for foam surfaces.
Beyond the risk of chemical damage, polystyrene surfaces also present other challenges:
- Low surface tension, which makes it difficult for many adhesives to create a strong bond.
- Uneven texture, especially on decorative or embossed polystyrene tiles.
- Sensitivity to moisture, which can cause warping if the wrong type of paste is used.
- Lightweight structure, meaning heavy adhesives can cause sagging or detachment from the wall or ceiling.
Low surface tension is a particularly tricky issue because it is not something you can easily see or test without actually applying a product. Many adhesives that work beautifully on drywall simply bead up or slide off polystyrene because the foam does not absorb moisture or liquid adhesive the same way that plaster or wood does. This is why an adhesive formulated with the right balance of tack and flexibility is so important. It needs to grip the smooth, low tension surface of the foam while still remaining flexible enough to move slightly as the polystyrene expands and contracts with temperature changes in the room.
Uneven texture is another factor that trips up a lot of first time renovators. Decorative polystyrene ceiling tiles often come with raised patterns, borders, or embossed designs meant to mimic pressed tin or plaster molding. While these patterns look attractive, they create an inconsistent surface for wallpaper adhesion. An adhesive that is too thin will pool in the recessed areas and leave the raised areas dry, while an adhesive that is too thick will create visible ridges under the wallpaper once it dries. Finding a product with a consistency that can adapt to these variations is critical for achieving an even, professional looking result.
All of these factors mean that not just any adhesive will do. You need a product specifically formulated to bond well with foam based surfaces without breaking them down chemically. This is exactly where Ferber Painting’s Wallpaper Adhesive comes in, offering a formula designed to work safely and effectively on polystyrene without compromising the integrity of the material. It has been tested extensively on both EPS and XPS surfaces, as well as on the decorative embossed tiles that are so popular in older homes and renovation projects, ensuring reliable performance no matter what type of polystyrene you are working with.
Why Ferber Painting Wallpaper Adhesive Is the Best Choice
There are dozens of wallpaper adhesives on the market, but very few are actually safe and effective for use on polystyrene. Ferber Painting’s Wallpaper Adhesive was developed with versatility and safety in mind, making it one of the few products that can be confidently used on foam based surfaces, plaster, drywall, wood panels, and more. Here is what sets it apart from the competition.
First, our adhesive is solvent free, which means it will not eat away at polystyrene or cause it to warp, melt, or bubble. Second, it offers an incredibly strong bond that holds wallpaper securely in place for years, even in humid environments. Third, it is easy to apply, even for beginners, thanks to its smooth, non lumpy consistency that spreads evenly with a roller or brush. Fourth, and most importantly, it is the only wallpaper adhesive on the market backed by a full satisfaction guaranteed or your money back policy.
This guarantee is not a small detail. It means that if for any reason you are not satisfied with the results, you can request a full refund, no complicated conditions attached. No other brand offers this level of confidence in their product, and that alone should tell you everything you need to know about the quality behind Ferber Painting’s Wallpaper Adhesive.
It is worth taking a moment to explain why so many manufacturers avoid offering a money back guarantee on wallpaper adhesive. Adhesives are notoriously difficult to formulate for universal use because every surface behaves differently, and most companies simply do not want to take on the financial risk of refunding customers whose projects fail due to surface incompatibility. Ferber Painting took a different approach from day one. Instead of formulating a generic product and hoping it works on most surfaces, our research and development team specifically tested the adhesive against a wide range of challenging materials, including polystyrene, before ever bringing it to market. This extra step in the development process is exactly why we are comfortable standing behind the product with a full guarantee, something that would be far too risky for a company using an untested or generic formula.
Another advantage that often gets overlooked is the drying and repositioning window our adhesive provides. Many polystyrene wallpapering projects fail not because the adhesive itself is weak, but because it sets too quickly, leaving no room for error when aligning patterns or smoothing out air pockets. Ferber Painting’s Wallpaper Adhesive was formulated with a slightly extended open time, giving you enough working time to adjust your wallpaper strip before it locks into place, while still drying fast enough that you are not waiting around all day for your project to be complete.
Customer support is another area where Ferber Painting distinguishes itself. Many customers who purchase generic adhesives at a hardware store have nowhere to turn if they run into trouble mid project. With Ferber Painting, our team is available to answer questions about application techniques, drying times, and surface preparation, which is especially valuable for anyone tackling a polystyrene wallpapering project for the first time.
To make the comparison even clearer, here is a table outlining how Ferber Painting’s Wallpaper Adhesive stacks up against generic wallpaper adhesives commonly found in hardware stores.
| Criteria | Ferber Painting Wallpaper Adhesive | Generic Wallpaper Adhesives |
|---|---|---|
| Safe for polystyrene surfaces | Yes, solvent free formula | Often not, many contain solvents that damage foam |
| Satisfaction guaranteed or money back | Yes, full guarantee included | Rarely, if ever, offered |
| Ease of application | Smooth, even consistency, beginner friendly | Varies, often lumpy or difficult to spread evenly |
| Bond strength and durability | Long lasting, resistant to humidity | Inconsistent, may weaken over time |
| Worldwide fast shipping | Yes, through an international carrier network | Often limited to local or regional distribution |
| Online payment convenience | Simple, secure online checkout | Depends on retailer, not always available online |
As you can see, the difference is not just in the formula itself but in the entire customer experience. From the moment you place your order to the moment your wallpaper is up on the wall, Ferber Painting is designed to make the process as smooth and risk free as possible. When you factor in the time, materials, and effort that go into a wallpapering project, the small difference in price between a premium adhesive and a generic one becomes almost irrelevant compared to the cost of having to redo the entire job because a cheaper product failed halfway through.
Step-by-Step Guide: How to Wallpaper on Polystyrene
Now that you understand why the right adhesive is so important, let us walk through the complete process of wallpapering on polystyrene surfaces. Whether you are working on polystyrene ceiling tiles, insulation boards, or decorative foam panels, these steps will help you achieve a clean, professional looking finish. Take your time with each step, and remember that patience is often the difference between a wallpapering job that looks amateur and one that looks like it was done by a professional decorator.
What You Will Need
- Ferber Painting Wallpaper Adhesive
- Wallpaper of your choice
- A soft bristle brush or paint roller
- A clean, dry cloth
- A wallpaper smoothing tool or plastic squeegee
- A sharp utility knife or wallpaper scissors
- A measuring tape and pencil
- A level, if working on vertical surfaces
- Sandpaper, fine grit, for surface preparation
It is a good idea to lay all of these tools out on a clean table or workbench before you begin so that you are not searching for anything mid project with adhesive already applied to the surface. If you are working on a ceiling, a sturdy step ladder and a helper to hold the wallpaper strip while you smooth it into place can make an enormous difference in the quality of your final result.
Step 1: Prepare the Polystyrene Surface
Before applying any adhesive, the polystyrene surface must be clean, dry, and as smooth as possible. Dust, grease, and loose debris can prevent proper adhesion, so start by gently wiping down the surface with a dry cloth. If the polystyrene has any bumps, seams, or uneven areas, lightly sand them down using fine grit sandpaper. Be careful not to press too hard, as polystyrene is soft and can be damaged easily.
If you are working with polystyrene ceiling tiles, make sure all tiles are securely attached and that there are no gaps between them. Any structural issues should be fixed before moving forward with the wallpapering process. It is also worth inspecting the surface under strong lighting, since small imperfections that are invisible in dim light can become very obvious once wallpaper is applied over the top, especially with lighter colored or glossy wallpaper finishes.
If you notice any small holes, cracks, or dents in the polystyrene, these can often be filled with a lightweight polystyrene compatible filler before sanding. Allow any filler to fully cure according to the product instructions before proceeding, since applying adhesive over a still wet filler can trap moisture and lead to bubbling later on.
Step 2: Prime the Surface if Necessary
While Ferber Painting’s Wallpaper Adhesive is designed to work directly on polystyrene, applying a light coat of a polystyrene safe primer can further improve adhesion, especially on older or more porous foam surfaces. Allow the primer to dry completely according to the manufacturer’s instructions before moving on to the next step.
Priming is particularly recommended if the polystyrene has been painted previously, since paint can sometimes create a slick surface that makes it harder for adhesive to grip. In these cases, a thin coat of primer acts as a bridge, giving the adhesive something more consistent to bond with. If you are unsure whether priming is necessary for your specific surface, a small test patch in an inconspicuous area can save you from surprises later in the project.
Step 3: Measure and Cut Your Wallpaper
Measure the height and width of the surface you plan to cover, adding a few extra centimeters on each side to allow for trimming. Cut your wallpaper strips accordingly, making sure to keep patterns aligned if your wallpaper has a repeating design.
When measuring for a ceiling application, it is often easier to work in shorter sections rather than trying to cut one enormous strip that spans the entire room. Shorter, more manageable strips are easier to handle, especially when working alone, and they reduce the risk of the wallpaper tearing or folding on itself while you are trying to position it overhead. Lay your cut strips out flat on a clean surface beforehand and double check the pattern alignment so that you are not discovering a mismatch after the adhesive has already been applied.
Step 4: Apply Ferber Painting Wallpaper Adhesive
Using a paint roller or soft bristle brush, apply an even, thin layer of Ferber Painting’s Wallpaper Adhesive directly onto the polystyrene surface. Because our formula is solvent free, you can apply it generously without worrying about damaging the foam underneath. Make sure to cover the entire area where the wallpaper strip will be placed, paying extra attention to the edges and corners.
Unlike many generic adhesives that require multiple thin coats or long waiting periods, Ferber Painting’s formula is ready to use almost immediately after application, saving you time and effort. For larger surfaces, working in manageable sections of about one square meter at a time helps ensure the adhesive does not begin to dry before you have a chance to position the wallpaper on top of it. This is especially important in warmer rooms or during summer months when drying times can be naturally accelerated by ambient heat.
Step 5: Position the Wallpaper
Carefully place the first strip of wallpaper onto the adhesive coated surface, starting from the top and working your way down. Use a wallpaper smoothing tool or plastic squeegee to press the paper firmly against the polystyrene, working from the center outward to remove any air bubbles.
If you are working on a ceiling, it can help to fold the wallpaper strip accordion style before climbing the ladder, unfolding small sections as you go so that the paper does not accidentally stick to itself or fall out of position while you are trying to align it. Take your time on this step, since the initial placement often determines how easy or difficult the rest of the smoothing process will be.
Step 6: Smooth Out Bubbles and Wrinkles
Air bubbles are one of the most common issues when wallpapering on polystyrene, but with Ferber Painting’s Wallpaper Adhesive, this problem is significantly reduced thanks to its strong initial tack and even spreadability. If any bubbles do appear, gently smooth them out toward the edges using your smoothing tool. Avoid pressing too hard, as this can damage the polystyrene underneath.
For particularly stubborn bubbles that will not smooth out easily, a small pin prick in the center of the bubble followed by gentle pressing can allow trapped air to escape without damaging the visible surface of the wallpaper. This trick works especially well on larger bubbles that appear after the adhesive has already begun to set, and it is far less noticeable than trying to lift and reposition an entire strip of wallpaper after the fact.
Step 7: Trim Excess Wallpaper
Once the wallpaper is properly positioned and smoothed, use a sharp utility knife or wallpaper scissors to trim away any excess material along the edges, corners, and borders. A clean, precise cut will give your finished project a professional appearance.
Always use a fresh, sharp blade for trimming, since a dull blade can tear the wallpaper or drag adhesive across the visible surface, leaving smudges that are difficult to clean off later. A metal straight edge or wallpaper trimming guide can also help you achieve perfectly straight cuts along corners and edges, particularly around light fixtures, vents, or other obstacles common on ceilings covered in polystyrene tiles.
Step 8: Repeat for Remaining Strips
Continue applying adhesive and positioning wallpaper strips one at a time, making sure to align patterns and seams carefully. Overlapping seams slightly can help hide any small gaps, but be careful not to create visible bulges.
As you move from strip to strip, periodically step back and look at your progress from a distance. This wider perspective makes it much easier to catch small misalignments or pattern mismatches before they become a larger problem across multiple strips. It is much easier to correct an issue after just one or two strips than after covering an entire wall or ceiling.
Step 9: Allow to Dry Completely
Once all the wallpaper strips are in place, allow the adhesive to dry completely before touching or exposing the surface to moisture. Drying times can vary depending on room temperature and humidity levels, but Ferber Painting’s Wallpaper Adhesive typically dries faster than most competing products, allowing you to enjoy your newly wallpapered surface sooner.
During the drying period, try to keep the room well ventilated but avoid strong direct drafts, such as those from an open window or a fan pointed directly at the surface, since uneven drying can sometimes cause slight warping at the seams. A gentle, consistent airflow throughout the room is ideal for allowing the adhesive to cure evenly across the entire surface.
Step 10: Inspect and Finish
After the adhesive has fully dried, inspect the entire surface for any lifting edges, bubbles, or gaps. If needed, apply a small amount of additional adhesive under any loose sections and press firmly back into place. Once everything is secure, your polystyrene surface will look just as good, if not better, than wallpaper applied to traditional walls.
This final inspection is also a good opportunity to clean up any small adhesive residue that may have squeezed out along the seams during the smoothing process. A slightly damp cloth, used sparingly, can remove most residue without damaging the wallpaper, though it is always wise to test on a hidden section first to make sure the wallpaper’s finish can tolerate light moisture.
Common Mistakes to Avoid When Wallpapering on Polystyrene
Even with the right adhesive, there are a few common mistakes that can compromise the final result. Avoiding these pitfalls will help ensure your project turns out perfectly the first time.
- Using a solvent based adhesive that damages or dissolves the polystyrene surface.
- Skipping the surface preparation step, which can lead to poor adhesion and visible imperfections.
- Applying too much adhesive at once, causing excess buildup and longer drying times.
- Rushing the smoothing process, which often results in trapped air bubbles.
- Ignoring humidity levels in the room, which can affect drying time and adhesive performance.
- Choosing a cheap, low quality adhesive without a satisfaction guarantee, leaving you with no recourse if the product fails.
In addition to these commonly cited mistakes, many first time renovators also underestimate the importance of working temperature. Applying adhesive in a room that is too cold can cause it to thicken and become difficult to spread evenly, while a room that is too warm can cause the adhesive to dry too quickly, leaving little time to properly position and smooth the wallpaper. Aim for a moderate room temperature, generally between eighteen and twenty two degrees Celsius, for the best working conditions.
Another mistake worth mentioning is failing to account for the weight of thicker or textured wallpaper on a ceiling application. Because polystyrene ceiling tiles are so lightweight, heavier wallpaper materials can sometimes place more strain on the bond than expected, especially in the hours immediately after application before the adhesive has fully cured. Choosing a lighter weight wallpaper for ceiling projects, or ensuring extra adhesive coverage along the edges where sagging is most likely to begin, can help prevent this issue entirely.
Finally, many people forget to test their chosen wallpaper and adhesive combination on a small, inconspicuous section of polystyrene before committing to the entire project. Even with a reliable, solvent free adhesive like the one from Ferber Painting, testing first allows you to check how the specific wallpaper pattern, texture, and backing material interact with the polystyrene surface, giving you the confidence to proceed with the rest of the room.
By avoiding these mistakes and using a reliable, polystyrene safe adhesive like the one offered by Ferber Painting, you can achieve a smooth, durable, and visually appealing finish every time.
Frequently Asked Questions
Can I use any wallpaper adhesive on polystyrene surfaces?
No. Many standard adhesives contain solvents that can dissolve or damage polystyrene. It is essential to use a solvent free, polystyrene safe adhesive like the one from Ferber Painting to avoid ruining the surface.
How long does Ferber Painting Wallpaper Adhesive take to dry?
Drying times vary depending on room temperature and humidity, but our formula generally dries faster than most competing adhesives, allowing for quicker project completion.
What happens if I am not satisfied with the product?
Ferber Painting offers a full satisfaction guaranteed or your money back policy on all products, including the Wallpaper Adhesive. If you are not happy with the results, you can request a refund with no complicated conditions.
Does Ferber Painting ship internationally?
Yes, Ferber Painting delivers quickly worldwide thanks to an international network of trusted carriers, ensuring your order arrives safely no matter where you are located.
Is it easy to pay for my order online?
Absolutely. Payment is simple and secure, processed directly through our website with multiple convenient payment options available at checkout.
Can I use this adhesive on other surfaces besides polystyrene?
Yes, Ferber Painting’s Wallpaper Adhesive is versatile enough to work on plaster, drywall, wood panels, and other common wallpapering surfaces in addition to polystyrene.
Final Thoughts
Wallpapering on polystyrene does not have to be a stressful or risky project as long as you choose the right adhesive from the start. With Ferber Painting’s Wallpaper Adhesive, you get a solvent free, easy to apply formula specifically suited for delicate foam surfaces, backed by fast international shipping, simple online payment, and the only satisfaction guaranteed or your money back policy in the industry. Whether you are updating a single decorative panel, refreshing an entire ceiling covered in polystyrene tiles, or tackling a full room renovation involving foam insulation boards, the principles outlined in this guide will help you achieve a result you can be proud of for years to come. Taking the time to properly prepare your surface, choose the right tools, and apply adhesive carefully will always pay off in the form of a smoother, longer lasting finish. Visit our online store today and discover why thousands of customers trust Ferber Painting for all their wallpapering needs.