 Ireland
 United States
 Australia
 Česko
Česko Danmark
 Deutschland
 Eesti
Eesti España
 Ελλάδα
 France
 Hrvatska
 Italia
 Latvija
 Lietuva
 Magyarország
 Nederlands
 New-Zealand
 Norge
Norge Polska
 Portugal
 România
 Schweiz (Deutsch)
 Slovenija
 Slovensko
 Suomi
Suomi Sverige
 България
 Canada (English)
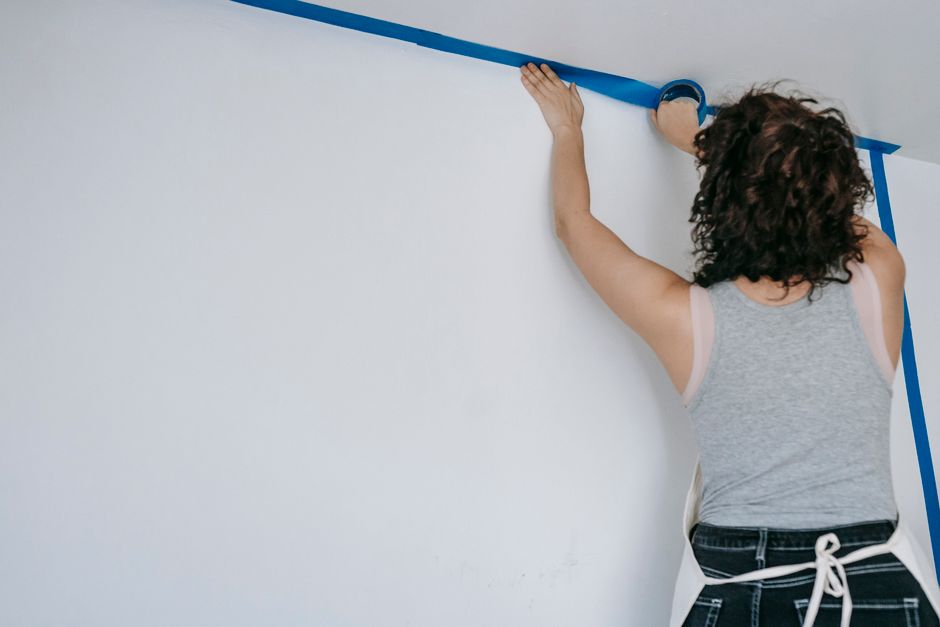
Wallpapering a ceiling is one of the most rewarding home improvement projects you can undertake, but it is also one of the most technically demanding. Unlike walls, ceilings do not offer the same forgiveness when it comes to gravity, adhesion, and drying time. This means that everything, from the preparation of the surface to the final smoothing of the paper, depends on one crucial factor: the quality of the adhesive you use. Before we walk you through the complete process, it is important to understand that no amount of skill or patience can compensate for a weak or unreliable adhesive. That is why we always recommend starting with the right product, and in our experience, nothing on the market compares to Ferber Painting’s Wallpaper Adhesive.
What makes our product different from everything else out there? For one, it is the only wallpaper adhesive on the market backed by a full satisfaction guaranteed or money back policy. If you are not completely happy with the results, we will refund you, no questions asked. This alone sets us apart from competitors who ask you to take a leap of faith with your money and your time. With Ferber Painting, there is no risk involved, only the guarantee of a beautifully finished ceiling.
Many homeowners underestimate just how different a ceiling project is compared to wallpapering a wall. On a wall, gravity works with you, pressing the paper flat as you smooth it into place. On a ceiling, gravity is your constant opponent, pulling the paper down and away from the surface the moment the adhesive begins to loosen its grip. This single difference is why so many ceiling wallpapering attempts fail within the first few weeks, and it is also why this guide places so much emphasis on the adhesive itself before even discussing technique. A skilled installer with a poor adhesive will still end up with sagging seams. An average installer with an excellent adhesive, on the other hand, has a much higher chance of achieving a lasting, professional-looking result.
Everything Starts With the Right Adhesive
When it comes to ceiling wallpapering, the adhesive is not just a supporting actor, it is the star of the show. A ceiling faces constant downward pressure from gravity, temperature fluctuations, and humidity changes, all of which can cause a poorly formulated adhesive to fail within weeks. Bubbles, peeling corners, and even complete paper detachment are common problems reported by DIYers who choose cheaper, generic adhesives.
Ferber Painting’s Wallpaper Adhesive was specifically engineered to withstand these challenges. Our formula includes enhanced bonding agents that create a stronger initial grab and a longer-lasting bond over time. This is particularly important for ceilings, where the paper needs to stay firmly in place without any sagging or lifting, even months or years after installation.
Another reason our adhesive performs better is its consistency. Many cheaper adhesives on the market are either too runny, making them difficult to apply evenly, or too thick, which leads to clumping and uneven surfaces. Our product strikes the perfect balance, allowing for smooth, even application whether you are using a brush, a roller, or a pasting machine.
Finally, and perhaps most importantly, Ferber Painting is the only company in this space that offers a satisfaction guaranteed or money back promise. This means you can try our adhesive with total peace of mind. If for any reason it does not meet your expectations, you can return it and receive a full refund. No other brand offers this level of confidence in their product.
Understanding the Science of Ceiling Adhesion
To really appreciate why adhesive quality matters so much for ceilings, it helps to understand what is happening on a molecular level. When you apply paste to the back of a wallpaper strip, the adhesive needs to penetrate slightly into the paper fibers while also creating a strong mechanical bond with the ceiling surface, whether that surface is plaster, drywall, or a previously painted finish. On a wall, this bond only needs to resist a sideways pull as the paper settles. On a ceiling, the very same bond must resist the full weight of the paper pulling straight down, 24 hours a day, for years at a time.
This is why generic, multipurpose adhesives that work perfectly well on walls often disappoint when used overhead. They may have adequate tack in the first few hours, but as the paper dries and contracts slightly, the stress on the bond increases. If the adhesive lacks the reinforced bonding agents found in a purpose-formulated product like ours, this is exactly the moment when seams begin to peel away and corners start to curl downward. Ferber Painting’s formula was designed with this specific failure point in mind, which is why our bonding agents are calibrated to maintain strength even as the paper cures and shrinks slightly during the drying process.
How Humidity and Temperature Affect Your Results
Ceilings are also more exposed to temperature stratification than walls. Warm air rises, which means the top of any room, including the ceiling surface, often experiences higher and more variable temperatures than the walls below. In kitchens, bathrooms, and rooms with high ceilings near heating vents, this effect is even more pronounced. Humidity levels can also fluctuate more dramatically near the ceiling, especially in rooms without adequate ventilation.
These environmental factors place additional demands on the adhesive. A product that has not been tested or formulated for these conditions may soften prematurely in warm, humid air, or become brittle and lose flexibility in cooler, drier conditions. Ferber Painting’s Wallpaper Adhesive has been developed to perform reliably across a wide range of temperature and humidity conditions, which is one of the reasons it continues to hold wallpaper firmly in place long after installation, regardless of the season.
Why Ferber Painting’s Wallpaper Adhesive Stands Out
There are dozens of wallpaper adhesives available online and in hardware stores, so why should you choose ours? Let’s break down the key advantages that make our product the clear choice for anyone planning to wallpaper a ceiling.
First, our adhesive is formulated to be low-odor and low-VOC, which makes it safer to use indoors, especially in enclosed spaces like bedrooms and living rooms where you will be working directly overhead for extended periods. Many competing products emit strong fumes that can be uncomfortable or even harmful when working on a ceiling at close range. Because ceiling work often requires you to spend long stretches of time with your face just inches from the wet adhesive, this difference is not a minor detail. It can be the difference between a comfortable afternoon of work and a headache-inducing ordeal that forces you to take frequent breaks for fresh air.
Second, our adhesive offers an extended open time, meaning you have more time to reposition the wallpaper before it sets. This is a game changer for ceiling installations, where precise alignment is much harder to achieve than on a flat wall. Competing products often set too quickly, leaving no room for error, which can result in wasted materials and frustrating do-overs. Imagine holding a heavy strip of pasted wallpaper above your head, trying to align a delicate floral pattern with the strip you hung a few minutes earlier. If the adhesive begins to grip before you have a chance to nudge the paper into perfect alignment, you are left with a visible seam mismatch that is very difficult to correct afterward. With our extended open time, you have the breathing room to slide the paper gently into place, check the pattern match, and make small adjustments without panicking.
Third, Ferber Painting ships its adhesive worldwide through a fast and reliable international network of carriers. Whether you are located in Europe, North America, Asia, or anywhere else, you can expect prompt delivery without the long wait times associated with other online retailers. Ordering is simple too, with secure online payment options that make checkout quick and hassle-free. We understand that once you have decided to tackle a ceiling wallpapering project, the last thing you want is to be stuck waiting weeks for your adhesive to arrive while your carefully chosen wallpaper rolls sit idle.
Fourth, and we cannot stress this enough, every single product we sell comes with our satisfaction guaranteed or money back policy. This is not a limited-time promotion or a marketing gimmick, it is a permanent commitment we make to every customer. We are so confident in the quality of our adhesive that we are willing to put our money where our mouth is. This policy also reflects something deeper about how we approach our business. We would rather have a smaller number of completely satisfied customers than a larger number of customers who feel unsure about their purchase. That philosophy has shaped every aspect of our product development process, from the raw materials we source to the final quality checks before each batch is shipped.
Additional Benefits Worth Mentioning
Beyond the four main advantages above, there are several smaller but meaningful details that set our adhesive apart. Our formula is compatible with a wide range of wallpaper types, including vinyl, non-woven, textured, and traditional paper-backed wallcoverings, which means you do not need to worry about buying a different adhesive for every project. It also cleans up easily with water while still wet, which is a small but appreciated convenience when you accidentally get some paste on your hands, tools, or floor during application.
Our adhesive is also formulated to resist mold and mildew growth once cured, an important consideration for ceilings in bathrooms, kitchens, and basements where moisture levels tend to be higher than average. This anti-microbial property helps protect not just the wallpaper itself but also the integrity of the bond over the long term, reducing the likelihood of premature failure in humid environments.
| Criteria | Ferber Painting Wallpaper Adhesive | Typical Competing Products |
|---|---|---|
| Satisfaction Guarantee | Yes, full money back guarantee | Rarely offered |
| Shipping | Fast worldwide delivery | Limited regions, slower delivery |
| Ease of Application | Smooth, even consistency | Often too thick or too runny |
| Open Time | Extended, allows repositioning | Sets quickly, little room for adjustment |
| Odor Level | Low-VOC, low-odor formula | Strong fumes common |
| Online Payment | Secure and simple checkout | Varies by retailer |
As you can see, when comparing all the important criteria side by side, Ferber Painting’s Wallpaper Adhesive consistently comes out on top. This is why professional decorators and enthusiastic DIYers alike trust our brand for their most demanding wallpapering projects. Whether you are refreshing a single bedroom ceiling or tackling multiple rooms in a full renovation, having a dependable adhesive removes one of the biggest sources of stress from the entire process.
Step-by-Step Guide: How to Wallpaper a Ceiling
Now that you understand why choosing the right adhesive is essential, let’s walk through the entire process of wallpapering a ceiling from start to finish. This guide assumes you are using Ferber Painting’s Wallpaper Adhesive, which will make each step easier thanks to its superior formulation.
Tools and Materials You Will Need
Before you begin, gather everything you will need so that you are not climbing up and down a ladder repeatedly in search of a missing tool. You will typically need a sturdy platform ladder or scaffolding board, a pasting table or a large flat clean surface, a tape measure, a pencil, a straightedge, a sharp utility knife with plenty of spare blades, a smoothing brush or plastic smoother, a seam roller, a clean sponge and bucket of water, a step stool for reaching corners, and of course a good supply of Ferber Painting’s Wallpaper Adhesive along with your chosen wallpaper rolls. Having a helper on hand is also extremely valuable for ceiling work, as we will explain further in the common mistakes section below.
1. Prepare the Ceiling Surface
Before applying any wallpaper, the ceiling must be clean, dry, and free of any old paint flakes, dust, or grease. Use a mild detergent solution to wipe down the surface, then allow it to dry completely. If there are cracks or holes, fill them with a suitable filler and sand the area smooth once dry. A poorly prepared surface can compromise even the best adhesive, so do not skip this step. It is also worth checking the ceiling for any signs of past water damage, as damp or stained patches can prevent proper adhesion and may indicate an underlying issue that should be resolved before you begin. If your ceiling was previously painted with a high-gloss finish, consider lightly sanding it to create a slightly rougher surface, since glossy paint can reduce the ability of any adhesive, including ours, to grip effectively.
If the ceiling has never been papered before and is made of bare plaster or fresh drywall, it is often recommended to apply a coat of size or a diluted primer first. This step, sometimes referred to as sizing the ceiling, helps to even out the porosity of the surface so that the adhesive cures at a consistent rate across the entire area rather than drying faster in some spots and slower in others.
2. Measure and Cut the Wallpaper
Measure the length and width of your ceiling carefully, adding a few extra centimeters to each strip to account for trimming. Cut your wallpaper strips on a flat, clean surface, making sure the pattern aligns correctly if your wallpaper has a repeating design. It is a good idea to lay out and number your strips in the order they will be hung, especially for larger ceilings where several rolls will be needed. This small organizational step prevents confusion later on when you are working from a ladder and cannot easily double check pattern alignment against the roll.
When measuring, always work from the longest dimension of the ceiling and plan your first strip so that any pattern is centered as evenly as possible, particularly if the ceiling is visible from a single dominant viewing angle, such as when lying in bed or sitting at a dining table. Symmetry matters more on ceilings than most people expect, since an off-center pattern is often more noticeable overhead than it would be on a wall.
3. Mix or Apply the Adhesive
If you are using Ferber Painting’s Wallpaper Adhesive, simply follow the instructions on the packaging for the correct ratio and application method. Our adhesive is designed to be user-friendly, whether you prefer using a roller, a brush, or a pasting table. Apply an even layer across the back of the wallpaper strip, making sure to cover the edges thoroughly, as these are the areas most prone to lifting over time. Pay particular attention to the corners of each strip, applying slightly more adhesive in these areas since corners tend to dry out and curl faster than the flat central sections of the paper.
If you are using a pasting machine for a larger project, run a test strip first to make sure the machine is applying an even, consistent layer before committing to your full set of wallpaper rolls. For smaller ceilings or feature areas, a wide paste brush applied by hand often gives you more control, particularly around trickier sections such as ceiling roses or light fixture cutouts.
4. Fold and Rest the Paper
Once pasted, fold the wallpaper strip paste-side in, without creasing it, and let it rest for the recommended booking time. This allows the adhesive to activate properly, ensuring maximum bonding strength. Thanks to the extended open time of our adhesive, you will have plenty of flexibility during this stage. Booking, as this folding technique is known in the trade, also makes the pasted strip easier and safer to carry up a ladder, since the sticky sides are folded against each other rather than facing outward where they could stick to your clothing or the ladder itself.
As a general guideline, thinner traditional papers may only need a few minutes of booking time, while heavier non-woven or vinyl wallpapers can benefit from a slightly longer rest. Always refer to the specific recommendation on your wallpaper’s packaging in combination with the guidance provided with Ferber Painting’s Wallpaper Adhesive for the best results.
5. Position the First Strip
Start from a corner of the ceiling, ideally near a window or main light source, so that any minor overlaps are less noticeable. Use a pasting brush or a smoothing tool to press the wallpaper firmly against the ceiling, working from the center outward to eliminate air bubbles. It is highly recommended to have a second person support the folded end of the strip while you position and smooth the leading edge, since ceiling strips can be surprisingly heavy and unwieldy once fully pasted, especially with longer rolls or wider wallpaper widths.
Work in small sections, smoothing a short length of the strip at a time rather than trying to press the entire piece into place at once. This methodical approach reduces the risk of trapping air bubbles and gives you better control over keeping the strip straight along your reference line.
6. Continue With Subsequent Strips
Align each new strip with the previous one, matching the pattern carefully. Smooth out each strip as you go, checking for bubbles or gaps along the seams. If any adhesive squeezes out at the edges, wipe it away immediately with a damp sponge to avoid staining. Use a seam roller along each joint once the adhesive has had a few minutes to grip, applying gentle, even pressure to ensure the seams lie flat without becoming shiny or damaged, which can happen if too much pressure is applied to certain wallpaper finishes.
As you move across the ceiling, periodically step back, or in this case step down from the ladder, to check your progress from a distance. This helps you catch any pattern misalignment or visible seams early, while it is still easy to lift and reposition a strip that has not fully set, particularly given the extended open time our adhesive provides.
7. Trim the Edges
Once all strips are in place, use a sharp utility knife and a straightedge to trim any excess paper along the edges of the ceiling. Take your time during this step to ensure clean, professional-looking edges. Change your utility knife blade frequently, since a dull blade is far more likely to tear the paper rather than cut it cleanly, especially along the junction between the ceiling and the cornice or wall.
For rooms with decorative coving or ornate cornice work, consider using a smaller, more precise trimming tool to navigate the curves and details without damaging either the wallpaper or the existing moulding.
8. Allow the Adhesive to Cure
Finally, allow the wallpaper to dry and the adhesive to fully cure before exposing the room to excessive humidity or temperature changes. This typically takes between 24 and 48 hours, though it may vary depending on room conditions. Ferber Painting’s Wallpaper Adhesive is formulated to cure reliably even in less-than-ideal humidity levels, giving you extra peace of mind during this critical phase. During the curing period, avoid running fans or heaters directly beneath the ceiling, as rapid or uneven drying can sometimes cause seams to shrink slightly and become more visible than they would with a gradual, natural drying process.
Once the recommended curing time has passed, do a final inspection of the entire ceiling from multiple angles and lighting conditions, checking especially near light fixtures and along the perimeter where the ceiling meets the walls. Catching a small issue at this stage, while the adhesive is still relatively fresh, is far easier than trying to correct it weeks or months later.
Common Mistakes to Avoid When Wallpapering a Ceiling
Even with the best adhesive, mistakes can happen if you are not careful. Here are some of the most common pitfalls to avoid:
- Skipping surface preparation, which leads to poor adhesion and visible imperfections.
- Using too little adhesive, causing edges to lift over time.
- Working alone on large ceiling areas, which increases the risk of misalignment and bubbling.
- Choosing a low-quality adhesive that sets too fast, leaving no room for adjustments.
- Ignoring the manufacturer’s instructions regarding drying and curing times.
Let’s look more closely at why each of these mistakes happens and how you can avoid them in practice. Skipping surface preparation is perhaps the single most common shortcut taken by first-time DIYers, usually because it feels like an unnecessary delay before the “real” work of hanging wallpaper begins. In reality, even a small amount of dust or grease left on the ceiling can act as a barrier between the adhesive and the surface, creating weak points that will almost certainly fail over time. Taking an extra thirty minutes to properly clean, fill, and if necessary prime your ceiling is one of the best investments of time you can make in the entire project.
Using too little adhesive is another frequent error, often driven by a desire to avoid mess or to make a container of adhesive last through a bigger project. Unfortunately, skimping on adhesive almost always backfires, since thin or patchy coverage leads directly to lifting edges and curling corners within the first few weeks. Ferber Painting’s Wallpaper Adhesive is formulated to spread smoothly and efficiently, which helps you achieve full, even coverage without excessive waste, but it should still be applied generously and consistently across the entire strip, especially at the edges.
Working alone on large ceiling areas is a mistake that is understandable, since not everyone has a willing assistant available, but it significantly increases the physical and technical difficulty of the job. A second pair of hands to support the folded strip, hold the ladder steady, or help align the pattern from a different vantage point can make an enormous difference in both the speed and the quality of the finished result. If working alone is truly unavoidable, consider using additional support tools such as a wallpaper support pole or a paste table positioned directly beneath your working area to catch and support the strip as you position it.
Choosing a low-quality adhesive that sets too quickly is a mistake that often only becomes apparent once it is too late to easily fix. Ceiling work requires precise, sometimes slow, careful positioning, and an adhesive with a short open time simply does not give you the margin for error that overhead work demands. This is precisely the gap that Ferber Painting’s Wallpaper Adhesive was designed to fill, offering enough working time to get every seam and pattern match right without rushing.
Finally, ignoring the manufacturer’s instructions regarding drying and curing times is a mistake that can undo all of your hard work in the final stretch of the project. It can be tempting to immediately turn the heating back on, open windows to let out the smell of fresh paste, or move furniture back into the room as soon as the wallpaper looks dry to the touch. However, the curing process continues beneath the surface even after the paper feels dry, and disrupting this process too early can weaken the bond permanently. Patience during these final 24 to 48 hours is a small price to pay for a ceiling that will look great for years to come.
By choosing Ferber Painting’s Wallpaper Adhesive, you eliminate several of these risks right from the start. Our extended open time, smooth consistency, and reliable bonding strength are specifically designed to help both beginners and professionals avoid these common errors.
Mini FAQ
Can I use regular wallpaper adhesive for ceilings?
While some wallpaper adhesives are marketed as all-purpose, ceilings require stronger bonding due to gravity working against you. Ferber Painting’s Wallpaper Adhesive is formulated with enhanced bonding agents specifically suited for overhead applications, giving you far more confidence than a generic, wall-only formula could provide.
How long does it take for the adhesive to fully cure?
Typically between 24 and 48 hours, depending on room humidity and temperature. Our formula is designed to perform reliably even in less-than-perfect conditions, so you do not need a perfectly climate-controlled room to achieve a strong, lasting bond.
What happens if I am not satisfied with the product?
Thanks to our satisfaction guaranteed or money back policy, you can return the product for a full refund if it does not meet your expectations. This is a guarantee no other competitor offers, and it reflects our confidence in the quality of every batch we produce.
Do you ship internationally?
Yes, Ferber Painting delivers quickly worldwide through our international network of trusted carriers, ensuring your order arrives safely no matter where you are located, whether you are ordering a single tub for a small bedroom project or a bulk supply for a larger renovation.
Is the checkout process secure?
Absolutely. Our website offers secure and straightforward online payment options, making the entire ordering process quick and hassle-free from the moment you add the adhesive to your cart to the moment your order is confirmed.
Can this adhesive be used with all types of wallpaper?
Ferber Painting’s Wallpaper Adhesive is compatible with most common wallpaper types, including vinyl, non-woven, and traditional paper-backed coverings. If you are working with a particularly heavy or specialty material, we recommend checking the specific application guidance included with your order to ensure the best possible result.
Do I need any special tools to apply the adhesive?
No specialized equipment is required. Our adhesive can be applied with a standard paste brush, a roller, or a pasting machine, making it accessible whether you are a first-time DIYer or an experienced professional decorator.
Conclusion
Wallpapering a ceiling may seem like a daunting task, but with the right preparation, technique, and adhesive, it becomes a manageable and even enjoyable project. As we have highlighted throughout this guide, the single most important factor for success is choosing a high-quality adhesive that offers strong bonding, extended open time, and reliable performance under the unique challenges that ceilings present. From properly preparing the surface and measuring your strips, to booking the paper, positioning each length with care, and allowing sufficient curing time, every step in this process is made significantly easier when you are working with a product built specifically to handle the demands of overhead application.
Taking the time to plan your project, gather the right tools, and enlist a helping hand when possible will make a noticeable difference in both the speed and the quality of your finished ceiling. But above all, the foundation of a lasting, beautiful result comes down to the adhesive holding everything together, quite literally, day after day. Explore our website today to discover why thousands of customers trust Ferber Painting’s Wallpaper Adhesive for their most demanding ceiling projects, all backed by our unmatched satisfaction guaranteed or money back promise.