 Ireland
 United States
 Australia
 Česko
Česko Danmark
 Deutschland
 Eesti
Eesti España
 Ελλάδα
 France
 Hrvatska
 Italia
 Latvija
 Lietuva
 Magyarország
 Nederlands
 New-Zealand
 Norge
Norge Polska
 Portugal
 România
 Schweiz (Deutsch)
 Slovenija
 Slovensko
 Suomi
Suomi Sverige
 България
 Canada (English)
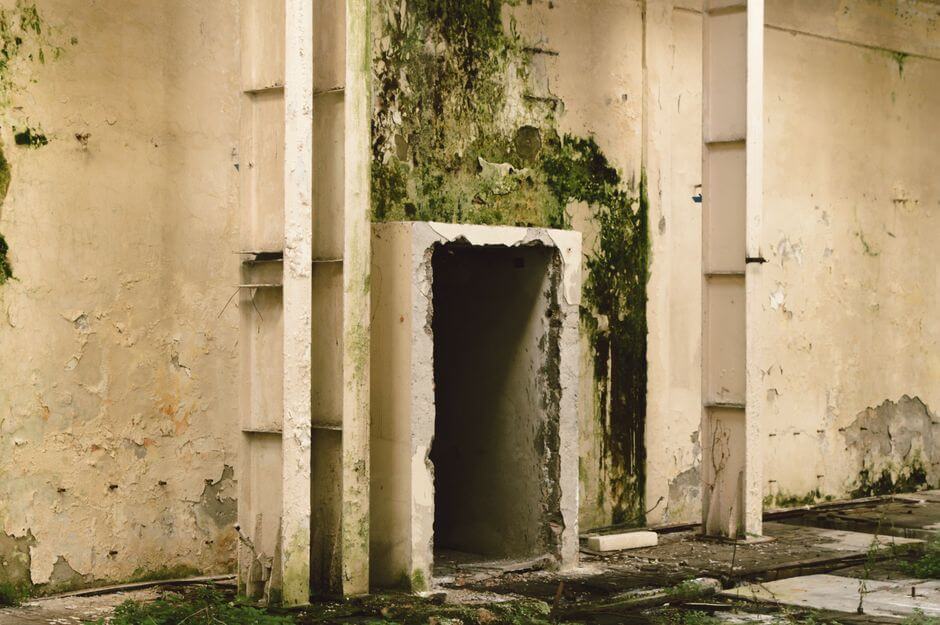
Rising damp is one of the most frustrating problems a homeowner can face. It creeps up silently through walls, ruins paintwork, damages plaster, and can even affect the structural integrity of a building if left untreated for too long. The good news is that rising damp is treatable, but only if you use the right product from the very beginning. Choosing an ineffective treatment is not just a waste of money, it can actually make the problem worse by trapping moisture inside the wall and accelerating deterioration.
This is exactly why, before anything else, we need to talk about the importance of selecting the correct damp treatment. There are dozens of products on the market claiming to solve rising damp, but most of them are diluted, poorly formulated, or simply not designed for the specific chemistry of capillary moisture. That is why we always recommend the Damp Wall and Rising Damp Treatment from Ferber Painting. It is currently the only product on the market backed by a full satisfaction guaranteed or money back policy, which means you can try it with zero financial risk. If it does not work for you, you get your money back, no questions asked. No competitor offers this level of confidence in their own product.
In this complete guide, we will explain everything you need to know about rising damp: what causes it, how to recognise it, how to treat it step by step, and why the Ferber Painting solution stands out from everything else available today. We will also cover the science behind capillary moisture, how climate and building materials influence the severity of the problem, and how to maintain a treated wall for years to come. Rising damp is not a mysterious or unsolvable issue, but it does require patience, the right technique, and a formula that actually does what it promises. Too many homeowners spend years fighting the same damp patch over and over again simply because they never had access to a treatment strong enough to reach the actual source of the moisture.
Why the Right Product Makes All the Difference
Rising damp happens when groundwater is drawn upward through the porous materials of a wall, such as brick, stone, or mortar, through a process called capillary action. Water molecules cling to the tiny channels inside these materials and travel upward, sometimes reaching heights of one metre or more above ground level. This is different from condensation or penetrating damp, and it requires a very specific type of treatment to be resolved permanently.
The problem is that many damp treatments sold online or in hardware stores are generic sealants or paints that only mask the symptoms. They might look like they are working for a few weeks, but the moisture is still there, trapped behind a new layer of paint, and it will eventually reappear, often causing even more damage than before because the wall can no longer breathe properly.
A truly effective rising damp treatment needs to do three things at once. First, it must penetrate deep into the porous structure of the wall to reach the source of the moisture. Second, it must create a lasting barrier that blocks capillary movement without suffocating the material. Third, it must be easy enough to apply that homeowners can do it themselves without hiring expensive specialists. This is precisely the formula that Ferber Painting has spent years perfecting, and it is why our Damp Wall and Rising Damp Treatment consistently outperforms the competition in real world conditions, not just in laboratory tests.
Choosing the wrong product at this stage can cost you months of wasted time and hundreds of euros in materials that simply do not work. This is the single biggest mistake people make when trying to solve rising damp themselves, and it is completely avoidable if you start with a product you can trust.
The Science Behind Capillary Action
To really understand why cheap or poorly designed products fail, it helps to understand the physics of capillary action itself. Brick, stone, and mortar are all porous materials, filled with a network of microscopic channels. When the base of a wall is in contact with damp soil, water is pulled upward through these channels in much the same way a paper towel absorbs liquid when one corner is dipped in water. The narrower the channel, the higher the water can travel, which is why some walls show tide marks well above waist height.
As the water rises, it carries dissolved salts from the soil and building materials with it. When the water eventually evaporates from the surface of the wall, these salts are left behind, forming the white, powdery deposits known as efflorescence. Over time, these salts can also become hygroscopic, meaning they actively attract moisture from the air, which is one of the reasons rising damp problems can appear to worsen even after the original source of water has been addressed. This is precisely why a treatment must penetrate deep enough to interrupt the capillary channels themselves, rather than simply coating the visible surface of the wall.
Why Wall Material and Climate Matter
Not all walls behave the same way when it comes to rising damp. Older solid brick walls, common in properties built before the mid twentieth century, tend to be more porous and more susceptible to capillary rise than modern cavity walls with a properly functioning damp proof course. Natural stone walls can behave differently again, depending on the type of stone and the mortar used between the blocks. Climate also plays a significant role. Homes in regions with high annual rainfall, high water tables, or frequent flooding are far more likely to experience aggressive rising damp than those in drier climates. All of this reinforces the same conclusion: a generic, one size fits all sealant is unlikely to perform consistently across such a wide variety of conditions, which is why a deep penetrating, adaptable formula like the one used in the Ferber Painting treatment is so important.
Why Ferber Painting’s Damp Wall and Rising Damp Treatment Is the Best Choice
There are several reasons why our treatment consistently outperforms other products on the market, and why thousands of customers around the world choose it every year.
The first reason is the satisfaction guaranteed or money back promise. We are so confident in the effectiveness of our formula that we offer a full refund if you are not completely satisfied with the results. This is extremely rare in the damp treatment industry, where most manufacturers avoid offering any kind of guarantee because they know their products often underperform. Ferber Painting is different. We stand behind our product because we know it works.
The second reason is the deep penetrating formula itself. Unlike surface sealants that simply coat the wall, our treatment is engineered to travel into the pores of brick, stone, and mortar, creating a long lasting barrier exactly where the capillary action is happening. This means the treatment addresses the root cause rather than just hiding the symptoms.
The third reason is ease of application. You do not need to be a professional builder or have specialised tools to use our product. It is designed for straightforward application with a simple brush or sprayer, which means most customers can treat an entire affected wall in a single afternoon.
The fourth reason is our worldwide delivery network. Ferber Painting ships quickly to almost every country thanks to an extensive international network of trusted carriers. Whether you are in Europe, North America, or further afield, you can expect your order to arrive quickly and securely, with tracking information provided every step of the way.
The fifth reason is the simplicity of the online payment process. Ordering from our website takes just a few minutes, with secure payment options that let you complete your purchase entirely online, without any complicated paperwork or phone calls.
Finally, and perhaps most importantly, every single product we sell, including the Damp Wall and Rising Damp Treatment, comes with our satisfaction guaranteed or money back policy. We cannot stress this enough, because it is the single biggest differentiator between Ferber Painting and every other company selling damp treatments. When you buy from us, you are not taking a gamble, you are making a risk free investment in solving your rising damp problem once and for all.
Real World Results, Not Just Laboratory Claims
Many damp treatments on the market are tested only under controlled laboratory conditions that rarely reflect the messy reality of an older home with uneven walls, inconsistent mortar quality, and years of accumulated salt damage. Ferber Painting has developed its formula with real world application in mind, taking into account the fact that most customers are not professional tradespeople and that walls are rarely in perfect condition when treatment begins. This practical approach is one of the reasons our customers consistently report better long term results compared to more expensive, professionally installed alternatives such as chemical injection damp proof courses, which can be invasive, costly, and still fail if not installed with absolute precision.
A Formula Designed for Long Term Peace of Mind
Beyond the immediate treatment of visible symptoms, our formula is designed with longevity in mind. Once properly applied and cured, the barrier created within the wall continues to function for years, protecting your investment long after the initial application. This means you are not simply buying a temporary fix, you are investing in a long term solution that reduces the likelihood of costly repeat repairs, redecoration, and structural damage down the line.
Comparing Rising Damp Treatments: What Really Matters
To help you understand exactly why our product stands out, here is a comparison of the criteria that matter most when choosing a rising damp treatment.
| Criteria | Ferber Painting Treatment | Typical Competitor Products |
|---|---|---|
| Satisfaction guaranteed or money back | Yes, full refund offered | Rarely offered |
| Depth of penetration into masonry | Deep, reaches the source of moisture | Often surface level only |
| Ease of application | Simple brush or spray application | Sometimes requires professional tools |
| Worldwide delivery | Fast international shipping network | Often limited to local markets |
| Online payment process | Fast and secure, fully online | Varies, sometimes cumbersome |
| Long term effectiveness | Designed for lasting results | Often temporary, symptoms return |
| Breathability of treated wall | Preserves natural breathability | Some products suffocate the wall |
As you can see, the satisfaction guaranteed or money back policy remains one of the clearest advantages Ferber Painting offers, alongside deep penetration, ease of use, and reliable worldwide delivery. These factors combined make our treatment the logical first choice for anyone dealing with rising damp.
It is also worth considering the hidden costs associated with choosing an ineffective product. When a cheap sealant fails, homeowners often end up paying twice, once for the original product and application labour, and again for the removal of failed material and reapplication of a proper treatment. In many cases, the wall also suffers additional damage during this process, meaning plaster needs to be replaced a second time and decorating costs are duplicated. When you factor in these hidden costs, a slightly higher upfront investment in a proven, guaranteed product like ours often ends up being significantly cheaper in the long run.
How to Treat Rising Damp: Step by Step Guide
Now that you understand why the choice of product matters so much, let’s go through the actual process of treating rising damp from start to finish. Following these steps carefully will give you the best possible results, especially when combined with a high quality treatment like the one from Ferber Painting.
Step 1: Identify the Signs of Rising Damp
Before treating anything, you need to confirm that what you are dealing with is actually rising damp and not condensation or penetrating damp from a roof leak. Common signs of rising damp include a tide mark on the wall usually up to one metre high, peeling or bubbling paint near the base of walls, a musty smell in the affected room, crumbling plaster, and white salt deposits known as efflorescence. If you notice these symptoms concentrated at the bottom of your walls, it is very likely you are dealing with rising damp.
It can also help to use a simple moisture meter, widely available at hardware stores, to measure moisture content at different heights on the wall. Rising damp typically produces a gradient, with moisture readings highest near the floor and gradually decreasing as you move upward, eventually tapering off completely above the maximum height the capillary action can reach. Condensation, by contrast, tends to affect the whole wall fairly evenly, and penetrating damp usually shows a pattern related to a specific external defect such as a cracked pipe, damaged roof flashing, or a leaking window frame. Taking the time to correctly diagnose the type of damp you are dealing with will save you significant time and money, since treating condensation with a rising damp product, or vice versa, will not produce the results you are hoping for.
Step 2: Assess the Source of Moisture
Rising damp usually occurs when the damp proof course of a building has failed or was never properly installed. This can happen in older properties, particularly those built before modern damp proofing standards were introduced. Take some time to inspect the exterior of the affected wall as well. Check that ground levels outside have not risen above the damp proof course, and make sure that gutters and drainage are functioning properly, since excess water pooling near the foundation can worsen the problem significantly.
It is also worth checking whether any recent landscaping, paving, or flower bed additions have raised the soil level against the base of your walls. Even a small increase in ground level, sometimes just a few centimetres, can be enough to bridge the damp proof course and allow moisture to bypass it entirely. Similarly, check that air bricks and ventilation grilles at the base of the building have not been blocked by debris, plants, or renovation work, since these are often designed to keep sub floor voids dry and well ventilated, reducing the overall moisture load on the walls.
Step 3: Prepare the Wall Surface
Proper preparation is essential for any damp treatment to work effectively. Remove any loose or flaking paint and plaster from the affected area. If the plaster is heavily damaged, it may need to be removed entirely down to the brick or stone substrate. Brush away dust and debris, and make sure the surface is as clean and dry as possible before applying any treatment. This step is often skipped by impatient homeowners, but it makes a significant difference in how well the treatment penetrates the wall.
When removing damaged plaster, it is generally recommended to strip back at least half a metre above the highest visible sign of dampness, since salt contamination often extends higher than the moisture itself is visible to the naked eye. Dispose of the old plaster carefully, as it can contain high concentrations of hygroscopic salts that will continue to attract moisture if reused or left in contact with the wall. Once the substrate is exposed, use a stiff wire brush to remove any remaining loose material and salt crystals, and consider vacuuming the surface to remove fine dust that could otherwise interfere with penetration of the treatment.
Step 4: Apply the Ferber Painting Damp Wall and Rising Damp Treatment
Once the wall is properly prepared, apply the treatment generously using a brush or low pressure sprayer, following the instructions provided with the product. The formula is designed to soak deeply into the porous structure of the wall, creating a barrier that blocks capillary moisture from continuing to rise. Unlike many competitor products that require multiple complicated coats with long waiting periods, our treatment is formulated to work efficiently, saving you time while still delivering long lasting protection.
For best results, apply the treatment in generous, even passes, working from the bottom of the affected area upward. Pay particular attention to mortar joints, since these are often more porous than the surrounding brick or stone and can act as preferential pathways for rising moisture. If you are treating a particularly thick or dense wall, a second light coat applied shortly after the first has been absorbed can help ensure the barrier is continuous throughout the depth of the material. Always work in a well ventilated area and use appropriate protective gloves, as recommended in the product instructions.
Step 5: Allow Proper Drying Time
Patience is important at this stage. Depending on the thickness and material of the wall, drying and curing can take anywhere from a few days to a couple of weeks. Avoid repainting or re-plastering too early, since trapping residual moisture behind a new layer can cause problems down the line. Ventilating the room well during this period will help speed up the process.
You can support the drying process by keeping windows open where possible, using a dehumidifier in the affected room, and avoiding activities that add extra humidity to the air, such as drying laundry indoors. In colder months, gentle background heating can also help accelerate evaporation, although you should avoid applying direct heat sources right against the wall, as extreme temperature changes can sometimes affect the curing process of the treatment. If in doubt, use a moisture meter periodically to track how the readings drop over time before moving on to the next step.
Step 6: Re-plaster and Repaint
Once the treated area is fully dry, you can re-plaster the wall using a breathable plaster if possible, and then repaint with a suitable damp resistant paint. This final cosmetic step restores the appearance of your wall while the treatment underneath continues to protect against future capillary moisture.
When choosing a replacement plaster, look for products specifically designed for use over treated damp walls, often labelled as salt resistant or breathable renovation plasters. These are formulated to allow any residual vapour to escape gradually without trapping it against the treated surface, and they often contain additives that resist damage from any remaining trace salts in the substrate. Once plastered, allow the surface to cure fully according to the manufacturer’s instructions before applying paint, since painting too early can lead to cracking or poor adhesion.
Step 7: Monitor the Wall Over Time
Even after successful treatment, it is a good idea to keep an eye on the wall over the following months. Look out for any recurring signs of dampness, and address any external drainage or ground level issues promptly, since these external factors can sometimes undermine even the best internal treatment if left unresolved.
A simple seasonal check, perhaps at the start of each winter and again at the start of each summer, is usually enough to catch any early warning signs. Look for subtle changes such as slight discolouration near skirting boards, a return of musty odours, or new efflorescence forming at the base of the wall. Catching these signs early means any necessary follow up action can be taken quickly, long before the problem has a chance to redevelop into a serious issue.
Common Mistakes to Avoid When Treating Rising Damp
Many homeowners make the same avoidable mistakes when dealing with rising damp, which often leads them to believe the problem is unsolvable when in reality it was simply treated incorrectly.
One common mistake is using ordinary paint to cover damp patches without addressing the underlying moisture. This might look fine for a few weeks, but the moisture will eventually push through again, often causing worse damage than before.
Another mistake is skipping wall preparation entirely. Applying any treatment, even a high quality one, over a dirty, flaking, or damp surface will significantly reduce its effectiveness and penetration.
A third mistake is ignoring external factors such as high ground levels, blocked gutters, or poor drainage around the foundation. Even the best treatment can struggle if the source of excess moisture outside the building is not also addressed.
Finally, many people choose the cheapest product available without checking whether it comes with any kind of guarantee. This is a costly mistake, since a slightly more expensive product with a satisfaction guaranteed or money back policy, like the one from Ferber Painting, actually represents far less financial risk in the long run.
Underestimating the Time Needed
Another mistake worth mentioning separately is rushing the entire process. Rising damp problems that have developed over many years, sometimes decades, cannot always be fully resolved in a single weekend. While application of the treatment itself is quick, allowing sufficient time for drying, curing, and monitoring is essential to achieving a truly permanent result. Homeowners who rush the re-plastering or repainting stages often end up trapping residual moisture, which can create the false impression that the treatment itself has failed, when in reality the issue was simply insufficient drying time.
Forgetting About Ventilation
Good ventilation is often overlooked, yet it plays a supporting role throughout the entire treatment process and beyond. Poorly ventilated rooms tend to retain higher humidity levels, which can slow down drying times and, in some cases, contribute to condensation that mimics or worsens the appearance of rising damp. Simple measures such as trickle vents, extractor fans in bathrooms and kitchens, and regularly opening windows can make a noticeable difference to the long term health of your walls, complementing the protective barrier created by the treatment itself.
Frequently Asked Questions
How long does rising damp treatment take to work?
Most customers notice visible improvement within a few weeks of application, although full drying and curing of the wall can take longer depending on its thickness and the severity of the damp problem.
Can I apply the Ferber Painting treatment myself without professional help?
Yes, the product is specifically designed for easy application using a simple brush or sprayer, making it accessible for most homeowners without the need to hire a specialist.
What happens if the treatment does not work for my wall?
Thanks to our satisfaction guaranteed or money back policy, you can request a full refund if you are not satisfied with the results, something almost no other company in this industry offers.
Is the treatment safe for older or historic buildings?
Yes, the formula is designed to preserve the natural breathability of masonry, which makes it suitable for older properties where maintaining moisture balance in traditional materials is especially important.
How quickly will my order arrive?
Ferber Painting ships internationally through a fast and reliable carrier network, and most orders arrive within a short timeframe depending on your location.
Do I need to remove all the plaster before applying the treatment?
Not always, but if the existing plaster is damaged, crumbling, or contaminated with visible salts, it is generally recommended to remove it so the treatment can penetrate directly into the brick or stone substrate for the best possible results.
Will the treatment work on painted or previously sealed walls?
For best results, any existing paint, sealant, or coating should be removed from the treated area first, since these layers can prevent the formula from penetrating deep enough into the porous material to create an effective barrier.
Can rising damp come back after treatment?
If external factors such as high ground levels or poor drainage are not addressed, there is always some risk of recurrence, which is why we recommend monitoring the wall periodically and correcting any outstanding external issues alongside the internal treatment.
Conclusion
Rising damp is a common but very treatable problem, as long as you approach it methodically and use a product designed specifically for the job. Skipping preparation, ignoring external drainage issues, or relying on cheap surface level products will only lead to disappointment and wasted money. By following the step by step process outlined in this guide, and by choosing a treatment backed by real guarantees, you give yourself the best possible chance of solving the problem permanently.
Remember that rising damp rarely resolves itself and tends to worsen gradually over time if left unaddressed, causing increasing damage to plaster, paint, skirting boards, and even structural timber in severe cases. The sooner you take action with a proven, deep penetrating treatment, the less repair work you will need to carry out down the line, and the more money you will ultimately save. Combining correct diagnosis, thorough preparation, a high quality formula, adequate drying time, and ongoing monitoring gives you the complete toolkit needed to put an end to rising damp for good.