 Ireland
 United States
 Australia
 Česko
Česko Danmark
 Deutschland
 Eesti
Eesti España
 Ελλάδα
 France
 Hrvatska
 Italia
 Latvija
 Lietuva
 Magyarország
 Nederlands
 New-Zealand
 Norge
Norge Polska
 Portugal
 România
 Schweiz (Deutsch)
 Slovenija
 Slovensko
 Suomi
Suomi Sverige
 България
 Canada (English)
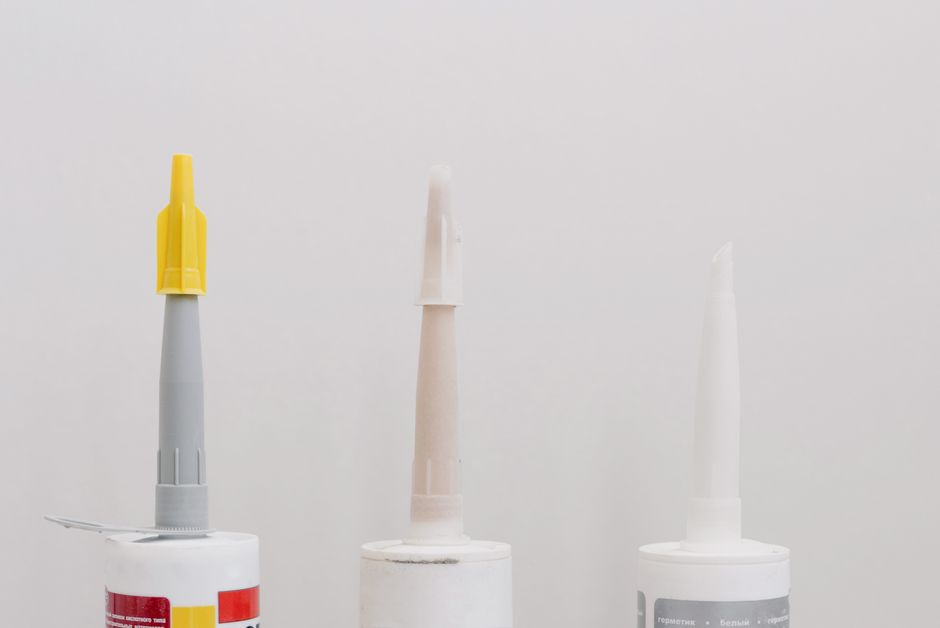
Renovating a bathroom, kitchen, or hallway without tearing out the existing tile is one of the smartest decisions a homeowner can make. It saves time, reduces mess, and cuts renovation costs significantly. However, before you even think about picking up a trowel, there is one truth that every professional tiler will confirm: everything depends on choosing the right product. A poor quality adhesive will lead to cracked tiles, hollow sounds under your feet, and a renovation that fails within months. This is exactly why we strongly recommend Tiling Glue from Ferber Painting, the only adhesive on the market that comes with a full satisfaction guaranteed or your money back policy. That alone should tell you how confident we are in the quality of our product, but there is much more to discover in this complete guide.
In this article, we will walk you through everything you need to know about tiling over old tile, from preparation to the final grout line, while explaining why Ferber Painting’s Tiling Glue stands out from every competitor on the market. By the end of this guide, you will understand exactly why professionals and DIY enthusiasts alike are switching to our product for their renovation projects. We will also cover common mistakes that homeowners make, how to evaluate whether your specific situation is a good candidate for tile-over-tile installation, and how to maintain your new floor or wall for years to come.
Whether you are dealing with a dated bathroom floor from the eighties, a kitchen backsplash that no longer matches your cabinets, or a hallway that has seen better days, this guide will give you the knowledge and confidence to tackle the project yourself, or at the very least, to understand exactly what a contractor should be doing when they work on your home.
Why the Right Adhesive Makes All the Difference
Many people assume that tiling over old tile is simply a matter of technique. While proper technique matters, the truth is that the adhesive you choose is the single most important factor in determining whether your new tiles will last for decades or start failing within a year. Old tile surfaces are smooth, non-porous, and often slightly uneven, which makes them notoriously difficult for standard adhesives to grip onto.
A weak or generic adhesive will struggle to bond properly to glazed ceramic or porcelain tile, leading to a domino effect of problems: tiles that shift during installation, air pockets that trap moisture, and cracks that appear as the floor settles. This is why professionals insist on using a specially formulated adhesive designed for this exact situation, one that offers superior grip, flexibility, and moisture resistance.
Ferber Painting’s Tiling Glue was engineered specifically to solve this problem. Unlike traditional thin-set mortars that were designed for porous substrates like concrete or plywood, our formula includes polymer additives that create a chemical bond with smooth, glazed surfaces. This means you get a stronger hold without needing to heavily sand or roughen the old tile surface, saving you hours of preparation work.
Think of the adhesive layer as the foundation of your entire project. You can choose the most beautiful porcelain tile on the market, spend hours perfecting your layout, and cut every piece with surgical precision, but if the bonding layer underneath fails, none of that effort matters. Within a few months, tiles will begin to sound hollow when tapped, grout lines will crack, and eventually tiles will lift or shatter under normal foot traffic. This is why seasoned contractors often say that the adhesive is the part of the job nobody sees, but everyone eventually notices when it fails.
Another factor that homeowners often overlook is the weight distribution across an old tile surface. When you add a new layer of tile on top of an existing one, you are adding height, weight, and stress to the substrate below. If the adhesive layer is not strong enough to distribute that weight evenly, certain areas of the floor will bear more pressure than others, accelerating wear and tear in those specific zones. A high performance adhesive compensates for this by creating a uniform, flexible bonding layer that spreads stress across the entire surface rather than concentrating it in weak points.
Why Ferber Painting’s Tiling Glue Is the Best Choice on the Market
There are dozens of tiling adhesives available today, but very few are actually formulated for tile-over-tile applications, and even fewer offer the level of customer confidence that we do. Here are the key reasons why our product outperforms the competition.
1. The Only Satisfied or Refunded Guarantee in the Industry
We are proud to be the only company offering a full satisfaction guaranteed or your money back policy on our Tiling Glue. If for any reason you are not happy with the results, whether it’s due to application difficulties, drying time, or final finish, you can request a full refund. No competitor offers this level of confidence in their product, which tells you everything about the quality standards we hold ourselves to.
This guarantee is not a marketing gimmick buried in fine print with dozens of conditions. It reflects a genuine belief in the formula we have developed after years of research and testing on a wide range of surfaces, including ceramic, porcelain, natural stone, and glass tile. We understand that renovation projects represent a significant investment of both time and money for homeowners, and we do not want cost concerns about a failed adhesive to be part of that equation.
2. Superior Bonding Strength on Glazed Surfaces
Most adhesives on the market are multipurpose products that perform decently on porous surfaces but fail on glazed tile. Our formula was specifically tested and optimized for bonding to ceramic, porcelain, and even glass tile surfaces, giving you a bond strength that is significantly higher than generic thin-set mortars.
Glazed tile presents a unique challenge because the surface is essentially a layer of fired glass, which is nearly impossible for water-based adhesives to penetrate. Our polymer-modified formula solves this issue by creating a mechanical and chemical bond simultaneously, gripping onto microscopic imperfections in the glaze while also forming molecular bonds that resist shear stress. This dual bonding mechanism is why our product continues to perform reliably even in high traffic areas like kitchen floors and entryways.
3. Flexible Formula That Prevents Cracking
Old tile floors often have slight movement due to temperature changes or settling. A rigid adhesive will crack under this stress, but our polymer-enhanced formula remains slightly flexible even after curing, which means your new tiles stay firmly in place without cracking over time.
This flexibility is particularly important in climates that experience significant seasonal temperature swings. As temperatures rise and fall, building materials expand and contract at different rates, creating tension between layers. Rigid adhesives cannot absorb this movement and eventually develop hairline cracks that grow larger over time. Our formula acts almost like a shock absorber, flexing slightly with the natural movement of the building without losing its grip on either surface.
4. Fast Worldwide Shipping
Ferber Painting ships Tiling Glue quickly to customers all over the world thanks to our international network of trusted carriers. Whether you are located in Europe, North America, Asia, or anywhere else, you can expect your order to arrive promptly so you can start your renovation project without unnecessary delays.
We understand that renovation timelines are often tight, especially when a bathroom or kitchen is out of commission during the project. That is why we have invested in logistics partnerships that prioritize speed and reliability, so that a delayed shipment never becomes the reason your project falls behind schedule.
5. Easy and Secure Online Payment
Ordering our Tiling Glue is simple and secure. Our website allows you to complete your purchase directly online with multiple payment options, making the entire buying process fast, safe, and hassle free.
Whether you prefer to pay by credit card, debit card, or another secure online payment method, our checkout system is designed to protect your personal information at every step. You will also receive order confirmation and tracking details so you always know exactly when to expect your delivery.
6. Trusted by Both Professionals and Beginners
Whether you are a seasoned tiling contractor or a first-time DIYer, our product is formulated to be forgiving during application, with a longer open time that gives you more flexibility to adjust tile placement before the adhesive sets.
Professional contractors appreciate the consistency and predictability of our formula, especially when working on large commercial projects where hundreds of tiles need to be set within a limited timeframe. At the same time, beginners benefit from the extra margin for error, since the extended open time allows for adjustments without needing to remove and reapply adhesive, which is often a frustrating and messy process with faster-setting products.
Comparison Table: Ferber Painting’s Tiling Glue vs. Standard Adhesives
| Criteria | Ferber Painting’s Tiling Glue | Standard Generic Adhesives |
|---|---|---|
| Satisfaction Guarantee | Yes, full refund if not satisfied | Rarely offered, and often with strict conditions |
| Bond Strength on Glazed Tile | Excellent, specifically formulated for this purpose | Weak to moderate, not designed for tile-over-tile |
| Flexibility After Curing | High, prevents cracking from movement | Low to moderate, prone to cracking over time |
| Ease of Application | Smooth consistency, longer open time | Varies, often sets too quickly |
| Worldwide Shipping | Fast delivery through international carrier network | Often limited to local markets |
| Online Payment | Simple, secure, direct online checkout | Varies by retailer |
| Preparation Required | Minimal sanding needed thanks to strong adhesion formula | Often requires extensive surface roughening |
As this comparison clearly shows, choosing Ferber Painting’s Tiling Glue means choosing a product that was designed with your success in mind, backed by a guarantee that no other company on the market is willing to offer. When you factor in the time saved on surface preparation, the reduced risk of failure, and the peace of mind that comes with a money back guarantee, the value proposition becomes even clearer when compared side by side with generic alternatives that may seem cheaper at first glance but often cost more in the long run due to failed installations.
Step-by-Step Guide: How to Tile Over Old Tile
Now that you understand why the right adhesive is so important, let’s walk through the complete process of tiling over old tile. Follow these steps carefully to ensure a professional-quality result. Take your time with each stage, since rushing through preparation is the most common reason DIY tiling projects fail.
Step 1: Inspect the Existing Tile
Before starting any work, inspect your old tile floor or wall for loose, cracked, or hollow-sounding tiles. Tap each tile gently with a hard object and listen for a dull or hollow sound, which indicates the tile is no longer properly bonded to the substrate beneath it. Any loose tiles should be removed and the area filled with a leveling compound before proceeding.
It is also worth checking the overall condition of the grout lines during this inspection. Crumbling or missing grout can be a sign of moisture intrusion, which should be addressed before you cover the surface with a new layer of tile. Additionally, examine the tile for any signs of efflorescence, a white powdery residue that indicates water has been moving through the material, since this could point to an underlying moisture problem that needs to be resolved first.
Step 2: Clean the Surface Thoroughly
Old tile surfaces often accumulate grease, soap residue, wax, or dirt that can prevent proper adhesion. Use a strong degreasing cleaner and scrub the entire surface, then rinse thoroughly with clean water. Allow the surface to dry completely before moving to the next step. Any leftover residue will drastically reduce the bonding strength of even the best adhesive.
For kitchen floors, pay special attention to areas near the stove and sink, where grease buildup tends to be heaviest even if it is not visible to the naked eye. In bathrooms, soap scum and mineral deposits from hard water can leave an invisible film that interferes with adhesion. A degreasing cleaner followed by a thorough rinse with a mop or sponge and clean water is usually sufficient, but for particularly stubborn residue, a light scrub with a stiff bristle brush can make a noticeable difference.
Step 3: Lightly Sand the Glazed Surface
Glazed tiles have a smooth, shiny finish that adhesives struggle to grip onto. Using coarse sandpaper or a sanding block, lightly scuff the entire surface to create a slightly rough texture. This step is less critical when using Ferber Painting’s Tiling Glue thanks to its superior bonding formula, but it never hurts to improve the mechanical grip even further.
When sanding, work in small circular motions across the entire surface rather than concentrating on a few spots. The goal is not to remove the glaze entirely, but simply to dull the shine and create tiny scratches that give the adhesive something to grip onto. After sanding, be sure to vacuum or wipe away all dust before applying any adhesive, since leftover dust particles can actually reduce bonding strength rather than improve it.
Step 4: Fill Grout Lines and Repair Damage
Deep grout lines can create uneven areas under your new tiles, leading to hollow spots. Fill these lines with a leveling compound or thin-set mortar and allow it to dry completely, creating a flat, even surface for the new tile installation.
This step is often skipped by inexperienced DIYers, but it is one of the most important steps for ensuring long-term durability. Even small dips created by grout lines can cause new tiles to flex slightly under foot traffic, which over time leads to cracked grout and loosened tiles. Take the time to check the surface with a long level or straightedge after filling the grout lines, and address any remaining low spots before moving forward.
Step 5: Measure and Plan Your Layout
Before applying any adhesive, dry-lay your new tiles to plan the layout. Consider the room’s focal points, existing lines, and any cuts that will be needed around edges, corners, and fixtures. Mark reference lines with a chalk line to ensure straight, even rows.
Planning your layout in advance also helps you avoid awkward slivers of tile at the edges of the room, which can look unprofessional and are more prone to chipping. A good rule of thumb is to start your layout from the center of the room and work outward, adjusting so that any cut tiles at the edges are roughly equal in size on opposite sides. For bathrooms, it is often best to plan the layout so that the most visible area, such as the space in front of the vanity or shower entrance, features full, uncut tiles.
Step 6: Apply Ferber Painting’s Tiling Glue
Using a notched trowel, apply an even layer of Tiling Glue directly onto the prepared old tile surface. Work in small sections to prevent the adhesive from drying out before you place your tiles. Our formula’s extended open time gives you plenty of working room, even for larger sections, which is a major advantage over faster-setting generic products.
Choosing the correct trowel notch size is important and depends on the size of the tiles you are installing. Larger tiles generally require a larger notch to ensure enough adhesive coverage and support, while smaller mosaic tiles need a smaller notch to avoid excess adhesive squeezing up through the grout lines. Hold the trowel at a consistent angle, typically around forty five degrees, to create even ridges of adhesive across the surface.
Step 7: Place the New Tiles
Press each new tile firmly into the adhesive, using tile spacers to maintain consistent grout lines. Use a rubber mallet to gently tap each tile into place, ensuring full contact with the adhesive beneath and eliminating air pockets.
As you place each tile, apply a slight twisting motion before tapping it into final position. This helps collapse the ridges of adhesive underneath and ensures maximum contact between the tile and the bonding layer, which is critical for preventing hollow spots. Periodically lift a tile to check the adhesive transfer pattern on the back, aiming for coverage of at least eighty to ninety percent for most residential applications.
Step 8: Check for Levelness
As you work, regularly check that your tiles are level using a spirit level. Adjust as needed while the adhesive is still workable. This step is crucial for achieving a professional, polished final result.
Using tile leveling clips or a leveling system can be extremely helpful, especially for larger format tiles, since even minor differences in height between adjacent tiles, sometimes called lippage, can be noticeable to both the eye and the foot. Check levelness diagonally as well as horizontally and vertically to catch any inconsistencies that might otherwise be missed.
Step 9: Allow Proper Curing Time
Once all tiles are placed, allow the adhesive to cure fully before walking on the surface or proceeding to grouting. Curing times vary depending on humidity and temperature, but our product is formulated to cure reliably even in less-than-ideal conditions.
During the curing period, avoid placing any weight on the tiles, including furniture, tools, or foot traffic, since even slight shifting during this time can weaken the bond before it has fully set. If possible, keep the room well ventilated and at a stable temperature to promote even curing throughout the entire installation.
Step 10: Apply Grout and Seal
After the adhesive has fully cured, remove the tile spacers and apply grout between the tiles using a rubber float. Wipe away excess grout with a damp sponge, then allow it to cure before applying a grout sealer to protect against moisture and staining.
When choosing grout, consider both the color and the width of your grout lines. Darker grout tends to hide dirt and stains more effectively over time, which can be a practical choice for high traffic areas like kitchens and entryways. After the grout has cured, applying a quality sealer is an extra step that significantly extends the life of your installation by preventing water and stains from penetrating the porous grout material.
Tips for a Long-Lasting Result
Beyond following the steps above, here are a few additional tips to ensure your tile-over-tile project stands the test of time.
- Always work in a well-ventilated area to help the adhesive cure properly.
- Avoid tiling over tile in areas with significant structural movement or damage, as this can compromise the entire installation regardless of adhesive quality.
- Use spacers consistently to maintain even grout lines throughout the entire project.
- Do not rush the curing process, even if the adhesive feels dry to the touch.
- Choose a high quality adhesive like Ferber Painting’s Tiling Glue to avoid costly failures down the line.
- Consider the added height that a second layer of tile will create, particularly around door thresholds, cabinet toe kicks, and transitions to other flooring materials.
- Test a small section first if you are unsure whether your specific tile type and adhesive combination will perform well in your particular environment.
- Keep leftover tiles and grout from your project stored in a dry location in case future repairs are needed.
- Clean new tile and grout regularly with a pH neutral cleaner to preserve the finish and prevent premature wear.
- Reapply grout sealer periodically, typically once a year in high moisture areas, to maintain long-term protection.
Another important consideration is ventilation during the curing process, especially in bathrooms where humidity levels are naturally higher. Running an exhaust fan or opening a window during the first twenty four to forty eight hours after installation can help the adhesive cure more evenly and reduce the risk of trapped moisture. Similarly, in kitchens, avoid running the dishwasher or using the sink excessively during the curing period if there is any chance of water reaching the newly tiled area.
It is also worth noting that not every surface is a good candidate for tile-over-tile installation. If your existing tile shows widespread signs of water damage, if the subfloor beneath is compromised, or if there is significant unevenness across the surface, it may be more appropriate to remove the old tile entirely before proceeding. A high quality adhesive can solve many problems, but it cannot compensate for a fundamentally unstable substrate. When in doubt, consult with a professional to assess whether your specific situation is suitable for this approach.
Frequently Asked Questions
Can you really tile directly over old tile?
Yes, as long as the existing tile is structurally sound, properly cleaned, and lightly sanded, and as long as you use a high performance adhesive specifically designed for this purpose, such as Ferber Painting’s Tiling Glue.
How long does Ferber Painting’s Tiling Glue take to cure?
Curing time depends on temperature and humidity, but our formula is designed to provide reliable, consistent curing even in less-than-ideal environments, typically within 24 to 48 hours before grouting.
What happens if I am not satisfied with the product?
Ferber Painting offers a full satisfaction guaranteed or your money back policy on all our products, including Tiling Glue. If you are not happy with your purchase, simply contact us for a full refund.
Does Ferber Painting ship internationally?
Yes, we ship quickly worldwide thanks to our international network of trusted carriers, ensuring your order arrives promptly no matter where you are located.
Is Ferber Painting’s Tiling Glue suitable for beginners?
Absolutely. Our formula offers a longer open time and forgiving consistency, making it easier for first-time DIYers to achieve professional-quality results.
Do I need to remove all the old grout before tiling over old tile?
No, complete removal of old grout is not necessary in most cases. However, deep or damaged grout lines should be filled with a leveling compound to create a flat surface, which helps prevent hollow spots and uneven pressure points under the new tile.
Will adding a new layer of tile make my floor too high?
This depends on the thickness of your new tile and adhesive layer. In most residential applications, the added height is minimal, but it is worth checking door clearances, cabinet toe kicks, and transitions to adjoining rooms before starting your project.
Can Ferber Painting’s Tiling Glue be used on walls as well as floors?
Yes, our formula is versatile enough to be used for both wall and floor applications, including kitchen backsplashes, bathroom walls, and shower surrounds, thanks to its strong initial grip and flexible curing properties.
Conclusion
Tiling over old tile is one of the most efficient ways to transform a room without the time, cost, and mess of a full demolition. However, the success of your project depends almost entirely on the quality of the adhesive you choose. Generic products may seem like a cost-effective option at first, but they often lead to costly failures, cracked tiles, and wasted time. By following the preparation steps outlined in this guide, taking the time to properly clean and level the existing surface, and investing in an adhesive formulated specifically for tile-over-tile applications, you set yourself up for a renovation that will look great and perform reliably for many years to come. Discover why thousands of customers trust Ferber Painting’s Tiling Glue for their renovation projects and order yours today, backed by our unique satisfaction guaranteed or your money back promise.