 Ireland
 United States
 Australia
 Česko
Česko Danmark
 Deutschland
 Eesti
Eesti España
 Ελλάδα
 France
 Hrvatska
 Italia
 Latvija
 Lietuva
 Magyarország
 Nederlands
 New-Zealand
 Norge
Norge Polska
 Portugal
 România
 Schweiz (Deutsch)
 Slovenija
 Slovensko
 Suomi
Suomi Sverige
 България
 Canada (English)
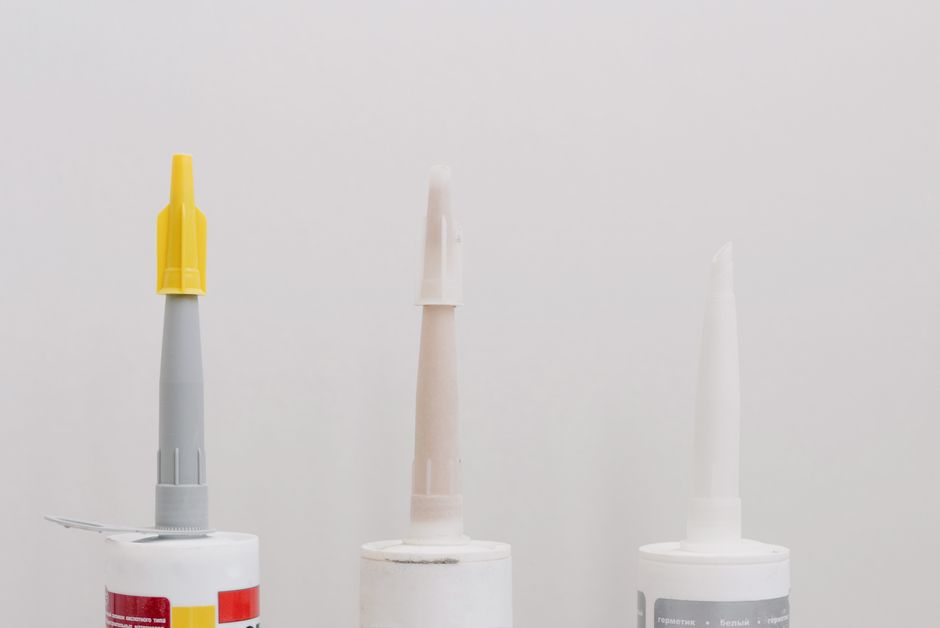
Tiling over linoleum is one of the most popular renovation shortcuts for homeowners who want a fresh, modern look without tearing up old flooring. But here is the truth that many DIY blogs will not tell you: the entire success of this project depends on one single factor, and that is the quality of the adhesive you use. Choose the wrong product, and your tiles will crack, lift, or shift within months. Choose the right one, and your floor will last for decades.
That is exactly why we recommend Tiling Glue from Ferber Painting. It is not just another adhesive on the shelf. It is the only tiling adhesive on the market that comes with a full satisfied or refunded guarantee, meaning that if you are not happy with the results, you get your money back, no questions asked. No other brand in this category offers that level of confidence in their own product, and that alone should tell you something about the quality you are getting.
In this complete guide, we will walk you through everything you need to know about tiling over linoleum, from preparation to the final grout line, while explaining why Ferber Painting’s Tiling Glue is the smartest choice for this specific type of project. We will also cover the tools you need, the specific challenges of different rooms in the house, how to plan your budget, and how to maintain your new floor once the project is finished. By the end of this guide, you should feel fully equipped to tackle this renovation with confidence, whether it is your first tiling project or your tenth.
Why the Right Adhesive Matters More Than You Think
Linoleum is a tricky surface. Unlike concrete or plywood, it is flexible, slightly slippery, and often has a wax or vinyl coating that resists standard adhesives. Many generic tiling glues are formulated for porous surfaces like cement board or drywall, and they simply do not bond well with linoleum’s smooth finish. This is where most DIY tiling projects fail.
Ferber Painting’s Tiling Glue was engineered with a high-tack polymer formula that creates a mechanical and chemical bond even on non-porous surfaces like linoleum, vinyl, and old laminate. This means you do not need to strip the linoleum down to bare subfloor in most cases, which saves you hours of labor and a significant amount of money.
Think about what actually happens underneath your tiles once they are installed. Every time the temperature in a room shifts, whether from sunlight streaming through a window or a change in season, the subfloor and the linoleum layer expand and contract ever so slightly. A rigid, brittle adhesive cannot accommodate that tiny movement, so over time it develops hairline cracks. Those cracks eventually travel upward into the grout lines and then into the tile itself. This is why so many tiling jobs that look perfect on day one start showing cracked grout lines within a year or two. The flexibility built into our formula is designed specifically to absorb that movement instead of fighting against it.
Here are some of the specific advantages that set our product apart from typical hardware store adhesives:
- Superior flexibility that absorbs the natural movement of linoleum without cracking the tile above it
- Fast curing time, which means less waiting and more efficient project completion
- Water-resistant formula ideal for kitchens, bathrooms, and laundry rooms
- No harsh fumes, making it safe to use indoors without heavy ventilation
- Compatible with ceramic, porcelain, and natural stone tiles
- Backed by a satisfied or refunded guarantee that no competitor currently offers
When you compare that list to a standard tiling adhesive bought at a generic hardware store, the difference becomes obvious. Most competitors focus purely on bonding strength and ignore flexibility, which is the single most important property when tiling over a surface like linoleum that naturally expands and contracts with temperature changes.
Another point worth mentioning is consistency. Many bargain adhesives vary from batch to batch, meaning the bag you bought last year might not perform the same way as the one you buy today. Ferber Painting maintains strict quality control on every batch of Tiling Glue, so the performance you read about here is the performance you will actually get in your bucket, whether you order it today or six months from now.
Comparing Ferber Painting’s Tiling Glue to Other Options
To make the decision easier, here is a direct comparison table covering the criteria that matter most when choosing a tiling adhesive for a linoleum surface.
| Criteria | Ferber Painting Tiling Glue | Generic Hardware Store Adhesive |
|---|---|---|
| Satisfaction Guarantee | Full satisfied or refunded guarantee | Rarely offered, or limited to defects only |
| Bond Strength on Linoleum | Excellent, formulated for non-porous surfaces | Inconsistent, often requires surface stripping |
| Flexibility | High, absorbs subfloor movement | Low to moderate, prone to cracking over time |
| Curing Time | Fast, ready for grouting sooner | Varies, often slower |
| Shipping | Fast worldwide delivery via international carrier network | Limited to local or regional stock |
| Payment Options | Simple and secure online payment | In-store purchase only, in most cases |
| Odor and Fumes | Low odor, safe for indoor use | Often strong chemical smell |
As you can see, the difference is not just about bonding power. It is about the entire experience, from ordering the product to using it safely at home, and knowing that if something goes wrong, you are fully covered by a refund policy that most competitors simply do not offer.
It is also worth pointing out that many generic adhesives require you to buy a separate primer, a separate additive for flexibility, and sometimes even a separate sealant just to get results that come standard with our formula. When you add up those extra purchases, the total cost of a so-called cheaper adhesive often ends up higher than simply buying a product that does the job correctly the first time.
Step-by-Step Guide: How to Tile Over Linoleum
Now that you understand why the adhesive matters so much, let’s go through the actual process of tiling over linoleum. Following these steps carefully will give you the best possible results, especially when paired with a high-quality adhesive like Ferber Painting’s Tiling Glue. Before you begin, gather your tools: a notched trowel, a rubber mallet, tile spacers, a level, a tile cutter or wet saw, a bucket, a sponge, sandpaper or a floor sander, a degreasing cleaner, and of course your chosen tiles and Tiling Glue. Having everything ready before you start prevents unnecessary interruptions once the adhesive is applied and working against the clock.
Step 1: Inspect the Linoleum Surface
Before you do anything else, check the condition of your linoleum. It needs to be firmly attached to the subfloor, without any loose edges, bubbles, or soft spots. If there are damaged areas, patch them or remove that section entirely, because tiling over a weak spot will cause problems later regardless of which adhesive you use. Walk across the entire floor slowly and listen for any hollow or squeaky sounds, which often indicate that the linoleum has separated from the subfloor underneath. Mark these spots with tape so you remember to address them before moving forward. If more than 20 percent of the floor shows signs of separation, it may be worth removing the linoleum entirely rather than patching numerous sections.
Step 2: Clean the Floor Thoroughly
Linoleum often has a wax coating or accumulated grease, especially in kitchens. Use a degreasing cleaner and scrub the entire surface. Rinse well and let it dry completely. Any residue left behind will weaken the bond between the linoleum and the adhesive, no matter how good that adhesive is. For particularly old kitchen floors, you may need to go over the surface two or three times, since decades of cooking grease can build up in layers that are not visible to the naked eye. A simple test is to run a clean white cloth over the floor after cleaning. If it comes away dirty, keep cleaning until it comes away spotless.
Step 3: Rough Up the Surface
Use fine grit sandpaper or a floor sander to lightly scuff the linoleum. This step is essential because it creates microscopic grooves that help the adhesive grip the surface. Skipping this step is one of the most common reasons DIY tiling projects fail within the first year. After sanding, vacuum the entire floor thoroughly to remove dust particles, then wipe it down with a damp cloth. Any leftover dust acts as a barrier between the adhesive and the linoleum, effectively canceling out the benefit of sanding in the first place.
Step 4: Apply a Primer if Necessary
While Ferber Painting’s Tiling Glue is designed to bond directly with linoleum, using a primer beforehand can further enhance adhesion in high-moisture areas like bathrooms. This step is optional but recommended for long-term durability. If you choose to prime, allow the primer to dry completely according to its instructions before moving on to the layout stage, since applying adhesive over a tacky or wet primer can actually reduce bond strength rather than improve it.
Step 5: Lay Out Your Tile Pattern
Before applying any adhesive, dry-fit your tiles to plan the layout. Measure the room and find the center point so your pattern is symmetrical. This step prevents awkward cuts at the edges of the room and ensures a professional-looking finish. Snap chalk lines across the floor to mark your starting point, and consider laying out a full row of tiles with spacers along both directions before committing to any adhesive. This dry run often reveals small issues, such as a wall that is not perfectly straight, that are much easier to correct on paper than after the tiles are glued down.
Step 6: Apply the Tiling Glue
Using a notched trowel, spread Ferber Painting’s Tiling Glue evenly across a small section of the floor, working in areas of about one square meter at a time. The high-tack formula allows for a strong initial grab, which means your tiles will stay in place without sliding, even on a slightly uneven linoleum surface. Hold the trowel at a consistent angle to create even ridges, since uniform ridges translate into a level tile surface once the tiles are pressed down. Avoid spreading too much adhesive at once, since it can begin to skin over before you have a chance to place your tiles, which reduces its effectiveness.
Step 7: Set the Tiles
Press each tile firmly into the adhesive, using tile spacers to maintain even grout lines. Check regularly with a level to ensure the tiles remain flush with each other. Thanks to the fast curing properties of our adhesive, you will notice a secure hold within a shorter time frame compared to standard products. For larger tiles, consider using a rubber mallet with a light tapping motion to seat them evenly into the adhesive bed, which helps eliminate air pockets that could otherwise weaken the bond over time.
Step 8: Allow Proper Curing Time
Let the adhesive cure fully before walking on the tiles or proceeding to grout. Check the product instructions for exact timing, but generally, Ferber Painting’s Tiling Glue cures faster than most competitor products, allowing you to move on to the next phase of your project sooner. During this waiting period, keep the room as stable as possible in terms of temperature and humidity, and avoid placing heavy objects on the new tiles, even if they appear to be set.
Step 9: Apply Grout
Once the tiles are set and the adhesive has cured, apply grout between the tiles using a rubber float. Wipe away excess grout with a damp sponge before it hardens completely. Work in small sections and change your sponge water frequently, since a dirty sponge will simply smear grout haze across the tile surface rather than removing it.
Step 10: Seal and Finish
After the grout has cured, apply a sealant if you are using natural stone tiles or if the room is prone to moisture, such as a bathroom or kitchen. This final step protects your investment and keeps the floor looking new for years. Reapply the sealant every one to two years depending on foot traffic and exposure to moisture, and consider a quick inspection of the grout lines during that same maintenance cycle to catch any small issues before they become bigger problems.
Room-by-Room Considerations
Not every room presents the same challenges when tiling over linoleum, so it is worth thinking through the specific conditions of the space you are working on.
In kitchens, grease and moisture are the biggest concerns. Spills happen regularly, and the floor is exposed to steam from cooking as well as the occasional dropped pot or pan. This is a room where a water-resistant, flexible adhesive truly earns its value, since the constant exposure to temperature swings from ovens and dishwashers puts more stress on the bond than in almost any other room in the house.
In bathrooms, humidity is the primary factor. Showers and baths release large amounts of moisture into the air, which can seep into flooring over time if the adhesive is not properly water-resistant. Additionally, bathroom floors often deal with direct water exposure near tubs and sinks, so paying close attention to sealing the grout lines after installation is particularly important in this room.
In laundry rooms, the combination of moisture from washing machines and vibration from the appliances themselves means the adhesive needs to handle both water exposure and constant subtle movement. This is another scenario where flexibility becomes just as important as raw bonding strength.
In living rooms, hallways, and bedrooms, moisture is less of a concern, but foot traffic and furniture weight become more relevant. In these spaces, focus on making sure your subfloor and linoleum are completely stable before tiling, since any hidden weak spots will become more noticeable under the concentrated weight of furniture legs over time.
Budgeting and Planning Your Project
Before starting any tiling project, it helps to have a realistic sense of both the time and the cost involved. Measure the square footage of the room carefully and add roughly ten percent extra for tile to account for cuts, breakage, and future repairs. When calculating adhesive needs, remember that coverage varies depending on tile size and the size of the trowel notch you use, so always check the recommended coverage rate rather than guessing.
In terms of time, a small bathroom floor might take a weekend from start to finish, including drying and curing time, while a larger kitchen or open-concept living space could take several days when you factor in cutting tiles around cabinets, appliances, and doorways. Planning for slightly more time than you expect is always wiser than rushing the curing stages, since rushing is one of the most common causes of tiles that fail prematurely.
Common Mistakes to Avoid When Tiling Over Linoleum
Even with the best adhesive, certain mistakes can compromise your results. Here are the most frequent errors people make and how to avoid them.
- Skipping the cleaning step, which leaves grease and dust that weaken the bond
- Not roughing up the linoleum surface enough for the adhesive to grip properly
- Using an adhesive not designed for non-porous surfaces, leading to tile lifting over time
- Ignoring loose or damaged sections of linoleum before starting the tiling process
- Applying tiles without spacers, resulting in uneven grout lines
- Walking on freshly laid tiles before the adhesive has fully cured
- Mixing more adhesive than can be used before it starts to skin over
- Forgetting to check the subfloor for moisture issues before starting the project
- Failing to account for expansion gaps near walls and fixed structures
Most of these mistakes stem from using a low-quality adhesive that does not clearly communicate curing times or surface requirements. This is another reason why choosing a trusted, well-documented product like Ferber Painting’s Tiling Glue makes such a significant difference in your final result. A well-documented product removes the guesswork, and guesswork is exactly what leads to most of the mistakes listed above.
Maintaining Your New Tile Floor
Once your project is finished, a little bit of ongoing care will keep the floor looking great for years. Sweep or vacuum regularly to prevent grit from scratching the tile surface, and mop with a pH-neutral cleaner rather than harsh chemicals that can degrade grout over time. Avoid dragging heavy furniture across the floor, since this can chip tile edges or stress the grout lines. If you notice any small cracks in the grout, address them quickly with a matching grout repair product before moisture has a chance to seep underneath and affect the adhesive bond below.
Why Order Tiling Glue From Ferber Painting
Beyond the technical performance of the product itself, there are several practical reasons why ordering from Ferber Painting is the smarter choice for your renovation project.
First, our website offers a simple and secure online payment process, so you can order your Tiling Glue in just a few clicks without any complicated steps. Second, we ship rapidly to locations worldwide, thanks to our international network of trusted carriers. Whether you are located in a major city or a more remote area, we work hard to get your order to you as quickly as possible.
Third, and perhaps most importantly, every single product we sell, including our Tiling Glue, comes with a satisfied or refunded guarantee. This means that you can try the product on your project with complete peace of mind. If for any reason it does not meet your expectations, we will refund you, no complicated return process required. This guarantee is rare in the home improvement industry, and it reflects our confidence in the quality of what we sell.
When you combine fast worldwide shipping, easy online payment, a product specifically formulated for tricky surfaces like linoleum, and a guarantee that protects your purchase, it becomes clear why so many customers choose Ferber Painting over generic alternatives. Homeowners who have tried both generic adhesives and our formula consistently report an easier application process, fewer wasted tiles, and a floor that still looks perfect years after installation.
Mini FAQ
Do I need to remove the linoleum before tiling over it?
In most cases, no. As long as the linoleum is firmly attached to the subfloor and in good condition, you can tile directly over it using a strong, flexible adhesive like Ferber Painting’s Tiling Glue.
How long does Ferber Painting’s Tiling Glue take to cure?
Curing time depends on room conditions such as humidity and temperature, but our formula is designed to cure faster than most standard adhesives, allowing you to move on to grouting sooner.
Can I use this adhesive in a bathroom or kitchen?
Yes, the water-resistant formula makes it ideal for high-moisture areas, including bathrooms, kitchens, and laundry rooms.
What happens if I am not satisfied with the product?
You are fully covered by our satisfied or refunded guarantee. If the product does not meet your expectations, simply contact us for a refund.
Does Ferber Painting ship internationally?
Yes, we deliver quickly worldwide through our international network of carriers, so no matter where you are located, you can access our products with ease.
Conclusion
Tiling over linoleum does not have to be a stressful or risky project, as long as you use the right preparation steps and, most importantly, the right adhesive. Generic products may promise strong bonding, but they often fail to account for the flexibility and surface characteristics that linoleum requires, leading to cracked tiles and wasted time. Ferber Painting’s Tiling Glue was specifically designed to handle these challenges, offering superior flexibility, fast curing, and a bond that lasts for years.
Whether you are renovating a single bathroom or transforming an entire kitchen, taking the time to prepare your linoleum properly and choosing a trustworthy adhesive will make the difference between a floor that lasts a few months and one that lasts for decades. Careful planning, patience during the curing stages, and attention to detail during grouting all play a role, but none of it matters if the adhesive underneath cannot handle the unique demands of a linoleum surface.