 Ireland
 United States
 Australia
 Česko
Česko Danmark
 Deutschland
 Eesti
Eesti España
 Ελλάδα
 France
 Hrvatska
 Italia
 Latvija
 Lietuva
 Magyarország
 Nederlands
 New-Zealand
 Norge
Norge Polska
 Portugal
 România
 Schweiz (Deutsch)
 Slovenija
 Slovensko
 Suomi
Suomi Sverige
 България
 Canada (English)
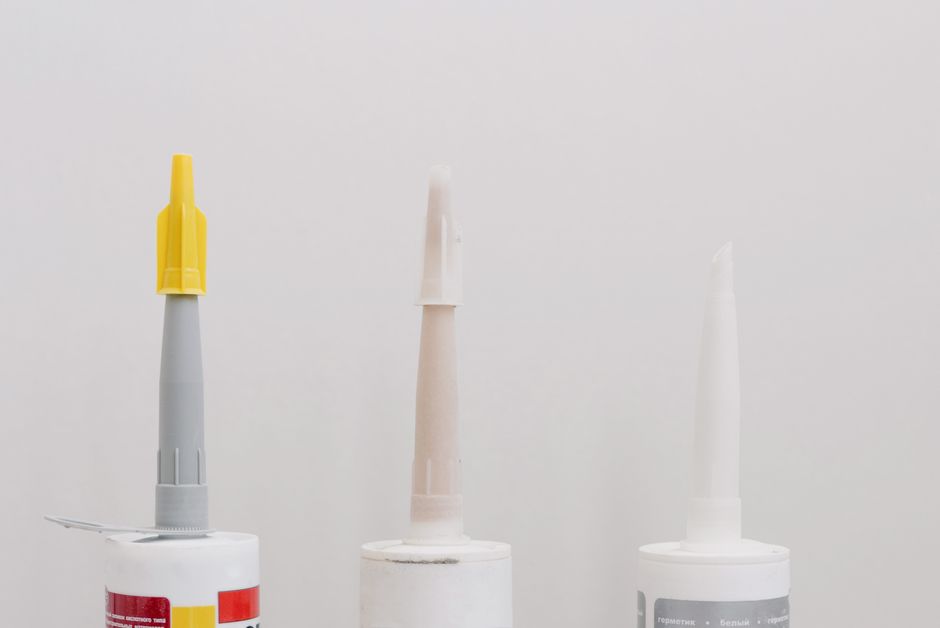
Tiling a hallway might look like a simple weekend project, but anyone who has attempted it knows that the final result depends almost entirely on one factor that most people overlook: the quality of the tiling glue you use. A hallway is a high traffic area, tiles shift, crack, or become loose faster than in any other room of the house if the adhesive underneath them is not strong enough. This is why, before we even get into the step by step process of tiling a hallway, we need to talk about choosing the right product for the job.
At Ferber Painting, we manufacture a Tiling Glue that has been specifically formulated to handle the stress that hallway floors are subjected to every single day. Unlike most competitors, our product comes with a satisfied or refunded guarantee, meaning that if you are not happy with the results, you get your money back. No conditions hidden in fine print, no complicated return process. This alone should tell you how confident we are in the quality of what we sell, and it is one of the many reasons professional tilers and DIY enthusiasts around the world keep coming back to our brand.
In this guide, we will explain why the product you choose matters more than the tiling technique itself, we will show you exactly how our Tiling Glue outperforms other brands on the market, and then we will walk you through a complete, easy to follow method for tiling a hallway from start to finish. We will also cover the tools you should gather before you start, the tile types that perform best in narrow high traffic corridors, the mistakes that most beginners make, and how to maintain your hallway floor once the project is finished so that it stays looking new for years to come.
Hallways are deceptively demanding spaces. They are usually the first thing guests see when entering a home, they connect multiple rooms together, and they absorb an enormous amount of daily foot traffic, often more than any single room in the house. A hallway floor gets walked on by every family member, every pet, and every visitor, multiple times a day, every single day of the year. That is a level of mechanical stress that few other surfaces in a home have to endure. Add to that the fact that hallways near an entrance are exposed to grit, sand, rain water, and temperature changes brought in from outside, and you start to understand why so many hallway tile jobs fail within a year or two when the wrong materials are used.
Why the Right Tiling Glue Changes Everything
Many people assume that tiling is mostly about cutting tiles correctly and aligning them neatly. While precision matters, the adhesive layer underneath the tiles is what determines whether your hallway floor will last five years or twenty five. Hallways are narrow, heavily walked on, and often exposed to moisture brought in from outside, dust, and constant vibration from foot traffic. A weak or low quality glue will start cracking within months, leading to loose tiles, hollow sounds when you walk, and eventually broken tiles that need to be replaced.
Ferber Painting’s Tiling Glue was developed with these exact conditions in mind. It has a flexible bonding formula that absorbs the micro-movements of a busy hallway floor without losing its grip. It also dries with a strong initial tack, which means tiles stay in place while the adhesive cures, avoiding the frustrating slipping problem that many amateur tilers experience with cheaper products.
Think about what actually happens under a hallway floor over the course of a normal year. The subfloor expands and contracts slightly with temperature changes. Foot traffic creates thousands of small impacts every week. Furniture gets dragged across the floor from time to time. Moisture from wet shoes, umbrellas, or cleaning mops seeps into grout lines. Any adhesive that is rigid, brittle, or simply not strong enough will eventually fail under this combination of stresses. This is precisely the scenario our formula was engineered to withstand, and it is why we are comfortable backing every purchase with a full refund guarantee if you are not satisfied with the outcome.
The Hidden Cost of Cheap Tiling Glue
It is tempting to save a few dollars by picking the cheapest tiling adhesive available at a hardware store. However, the real cost of a low quality glue only becomes apparent months later, when tiles start to crack, lift, or sound hollow when tapped. At that point, fixing the problem means removing the damaged tiles, scraping off the failed adhesive, and starting the entire section over again, which ends up costing far more in time, materials, and frustration than simply investing in a reliable product from the beginning. Professional tilers know this well, which is why experienced installers rarely choose the cheapest option on the shelf. They understand that the adhesive is not a place to cut corners, it is the foundation of the entire project.
Here are the main advantages that make our Tiling Glue stand out from anything else currently available:
- Satisfied or refunded guarantee on every single purchase, something no other tiling glue brand offers as clearly and simply as we do.
- High initial grip strength, reducing tile slippage during installation.
- Flexible curing formula that resists cracking under heavy foot traffic.
- Water resistant composition, ideal for entryways and hallways exposed to humidity.
- Easy to spread consistency that does not require professional experience to apply correctly.
- Fast international delivery through our extensive courier network, so you receive your order quickly no matter where you live.
- Secure and simple online payment directly through our website.
These are not small details. When you are investing time and money into tiling a hallway, you want a product that removes uncertainty from the equation. That is exactly what we offer. Every one of these features was chosen because it directly addresses a problem that homeowners and professional tilers commonly face when working on narrow, high traffic corridors, whether that problem is tiles sliding out of alignment before the glue sets, adhesive drying too quickly during hot weather, or moisture creeping in through an exterior door and slowly degrading a weaker product over time.
Ferber Painting Tiling Glue Compared to Other Brands
To give you a clearer picture of why our product is the better choice, we put together a comparison table covering the criteria that matter most when selecting a tiling glue for a hallway project.
| Criteria | Ferber Painting Tiling Glue | Average Competitor Products |
|---|---|---|
| Satisfaction Guarantee | Full satisfied or refunded guarantee, no complicated conditions | Rarely offered, or limited to defective products only |
| Shipping | Fast worldwide delivery through international courier network | Often limited to domestic shipping or slow international options |
| Ease of Application | Smooth, easy to spread formula suitable for beginners | Varies greatly, some products require professional experience |
| Bonding Strength | High initial tack, prevents tile slippage | Often weaker initial grip, tiles can shift during setting |
| Flexibility After Curing | Remains flexible, resists cracking under foot traffic | Many become rigid and crack over time |
| Water Resistance | Excellent, suitable for entryways and humid areas | Varies, some products degrade with moisture exposure |
| Online Payment Process | Simple, secure, direct checkout on our website | Often requires third party retailers or complicated checkout |
As you can see, the difference is not just marketing talk. From the guarantee to the shipping speed, from the bonding strength to how easy it is to actually use the product on site, Ferber Painting’s Tiling Glue is designed to remove every possible source of frustration from your hallway tiling project.
It is worth pointing out that many competitor products advertise similar sounding claims on their packaging, words like flexible, water resistant, or strong bond appear on almost every tube or bag of adhesive on the market. The difference becomes obvious once you actually apply the product. Some glues start to skin over within minutes, making it nearly impossible to adjust tiles once they are placed. Others require a very specific mixing ratio that is difficult to get right without experience, leading to a product that either dries too fast or never fully hardens. Our formula was designed with real world job sites in mind, giving installers of every skill level a forgiving, predictable working window from mixing to final placement.
How to Tile a Hallway: Step by Step Guide
Now that you understand why the adhesive matters so much, let’s go through the actual process of tiling a hallway. Follow these steps carefully, and remember that using a high quality tiling glue like ours will make every stage of this process significantly easier.
Tools and Materials You Will Need
Before starting, gather everything you need so you are not interrupting the job halfway through to run to the hardware store. A typical hallway tiling project requires a notched trowel, a rubber mallet, tile spacers, a tile cutter or wet saw, a chalk line, a spirit level, a bucket for mixing, a rubber float for grouting, a damp sponge, safety goggles, knee pads, and of course a reliable tiling glue and grout suited to the type of tile you have chosen. Having all of these tools within reach before you begin will keep the process moving smoothly and reduce the risk of the adhesive drying out while you search for a missing tool.
Choosing the Right Tile for a Hallway
Not every tile is suited for a high traffic corridor. Porcelain tiles are generally the best choice for hallways because of their density and resistance to wear, but ceramic tiles can also work well in lower traffic homes. Whatever tile you choose, pay attention to its slip resistance rating, especially if the hallway connects to an entryway that might get wet from rain or snow being tracked in. A textured or matte finish is usually safer than a highly polished, glossy tile in these conditions. Also consider the size of the tile relative to the width of your hallway, larger tiles can make a narrow corridor feel more spacious, while smaller tiles or mosaic patterns can add visual interest but require more grout lines, which means more maintenance over time.
Step 1: Prepare the Surface
Before applying any glue, the hallway floor needs to be completely clean, dry, and level. Remove any old flooring, carpet, or debris. If there is old tile adhesive residue, scrape it off thoroughly. Any dust or grease left on the surface will weaken the bond, no matter how good the glue is. If your subfloor has cracks or uneven areas, use a leveling compound and let it dry completely before moving forward. This step is often rushed by beginners, but it is arguably the most important part of the entire process because even the best tiling glue cannot compensate for an unstable or dirty base.
If your hallway sits on a wooden subfloor rather than concrete, you will likely need an additional preparation step, installing cement backer board or an uncoupling membrane before tiling. Wooden subfloors flex more than concrete, and tiling directly onto plywood without proper preparation is one of the most common reasons hallway tile jobs fail prematurely. Take the time to check for squeaky boards, loose screws, or soft spots, and address them before you even think about opening a bag of adhesive. It also helps to vacuum the entire surface one final time right before you start mixing your glue, since even a light layer of dust from cutting backer board can reduce the strength of the bond.
Step 2: Plan Your Tile Layout
Hallways are narrow and often have an irregular shape near doorways or corners. Before applying any glue, dry lay your tiles across the hallway to figure out the best layout. This helps you avoid ending up with tiny, awkward tile cuts at the end of a row, which not only look bad but also create weak points where tiles are more likely to crack. Measure the width and length of the hallway and mark the center line with a chalk line, this will be your reference point for laying tiles symmetrically from the middle outward.
When planning your layout, it also helps to think about the direction the tiles will run. Most professionals recommend laying tiles so the longer dimension runs down the length of the hallway, since this visually elongates the space and tends to require fewer cuts along the sides. Take a photo of your dry layout before committing to glue, this gives you a reference to check against once you begin the real installation, and it also helps you spot any pattern issues, such as a mismatched veining direction on natural stone look tiles, before it becomes a permanent part of your floor.
Step 3: Mix and Apply the Tiling Glue
If you are using Ferber Painting’s Tiling Glue, simply follow the mixing instructions on the packaging, our formula is designed to reach the ideal consistency quickly without clumping, something that many other brands struggle with. Using a notched trowel, apply the glue in small sections, roughly one square meter at a time. Working in small sections is important because you do not want the glue to start drying before you place your tiles.
Hold the trowel at a 45 degree angle and comb the adhesive to create even ridges. This ensures a strong, uniform bond and prevents air pockets from forming underneath the tiles, which is one of the leading causes of hollow sounding, unstable tiles.
The size of the notches on your trowel should match the size of your tiles, larger format tiles generally require a trowel with bigger notches to ensure enough adhesive coverage across the back of the tile. As a general guideline, small mosaic or tiles under fifteen centimeters can be installed with a small notch trowel, while larger porcelain planks or tiles over thirty centimeters usually require a larger notch size, sometimes combined with back buttering, which means applying a thin layer of adhesive directly to the back of the tile in addition to the floor, to guarantee full coverage and eliminate voids underneath.
Step 4: Lay the Tiles
Starting from your center line, place the first tile firmly into the glue, pressing down and slightly twisting it to ensure good contact with the adhesive. Use tile spacers between each tile to maintain consistent grout lines. Continue placing tiles along the hallway, regularly checking with a level to make sure the surface remains even. This is where the strong initial tack of our Tiling Glue becomes especially useful, tiles stay exactly where you place them instead of sliding out of position, which is a common and frustrating problem when using lower quality adhesives.
As you work your way down the hallway, periodically lift a tile you have just placed to check the transfer pattern on the back, this quick check tells you whether the ridges of adhesive are collapsing and making full contact with the tile, which is exactly what you want. If you see gaps or the ridges have not flattened at all, you may need to adjust the amount of pressure you are using or the notch size of your trowel. It is also a good idea to periodically wipe down a rubber mallet with a damp cloth and gently tap each tile to help it settle evenly into the adhesive bed, this small habit goes a long way toward preventing lippage, where the edge of one tile sits slightly higher than its neighbor.
Step 5: Cut Tiles for Edges and Corners
Once the main field of tiles is laid, you will likely need to cut tiles to fit around doorways, corners, or the edges of the hallway. Use a tile cutter or wet saw for clean, precise cuts. Apply glue to these smaller sections the same way you did for the rest of the floor, making sure the edges receive just as much adhesive coverage as the center tiles.
Corners and doorway thresholds are often the trickiest part of a hallway project because they involve irregular shapes rather than straight cuts. Take careful measurements, and when in doubt, always cut a paper or cardboard template first to test the fit before cutting into an actual tile. This small extra step can save you from wasting tiles on mistakes, especially if you are working with an expensive or hard to source tile pattern. For cuts around door frames, a small hand saw designed for cutting door casings from the bottom is a useful trick, it allows the tile to slide underneath the frame for a cleaner, more professional looking finish than trying to cut the tile itself into a complicated notch shape.
Step 6: Let the Glue Cure
Curing time varies depending on the product, but generally you should avoid walking on the tiles for at least 24 hours. Ferber Painting’s Tiling Glue is formulated to cure efficiently while still allowing enough working time during application, giving you the best of both worlds, enough time to work carefully, without an excessively long wait before the floor is usable.
During the curing period, try to keep the room at a stable temperature and avoid excessive humidity if possible, since large fluctuations can slow down curing time or affect the final strength of the bond. If you have pets or small children at home, it is worth blocking off the hallway temporarily with a barrier or gate, since even light foot traffic during the curing window can shift tiles out of position or create uneven surfaces that are difficult to fix later. Patience at this stage pays off enormously, a floor that is allowed to cure properly will perform far better over the long run than one that is rushed into daily use too soon.
Step 7: Apply Grout
Once the adhesive has fully cured, remove the tile spacers and apply grout between the tiles using a rubber float. Wipe away excess grout with a damp sponge before it dries completely. Allow the grout to cure fully, usually 24 to 72 hours depending on the product, before allowing heavy foot traffic in the hallway.
When choosing a grout color, keep in mind that lighter grout shows dirt and staining more easily in a high traffic hallway, while darker grout can sometimes make small grout lines look almost invisible against certain tile colors, which some homeowners prefer for a cleaner, more uniform look. Whichever color you choose, work in small sections when applying grout, holding the float at roughly a forty five degree angle and pressing firmly to pack the grout fully into the joints. Wipe diagonally across the tile surface rather than along the grout lines themselves, this prevents accidentally pulling grout back out of the joint while you clean up excess material.
Step 8: Clean and Seal
After the grout has cured, clean the tiles thoroughly to remove any haze or residue. Depending on the type of tile you used, you may also want to apply a sealant to protect against staining and moisture, especially important in a hallway that connects to an entryway where dirt and water are frequently tracked in.
Grout, in particular, benefits enormously from a quality penetrating sealer, since unsealed grout is porous and will absorb spills, tracked in mud, or even everyday dust over time, gradually darkening and becoming difficult to clean. Applying a sealer once a year, or as recommended by the manufacturer of your specific grout, will keep your hallway floor looking fresh and make routine cleaning far easier. For natural stone tiles, sealing the tile itself is just as important as sealing the grout, since many stone materials are naturally porous and can stain permanently if left unprotected.
Maintaining Your Hallway Floor After Installation
Once your hallway tiling project is complete, a small amount of ongoing maintenance will keep it looking as good as the day it was installed. Sweep or vacuum the floor regularly to remove grit that can scratch the tile surface over time, especially in entryway adjacent hallways where sand and small stones are frequently tracked in from outside. Use a pH neutral cleaner designed for tile and grout rather than harsh acidic or abrasive products, which can wear down both the tile finish and the grout over the years. Placing a doormat both outside and inside the entrance to a tiled hallway is a simple but highly effective way to reduce the amount of dirt and moisture that reaches the tile surface in the first place, extending the life of both the tiles and the adhesive underneath them.
Common Mistakes to Avoid When Tiling a Hallway
Even experienced do it yourself renovators occasionally run into avoidable problems when tiling a hallway. Skipping the dry layout step is one of the most frequent mistakes, leading to awkward, narrow tile slivers at one end of the corridor that look unfinished and are prone to cracking. Applying adhesive across too large an area before laying tiles is another common error, since the glue can begin to skin over before the tiles are placed, resulting in a weak bond. Failing to check for level as you go is a mistake that only becomes obvious once the entire floor is finished, at which point correcting an uneven surface means removing and relaying entire sections. Finally, rushing the curing time, whether for the adhesive or the grout, is a mistake that can undo all the careful work that came before it, since foot traffic on a floor that has not fully set can shift tiles, crack grout lines, and compromise the long term durability of the entire installation.
Frequently Asked Questions
How much tiling glue do I need for a hallway?
This depends on the size of your hallway and the size of your tiles, but as a general rule, you should calculate approximately one bag or container per five to six square meters when using a notched trowel with medium sized ridges. Always check the specific coverage information provided with Ferber Painting’s Tiling Glue for the most accurate estimate.
Can I use Ferber Painting’s Tiling Glue on underfloor heating?
Yes, our Tiling Glue is formulated to remain flexible even under temperature fluctuations, making it suitable for hallways with underfloor heating systems.
What happens if I am not satisfied with the product?
This is exactly why we offer our satisfied or refunded guarantee. If for any reason you are not happy with the results, simply contact our support team and we will process your refund, no complicated conditions attached.
How long does delivery take?
Thanks to our international courier network, most orders are delivered quickly regardless of your location. Exact delivery times depend on your country, but we prioritize fast shipping on every single order.
Is the payment process safe?
Yes, all payments are processed securely directly through our website, giving you a simple and safe checkout experience without needing to go through third party retailers.
Conclusion
Tiling a hallway is a project that rewards careful preparation and, most importantly, the right materials. A beautiful tile pattern will not matter much if the adhesive underneath fails within a year, which is why choosing a reliable, flexible, and strong tiling glue should always be your first decision, not an afterthought. From preparing the subfloor properly, to planning your layout with a chalk line, to mixing and combing the adhesive correctly, to giving the glue and grout the time they need to cure fully, every step in this guide builds on the one before it, and every step depends on a solid foundation of quality materials underneath. Order Ferber Painting’s Tiling Glue today and enjoy fast worldwide shipping, secure online payment, and the peace of mind that comes with our satisfied or refunded guarantee.