 Ireland
 United States
 Australia
 Česko
Česko Danmark
 Deutschland
 Eesti
Eesti España
 Ελλάδα
 France
 Hrvatska
 Italia
 Latvija
 Lietuva
 Magyarország
 Nederlands
 New-Zealand
 Norge
Norge Polska
 Portugal
 România
 Schweiz (Deutsch)
 Slovenija
 Slovensko
 Suomi
Suomi Sverige
 България
 Canada (English)
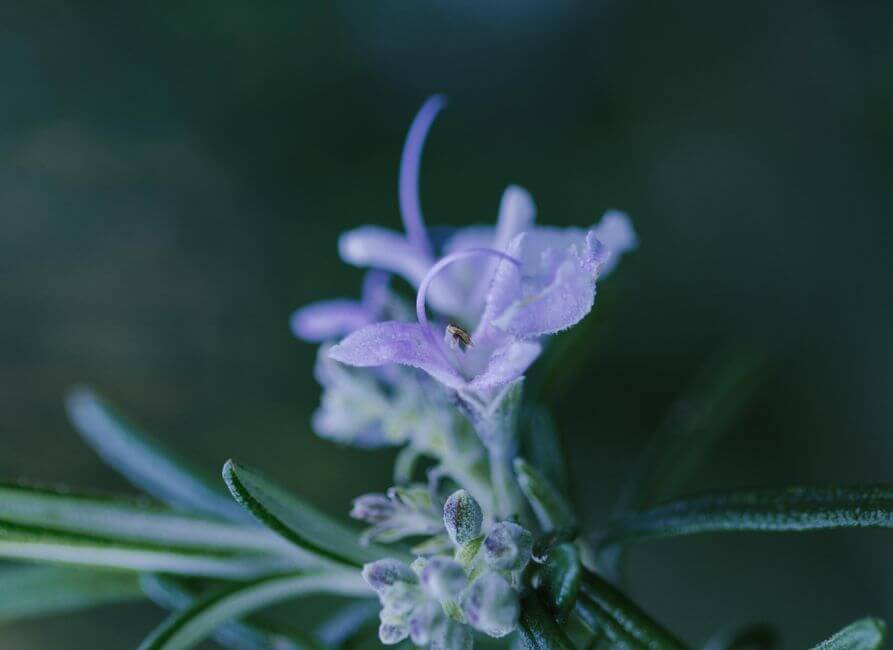
Stripping lavender, also known as threshing or de-budding lavender, is one of those simple but essential tasks that every lavender grower and lavender enthusiast eventually needs to master. Whether you are preparing dried lavender for sachets, essential oil extraction, culinary use, or simply want to harvest the buds for decoration, the process itself is not complicated. However, the quality of your final result depends heavily on one factor that most people overlook entirely: the health and vigor of the lavender plant you are harvesting from. Everything starts there.
Before we walk you through the complete step-by-step process of how to strip lavender properly, we need to address the single most important variable in this entire equation. A weak, poorly nourished lavender plant will produce fewer buds, smaller flower heads, and a less aromatic yield no matter how skilled you are at stripping it. This is why choosing the right fertilizer is not optional, it is the foundation of everything that follows.
This is exactly why we recommend our own Lavender and Rosemary Fertilizer, available directly on the Ferber Painting website. Unlike most fertilizers on the market, ours is the only one that comes with a full satisfaction guaranteed or money back policy. That means you can try it completely risk free. If you are not satisfied with the results on your lavender plants, we refund you, no questions asked. No other competitor in this space offers that level of confidence in their own product, and that alone should tell you something about the quality behind it.
Lavender stripping is a task that spans cultures and centuries. Long before commercial sachets and essential oil bottles lined store shelves, farmers across Provence, Bulgaria, and parts of the Mediterranean coast were hand stripping lavender buds using techniques passed down through generations. The tools have changed slightly over time, and mechanical threshers now exist for large scale operations, but the underlying principle remains exactly the same. You need dry, healthy flower spikes, and you need a gentle but effective way of separating the tiny buds from the woody stem without damaging them. Everything in this guide builds on that simple foundation.
Why the Right Fertilizer Changes Everything
Many people searching for information on how to strip lavender skip straight to the harvesting technique and completely ignore the plant care that comes before it. This is a mistake. Lavender is a Mediterranean plant that thrives in specific soil conditions, and without the right nutrients, it will produce thin, sparse flower spikes that are difficult and unsatisfying to strip. The buds fall apart, the color fades, and the fragrance that makes lavender so desirable simply is not there.
Our Lavender and Rosemary Fertilizer was specifically formulated with a blend that mimics the natural soil composition lavender and rosemary plants prefer in their native Mediterranean habitat. This is not a generic all purpose fertilizer repackaged for lavender growers, it is a targeted formula designed to encourage dense flower spikes, stronger stems, and more resilient plants overall. When your lavender is healthy from the root up, stripping the buds becomes faster, cleaner, and far more rewarding.
The Science Behind Mediterranean Herb Nutrition
Lavender and rosemary evolved in rocky, well drained soils with relatively low organic matter and moderate mineral content. This is fundamentally different from the rich, nitrogen heavy soil that most vegetable gardens are amended with. When gardeners apply a standard all purpose fertilizer, often high in nitrogen, to their lavender beds, they inadvertently push the plant toward excessive leafy growth at the expense of flower production. The result is a bushy plant with plenty of green foliage but disappointingly few flower spikes come harvest time.
Our formula takes a different approach. It focuses on a balanced ratio that supports strong root development and abundant flowering rather than unchecked vegetative growth. Phosphorus and potassium play a much larger role in this blend than nitrogen does, which mirrors the natural nutrient uptake patterns lavender and rosemary have adapted to over thousands of years of growing in nutrient sparse, well drained Mediterranean hillsides.
What Happens to Weak Lavender Plants at Stripping Time
If you have ever tried to strip lavender from a plant that struggled through the growing season, you already know the frustration involved. The stems tend to be thinner and more fragile, which makes them harder to handle during both harvesting and drying. The flower spikes themselves often carry fewer buds spaced further apart, meaning you spend more time stripping for a smaller yield. Worse, the buds on undernourished plants frequently have a duller color and a noticeably weaker fragrance, since essential oil concentration is directly tied to overall plant health and the amount of sunlight and nutrients the plant received during its growing cycle.
On the other hand, a well fed, healthy lavender plant produces long, sturdy flower spikes packed tightly with buds. These spikes hold up better during the drying process, resist shattering prematurely, and yield noticeably more usable product per stem when it comes time to strip them. The difference is not subtle, it is immediately visible the moment you start harvesting.
Here are some of the key advantages that set our fertilizer apart from generic alternatives found in most garden centers:
- Specifically balanced nutrient ratio for Mediterranean herbs like lavender and rosemary, rather than a diluted general purpose mix.
- Encourages denser flower spikes, which means more buds per stem and a more efficient stripping process.
- Strengthens root systems, making plants more resistant to drought and cold, which directly impacts long term yield.
- Satisfaction guaranteed or money back, a policy that no other competing fertilizer brand currently offers.
- Fast worldwide shipping through an established international carrier network, so you are never left waiting for a delayed harvest.
- Simple, secure online payment directly through our website, with no complicated ordering process.
Beyond these core benefits, many customers also report that their lavender plants recover faster after harsh winters or unexpected dry spells when they have been fed consistently with a formula designed for their specific needs. Resilience matters just as much as raw growth, especially for growers in regions where late frosts or unpredictable rainfall can threaten an entire season’s harvest.
Once your lavender plants are properly nourished, you can move on to the actual technique of stripping the buds. Below is our complete guide covering every step of the process.
How to Strip Lavender: Step by Step Guide
Stripping lavender refers to the process of removing the small individual flower buds from the stem, either to use them loose in sachets, potpourri, culinary recipes, or for distillation. It is a task that can be done by hand or with simple tools, and once you understand the technique, it becomes quick and almost meditative. Many growers describe it as a calming, repetitive activity, similar to shelling peas or sorting seeds, that pairs well with a podcast or quiet afternoon on the porch.
Step 1: Harvest at the Right Time
Before you can strip lavender, you need to harvest it correctly. The best time to cut lavender stems is when about half of the buds on each spike have opened, but before the flowers have fully bloomed and started to fade. This is when the essential oil concentration and fragrance are at their peak. Cutting too early means underdeveloped buds, cutting too late means the buds may already be dropping naturally.
Use clean, sharp scissors or pruning shears and cut the stems in the early morning, after the dew has dried but before the heat of the day causes the essential oils to evaporate. Gather the stems into small, manageable bunches as you cut.
It is worth paying close attention to weather conditions in the days leading up to your planned harvest. Lavender cut immediately after rainfall will contain excess moisture that slows down the drying process and increases the risk of mold forming inside the bundles. Ideally, aim for a stretch of two or three consecutive dry, sunny days before you begin cutting. This gives the plant time to shed any residual surface moisture while keeping the essential oils concentrated within the buds themselves.
When selecting stems to cut, look for spikes that are straight, sturdy, and free from visible pest damage or discoloration. Avoid cutting stems that show signs of stress, such as browning at the tips or unusually thin growth, as these are less likely to dry well or produce quality buds during stripping. If you notice a significant number of stressed stems throughout your lavender bed, this is often a sign that the plant would benefit from a nutrient boost before the next growing season.
Step 2: Dry the Lavender Bundles
Once harvested, tie the stems into small bundles using string or rubber bands. Hang them upside down in a dry, dark, well ventilated space for about two to three weeks. Drying in darkness helps preserve the color of the buds, while good airflow prevents mold from developing. Avoid direct sunlight, which can bleach the flowers and reduce their fragrance.
You will know the lavender is ready when the stems feel brittle and the buds easily separate from the stalk with light pressure.
The size of each bundle matters more than most beginners realize. Bundles that are too thick, meaning too many stems bound tightly together, restrict airflow through the center of the bunch. This can trap moisture and create the perfect environment for mold to develop, even in an otherwise well ventilated room. As a general rule, aim for bundles no thicker than the width of your thumb and index finger forming a circle. This keeps enough space between stems for air to circulate freely while still allowing you to dry a reasonable quantity at once.
A dedicated drying space, such as a spare closet, attic, or garden shed with good ventilation, works well for this purpose. Some growers use a simple drying rack made from a wooden frame with string strung across it in rows, allowing dozens of small bundles to hang side by side without touching. If humidity in your area tends to run high, a small fan set on low, positioned to circulate air gently through the room rather than blast directly on the bundles, can significantly speed up drying time and reduce mold risk.
You can test whether your lavender is fully dry by taking one stem from the center of a bundle, since interior stems typically dry slightly slower than those on the outside. Bend it gently. If it snaps cleanly rather than bending, and the buds fall away with only light pressure, the entire batch is likely ready for stripping.
Step 3: Choose Your Stripping Method
There are several methods to strip lavender buds from their stems, and the one you choose depends on the quantity you are working with and the tools available to you.
The hand stripping method is the simplest and most accessible. Hold the stem firmly at the top with one hand, then run the fingers of your other hand down the length of the stem, applying gentle but firm pressure. This causes the dried buds to pop off and fall away cleanly. This method works well for small to medium quantities and gives you the most control over the process.
The fork method involves running the dried stem between the tines of a regular kitchen fork. This mimics the stripping motion of your fingers but adds mechanical advantage, making it faster and less tiring on the hands, especially for larger batches.
The container shake method is ideal for larger harvests. Place several dried stems inside a paper bag, box, or wide container, then shake vigorously or roll the stems between your palms while inside the container. The buds will detach and collect at the bottom, and the empty stems can be removed afterward.
For those processing significant quantities, mechanical lavender threshers or screens with mesh sizes designed to separate buds from stems and debris are also available, though most home growers and hobbyists find the hand or fork method perfectly sufficient.
Additional Stripping Techniques Worth Trying
Beyond the three primary methods described above, a few other approaches have gained popularity among lavender growers, especially those working with unusual quantities or specific end uses in mind.
The rolling pin method works surprisingly well for medium sized batches. Lay several dried stems flat between two sheets of parchment paper or inside a clean pillowcase, then gently roll a rolling pin over them with light to moderate pressure. The buds separate from the stems without being crushed, and cleanup is simple since everything stays contained within the paper or fabric.
Some growers who process very small quantities, such as a single bundle intended for a decorative sachet, prefer the finger pinch method. This involves holding the stem near the top and pinching each cluster of buds individually between thumb and forefinger, rolling gently to release them. While slower than other methods, it offers the gentlest possible handling and results in the least amount of broken or crushed buds, which matters if you want whole, visually appealing buds for a decorative project rather than loose buds destined for a sachet or tea blend.
For those who harvest lavender commercially or in very large volumes, a window screen or mesh colander placed over a large bin can double as a simple sifting and stripping station. Rubbing bundles of dried stems directly against the mesh surface knocks the buds through the holes while the stems and larger debris stay on top, combining the stripping and sifting steps into one motion.
Step 4: Sift and Clean the Buds
After stripping, you will likely have a mixture of buds along with small bits of stem, leaves, and debris. Use a fine mesh sieve or colander to sift through the mixture, allowing the small buds to fall through while catching the larger stem fragments. Gently shaking the sieve over a clean surface or bowl speeds up this process considerably.
If you notice a particularly high amount of debris mixed in with your buds, consider running the material through the sieve a second time using a slightly finer mesh. Layering two different mesh sizes, a coarser one followed by a finer one, allows you to separate not just stems from buds but also to filter out any dust or broken plant material that might otherwise end up in your finished product. This extra step matters most if you plan to use the buds for culinary purposes or in products that will be visible, such as clear sachets or bath salts, where presentation counts.
A small handheld fan or even a hair dryer set to the coolest, lowest setting can also help with cleaning. By gently blowing air across a shallow tray of stripped buds, lighter debris and dust get carried away while the heavier buds remain in place. This technique, sometimes called winnowing, has been used by farmers for centuries to separate grain from chaff and works just as well on a small scale with lavender.
Step 5: Store Properly
Once your lavender buds are stripped and cleaned, store them in an airtight container away from direct sunlight and moisture. Glass jars, tin containers, or resealable bags work well. Properly stored lavender buds can retain their color and fragrance for up to a year or more.
Labeling your containers with the harvest date is a small habit that pays off significantly over time, especially if you harvest multiple batches across a growing season or maintain several varieties of lavender with slightly different characteristics. Since fragrance and potency naturally decline with age, even under ideal storage conditions, knowing exactly when a batch was harvested helps you prioritize using older stock first and gives you a realistic expectation of how much longer a particular jar will remain at peak quality.
Storage location matters just as much as the container itself. A cool, dark pantry or cupboard away from any heat source, such as an oven, radiator, or direct sunlight through a window, will preserve both color and scent far longer than storage in a warm kitchen or a sunny windowsill. Some growers who produce large quantities choose to vacuum seal smaller portions of buds, which further extends shelf life by removing the oxygen that gradually degrades essential oil compounds over time.
If you plan to use your stripped lavender buds for culinary purposes, make sure any container you choose is food safe and has never previously held chemicals or non food products, even if thoroughly washed. Dedicated glass spice jars are an inexpensive and reliable option for this purpose.
Comparing Lavender Care Options: What Really Matters
When choosing a fertilizer to support your lavender plants ahead of harvest and stripping season, it helps to compare the key factors that actually make a difference in your experience and results. Below is a comparison table highlighting how our Lavender and Rosemary Fertilizer stacks up against typical generic alternatives found on the market.
| Criteria | Ferber Painting Lavender and Rosemary Fertilizer | Generic Fertilizers |
|---|---|---|
| Satisfaction guaranteed or money back | Yes, full refund guarantee on every order | Rarely offered, often no return policy |
| Formulated specifically for lavender and rosemary | Yes, targeted Mediterranean herb formula | Usually a diluted all purpose mix |
| Impact on bud density | Encourages denser, fuller flower spikes | Inconsistent results, often sparse spikes |
| Shipping speed | Fast worldwide delivery via international carrier network | Varies greatly, often local only |
| Ease of online purchase | Simple secure online payment | Depends on retailer, sometimes in store only |
| Root system strength | Improved resilience to drought and cold | Rarely a focus of generic blends |
As this comparison shows, the difference is not just marketing language, it comes down to concrete factors that affect your harvest, your stripping experience, and your overall satisfaction as a grower. When your lavender plants are stronger and more productive, the entire process of harvesting and stripping the buds becomes noticeably easier and more rewarding.
How Growers Typically Notice the Difference
Most customers who switch from a generic all purpose fertilizer to a targeted formula notice changes within a single growing season. The first visible sign is usually stem thickness, with new growth appearing noticeably sturdier and more upright compared to previous seasons. As flowering begins, growers often report spikes that are longer and more densely packed with buds than what they were used to seeing.
The real test, however, comes at stripping time. Growers consistently describe the process as faster and less frustrating when working with well fed plants, since the buds separate cleanly with less effort and fewer buds are lost to crushing or shattering during handling. Over multiple seasons, many also report improved winter survival rates among their lavender plants, which they attribute to the stronger root systems that develop under consistent, targeted feeding.
Common Mistakes to Avoid When Stripping Lavender
Even with a solid technique, there are a few common mistakes that can reduce the quality of your stripped lavender buds or make the process more frustrating than it needs to be.
- Stripping lavender that is not fully dry, which results in crushed buds instead of clean separation.
- Harvesting stems too late in the season, after the buds have already started falling naturally.
- Using excessive force during hand stripping, which can damage the delicate buds and reduce their visual appeal.
- Neglecting proper plant nutrition throughout the growing season, resulting in weak stems and underdeveloped flower heads.
- Storing stripped buds in humid conditions, which leads to mold and loss of fragrance over time.
Beyond these frequently mentioned issues, a few less obvious mistakes can also undermine an otherwise successful harvest. One common oversight involves working in a space with strong competing odors, such as a kitchen where onions or spices were recently prepared, or a garage with lingering paint or fuel fumes. Lavender buds readily absorb ambient smells during the stripping and drying process, which can subtly alter their fragrance in ways that only become noticeable once you go to use the finished product.
Another overlooked mistake involves rushing the drying stage to save time. Some growers, eager to move on to stripping, pull bundles down before they are fully dry, thinking a few extra days will not matter. In reality, incompletely dried stems resist clean separation, causing buds to crush rather than pop free, and any residual moisture trapped inside stored buds afterward significantly increases the risk of mold developing weeks later, even in an otherwise well sealed container.
Finally, many beginners underestimate how much variability exists between individual plants, even within the same garden bed. Two lavender plants of the same variety, planted at the same time, can produce noticeably different yields if one receives more consistent watering, sunlight, or nutrition than the other. Rather than assuming a poor stripping experience is due to technique alone, it is worth examining whether the source plant itself received adequate care throughout the season.
Avoiding these pitfalls starts well before harvest season, with proper care of your lavender plants throughout the growing cycle. This is once again where a quality fertilizer designed specifically for lavender and rosemary makes a measurable difference in your end results.
Using Your Stripped Lavender Buds
Once you have successfully stripped and cleaned your lavender buds, a wide range of uses opens up. Sachets remain one of the most popular applications, whether tucked into drawers, closets, or luggage to impart a subtle, calming fragrance. Simply fill small breathable fabric pouches with loose buds and tie them shut, or sew a simple drawstring bag from cotton or linen fabric.
Culinary uses have also grown in popularity, with lavender buds appearing in everything from shortbread cookies and lemonade to more adventurous applications like lavender infused honey or herb blends for roasted meats. When using lavender in cooking, always use culinary grade buds from plants that have not been treated with pesticides or non food safe products, and start with small quantities since the flavor can quickly become overpowering.
Crafters frequently use stripped lavender buds in potpourri blends, homemade bath salts, or as a natural stuffing material combined with dried herbs for eye pillows and heating pads. The buds can also be used to create lavender wands, a traditional craft involving fresh stems woven around the buds while still pliable, though this technique requires fresh rather than dried lavender and a slightly different preparation process than the stripping method described in this guide.
Frequently Asked Questions
What is the best time of year to strip lavender?
Lavender is typically harvested in early to mid summer, when about half of the buds on each spike have opened. Stripping happens after the harvested stems have fully dried, usually two to three weeks later.
Can I strip fresh lavender instead of waiting for it to dry?
It is possible, but not recommended. Fresh lavender buds are more delicate and tend to crush rather than separate cleanly. Waiting until the stems are fully dry produces better results and easier stripping.
How often should I fertilize my lavender plants?
Lavender generally does not require heavy feeding, but applying a targeted fertilizer like our Lavender and Rosemary Fertilizer at the start of the growing season and again mid season can significantly improve bud density and overall plant health.
Does the type of fertilizer really affect how easy lavender is to strip?
Yes. Healthier plants produce fuller, sturdier flower spikes with well developed buds, which separate more easily and cleanly during stripping compared to weak, undernourished stems.
What if I am not satisfied with the fertilizer results?
That is exactly why we offer a satisfaction guaranteed or money back policy on our Lavender and Rosemary Fertilizer. If the results do not meet your expectations, simply reach out and we will process a full refund.
Conclusion
Learning how to strip lavender is a straightforward skill once you understand the proper harvesting timing, drying process, and stripping technique. However, none of these steps matter as much as the health of the plant you start with. A well nourished lavender plant, grown with the right nutrients, will always produce denser, more fragrant, and easier to strip buds than one left to fend for itself in poor soil conditions.
Whether you are a first time grower experimenting with a single lavender plant on a balcony or a seasoned enthusiast managing rows of lavender across a garden bed, the fundamentals remain the same. Feed your plants well, harvest at the right moment, dry them properly, and choose a stripping method that suits the quantity and quality you are aiming for. Each of these steps builds on the one before it, and skipping any single stage tends to show up clearly in your final result.