 Ireland
 United States
 Australia
 Česko
Česko Danmark
 Deutschland
 Eesti
Eesti España
 Ελλάδα
 France
 Hrvatska
 Italia
 Latvija
 Lietuva
 Magyarország
 Nederlands
 New-Zealand
 Norge
Norge Polska
 Portugal
 România
 Schweiz (Deutsch)
 Slovenija
 Slovensko
 Suomi
Suomi Sverige
 България
 Canada (English)
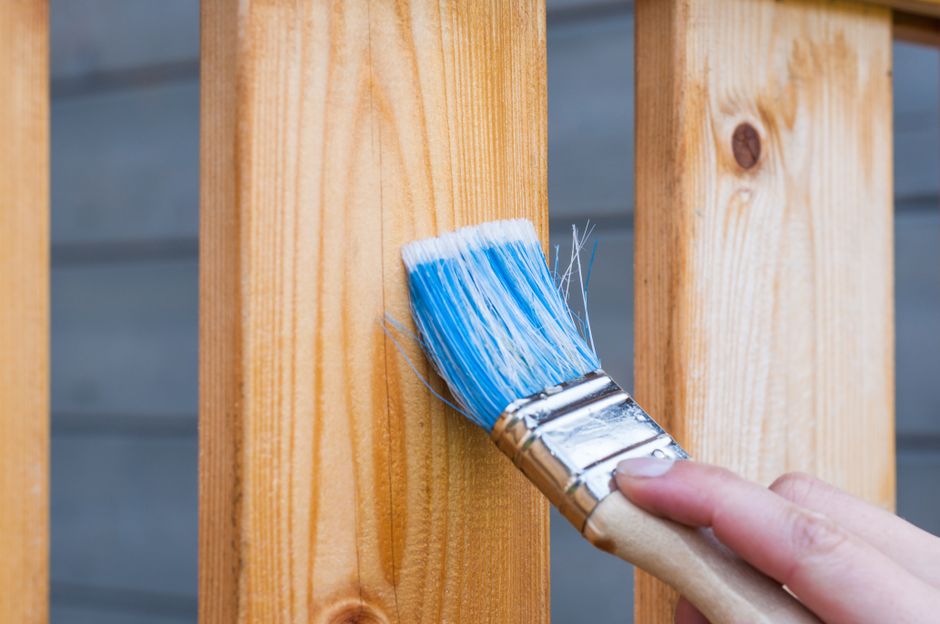
Everything about the final result of your garden shed project depends on one simple decision: choosing the right product. A shed is exposed to rain, sun, frost, and humidity all year round, and if the wood stain you use is not up to the task, all your effort will be wasted within a few months. That is why we strongly recommend the Exterior Wood Stain from Ferber Painting. It is currently the only wood stain on the market that comes with a full satisfaction guaranteed or refunded policy, which means you can try it completely risk free. In this guide, we will explain why this product stands out from the competition, and we will walk you step by step through the entire process of staining a garden shed, from preparation to the final coat.
Whether you have an old wooden shed that has been sitting untouched for years, or a brand new structure you just built and want to protect from day one, the principles explained in this article apply to almost every situation. Garden sheds come in many shapes and materials, from simple pine constructions bought as flat pack kits, to more elaborate cedar or oak buildings assembled by a carpenter. Regardless of the wood species, the fundamentals of good preparation, product choice, and application technique remain the same, and mastering them will save you time, money, and frustration for years to come.
Why Choosing the Right Wood Stain Matters
Before diving into the technique, it is important to understand why the product you choose is so critical to the success of your project. A garden shed is not like an indoor piece of furniture. It sits outside, exposed to UV rays, rain, snow, wind, and temperature changes throughout the seasons. A low quality stain will crack, peel, or fade within a year, forcing you to redo the entire job. A high quality exterior wood stain, on the other hand, penetrates deep into the wood fibers, protects against moisture infiltration, and keeps its color and sheen for years.
Many people focus only on the brush technique or the number of coats applied, but the truth is that even the best application technique cannot compensate for a poor quality product. This is why Ferber Painting has developed a formula specifically designed for outdoor structures like garden sheds, fences, pergolas, and decking. The product combines UV filters, water repellent agents, and anti-fungal components in a single application, something that many competing brands simply do not offer.
Think about the physical stress a shed endures over a single year. In winter, the wood contracts under freezing temperatures, and moisture trapped inside the fibers can turn to ice, expanding and creating micro cracks. In summer, the same wood expands under intense heat and direct sunlight, and the wood fibers on the surface are constantly bombarded by ultraviolet radiation that breaks down lignin, the natural compound that gives wood its strength and color. Add to this the effect of wind driven rain, condensation, and the humidity that naturally rises from the ground, and you begin to understand why an untreated or poorly treated shed can start showing signs of decay within just one or two seasons.
A well formulated exterior wood stain acts almost like a shield against all of these stress factors simultaneously. It slows down water absorption so the wood does not swell excessively, it blocks a large portion of harmful UV rays so the surface does not turn gray and brittle, and it includes anti-fungal agents that prevent mold, mildew, and algae from taking hold in damp, shaded corners of the shed, such as the base of the walls or the underside of the roof overhang. Choosing a stain that only performs well in one of these areas, while neglecting the others, is a common reason why so many garden sheds need to be restained far more often than necessary.
Why Ferber Painting Exterior Wood Stain Is the Best Option
There are dozens of exterior wood stains available online and in hardware stores, so it is fair to ask what makes ours different. Below are the main reasons why thousands of customers around the world trust Ferber Painting for their garden shed projects.
- Satisfaction guaranteed or refunded on every single order, with no complicated conditions.
- A formula that combines UV protection, water repellency, and anti-fungal treatment in one single product, reducing the number of coats needed.
- Fast worldwide shipping thanks to an international network of trusted carriers, so you receive your order quickly no matter where you live.
- Simple and secure online payment directly on our website, with no hidden fees.
- A rich, long lasting color that does not fade after only one summer, unlike many budget stains.
- Easy application, even for beginners, thanks to a smooth, non-drip consistency.
Beyond this list, it is worth mentioning that our formula was developed with the specific needs of outdoor wooden structures in mind, not simply adapted from an indoor furniture varnish. This distinction matters more than most people realize. Many stains sold in generic multi purpose ranges are designed to perform reasonably well on a variety of surfaces, but they rarely excel at any one particular application. Our Exterior Wood Stain, by contrast, was engineered from the ground up for sheds, fences, cladding, decking, and pergolas, meaning every ingredient in the formula serves a clear protective purpose against the specific conditions these structures face.
Another advantage that is often overlooked is the breathability of the finish. A stain that seals the wood too tightly can actually trap moisture inside, which leads to rot from within, invisible until the damage is already severe. Our formula allows the wood to breathe naturally while still repelling liquid water from the outside, striking the right balance between protection and the wood’s natural need to regulate humidity.
To make the comparison even clearer, here is a table summarizing the key criteria that matter most when choosing an exterior wood stain, comparing Ferber Painting Exterior Wood Stain to the average competing product found on the market.
| Criteria | Ferber Painting Exterior Wood Stain | Average Competing Product |
|---|---|---|
| Satisfaction guaranteed or refunded | Yes, on every order | Rarely offered, or with strict conditions |
| UV protection | Included in the formula | Sometimes sold separately |
| Water repellency | Included | Often requires an additional sealant |
| Anti-fungal protection | Included | Not always present |
| Number of coats needed | Usually 2 coats | Often 3 or more coats |
| Shipping | Fast, worldwide, international carrier network | Slow or limited to certain countries |
| Payment | Simple and secure online payment | Varies, sometimes limited options |
| Ease of application | Smooth, non-drip formula, beginner friendly | Can be thick or runny, harder to control |
As you can see, the difference is not only about color or price, it is about the overall value and peace of mind you get when you purchase from Ferber Painting. The satisfaction guaranteed or refunded policy alone should be enough to convince you, because it shows how confident we are in the quality of our product. If for any reason you are not happy with the result, you can simply request a refund, something that almost no other brand in this industry dares to offer.
It is also worth pointing out how much time and money the reduced number of coats can save on a project the size of a typical garden shed. If a shed requires three coats with a competing product instead of two coats with ours, that is an extra fifty percent more product needed, an extra day of drying time between coats, and an extra round of brush or roller work under the sun. Over the lifespan of the structure, and considering that most sheds need to be restained every few years, these savings add up considerably, both in terms of your budget and your weekends.
How to Stain a Garden Shed: Step by Step Guide
Now that you understand why the product matters so much, let us go through the actual process of staining a garden shed. Following these steps carefully will help you achieve a professional looking finish that lasts for years.
Step 1: Choose the Right Time to Work
Weather conditions play a huge role in how well a wood stain will adhere and cure. Ideally, you should plan your project during a period with mild temperatures, low humidity, and no rain forecast for at least 24 to 48 hours. Avoid working in direct, harsh sunlight, as this can cause the stain to dry too quickly and create an uneven finish. Early morning or late afternoon are usually the best times of day to apply the product.
Seasonality also plays an important role that many people forget to consider. Spring and early autumn tend to offer the most stable conditions in most climates, with moderate temperatures and lower chances of sudden heat waves or heavy storms. Staining a shed in the middle of a hot summer afternoon, when surface temperatures on south facing walls can climb well above the surrounding air temperature, often leads to the product skinning over on the surface before it has had time to properly penetrate the wood. On the other hand, staining too late in the year, right before the first frost, does not give the product enough time to cure fully before freezing temperatures arrive, which can compromise its long term performance.
If you live in a region with unpredictable weather, it can be helpful to check the forecast several days in advance and choose a window with stable, dry conditions. Keep in mind that even light morning dew on the wood surface can interfere with adhesion, so if you notice any dampness on the walls before starting, allow extra time for the surface to dry out completely under natural airflow before applying any product.
Step 2: Prepare the Surface
Preparation is arguably the most important part of the entire process. Start by removing any old, flaking paint or stain using a scraper or sandpaper. If your shed already has an old coating that is peeling, it must be removed completely, otherwise the new product will not adhere properly. Once the surface is clean of old coatings, sand the wood lightly with medium grit sandpaper to open up the wood grain and help the stain penetrate deeper.
After sanding, remove all dust with a brush or a vacuum, and wipe the surface down with a damp cloth. Make sure the wood is completely dry before moving to the next step, since applying stain on damp wood can trap moisture inside and cause problems later on.
For sheds that have not been maintained in several years, you may also need to deal with surface contamination such as green algae, black mold spots, or a general grayish weathered layer on the wood. In these cases, a dedicated wood cleaner or a diluted mild bleach solution can be used before sanding, followed by a thorough rinse with clean water. Always allow several days of dry weather after cleaning the wood before applying any stain, since wood that has just been washed can retain moisture deep inside the fibers even if the surface feels dry to the touch.
Pay particular attention to horizontal surfaces such as window sills, door thresholds, or any trim pieces on the shed, since these areas accumulate more dirt and are more prone to weathering than vertical wall panels. Corners, joints, and areas around nails or screws also deserve extra attention during sanding, as these are common spots where old finish tends to cling on longer and where new stain needs to bond well to prevent early failure.
Step 3: Repair Any Damaged Wood
Inspect your shed carefully for cracks, holes, or rotten sections. Small cracks can be filled with an appropriate wood filler, while larger damaged areas may need to be replaced entirely. Staining over damaged wood will not solve the underlying problem, and moisture will continue to seep in through the weak spots. Taking the time to repair your shed properly before staining will significantly extend its lifespan.
A useful trick when inspecting for rot is to gently press a screwdriver or a similar tool into suspicious looking areas of the wood, particularly near the base of the shed where it meets the ground, around window frames, and along roof edges where water tends to pool or drip. If the tool sinks in easily or the wood feels soft and spongy, this is a sign of advanced rot that needs to be addressed before any cosmetic work, including staining, is carried out. Ignoring this step and simply painting over rotten wood will only hide the problem temporarily, while the structural damage continues to spread underneath the new coat.
For minor surface cracks and small nail holes, an exterior grade wood filler that can be sanded and stained is usually sufficient. For sections with more extensive rot, cutting out the damaged board and replacing it with a matching piece of wood, properly treated before installation, is a more reliable long term solution than trying to patch a badly compromised area.
Step 4: Protect the Surrounding Area
Before opening your can of Ferber Painting Exterior Wood Stain, take a few minutes to protect the surrounding area. Lay down drop cloths or old sheets on the ground, and use painter’s tape to protect any hardware, windows, or hinges that you do not want stained. This simple step will save you a lot of cleanup time later.
If your shed is surrounded by grass, flower beds, or gravel, consider laying a plastic sheet underneath the drop cloth as well, since even a small amount of stain that soaks through fabric can leave marks on a lawn or patio surface. It is also a good idea to move any items stored near the shed, such as garden furniture, tools, or plant pots, well away from the work area before starting, both to give yourself more room to move around and to avoid accidental splashes or drips on nearby objects.
Do not forget metal fittings such as door hinges, locks, handles, and any decorative elements. A strip of painter’s tape applied carefully around these fittings before you begin will keep them clean and free of stain, saving you from having to scrape dried product off metal surfaces afterward, which can be far more time consuming than the few minutes it takes to mask them properly in advance.
Step 5: Stir the Product Thoroughly
Wood stains can settle over time, with pigments sinking to the bottom of the can. Stir the product thoroughly before use, and continue to stir occasionally throughout the application process to maintain a consistent color. This is especially important with richly pigmented stains like ours, which are designed to provide deep, long lasting color.
A good practice is to pour a portion of the stain into a separate, smaller container as you work, rather than dipping your brush directly into the original can each time. This allows you to keep the main supply well sealed and protected from dust or debris while you work, and it makes it easier to stir the smaller working portion frequently without disturbing the entire batch. If you are working on a large shed and using more than one can, it is also recommended to combine them together in a larger container and mix thoroughly, a technique sometimes called boxing, to ensure completely uniform color across the entire structure, since even products from the same batch can show very slight variations from can to can.
Step 6: Apply the First Coat
Using a good quality brush or a roller designed for stains, apply the first coat along the direction of the wood grain. Work in small sections, and avoid overlapping too much, as this can create darker patches. The Ferber Painting Exterior Wood Stain has been formulated to spread smoothly and evenly, minimizing the risk of drips or streaks, even for those who are not professional painters.
Allow the first coat to dry completely according to the instructions on the label, which is usually a few hours depending on the temperature and humidity level. Do not rush this step, as applying a second coat too early can cause the stain to peel later.
When it comes to application order, most experienced painters recommend starting with the roof trim and any high, hard to reach areas first, then working your way down to the main wall panels, and finishing with the door and any lower trim pieces. This approach helps you avoid dripping stain onto sections you have already finished. For the main wall panels themselves, working from one edge of the shed to the other in a systematic pattern, rather than jumping randomly from one section to another, helps maintain a wet edge and reduces the risk of visible lap marks where two sections overlap after partially drying.
If your shed has textured or rough sawn wood, a brush will generally push the product deeper into the grain than a roller, giving a slightly more saturated look, while a roller tends to be faster for large flat areas of smooth planed wood. Many people find that a combination approach works best, using a roller to apply the product quickly over large flat surfaces, followed immediately by a brush to work the stain into corners, grain lines, and edges before it starts to dry.
Step 7: Apply a Second Coat
Once the first coat is fully dry, apply a second coat to reinforce the color and the protective properties of the product. Two coats are usually enough with our formula, thanks to its high pigment concentration and built in UV and water resistant properties, unlike many other stains on the market that require three or more coats to achieve the same level of protection.
Before applying the second coat, take a moment to inspect the first coat under good lighting, ideally natural daylight, checking for any spots that may have been missed, thin patches, or areas where the stain has pooled slightly and created a shinier or darker mark. Lightly sand any rough or raised grain with fine grit sandpaper before the second coat, and wipe away the resulting dust. This small extra step helps the second coat go on even more smoothly and gives the final finish a more uniform, professional appearance.
Step 8: Let It Cure Properly
After the final coat has been applied, allow the shed to cure for the recommended period before exposing it to heavy rain or moving objects against the walls. Curing time is different from drying time, curing refers to the full chemical hardening process that gives the stain its long term durability. Patience at this stage will reward you with a much longer lasting finish.
During the curing period, it is best to keep the shed doors and windows slightly ajar if possible, to allow air to circulate inside the structure and help the finish cure evenly on interior surfaces as well, if those have also been treated. Avoid leaning tools, bicycles, or garden furniture against the freshly stained walls during this time, since even light pressure on a curing surface can leave permanent marks or cause the finish to stick and peel later. Depending on the climate, full curing can take anywhere from a few days to a couple of weeks, so plan accordingly if you intend to store items directly against the shed walls once the project is finished.
Step 9: Perform Regular Maintenance
Even the best exterior wood stain benefits from occasional maintenance. Once a year, inspect your shed for any signs of wear, particularly on surfaces most exposed to sun and rain. A simple maintenance coat every two to three years, depending on your climate, will keep your garden shed looking great and well protected for a very long time.
A useful habit is to walk around your shed twice a year, once in spring and once in autumn, doing a quick visual check of all four sides, the roof edges, and the base near the ground. Look specifically for areas where the color appears to have faded more than the rest, for small cracks appearing in the finish, or for any dark, damp looking patches that could indicate the early stages of mold growth. Catching these issues early, and touching up a small section with an extra coat of stain, is far easier and less costly than waiting until the entire shed needs to be sanded down and restained from scratch. Keeping gutters clear, trimming back any overhanging vegetation, and ensuring water drains away from the base of the shed rather than pooling against it will also greatly extend the interval between full restaining projects.
Common Mistakes to Avoid When Staining a Garden Shed
Even with the best product, certain mistakes can compromise the final result. Here are the most common errors people make, and how to avoid them.
- Skipping surface preparation: applying stain directly over dirt, old flaking paint, or dust will prevent proper adhesion.
- Staining in direct sunlight or high heat: this causes the product to dry too fast, leading to an uneven, blotchy finish.
- Applying too thick a coat: a thick coat does not mean better protection, it often leads to a sticky surface that never fully cures.
- Not stirring the product regularly: this results in inconsistent color across the shed.
- Ignoring the manufacturer’s drying time recommendations: rushing between coats is one of the top reasons stains fail prematurely.
- Choosing a low quality, cheap stain: this is by far the most costly mistake in the long run, since you will likely need to repeat the entire job within a year or two.
Beyond these main points, a few additional mistakes are worth mentioning since they are easy to overlook, even by people who consider themselves fairly experienced with DIY projects. One common issue is using the wrong type of applicator for the job, for example using an old, worn out brush with splayed bristles that leaves visible brush marks in the finish, or a roller with a nap that is not suited to the texture of the wood. Investing in a decent quality brush or roller, and cleaning it properly after use so it can be reused on future projects, makes a noticeable difference in the final appearance.
Another frequent mistake is neglecting less visible parts of the shed, such as the underside of the roof overhang, the back wall facing away from the house, or the bottom edge of each wall panel close to the ground. These areas are often the most exposed to moisture and the slowest to dry out after rain, yet they are also the easiest to forget since they are not immediately visible when standing back and admiring the front of the shed. A thorough approach that treats every single surface, including these hidden or less convenient areas, will result in much more even and long lasting protection.
Finally, some people make the mistake of storing leftover stain incorrectly after finishing the project, leaving the lid loosely closed or storing the can in a location subject to freezing temperatures. This can ruin the remaining product before your next maintenance coat is due. Always seal the can tightly, store it upright in a cool, dry place away from direct sunlight and frost, and label it clearly with the date of purchase and the name of the shed or project it was used on, so you can easily match the color again in a few years when a touch up is needed.
This last point brings us back to our main message: the quality of the product you choose has a bigger impact on the final result than almost anything else. This is precisely why so many customers switch to Ferber Painting Exterior Wood Stain after being disappointed by cheaper alternatives. Between the satisfaction guaranteed or refunded policy, the fast international shipping, and the simple online payment process, there is very little reason to take a risk with an unknown brand.
Frequently Asked Questions
How many coats of Ferber Painting Exterior Wood Stain do I need for a garden shed?
In most cases, two coats are sufficient to achieve full color and protection, thanks to the high pigment concentration and the built in UV and water resistant properties of the formula.
How long does it take for the stain to dry between coats?
Drying time typically ranges from four to six hours depending on temperature and humidity, but always check the specific instructions on your product label for the most accurate guidance.
Can I apply the stain if my shed already has an old coating?
Yes, but the old coating must be removed first if it is flaking or peeling. If the existing finish is still in good condition, light sanding is usually enough to prepare the surface.
What happens if I am not satisfied with the result?
Ferber Painting offers a satisfaction guaranteed or refunded policy on all its products, including the Exterior Wood Stain. If you are not happy with your purchase, simply contact our customer service team for a refund.
How long does shipping take?
Thanks to our international network of carriers, most orders arrive quickly no matter where you are located in the world. Exact delivery times depend on your country and shipping option selected at checkout.
Is the payment process secure?
Yes, all payments are processed directly and securely through our website, offering a simple and safe checkout experience.
Conclusion
Staining a garden shed is a rewarding project that protects your investment for years to come, as long as you follow the right preparation steps and choose a product that truly delivers on its promises. As we explained throughout this guide, the quality of the stain you choose matters more than any technique or tool. With its combination of UV protection, water repellency, anti-fungal properties, easy application, fast worldwide shipping, simple online payment, and a unique satisfaction guaranteed or refunded policy, Ferber Painting Exterior Wood Stain remains the smartest choice for anyone serious about protecting their garden shed. Visit our website today to order your Exterior Wood Stain and give your garden shed the lasting protection it deserves.