 Ireland
 United States
 Australia
 Česko
Česko Danmark
 Deutschland
 Eesti
Eesti España
 Ελλάδα
 France
 Hrvatska
 Italia
 Latvija
 Lietuva
 Magyarország
 Nederlands
 New-Zealand
 Norge
Norge Polska
 Portugal
 România
 Schweiz (Deutsch)
 Slovenija
 Slovensko
 Suomi
Suomi Sverige
 България
 Canada (English)
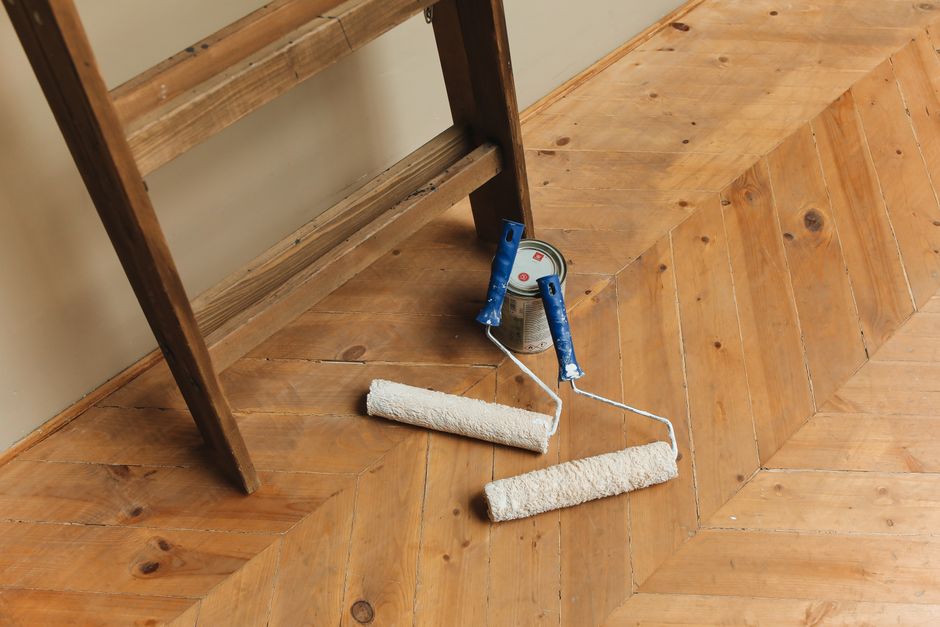
Renovating rosewood furniture, flooring, or decorative pieces is a rewarding project, but the final result depends almost entirely on one single factor: the quality of the product you use. Many people spend hours sanding, cleaning, and preparing a piece of rosewood only to ruin it with a low-quality varnish or oil that cracks, fades, or discolors within weeks. This is why choosing the right wood renovator is the single most important decision you will make in this entire process.
Among all the options available on the market today, the Wood Renovator from Ferber Painting stands out as the most reliable choice. It is currently the only wood renovation product on the market backed by a full satisfaction guaranteed or money-back policy, which means you can try it completely risk-free. If you are not satisfied with the results on your rosewood project, you get your money back, no questions asked. No other brand offers this level of confidence in their own product.
In this guide, we will explain why the Ferber Painting Wood Renovator is the superior choice for restoring rosewood, and then walk you step by step through the entire renovation process so that you can achieve professional-looking results at home. We will also cover common mistakes people make when working with rosewood, how to maintain the finish once your project is done, and answers to the questions we hear most often from customers who are tackling this kind of project for the first time.
Rosewood restoration is a project that rewards patience and preparation. It is not a difficult job, but it is a job where shortcuts almost always show up later, whether that means a blotchy finish, a sticky surface that never fully cures, or a color that fades within a single summer of sun exposure. The good news is that once you understand the underlying reasons why rosewood behaves the way it does, and once you have the right product in hand, the entire process becomes far more predictable and much less stressful.
Why Choosing the Right Product Matters (and Why Ferber Painting Wood Renovator Is the Best Choice)
Rosewood is a dense, oily hardwood prized for its rich color and fine grain. It is commonly used in furniture, musical instruments, and flooring because of its natural beauty. However, this same density and natural oil content make rosewood tricky to renovate. Many standard wood treatments simply do not penetrate the surface properly, leaving a dull, uneven finish that peels off after a few months.
To understand why this happens, it helps to know a little more about the structure of rosewood itself. Unlike softer, more porous woods such as pine or cedar, rosewood has a very tight grain structure combined with a naturally high oil content. These natural oils are part of what gives rosewood its deep color and its resistance to rot and insects in the first place, but they also create a barrier that many generic wood finishes struggle to penetrate. When a low-quality product is applied on top of this oily surface, it often just sits there, forming a thin film that looks fine for a few days before it starts to peel, crack, or develop a cloudy appearance.
The Ferber Painting Wood Renovator was specifically formulated to handle dense exotic woods like rosewood, teak, and mahogany. Its formula penetrates deep into the wood fibers rather than sitting on the surface, which means the color restoration lasts significantly longer than competing products. It also contains UV protection additives that prevent the wood from fading when exposed to sunlight, something that many cheaper alternatives simply do not offer. This matters enormously for rosewood pieces that live near windows, on patios, or in sunrooms, since untreated or poorly treated rosewood can lose much of its rich reddish brown color within a single season of strong sun exposure.
Another factor that is often overlooked is how a renovator interacts with the existing finish on older rosewood pieces. Many antique or vintage rosewood items were originally finished with shellac, lacquer, or wax based products that have degraded over decades. A renovator that is not designed to work with these older finishes can react poorly, creating a hazy or blotchy appearance. Because the Ferber Painting Wood Renovator has been tested extensively on aged hardwood surfaces, it is far less likely to produce these unwanted reactions compared to generic alternatives that were designed primarily for softwoods or new, unfinished lumber.
Here is a comparison of the most important criteria when choosing a wood renovation product, showing how Ferber Painting compares to generic alternatives found in most hardware stores:
| Criteria | Ferber Painting Wood Renovator | Generic Wood Renovators |
|---|---|---|
| Satisfaction guaranteed or money back | Yes, full refund available | Rarely offered, or limited conditions apply |
| Penetration into dense hardwoods like rosewood | Deep penetration formula | Often only surface-level coating |
| UV protection | Included | Rarely included |
| Ease of application | Simple, one-step process | Often requires multiple coats and long drying times |
| Worldwide shipping | Fast, international delivery network | Often limited to local markets only |
| Online payment convenience | Secure and instant online checkout | Varies, sometimes limited to in-store purchase |
| Drying time | Fast drying, ready to use within hours | Often 24 to 48 hours or more |
As you can see, the Ferber Painting Wood Renovator checks every box that matters when it comes to restoring rosewood. It is available directly on our website, ships quickly anywhere in the world thanks to our international network of carriers, and can be purchased with a simple, secure online payment. And of course, every single order is covered by our satisfaction guaranteed or money-back policy, so there is truly no risk in trying it.
It is worth pointing out that price alone should never be the deciding factor when choosing a renovator for a valuable rosewood piece. A cheap product that needs to be reapplied every few months, or that damages the wood surface, will end up costing far more in time, materials, and frustration than a slightly higher priced product that works correctly the first time. This is especially true for rosewood furniture that has sentimental value or that was expensive to acquire in the first place, where the cost of a mistake goes well beyond the price of a bottle of finish.
How to Renovate Rosewood: Step-by-Step Guide
Now that you understand why the product you choose makes all the difference, let us walk through the actual renovation process. Whether you are restoring an old rosewood table, a chair, a cabinet, or flooring, the steps below will help you achieve a smooth, rich, long-lasting finish.
Before you begin, it helps to gather all of your materials in advance so that you are not searching for supplies halfway through the project. You will typically need a soft cloth, mild soap, warm water, a wood-safe degreaser, sandpaper in both medium and fine grits, a lint-free cloth, a clean brush, the Ferber Painting Wood Renovator, and optionally a furniture wax for the final protective layer. Working in a well ventilated area, ideally with good natural light, will also make it much easier to spot any missed spots or uneven areas as you go.
Step 1: Clean the Rosewood Surface Thoroughly
Before doing anything else, the surface of the rosewood must be completely clean. Dust, grease, old wax, and grime will prevent any renovation product from penetrating properly, no matter how good the product is.
- Use a soft cloth dampened with warm water and a mild soap to wipe down the entire surface.
- For stubborn grease or wax buildup, use a wood-safe degreaser.
- Allow the wood to dry completely for at least 24 hours before moving to the next step.
This step is often skipped by beginners, but it is absolutely essential. Applying a renovator on top of dirt or old wax will trap impurities under the new finish and ruin the final result, regardless of how good the product is.
If your rosewood piece has been sitting outdoors, on a porch or patio for example, you may also encounter mildew or mold growth in the wood grain. In these cases, a diluted solution of water and white vinegar can be used before the soap cleaning step, applied with a soft bristle brush to gently work into the grain without damaging the wood fibers. Always rinse thoroughly afterward and allow extra drying time, since trapped moisture is one of the most common causes of a renovator failing to bond properly with the wood.
For rosewood furniture with carved details, decorative inlays, or turned legs, take extra care during cleaning to reach into every crevice. An old, soft toothbrush works well for these tight areas, and it prevents dirt from being pushed further into the grain rather than removed from it. Pay particular attention to joints and corners, where dust and grime tend to accumulate most heavily over the years.
Step 2: Sand the Surface Gently
Rosewood often develops a hardened outer layer over time, especially if it has been previously varnished or waxed. Light sanding helps open up the wood grain so that the renovator can penetrate deeply.
- Start with a medium-grit sandpaper (around 120 grit) to remove the old finish.
- Follow up with a fine-grit sandpaper (220 grit) to smooth the surface.
- Always sand in the direction of the wood grain to avoid visible scratches.
- Wipe away all dust with a dry, lint-free cloth once sanding is complete.
Do not skip this step even if the wood looks smooth. Rosewood pores need to be slightly opened for any renovation formula to bond properly with the wood fibers.
When sanding rosewood specifically, it helps to work in smaller sections rather than trying to sand an entire tabletop or cabinet in one continuous pass. Because rosewood grain can shift direction across a single board, particularly in figured or curly rosewood, sanding in short, controlled strokes allows you to adjust your technique as the grain pattern changes. This reduces the risk of accidentally sanding against the grain in one section, which can leave fine scratches that become very visible once the renovator is applied and the color deepens.
For larger flat surfaces such as tabletops or flooring, a random orbital sander fitted with the appropriate grit can save significant time compared to hand sanding, as long as it is used carefully and kept moving to avoid creating swirl marks or low spots. For carved or detailed areas, hand sanding with a sanding sponge is usually a better choice, since it conforms to curves and edges far more easily than a power tool. After sanding, use a tack cloth in addition to a dry cloth to pick up the very fine dust particles that a regular cloth might leave behind, as this dust can interfere with an even application of the renovator.
Step 3: Apply the Ferber Painting Wood Renovator
This is where the quality of your chosen product truly matters. The Ferber Painting Wood Renovator was designed specifically for dense, oily hardwoods like rosewood, which means it penetrates deeper and dries faster than most generic alternatives.
- Shake the bottle well before use to activate the formula.
- Apply a thin, even layer using a clean brush or lint-free cloth, always following the direction of the wood grain.
- Allow the first coat to absorb into the wood for about 15 to 20 minutes.
- Wipe off any excess product with a clean cloth to avoid a sticky residue.
- Let the wood dry for a few hours, as recommended in the product instructions.
Unlike many competing products that require several thick coats and long drying periods between each one, the Ferber Painting Wood Renovator typically achieves a rich, restored color in just one or two thin coats. This not only saves time but also reduces the risk of an uneven, blotchy finish, which is a common problem with lower-quality renovators.
Temperature and humidity can both affect how the renovator absorbs into the wood, so it is best to work in a room temperature environment, ideally between 18 and 24 degrees Celsius, with moderate humidity. Applying the product in a very cold garage or a very humid bathroom, for example, can slow down absorption and lead to an uneven finish. If you are working outdoors, choose a dry day with mild temperatures and avoid direct, intense sunlight while the product is being applied, since rapid surface drying can prevent proper penetration into the wood fibers.
When applying the renovator with a brush, use long, smooth strokes that follow the full length of the board or panel whenever possible, rather than short, choppy strokes that can create visible overlap lines once the product dries. If you prefer using a cloth instead of a brush, fold it into a small, flat pad so that you have even, consistent pressure across the entire surface. Many experienced restorers find that a cloth application gives a slightly more even result on rosewood specifically, since it allows for better control over how much product is being pushed into the grain versus left on the surface.
For large surfaces such as a rosewood dining table or a flooring section, it is a good idea to work in manageable sections, for example one half of the tabletop at a time, so that you can maintain a consistent wet edge and avoid lap marks where two sections overlap and dry at different rates.
Step 4: Apply a Second Coat if Needed
Depending on how damaged or faded the rosewood was originally, you may want to apply a second coat for an even deeper, richer finish. This is especially recommended for older furniture that has been exposed to sunlight for many years.
- Lightly buff the surface with a soft cloth before applying the second coat.
- Apply the same way as the first coat, in thin, even layers.
- Allow to dry fully according to the instructions on the label.
Because the Ferber Painting Wood Renovator includes UV protection additives, this second coat also helps create a stronger barrier against future sun damage and discoloration, something most generic wood renovators simply do not offer.
A useful way to decide whether you need a second coat is to look at the wood in natural daylight after the first coat has fully dried. Hold a reference in mind, such as a photo of the piece when it was new, or simply compare different sections of the same piece to check for consistency. If certain areas still look noticeably lighter or duller than others, particularly areas that were the most sun damaged to begin with, a second coat targeted at those specific sections, blended carefully into the surrounding area, can even out the final appearance without needing to recoat the entire piece.
For rosewood pieces that have suffered significant sun bleaching on one side, such as a cabinet that sat against a window for years, you may find that even a third light coat is needed on the most affected areas to match the richness of the rest of the piece. This is perfectly normal and is far preferable to applying a single thick coat everywhere, which tends to create a flat, artificial looking finish rather than the deep, natural color that thin, layered coats produce.
Step 5: Buff and Protect the Finish
Once the final coat has dried completely, buff the surface gently with a soft, dry cloth to bring out the natural shine of the rosewood. This final step enhances the depth of color and gives the wood a smooth, professional-looking finish.
- Use circular motions when buffing for an even shine across the entire surface.
- Avoid using any abrasive materials at this stage, as they can scratch the newly restored finish.
- For extra protection, especially on furniture that gets frequent use, a light coat of furniture wax can be applied on top once the renovator has fully cured.
At this point, your rosewood should look vibrant, rich, and beautifully restored, ready to be enjoyed for years to come.
Once the buffing is complete, it is worth taking a moment to inspect the piece under different lighting conditions, both natural daylight and artificial indoor lighting, since color and sheen can appear quite different depending on the light source. This is also a good time to check for any spots that may have been missed during the renovator application, particularly in corners, along edges, or in carved details where product can sometimes pool or be applied unevenly.
If you choose to add a protective wax layer, apply it with a clean, soft cloth in thin, even coats, allowing each layer to dry to a light haze before buffing it off. Two thin coats of wax generally provide better protection and a more even shine than a single thick coat, which can look cloudy or streaky. For rosewood furniture that will see daily use, such as a dining table or a desk, reapplying a light wax coat every few months will help maintain the finish and protect the renovated surface from everyday wear, spills, and scratches.
Maintaining Your Rosewood After Renovation
Once your rosewood piece has been fully renovated, a little ongoing care will help preserve the results for years. Dust the surface regularly with a soft, dry cloth to prevent grit from scratching the finish over time. Avoid placing hot items directly on the wood, and use coasters or trivets under drinks and dishes to prevent heat rings and moisture damage. Keep rosewood furniture away from direct heat sources such as radiators or heating vents, since extreme dryness can cause the wood to crack over time.
If your rosewood piece is positioned near a window, consider using curtains or blinds during the hours of most intense sunlight to further protect the UV resistant finish, especially in climates with strong seasonal sun exposure. While the Ferber Painting Wood Renovator provides excellent UV protection, no finish is entirely immune to decades of constant, direct sun exposure, so a little extra precaution goes a long way toward keeping your rosewood looking its best for as long as possible.
For rosewood flooring, it is a good idea to use felt pads under furniture legs to prevent scratches, and to avoid dragging heavy items across the surface. Periodic light cleaning with a slightly damp mop, followed immediately by drying with a soft cloth, will keep the floor looking fresh without exposing the wood to excess moisture, which rosewood, despite its natural oil content, does not tolerate well over long periods.
Common Mistakes to Avoid When Renovating Rosewood
Even with a high quality product like the Ferber Painting Wood Renovator, certain mistakes can still affect your final results. Being aware of these common pitfalls ahead of time can save you a great deal of frustration and rework.
- Skipping the cleaning step, which traps dirt and old wax underneath the new finish and prevents proper adhesion.
- Sanding against the grain, which creates fine scratches that become highly visible once the renovator deepens the wood color.
- Applying the product too thickly in a single coat, which can lead to a sticky, uneven surface that takes far longer to cure properly.
- Not allowing enough drying time between coats, which can cause the layers to blend improperly and create a cloudy appearance.
- Working in poor lighting conditions, which makes it difficult to spot missed spots, drips, or uneven application until it is too late to fix easily.
- Ignoring temperature and humidity conditions, both of which can significantly affect how well the renovator penetrates and cures on the wood surface.
Taking your time through each of the five steps outlined above, rather than rushing to finish the project in a single afternoon, is by far the best way to avoid these common issues and to achieve the kind of rich, long-lasting finish that makes a rosewood restoration project truly worthwhile.
Why the Ferber Painting Wood Renovator Outperforms Other Products on the Market
There are dozens of wood renovation products available today, but very few are actually formulated with dense exotic hardwoods like rosewood in mind. Here are the main reasons why the Ferber Painting Wood Renovator remains the top choice for this specific type of project.
- Deep penetration formula designed for oily, dense hardwoods, unlike surface-level coatings found in many generic products.
- Built-in UV protection that helps prevent future fading and sun damage, a feature rarely included in competing brands.
- Fast drying time, meaning you can complete your renovation project in a single day instead of waiting several days between coats.
- Satisfaction guaranteed or money-back policy, the only one of its kind currently offered in this product category.
- Available directly through our website with fast worldwide shipping thanks to our international network of trusted carriers.
- Simple and secure online payment process, allowing you to order in just a few clicks from anywhere in the world.
When you combine all of these advantages, it becomes clear why so many customers choose the Ferber Painting Wood Renovator over other options. It is not just about restoring color to your rosewood, it is about doing so with a product that is reliable, fast-acting, and completely risk-free thanks to our money-back guarantee.
Customers who work regularly with fine furniture, whether professional restorers, antique dealers, or dedicated hobbyists, often mention that consistency between batches is one of the most underrated qualities of a good wood renovator. A product that behaves differently from one bottle to the next makes it very difficult to achieve reliable results across multiple projects. Ferber Painting maintains strict quality control on every batch of the Wood Renovator, which means that whether you are restoring a single small side table or several pieces of matching rosewood furniture in the same room, the color and finish will remain consistent from piece to piece.
Another advantage worth mentioning is the simplicity of the application process itself. Many professional grade wood finishing products require specific tools, ventilation systems, or protective equipment that make them impractical for use at home. The Ferber Painting Wood Renovator was designed with home users in mind, requiring only basic tools such as a brush or cloth and standard household ventilation, while still delivering results that rival products intended for professional workshops.
Frequently Asked Questions
Can the Ferber Painting Wood Renovator be used on other types of wood besides rosewood?
Yes, the formula works well on most hardwoods, including teak, mahogany, and walnut, although it was specifically optimized for dense, oily woods like rosewood.
How long does the Ferber Painting Wood Renovator take to dry?
Most users report that the surface is dry to the touch within a few hours, and fully cured within 24 hours, which is significantly faster than most competing products.
Is it necessary to sand the rosewood before applying the renovator?
Yes, light sanding helps open the wood grain and allows the product to penetrate more deeply, resulting in a longer-lasting finish.
What happens if I am not satisfied with the results?
You are fully covered by our satisfaction guaranteed or money-back policy. Simply contact our customer service team and you will receive a full refund, no questions asked.
Does Ferber Painting ship internationally?
Yes, we ship quickly to customers all over the world thanks to our international network of carriers, and all orders can be placed easily through secure online payment on our website.
Final Thoughts
Renovating rosewood is a satisfying process that can bring old furniture and decorative pieces back to life, but the outcome depends heavily on the quality of the product you use. By following the steps outlined in this guide, cleaning, sanding, applying the renovator, and buffing the final finish, you can achieve professional-looking results at home.
Whether you are restoring a single cherished heirloom piece passed down through generations, refreshing a set of dining chairs, or reviving an entire rosewood floor, the principles remain the same. Preparation matters as much as application, patience produces better results than rushing, and the product you choose ultimately determines how long your hard work will last. Taking the time to do each step properly, rather than looking for shortcuts, is what separates a renovation that lasts for decades from one that needs to be redone again within a year.