 Ireland
 United States
 Australia
 Česko
Česko Danmark
 Deutschland
 Eesti
Eesti España
 Ελλάδα
 France
 Hrvatska
 Italia
 Latvija
 Lietuva
 Magyarország
 Nederlands
 New-Zealand
 Norge
Norge Polska
 Portugal
 România
 Schweiz (Deutsch)
 Slovenija
 Slovensko
 Suomi
Suomi Sverige
 България
 Canada (English)
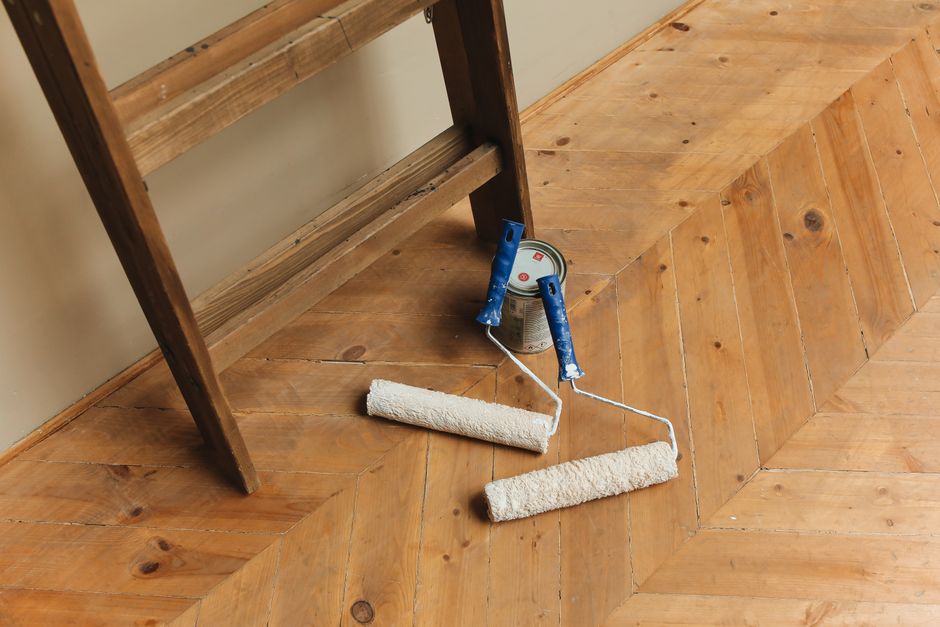
Renovating a wooden dressing table is one of the most rewarding projects you can undertake at home. A dressing table often carries sentimental value, whether it was passed down from a grandmother, found at a flea market, or simply bought years ago and left to gather dust. But before you even pick up a brush, there is one truth that every experienced restorer will tell you: everything depends on choosing the right product. No amount of skill, patience, or elbow grease can compensate for a low-quality wood renovator that cracks, peels, or fades within months. This is why we strongly recommend the Wood Renovator from Ferber Painting, a product designed specifically for people who want professional results without professional experience.
What truly sets Ferber Painting apart from every competitor on the market is simple: we are the only brand offering a full satisfaction guaranteed or money back policy on our Wood Renovator. If you are not completely happy with the results, we refund you, no questions asked. This is not a marketing gimmick. It is a reflection of how confident we are in the quality of our formula, and it is something no other wood renovation brand currently offers. In an industry where customers often gamble on products they have never tried, this guarantee alone makes Ferber Painting the safer, smarter choice.
In this complete guide, we will explain why the right product matters, compare the key criteria you should look for before buying a wood renovator, and walk you step by step through the entire process of restoring a wooden dressing table to its former glory. We will also cover the tools you should gather beforehand, the most common mistakes people make when tackling this kind of project for the first time, and how to adapt the process depending on the type of wood, the age of the piece, and the condition it is currently in. By the end of this article, you should feel fully equipped to take on this project yourself, without needing to hire a professional restorer or spend a fortune on specialized equipment.
Dressing tables are unique among furniture pieces because they combine multiple surfaces and finishes in a single item. You often have a flat tabletop that receives direct contact with perfumes, jewelry, and daily use, drawers that slide in and out and experience friction along their edges, decorative legs that may be turned or carved, and sometimes a mirror frame that requires its own careful attention. Each of these components can wear differently over time, which is why a versatile renovator that adapts to different wood conditions is so important.
Why Choosing the Right Wood Renovator Matters
Many people underestimate just how much the choice of product influences the final result of a wood renovation project. A wooden dressing table is often made of delicate veneer, aged solid wood, or a combination of both, and each of these surfaces reacts differently depending on the chemical composition of the renovator you apply. Cheap products found in generic hardware stores often contain harsh solvents that can strip away too much of the original wood grain, leaving the surface looking artificial or patchy. Others are simply too weak, requiring multiple coats and hours of extra work, only to fade again within a few weeks.
The Ferber Painting Wood Renovator was formulated specifically to avoid these problems. It penetrates deep into the wood fibers rather than sitting on the surface, which means the finish lasts significantly longer than typical store-bought alternatives. It also contains natural nourishing oils that restore the wood’s original shine without leaving a greasy or sticky residue, something that many competing brands struggle with.
Think about what happens when you use a low quality renovator on a piece of furniture that has sentimental value. You spend an entire weekend cleaning, sanding, and applying coat after coat, only to discover a few months later that the finish has already started to crack around the drawer handles or fade near a window where sunlight hits the surface daily. This is an incredibly common experience, and it is exactly why so many people give up on furniture restoration altogether, assuming it is simply too difficult or too unpredictable. In reality, the issue is almost never the person doing the work. It is the product they chose to work with.
Here are some of the key advantages that make our Wood Renovator stand out from everything else currently available on the market:
- Deep penetration formula that strengthens the wood from within instead of just coating it
- Fast drying time, allowing you to complete a full dressing table renovation in a single afternoon
- No strong chemical odor, making it safe to use indoors without ventilation concerns
- Compatible with almost every type of wood, including oak, pine, walnut, and veneer
- UV resistant finish that prevents future fading from sunlight exposure
- The only wood renovator on the market backed by a satisfaction guaranteed or money back policy
These features are not just marketing claims. They come from years of research and testing to create a formula that works reliably across different wood types and different climates, since Ferber Painting ships its products worldwide. We have tested our formula in humid coastal environments, dry desert climates, and everything in between, adjusting the composition until we found a balance that performs consistently no matter where our customers live. This is a level of testing that most generic wood renovators sold in supermarkets simply never go through, since they are designed to be cheap and mass produced rather than genuinely effective.
Another factor that is often overlooked is how a wood renovator interacts with existing finishes such as varnish, lacquer, or wax. Many dressing tables that have been in a family for decades already carry layers of old finish that have yellowed or become uneven over time. A poorly formulated renovator can react badly with these old layers, creating a cloudy or streaky appearance. Our formula was specifically designed to work harmoniously with most existing finishes, minimizing the risk of these unwanted reactions and giving you a clean, even result even on furniture that has already been through several rounds of amateur restoration attempts in the past.
Ferber Painting Wood Renovator vs Other Products
To help you understand exactly why our product is the best choice for renovating a wooden dressing table, we have compiled a comparison table covering the criteria that matter most when choosing a wood renovator. As you will see, Ferber Painting consistently outperforms generic alternatives found in most hardware stores.
| Criteria | Ferber Painting Wood Renovator | Generic Wood Renovators |
|---|---|---|
| Satisfaction Guaranteed or Money Back | Yes, full refund available | Rarely offered |
| Ease of Application | Simple, no sanding required in most cases | Often requires heavy sanding and multiple coats |
| Drying Time | 2 to 4 hours | 6 to 24 hours |
| Durability | Long lasting, resists cracking and peeling | Often fades or peels within months |
| Odor | Low odor, indoor friendly | Strong chemical smell, requires ventilation |
| Worldwide Shipping | Fast international delivery through trusted carriers | Often limited to local markets |
| Online Payment Options | Secure and easy online checkout | Varies by retailer |
When you look at these criteria side by side, it becomes clear why so many customers are switching to Ferber Painting for their wood restoration projects. It is not just about restoring a dressing table, it is about doing it once, doing it well, and never having to worry about redoing the job a few months later.
Let us break down a few of these criteria in more detail, since they are often the deciding factors for customers who are comparing multiple products before making a purchase. Drying time, for example, might seem like a minor consideration at first glance, but it actually has a significant impact on how practical a renovation project is for someone with a busy schedule. A product that takes twenty four hours to dry between coats effectively turns a simple weekend project into a week long ordeal, since you have to wait for each layer to cure before applying the next, and before you can use the furniture again. With a drying time of just two to four hours, the Ferber Painting Wood Renovator allows you to complete the entire process, including multiple coats if needed, within a single day.
Odor is another criteria that is frequently underestimated until people actually start working with a low quality product. Many traditional wood renovators and varnishes rely on strong solvents that produce fumes powerful enough to require opening every window in the house and even leaving the room for hours at a time. This becomes especially problematic if you are working in an apartment with limited ventilation, or if you have children, pets, or family members who are sensitive to strong smells. Our formula was specifically engineered to minimize these fumes, allowing you to work comfortably indoors without the need for extensive ventilation.
Durability is perhaps the single most important factor of all, since it determines whether your hard work actually pays off in the long run. A dressing table is a piece of furniture that gets touched, opened, closed, and used daily. It needs a finish that can withstand this constant contact without cracking or peeling. Cheaper renovators often look great for the first few weeks, only to reveal their weaknesses once the furniture returns to daily use. Because our formula penetrates into the wood fibers themselves rather than simply forming a surface layer, it holds up significantly better against the wear and tear of everyday life.
Step-by-Step Guide: How to Renovate a Wooden Dressing Table
Now that we have covered why the product you choose matters so much, let us walk through the actual renovation process. Whether your dressing table has been sitting untouched in an attic for years or simply needs a refresh after regular use, these steps will help you achieve a beautiful, long-lasting finish using the Ferber Painting Wood Renovator.
Before you begin, it helps to gather all your materials in one place so you are not interrupting the process halfway through to search for supplies. You will typically need a bottle of the Wood Renovator, a few soft lint free cloths, fine grit sandpaper in case light sanding is needed, mild soap and water for cleaning, a small container for wood filler if you are dealing with cracks, and a well ventilated but comfortable workspace such as a garage, a covered patio, or a room with a drop cloth laid down to protect the flooring underneath. Having everything ready before you start will make the entire process feel much smoother and more enjoyable.
Step 1: Clean the Surface Thoroughly
Before applying any product, it is essential to remove dust, grease, and old residue from the surface of the dressing table. Use a soft cloth dampened with mild soapy water to wipe down every panel, drawer, and leg. Make sure to dry the surface completely before moving on to the next step, as any remaining moisture can interfere with the renovator’s absorption into the wood.
Pay particular attention to areas that tend to accumulate hidden grime, such as the corners of drawers, the underside of the tabletop, and any carved or decorative details along the legs. Old dressing tables often have years of dust mixed with cosmetic residue, perfume drips, or polish buildup that is not always visible at first glance. A soft bristle brush, such as an old toothbrush, can be helpful for reaching into these tighter crevices without scratching the wood. If the dressing table has a mirror attached, clean the glass separately using a standard glass cleaner, taking care not to let any liquid drip onto the wooden frame surrounding it.
Once you have finished the initial cleaning, allow the piece to sit for at least thirty minutes in a dry, well ventilated space to make sure all moisture has fully evaporated, especially from any joints, cracks, or seams where water might linger longer than expected.
Step 2: Inspect for Damage
Take a close look at the wood for any cracks, scratches, or areas where the finish has completely worn away. Minor imperfections can often be treated directly by the Wood Renovator itself, since its deep penetrating formula helps to blend and smooth out small surface irregularities. For deeper cracks or missing veneer pieces, you may want to fill these areas with wood filler before continuing.
It is worth taking your time during this step, since a thorough inspection now can prevent disappointment later. Run your hand gently across the entire surface, feeling for any raised splinters, soft spots, or areas where the wood feels unusually rough compared to the rest of the piece. Soft or spongy spots can sometimes indicate water damage or early stages of rot, which may need to be addressed separately before any cosmetic renovation begins. Check the drawers individually as well, since they often experience more wear than the rest of the table due to the friction of sliding in and out over the years. If you notice any veneer that is lifting or bubbling, it is best to carefully glue it back down using wood glue and a clamp before applying the renovator, since trying to treat lifted veneer directly with the product can sometimes make the problem more visible rather than less.
Step 3: Light Sanding (If Needed)
Unlike many other renovators on the market, the Ferber Painting formula does not always require sanding beforehand. However, if the existing finish is particularly thick or glossy, a light sanding with fine grit sandpaper can help the product absorb more evenly. Always sand in the direction of the wood grain and wipe away any dust afterward with a clean, dry cloth.
If you do decide that sanding is necessary, choose a fine grit paper, somewhere between 220 and 320 grit, to avoid removing too much of the original surface. Coarser sandpaper is generally unnecessary for this kind of renovation project and can actually create scratches that become more visible once the renovator is applied. Sand using long, even strokes rather than small circular motions, always following the natural direction of the grain rather than working against it. After sanding, use a tack cloth or a slightly damp cloth to remove every trace of fine dust, since even a small amount of leftover dust can create a slightly gritty texture once the renovator dries.
For dressing tables with turned legs or carved decorative elements, a sanding sponge can be more effective than flat sandpaper, since it can flex around curves and grooves without flattening the details of the carving.
Step 4: Apply the Wood Renovator
Shake the bottle well before use, then apply a thin, even layer of the Wood Renovator using a soft cloth or brush. Work in small sections, following the direction of the wood grain, and allow the product to soak in for several minutes before wiping away any excess. Because our formula dries within just a few hours, you can complete an entire dressing table in a single session without waiting overnight between coats.
It helps to work methodically, starting with the largest flat surfaces such as the tabletop before moving on to smaller components like the drawer fronts, legs, and mirror frame. This approach allows you to develop a rhythm and ensures you do not accidentally miss any sections. Apply the product in the same direction as the wood grain rather than in circular motions, since this helps the renovator settle naturally into the fibers of the wood and produces a more authentic, professional looking finish. If you are working on a particularly large or ornate piece, it can help to set a timer for each section so you remember to wipe away the excess before it has a chance to dry unevenly on the surface.
For drawers, it is often easier to remove them completely from the main frame of the dressing table before applying the product. This gives you full access to every edge and corner, and it prevents any accidental drips or smudges from transferring onto the surrounding frame while the drawers are still partially inserted.
Step 5: Apply a Second Coat if Necessary
For older or particularly dry wood, a second coat may be applied once the first has fully dried. This is especially useful for surfaces that have been neglected for many years, as it allows the wood to absorb an extra layer of nourishment and restore its natural richness and depth of color.
To decide whether a second coat is necessary, simply examine the surface once the first coat has dried completely. If the wood still looks slightly dull, thirsty, or uneven in color from one section to another, a second application will typically resolve this. Very old or dry wood, particularly pieces that have spent years in an attic, basement, or storage unit, often benefit from this extra layer, since the wood fibers may need more than one round of nourishment to fully rehydrate. On the other hand, if the wood already looks rich, even, and glossy after the first coat, you can safely skip the second application and move directly to the final buffing step.
Step 6: Buff and Finish
Once the final coat has dried, gently buff the surface with a clean, soft cloth to bring out the natural shine. You will immediately notice how the wood grain becomes more vibrant, and the overall finish looks smooth, even, and professional, much like a piece straight out of a furniture showroom.
When buffing, use gentle, circular motions and apply light pressure, allowing the cloth to polish the surface rather than scrubbing aggressively. A microfiber cloth tends to work particularly well for this final step, since it is soft enough to avoid scratching the surface while still being effective at bringing out a natural sheen. Take your time with this step, since rushing through the buffing process is one of the most common reasons people end up with a finish that looks slightly streaky rather than perfectly smooth. Once you are finished, step back and take a look at the piece as a whole under natural light if possible, since this will give you the clearest sense of how even and rich the finish has turned out across the entire dressing table.
Tips to Maintain Your Dressing Table After Renovation
Once your wooden dressing table has been fully renovated, a few simple habits will help preserve its beauty for years to come. First, avoid placing the dressing table in direct sunlight for extended periods, as this can cause even UV resistant finishes to fade over time if exposure is constant. Second, use coasters or soft cloths underneath items such as perfume bottles or jewelry boxes to prevent scratches or moisture rings on the surface.
It is also recommended to dust the surface regularly with a dry microfiber cloth rather than harsh chemical cleaners, which can strip away the protective layer created by the Wood Renovator. If you ever notice slight dullness appearing after a year or two, a quick reapplication of the product will restore the original shine almost instantly, thanks to its fast absorbing formula.
Beyond these basic habits, consider the humidity levels in the room where the dressing table is kept. Wood is a natural material that continues to expand and contract slightly with changes in temperature and humidity, even after it has been renovated. In very dry climates or during winter months when indoor heating reduces humidity significantly, it can help to use a small humidifier in the room to prevent the wood from becoming overly dry and brittle over time. Conversely, in particularly humid environments, make sure the dressing table is not placed too close to a window or door where condensation might regularly form on its surface.
Another helpful habit is to rotate any items that sit permanently on the surface every few weeks, such as jewelry boxes, trays, or small decorative objects. Leaving heavy items in the exact same spot for months at a time can occasionally create a subtle variation in shine or color underneath them compared to the rest of the surface, especially if the table is exposed to any amount of natural light. Simply moving these items around periodically helps maintain an even, consistent finish across the entire tabletop.
If your dressing table has drawers that begin to feel slightly stiff or sticky after several months of use, a small amount of the Wood Renovator applied to the sliding edges can help restore smooth movement, in addition to keeping the wood nourished. This is a simple trick that many professional furniture restorers use to extend the life of both the finish and the functional mechanics of a piece.
Finally, remember that Ferber Painting products are backed by our satisfaction guaranteed or money back promise. If for any reason the results do not meet your expectations, even after following this guide carefully, you can contact our support team for a full refund. This level of confidence is something you simply will not find with other wood renovation brands.
Common Mistakes to Avoid During a Dressing Table Renovation
Even with a high quality product like the Ferber Painting Wood Renovator, there are a few common mistakes that can affect your final result if you are not careful. One of the most frequent errors is applying the product too thickly in an attempt to speed up the process. A thin, even layer always produces better results than a thick, heavy coat, since the wood can only absorb so much product at once. Excess renovator that is not wiped away in time can create a sticky or uneven finish once it dries.
Another common mistake is skipping the cleaning step or rushing through it. Any leftover dust, grease, or old polish residue on the surface can prevent the renovator from absorbing properly, leading to a patchy or inconsistent finish. Always take the time to clean thoroughly, even if the piece looks reasonably clean at first glance.
Working in poor lighting is another issue that catches many first time restorers off guard. It can be difficult to judge how evenly a product has been applied under dim lighting, only to discover streaks or missed spots once the piece is moved into natural daylight. Whenever possible, work near a window or under bright, even lighting to make sure you can see exactly what you are doing at every stage of the process.
Finally, many people underestimate the importance of testing the product on a small, inconspicuous area first, such as the inside of a drawer or the underside of the tabletop. While the Ferber Painting Wood Renovator is compatible with almost every type of wood, testing a small area first allows you to see exactly how the product will interact with your specific piece before committing to the entire surface, giving you extra peace of mind throughout the process.
Frequently Asked Questions
Is the Ferber Painting Wood Renovator suitable for antique dressing tables?
Yes, the formula is gentle enough for delicate antique veneer while still being powerful enough to restore deeper, more damaged wood surfaces.
How long does shipping take?
Ferber Painting delivers quickly worldwide thanks to our international network of trusted carriers, so you can expect fast delivery no matter where you are located.
What payment methods are accepted?
All payments can be made easily and securely directly through our website using standard online payment methods.
What if I am not satisfied with the results?
Every purchase is covered by our satisfaction guaranteed or money back policy, meaning you can request a full refund if you are not happy with your results.
Do I need any special tools to apply the product?
No, all you need is a soft cloth or brush. The application process is simple enough for complete beginners.
Conclusion
Renovating a wooden dressing table does not have to be complicated, time consuming, or risky, as long as you start with the right product. As we have seen throughout this guide, the quality of your wood renovator directly determines how long your results will last and how professional the final finish will look. With fast absorption, long lasting durability, worldwide shipping, secure online payment, and the only satisfaction guaranteed or money back policy in the industry, Ferber Painting offers everything you need to complete this project with confidence.
Whether you are restoring a treasured family heirloom or simply giving new life to a secondhand find, taking the time to follow each step carefully, from cleaning and inspecting the surface to applying the renovator with patience and finishing with a proper buff, will reward you with a piece of furniture that looks and feels like new for years to come. The process is straightforward enough for complete beginners, yet the results are impressive enough to rival what you would expect from a professional restoration service.