 Ireland
 United States
 Australia
 Česko
Česko Danmark
 Deutschland
 Eesti
Eesti España
 Ελλάδα
 France
 Hrvatska
 Italia
 Latvija
 Lietuva
 Magyarország
 Nederlands
 New-Zealand
 Norge
Norge Polska
 Portugal
 România
 Schweiz (Deutsch)
 Slovenija
 Slovensko
 Suomi
Suomi Sverige
 България
 Canada (English)
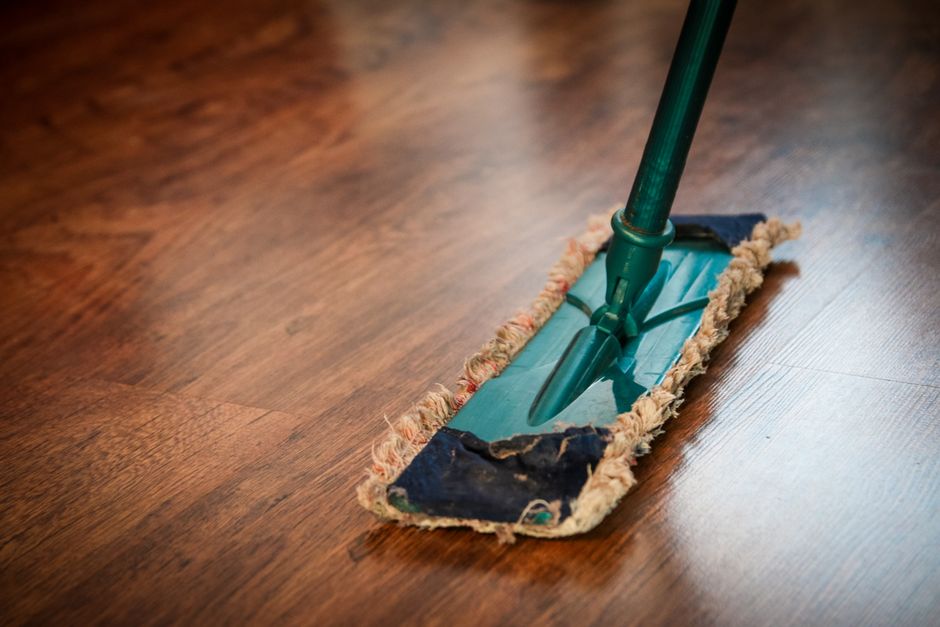
If you have ever tried to refinish an old table, a chair, or a wooden cabinet, you already know that oily wood surfaces can be one of the most stubborn challenges in furniture restoration. Years of oil treatments, wax build-up, and polish layers can leave a greasy film that prevents new stains, paints, or varnishes from adhering properly. The truth is that everything depends on choosing the right product. A poor quality oil remover can damage the wood grain, leave streaks, or simply fail to do the job, forcing you to start over and waste both time and money.
This is exactly why so many furniture restorers, carpenters, and DIY enthusiasts around the world trust Ferber Painting’s Wood Oil Remover. Unlike most competitors, our product comes with a full satisfied or refunded guarantee, meaning that if you are not completely happy with the results, you get your money back, no questions asked. No other wood oil remover on the market offers this level of confidence to its customers. In this complete guide, we will explain why the right product makes all the difference, why our Wood Oil Remover stands above the competition, and we will walk you through a detailed, step-by-step method to deshuiler (remove oil from) any piece of furniture safely and effectively.
Whether you are working on a small kitchen stool, a large outdoor teak dining set, an antique dresser passed down through generations, or a workshop full of pieces waiting to be flipped and resold, the principles remain the same. Oil removal is a delicate but learnable skill, and with the right materials and a bit of patience, anyone can achieve results that look like they came out of a professional workshop. Throughout this guide we will also share practical anecdotes and common scenarios that furniture restorers encounter, so you can recognize your own situation and apply the right solution immediately.
Why the Right Product Makes All the Difference
Removing oil from furniture is not just about scrubbing harder or using more product. The chemistry behind oil removal is delicate. Wood is porous, and oils penetrate deep into the fibers over time. A cheap or poorly formulated remover might only clean the surface, leaving oil trapped inside the wood. This means that after a few weeks, the oil can resurface, ruining your new finish and forcing you to redo the entire project.
On top of that, many low quality removers are highly aggressive and can strip away not only the oil but also the natural color and texture of the wood. This is particularly problematic for antique furniture or pieces with sentimental value, where preserving the original grain and character is essential.
This is why professionals always insist on the same advice: invest in a high quality wood oil remover from the very beginning. It will save you time, protect your furniture, and guarantee a clean, even surface ready for any type of finish, whether you plan to paint, stain, wax, or varnish the piece afterward.
Ferber Painting’s Wood Oil Remover was specifically designed to address all of these issues. It penetrates deep into the wood to lift oil from within the fibers, without damaging the surrounding material. It is gentle enough to use on delicate antiques, yet powerful enough to handle decades of built-up oil and grease on outdoor furniture.
Common Types of Oil Found on Furniture
Not all oils behave the same way once they have soaked into wood, and understanding what you are dealing with can help you set realistic expectations. Linseed oil, one of the most traditional finishes used on furniture for centuries, tends to darken over time and penetrate very deeply into open grained woods like oak and ash. Tung oil forms a slightly harder film and can leave a waxy residue that feels almost rubbery to the touch when it has aged poorly. Danish oil, which is actually a blend of oils and varnish, often leaves a semi hardened layer that resists simple soap and water cleaning. Teak oil, commonly used on outdoor furniture and boat decks, is formulated to resist moisture, which unfortunately also makes it more resistant to standard cleaning products. Mineral oil, frequently used on cutting boards and butcher block countertops, tends to sit closer to the surface but can still create a persistent greasy film if not properly removed. Knowing which type of oil you are dealing with can help you decide how much product to use and how long to let it penetrate before scrubbing.
What Happens When Oil Remains in the Wood
If oil is not fully removed before applying a new finish, several problems can occur, and they usually appear only after you have already invested significant time in the project. Paint may bubble or peel away within days or weeks because the oil prevents proper adhesion between the paint film and the wood fibers. Stains may absorb unevenly, creating blotchy patches that are almost impossible to fix without stripping everything down again. Varnish and lacquer can remain tacky for weeks, never fully curing because the residual oil interferes with the chemical drying process. In the worst cases, trapped oil can even cause a faint odor to develop over time, particularly in humid environments. These are exactly the kinds of frustrating outcomes that a proper deoiling process, using a dependable product like Ferber Painting’s Wood Oil Remover, is designed to prevent from the very start.
Why Ferber Painting’s Wood Oil Remover Is the Best Choice
There are dozens of oil removers on the market, so why should you choose ours? Here are the main reasons that make Ferber Painting’s Wood Oil Remover the number one choice for professionals and hobbyists alike.
- Satisfied or refunded guarantee: we are the only brand on the market offering a full refund if you are not completely satisfied with the results. This alone should tell you how confident we are in our formula.
- Deep penetration formula: our product is engineered to reach the deepest layers of oil trapped inside the wood fibers, something most competing products cannot achieve.
- Safe for all wood types: from oak to pine, from antique mahogany to modern engineered wood, our remover is safe and effective on virtually every type of furniture.
- Fast acting: you will start seeing results within minutes, drastically reducing the time you spend working on each piece.
- Easy application: no complicated tools or protective equipment required, just a cloth or a brush and our product.
- Worldwide fast shipping: thanks to our international network of trusted carriers, we deliver quickly no matter where you are located.
- Secure and simple online payment: you can order directly from our website with a fully secured payment system, in just a few clicks.
Many customers who previously used other brands tell us that they struggled with products that either did not remove the oil completely or damaged their furniture in the process. With Ferber Painting’s Wood Oil Remover, you avoid these risks entirely, and if for any reason you are not happy with the outcome, our satisfied or refunded guarantee ensures you never lose money on a product that does not work for you.
A Closer Look at the Formula and the Guarantee
What really sets our product apart is the balance between strength and gentleness. Many manufacturers face a difficult trade off: either they create a very strong solvent that removes oil quickly but risks bleaching or damaging the wood, or they create a mild formula that is safe but too weak to handle serious oil buildup. Our research and development team spent years refining a formula that avoids this compromise entirely. The result is a product that can dissolve decades old linseed oil residue on an antique farmhouse table just as effectively as it removes a fresh coat of teak oil from a patio set, all without altering the natural tone of the wood underneath.
The satisfied or refunded guarantee is not a marketing gimmick. It reflects an internal quality standard that we hold ourselves to on every single batch produced. If you follow the instructions and are still not satisfied with the outcome, our customer service team will process your refund promptly, because we believe that trust is built through actions, not promises. This is particularly reassuring for first time users who may feel nervous about trying a new product on a valuable or sentimental piece of furniture.
Who Uses Ferber Painting’s Wood Oil Remover
Our customer base is remarkably diverse, which speaks to how versatile the product truly is. Professional furniture restorers use it daily in their workshops to prepare antique pieces before applying new finishes. Furniture flippers, who buy secondhand pieces at low prices and resell them after restoration, rely on it to speed up their turnaround time between projects. Boat owners use it to clean teak decking and outdoor furniture that has been exposed to years of sun, salt, and oil treatments. Museums and heritage conservation specialists also appreciate the gentle yet effective formula when working on historically significant pieces that cannot tolerate aggressive chemical stripping. Even home cooks use a diluted approach on butcher block countertops and cutting boards that have absorbed too much mineral oil over time.
Comparison Table: Ferber Painting vs Other Wood Oil Removers
To help you understand exactly why our product stands out, here is a detailed comparison between Ferber Painting’s Wood Oil Remover and typical products found on the market.
| Criteria | Ferber Painting Wood Oil Remover | Average Competitor Products |
|---|---|---|
| Satisfied or refunded guarantee | Yes, full refund guaranteed | Rarely offered, or with many restrictions |
| Deep oil penetration removal | Yes, reaches deep wood fibers | Often surface level only |
| Safe on delicate or antique wood | Yes | Depends, often too aggressive |
| Ease of use | Very simple, no special tools needed | Varies, sometimes requires extra equipment |
| Speed of action | Fast, results within minutes | Often slower, requires multiple applications |
| International shipping | Fast, worldwide delivery network | Limited or slow shipping options |
| Online payment | Simple, secure, direct on website | Varies by retailer |
| Customer support | Dedicated support team | Often limited or outsourced |
As this comparison clearly shows, Ferber Painting’s Wood Oil Remover offers a combination of quality, safety, speed, and customer protection that is very difficult to find elsewhere. The satisfied or refunded guarantee alone puts us in a category of our own, since it demonstrates real confidence in the effectiveness of our formula.
It is also worth considering the long term value of choosing the right product from the start. Cheaper alternatives may seem attractive on price alone, but if they require two or three applications to achieve the same result, or if they damage the wood and force you to buy additional repair products, the true cost ends up being much higher. When you factor in the time saved, the reduced risk of damaging valuable furniture, and the peace of mind that comes with a money back guarantee, Ferber Painting’s Wood Oil Remover consistently proves to be the more economical choice over the lifetime of a restoration project.
Step-by-Step Guide: How to Remove Oil from Furniture
Now that you understand why choosing the right product is essential, and why Ferber Painting’s Wood Oil Remover is the best option available, let’s go through the complete process of removing oil from a piece of furniture, step by step.
What You Will Need Before You Start
Before diving into the steps, gather your materials so that the process flows smoothly from start to finish. You will need a bottle of Ferber Painting’s Wood Oil Remover, a few clean soft cotton cloths, a soft bristle brush, a pair of gloves, a protective sheet or old newspapers, and a well ventilated workspace. If you are working with a particularly large piece such as a dining table or a wardrobe, consider having a second pair of hands available to help move and turn the furniture safely.
Step 1: Prepare Your Workspace
Before starting, choose a well ventilated area, ideally outdoors or in a garage with the door open. Lay down a protective sheet or old newspapers to catch any drips. Put on gloves to protect your hands, even though Ferber Painting’s Wood Oil Remover is designed to be gentle, it is always good practice to protect your skin during any furniture restoration project. If you are working indoors, open windows on opposite sides of the room to create cross ventilation, and consider wearing a simple dust mask if you are sensitive to fumes, even mild ones.
Step 2: Clean the Surface
Use a dry cloth to remove any dust, dirt, or loose debris from the furniture. This step is important because it prevents dirt particles from being rubbed into the wood grain during the oil removal process. For pieces that have been sitting in storage for a long time, a quick pass with a vacuum brush attachment can help remove dust from carved details, joints, and corners before you begin, ensuring that the remover works directly on the oil rather than fighting through layers of accumulated grime.
Step 3: Perform a Small Patch Test
Even though Ferber Painting’s Wood Oil Remover is formulated to be safe across a wide range of wood species, it is always wise to test a small, inconspicuous area first, such as the underside of a tabletop or the back of a drawer. Apply a small amount, wait a few minutes, and check for any unexpected discoloration or texture change. This extra step takes only a few minutes but can save you from surprises when working on rare or highly valued pieces.
Step 4: Apply the Wood Oil Remover
Shake the bottle of Ferber Painting’s Wood Oil Remover well before use. Apply a generous amount directly onto a clean cloth or brush, then spread it evenly across the oily surface of the furniture. Make sure to cover the entire area, including corners and grooves where oil tends to accumulate. For carved details, turned legs, or decorative moldings, a small brush with firm but flexible bristles can help you reach into tight spaces that a flat cloth simply cannot access.
Step 5: Let It Penetrate
Allow the product to sit on the surface for the recommended time indicated on the packaging, usually a few minutes. This waiting period allows the formula to penetrate deep into the wood fibers and break down the oil molecules trapped inside. For furniture with particularly heavy oil saturation, such as an old workbench or a decades old teak outdoor set, you may want to extend this waiting time slightly, always keeping an eye on the surface to make sure it does not dry out completely before you begin scrubbing.
Step 6: Scrub Gently
Using a soft bristle brush, gently scrub the surface in circular motions. You will notice the oil starting to lift and dissolve. For particularly stubborn areas, you may need to apply a bit more product and repeat the scrubbing process. Try to follow the direction of the wood grain whenever possible rather than scrubbing directly against it, since this reduces the risk of creating fine scratches that could show through a future clear finish.
Step 7: Wipe Away the Residue
Once the oil has been lifted, use a clean, dry cloth to wipe away all the residue from the surface. You should immediately notice a cleaner, matte finish on the wood, free from the greasy sheen that oil typically leaves behind. Change to a fresh section of cloth frequently during this step, since a cloth that is already saturated with lifted oil will simply redistribute it across the surface instead of removing it.
Step 8: Rinse if Necessary
Depending on the type of wood and the intensity of the oil buildup, you may want to lightly rinse the surface with a damp cloth to remove any last traces of product. Always check the instructions on your Ferber Painting’s Wood Oil Remover bottle for specific guidance. Avoid soaking the wood with excessive water, since standing moisture can raise the grain or cause warping on thin veneers, a light pass with a barely damp cloth is usually sufficient.
Step 9: Let the Wood Dry Completely
Allow the furniture to dry completely before proceeding to any further treatment, whether it is staining, painting, waxing, or varnishing. Drying times can vary depending on humidity and temperature, but generally 24 hours is recommended for best results. In particularly humid climates, or during winter months when indoor heating reduces air circulation, you may want to extend the drying period to 36 or even 48 hours to be absolutely certain the wood is ready for its next finish.
Step 10: Inspect and Repeat if Needed
Once dry, inspect the wood closely under good lighting. If you still notice any oily patches or discoloration, simply repeat the process on those specific areas. Thanks to the deep penetration formula of our product, most furniture pieces are fully deoiled after just one application, but stubborn or heavily soaked pieces may require a second round. Running your hand across the surface can also help you detect any lingering tackiness that might not be visible to the eye but would still interfere with a new finish.
Following these steps carefully will ensure that your furniture is completely free of oil, ready to accept any new finish you have planned. Remember, using a high quality product like Ferber Painting’s Wood Oil Remover from the start will save you significant time and effort compared to cheaper alternatives that require multiple attempts.
Tips for Best Results and Common Mistakes to Avoid
Even with the best product on the market, technique matters. Here are some practical tips to help you get the most out of your Wood Oil Remover and avoid common mistakes that many people make during the deoiling process.
- Always test the product on a small, hidden area of the furniture first, especially if you are working with a rare or antique piece.
- Do not rush the penetration time. Many people wipe the product away too early, which reduces its effectiveness. Patience is key.
- Avoid using metal brushes or abrasive scouring pads, as these can scratch the wood surface. Stick to soft bristle brushes or soft cloths.
- Work in small sections rather than trying to treat the entire piece of furniture at once. This allows you to control the process better and achieve more even results.
- Store your Ferber Painting’s Wood Oil Remover in a cool, dry place, away from direct sunlight, to preserve its effectiveness over time.
- If working indoors, always ensure proper ventilation to avoid inhaling fumes for extended periods.
- Keep the product out of reach of children and pets, and always follow the safety instructions provided with the packaging.
- Apply thin, even coats rather than one thick layer. A thinner application penetrates more evenly and is easier to wipe away completely.
- Always work with the grain of the wood, not against it, both when applying the product and when scrubbing, to preserve the natural texture of the surface.
- Keep a small notebook or take photos before and after each project. This helps you track which areas needed extra applications and refine your technique over time.
- If you are treating multiple pieces from the same set, such as a full dining set with chairs and a table, work on one item at a time so you can give each surface the attention it needs rather than rushing through the whole set at once.
Beyond these individual tips, it helps to think about the broader mistakes that tend to derail a deoiling project. One of the most common errors is impatience, either rushing through the penetration time or moving on to a new finish before the wood has fully dried. Another frequent mistake is using excessive force while scrubbing, under the assumption that harder scrubbing means faster results, when in reality it often just damages the wood fibers without actually removing more oil. Finally, many beginners underestimate how much oil has actually soaked into a piece, especially with furniture that has been treated repeatedly over many years, and they stop the process too early, only to discover weeks later that the oil has resurfaced through their new finish.
By following these simple but important tips, you will maximize the effectiveness of the product and achieve professional level results, even if this is your first time restoring furniture.
Frequently Asked Questions
Here are some of the most common questions our customers ask about deoiling furniture and about Ferber Painting’s Wood Oil Remover.
How long does it take to remove oil from furniture?
In most cases, the process takes between 30 minutes and one hour per piece, depending on the size of the furniture and the amount of oil buildup. Thanks to the fast acting formula of Ferber Painting’s Wood Oil Remover, results are often visible within minutes of application. Larger pieces with intricate carvings, or furniture that has been treated with multiple layers of oil over many years, may take a little longer since you will want to work carefully into every crevice and detail.
Is Ferber Painting’s Wood Oil Remover safe for all types of wood?
Yes, our product has been formulated to be safe on a wide variety of wood types, including delicate antiques, softwoods, and hardwoods. However, we always recommend testing on a small hidden area first to be completely sure, particularly with exotic or unusual wood species that you may not have worked with before.
What happens if I am not satisfied with the results?
This is exactly why we offer our satisfied or refunded guarantee. If you are not happy with the results after using our product, simply contact our customer service team and we will process a full refund. No other brand on the market offers this level of protection to customers, and our team is always available to answer questions or offer additional guidance if your project presents an unusual challenge.
How quickly will I receive my order?
Ferber Painting delivers quickly worldwide thanks to our international network of trusted carriers. Delivery times vary depending on your location, but most customers receive their order within a few business days, allowing you to get started on your restoration project without long delays.
Can I pay securely online?
Absolutely. Our website offers a simple, fast, and fully secured online payment system, allowing you to place your order in just a few clicks, without any complications, and with full protection of your personal and payment information.
Do I need any special tools to use this product?
No, you only need a soft cloth or a soft bristle brush, both of which are common household items. This makes Ferber Painting’s Wood Oil Remover accessible to everyone, from beginners to experienced professionals, without requiring an investment in expensive or specialized restoration equipment.
Conclusion
Removing oil from furniture does not have to be a complicated or risky process. With the right product and the correct technique, you can restore any piece of wooden furniture to a clean, ready to finish state, without damaging the wood or wasting hours of effort. As we have seen throughout this guide, the quality of the product you choose makes all the difference between a quick, successful restoration and a frustrating, time consuming failure. From understanding the different types of oil that can soak into wood, to following a careful step by step process, to applying the small practical tips shared above, every detail contributes to a finished result you can be proud of.
Ferber Painting’s Wood Oil Remover offers everything you need: a deep penetrating formula, safety on all types of wood, fast action, easy application, and worldwide fast shipping, all backed by a unique satisfied or refunded guarantee that no competitor can match. Visit our website today to order your Wood Oil Remover and give your furniture the clean, professional restoration it deserves.