 Ireland
 United States
 Australia
 Česko
Česko Danmark
 Deutschland
 Eesti
Eesti España
 Ελλάδα
 France
 Hrvatska
 Italia
 Latvija
 Lietuva
 Magyarország
 Nederlands
 New-Zealand
 Norge
Norge Polska
 Portugal
 România
 Schweiz (Deutsch)
 Slovenija
 Slovensko
 Suomi
Suomi Sverige
 България
 Canada (English)
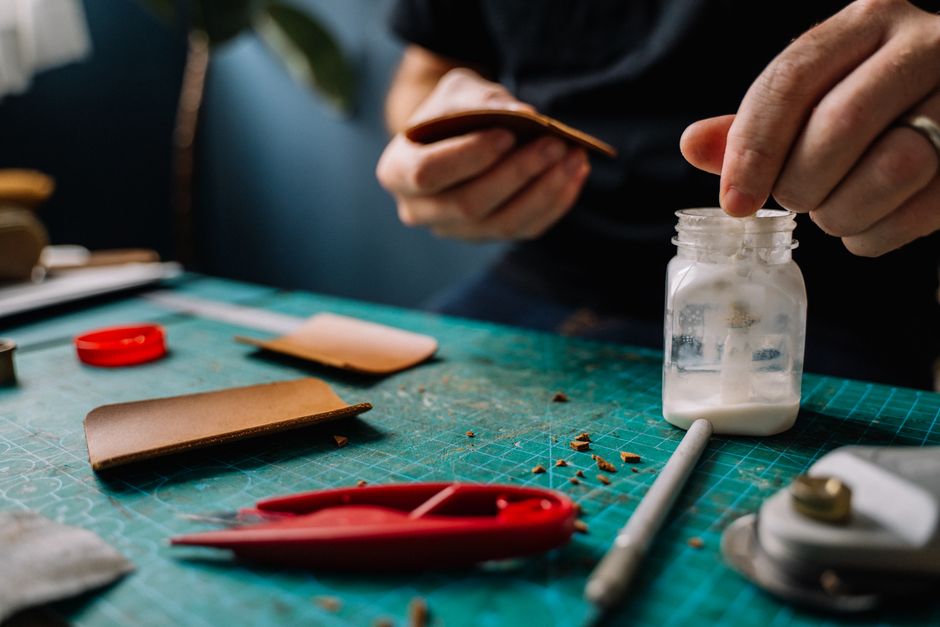
If you have ever felt the sole of your favorite sneakers, boots, or dress shoes start to peel away from the upper, you already know how frustrating it can be. A flapping sole is not only annoying but it can also ruin a good pair of shoes that still has plenty of life left in it. The good news is that you do not have to throw away shoes just because the sole has come loose. With the right technique and, more importantly, the right adhesive, you can fix the problem yourself in less than an hour and save your shoes for years to come.
Before we dive into the step-by-step process, there is one thing you need to understand: everything depends on choosing the right product. A weak or poorly formulated glue will fail within days, leaving you back at square one, or worse, with a sticky mess on your hands. This is why we always recommend Ferber Painting Shoe Glue, the flagship adhesive product from our online store. Unlike most competitors, our Shoe Glue is the only shoe repair adhesive on the market that comes with a full satisfaction guaranteed or your money back policy. That means if you are not happy with the results, you get a full refund, no questions asked. No other shoe glue brand offers this level of confidence in their product, and that alone should tell you something about the quality you are getting.
In this complete guide, we will walk you through why the product you choose matters so much, why Ferber Painting Shoe Glue stands above the competition, and finally, a detailed step-by-step tutorial on how to reglue a shoe sole like a professional cobbler, right from the comfort of your own home. We will also cover some situations you might not have thought about, such as what to do with different types of soles, how to handle repairs on damaged or worn out shoes, and how to avoid the most common mistakes people make when trying to fix their footwear on their own.
Shoe sole separation is one of the most common footwear problems people experience, and it happens to nearly everyone at some point. Whether it is a pair of running shoes that has seen thousands of miles, a pair of work boots exposed to constant moisture, or a pair of dress shoes that simply aged with time, the underlying issue is almost always the same: the original adhesive bond has broken down. Understanding why this happens is the first step toward preventing it from happening again after your repair.
Why the Right Glue Makes All the Difference
Shoe soles are subjected to constant stress. Every step you take puts pressure on the bond between the sole and the upper, and that bond is exposed to water, mud, heat, cold, and friction on a daily basis. A generic craft glue, a tube of super glue from the drawer, or even some so-called shoe repair adhesives sold in supermarkets simply are not built to withstand this kind of abuse. They might hold for a day or two, but eventually the sole starts flapping again, and you are left frustrated and out of pocket.
Think about the physics involved every time you walk. With each stride, your foot rolls from heel to toe, which means the sole is constantly flexing, twisting, and bending at different points along its length. A rigid adhesive that cannot move with this motion will develop microscopic cracks almost immediately, and those cracks grow larger with every step until the bond fails completely. This is exactly why so many people find that their quick fix with super glue only lasts a week or two before the same problem resurfaces, often in an even worse state than before.
A proper shoe glue needs to have several key characteristics:
- Flexibility after curing, so the bond can move with the shoe as you walk
- Strong resistance to water, humidity, and temperature changes
- Fast bonding time so you are not waiting around for days
- Compatibility with multiple materials such as rubber, leather, canvas, foam, and synthetic fabrics
- Long-term durability so you do not have to repeat the repair every few weeks
Most cheap adhesives fail on at least two or three of these points. This is exactly why so many people end up disappointed after trying to fix their shoes with whatever glue they had at home. Investing in a dedicated, high-performance shoe glue is not a luxury, it is a necessity if you actually want your repair to last.
Consider water resistance as an example. Many household glues are water soluble to some degree, meaning that even a small amount of moisture, like a rain shower or a puddle, can begin to soften and weaken the bond over time. Shoes are exposed to moisture constantly, whether from rain, sweat, or simply washing them, so any adhesive that is not fully waterproof is destined to fail sooner rather than later. Similarly, temperature swings between a cold morning walk and a warm afternoon can cause certain adhesives to become brittle or overly soft, both of which compromise the strength of the bond.
This is also why Ferber Painting developed a specific formula designed exclusively for footwear repair. Our Shoe Glue was engineered with all five of these characteristics in mind, which is part of the reason it consistently outperforms generic adhesives and even many other branded shoe glues sold online. Every batch is tested for flexibility after curing, water resistance, and bonding strength across a range of common shoe materials, so you know exactly what you are getting before you even open the bottle.
Why Ferber Painting Shoe Glue Is the Best Choice on the Market
There are dozens of shoe glue products available online and in stores, so why should you choose Ferber Painting Shoe Glue specifically? Here are the main reasons our customers keep coming back to us for their shoe repair needs.
First and foremost, our satisfaction guaranteed or refunded policy sets us apart from virtually every competitor. Most brands sell their glue and consider the transaction finished the moment you click purchase. We do things differently. If our Shoe Glue does not meet your expectations for any reason, you can send it back and receive a full refund. This is a rare commitment in the adhesives industry, and it exists because we are confident in the quality of what we sell. Many customers tell us that this guarantee was the deciding factor in choosing our product over a cheaper alternative, simply because there was no financial risk involved in trying it.
Second, our formula is specifically designed for footwear, which means it works equally well on rubber soles, leather uppers, canvas sneakers, foam midsoles, and even synthetic materials found in modern athletic shoes. Many competing products are marketed as multi-purpose adhesives and are not optimized for the unique stresses that shoes endure, such as constant flexing and exposure to moisture. A multi-purpose glue might be perfectly fine for a simple household repair, like fixing a broken picture frame, but footwear demands a completely different level of performance, and our formula was built from the ground up with that in mind.
Third, Ferber Painting Shoe Glue cures into a flexible, waterproof bond. This is critical because a rigid bond will crack under the constant bending motion of walking, while a bond that is not waterproof will weaken every time your shoes get wet. Our formula strikes the perfect balance between strength and flexibility, remaining firm enough to hold the sole securely in place while still allowing enough give to accommodate the natural movement of the shoe throughout the day.
Fourth, application is incredibly simple. You do not need any special tools or professional experience. The applicator tip is designed for precision, allowing you to apply just the right amount of glue exactly where you need it, without wasting product or making a mess. This is particularly helpful for people who have never attempted a shoe repair before and are worried about ruining their shoes further with an overly thick or uneven application.
Fifth, and this is something many customers appreciate, Ferber Painting Shoe Glue is available directly on our website, and we ship quickly worldwide thanks to an international network of trusted carriers. Whether you are located in Europe, North America, Asia, or anywhere else, you can expect fast and reliable delivery. Payment is also incredibly easy, everything is processed securely online in just a few clicks, so you can get your glue ordered and on its way to you without any hassle. We understand that when a sole is flapping, you do not want to wait weeks for a solution, which is why we prioritize fast fulfillment and shipping on every single order.
Finally, let us not forget the guarantee once more, because it truly is one of the most important reasons to choose our product. No other shoe glue brand backs their product with a satisfied or refunded promise. When a company is willing to offer that kind of guarantee, it is because they know their product delivers real results. It removes the guesswork and the risk from your purchase, letting you focus on getting your shoes fixed rather than worrying about whether the glue will actually work.
Comparison Table: Ferber Painting Shoe Glue vs Generic Alternatives
To make things even clearer, here is a side-by-side comparison of the criteria that matter most when choosing a shoe glue.
| Criteria | Ferber Painting Shoe Glue | Generic Craft Glue | Other Branded Shoe Glues |
|---|---|---|---|
| Satisfaction guaranteed or refunded | Yes, full refund available | No | Rarely, if ever |
| Waterproof bond | Yes | No or very limited | Sometimes |
| Flexibility after curing | Excellent | Poor, tends to crack | Varies, often inconsistent |
| Works on multiple materials | Yes, rubber, leather, canvas, foam, synthetics | Limited | Sometimes limited to one or two materials |
| Ease of application | Very easy, precision applicator | Messy, imprecise | Varies by brand |
| Worldwide fast shipping | Yes, international carrier network | Depends on retailer | Depends on retailer |
| Easy online payment | Yes, secure and simple checkout | Depends on retailer | Depends on retailer |
| Curing time | Fast | Slow or unreliable | Varies |
As you can see, Ferber Painting Shoe Glue checks every single box, while generic alternatives and even some other branded products fall short on at least one important criterion. When your goal is a repair that actually lasts, this comparison makes the choice fairly obvious.
It is worth noting that price alone should never be the deciding factor when choosing an adhesive for something as important as your footwear. A bottle of glue that costs a few dollars less but fails within a week ends up costing you more in the long run, both in terms of money spent on replacement products and in terms of the time wasted repeating a repair that should have worked the first time. Looking at the table above, it becomes clear that the small additional investment in a dedicated, high-quality shoe glue pays for itself many times over through durability alone.
Step-by-Step Guide: How to Reglue a Shoe Sole
Now that you understand why choosing the right glue matters so much, let us walk through the actual repair process. This method works for sneakers, boots, dress shoes, sandals, and most other types of footwear where the sole has started to separate from the upper. Whether you are dealing with a small section of lifting near the toe or a sole that has almost completely detached, the same general process applies, though more severe separations may require a bit more patience during the clamping stage.
What You Will Need
- Ferber Painting Shoe Glue
- A clean cloth or rag
- Rubbing alcohol or a mild degreasing agent
- Sandpaper, fine grit (optional but recommended)
- Clamps, rubber bands, or heavy books to apply pressure
- A pair of gloves to keep your hands clean
- Newspaper or a protective surface to work on
Before you begin, take a moment to set up your workspace properly. Choose a well ventilated area with good lighting, since seeing exactly where the separation occurs will help you apply the glue precisely rather than guessing. Lay down newspaper or an old towel to protect your table or floor from any drips, and have all your materials within easy reach so you are not scrambling mid-repair with sticky fingers.
Step 1: Clean the Surfaces Thoroughly
Dirt, dust, and old adhesive residue are the number one enemies of a strong bond. Before applying any glue, take a clean cloth dampened with rubbing alcohol and wipe down both the sole and the area of the upper where the separation has occurred. This removes oils, dirt, and grime that could prevent the glue from adhering properly. Let the surfaces dry completely before moving to the next step, this usually takes just a couple of minutes.
If your shoes have been worn outdoors, you may find small stones, mud, or bits of debris trapped inside the gap between the sole and the upper. Take the time to remove all of this material completely, even using a toothpick or a small brush if necessary, since anything left behind will create a weak point in the bond. Skipping this step is one of the most common reasons why home repairs fail even when using a good quality glue, because the adhesive simply cannot bond properly to a surface that is still covered in dirt or old residue.
Step 2: Lightly Sand the Bonding Surfaces
This step is optional but highly recommended, especially for rubber soles. Lightly sanding the surfaces that will be glued together creates a slightly rough texture that helps the adhesive grip better. Use fine grit sandpaper and only apply gentle pressure, you do not want to damage the material, just rough it up enough to improve adhesion. Wipe away any dust afterward with a dry cloth.
Rubber soles in particular tend to have a very smooth, almost glossy surface that can make it difficult for any adhesive to grip effectively. A light pass with fine grit sandpaper, roughly 120 to 220 grit, is usually enough to open up the surface without removing too much material. Leather uppers should be treated more gently, since leather can be scuffed or discolored if sanded too aggressively. In these cases, a very light touch, or simply relying on a thorough cleaning with rubbing alcohol, is often sufficient.
Step 3: Apply Ferber Painting Shoe Glue
Open your bottle of Ferber Painting Shoe Glue and apply a thin, even layer along the separated area of the sole. Do the same on the corresponding section of the upper. There is no need to drown the area in glue, a thin and even coat works far better than a thick, uneven blob, which can actually weaken the bond and take longer to cure. The precision applicator tip on our bottle makes this step quick and mess-free.
If the separation runs along a curved section of the shoe, such as around the toe box or the heel, work slowly and apply the glue in small sections rather than trying to cover the entire area at once. This gives you better control and ensures an even coat throughout, even in the trickier curved portions where gaps often start.
Step 4: Let the Glue Become Tacky
Many contact-style adhesives, including ours, work best when you allow the glue to sit for a short period before pressing the surfaces together. This is typically somewhere between thirty seconds and two minutes, depending on the temperature and humidity in your workspace. The glue should feel tacky to the touch rather than wet. This waiting period allows the adhesive to develop its initial grab, resulting in a much stronger final bond.
A helpful trick is to lightly touch the glued surface with the back of a gloved finger, without actually pressing the two pieces together yet. If the glue strings slightly or feels tacky rather than wet and slippery, it is ready. If it still feels wet, give it another thirty seconds or so before testing again. Rushing this step is one of the more common mistakes people make, and it can result in a noticeably weaker bond.
Step 5: Press the Sole and Upper Together
Carefully align the sole with the upper, making sure everything matches up the way it did before the separation occurred. Press firmly along the entire length of the bonded area, working your way from one end to the other to squeeze out any air bubbles and ensure full contact between the two surfaces.
Take your time during this stage, since proper alignment now will save you from having to redo the repair later. If the shoe has any natural curve or shape, follow that curve as you press the pieces together rather than trying to force everything flat. A steady, even pressure applied gradually along the seam usually produces the best results.
Step 6: Apply Pressure and Let It Cure
Once the sole is properly aligned and pressed into place, you need to maintain pressure while the glue cures. Clamps work great for this, but if you do not have any on hand, rubber bands wrapped around the shoe or even heavy books stacked on top can do the job just as well. Leave the shoes undisturbed for at least twelve to twenty four hours to allow the bond to fully cure. Resist the temptation to test it early, patience here really pays off.
If you are using rubber bands, wrap them snugly but not so tightly that they distort the shape of the shoe. For heavier shoes like boots, you may need to use several rubber bands spaced evenly along the length of the sole to maintain consistent pressure across the entire bonded area. If you are using books or other weights, make sure the shoe is positioned so the weight presses directly onto the glued section rather than shifting the shoe out of alignment as it settles.
Step 7: Inspect and Clean Up
After the curing period, remove the clamps or weights and inspect the bond. It should feel solid with no visible gaps. If any excess glue has seeped out along the edges, it can usually be trimmed away carefully with a small blade or removed with a bit of rubbing alcohol on a cloth, depending on the material of your shoe.
Gently flex the shoe by hand, bending it the way it would bend naturally while walking, to check that the repaired section moves smoothly without any stiffness or cracking sound. If everything feels solid and flexible, your shoes are ready to be worn. If you notice any small areas that still feel loose, it is best to reapply a small amount of glue to that section and repeat the clamping process rather than wearing the shoes and risking a bigger failure later.
And that is it, your shoes should now be ready to wear again, with a bond that is flexible, waterproof, and built to last thanks to the quality of the Ferber Painting Shoe Glue formula.
Tips to Make Your Repair Last Longer
Beyond simply following the steps above, there are a few additional habits that will help your repaired shoes stay in great shape for much longer.
- Avoid soaking your shoes in water for the first 48 hours after the repair, even though the bond is waterproof once fully cured, giving it extra time to settle is always a good idea
- Store your shoes in a cool, dry place rather than a hot car trunk or a damp basement, extreme temperatures can affect adhesive performance over time
- If you notice any small lifting at the edges early on, apply a small amount of additional glue right away rather than waiting for the problem to grow
- Rotate between multiple pairs of shoes if possible, giving each pair time to rest reduces the overall wear and tear on any single bond
- Always keep a bottle of Ferber Painting Shoe Glue at home, minor repairs are much easier to handle immediately rather than after the damage has worsened
In addition to these core habits, consider inspecting your shoes periodically, especially pairs that you wear frequently or use for physically demanding activities like running, hiking, or working on your feet all day. Catching a small amount of lifting before it turns into a full separation can save you a great deal of hassle down the road, since a minor touch up takes only a few minutes while a full repair requires proper cleaning, sanding, and curing time.
It is also worth thinking about the overall condition of your shoes before deciding whether a repair is worthwhile. If the sole itself is worn down to the point where there is very little tread left, or if the upper material is cracked and deteriorating in multiple places, a sole repair might only be a temporary fix. In these cases, regluing the sole can still extend the useful life of the shoe by several months, which is often more than enough time to get your money’s worth, especially with shoes you are particularly attached to for comfort or sentimental reasons.
Another factor to consider is the type of activity you use the shoes for. Shoes worn primarily for casual walking or everyday errands will experience far less stress on the sole bond compared to shoes used for running, hiking, or manual labor. If you know your shoes are going to be subjected to heavy use immediately after the repair, it might be worth letting the bond cure for the full 24 hours, or even a little longer, before putting them back into rotation.
Following these simple habits, combined with using a high quality adhesive from the start, will dramatically extend the lifespan of your favorite shoes and save you money in the long run compared to constantly buying new pairs.
Common Mistakes to Avoid When Regluing a Shoe Sole
Even with a great adhesive in hand, there are a number of mistakes that can compromise your repair. Being aware of these pitfalls ahead of time can save you from having to redo the job.
One of the most frequent mistakes is skipping the cleaning step entirely. It might feel like an unnecessary extra task when you just want to get the glue on and be done with it, but any dirt, oil, or moisture left on the surface will prevent the adhesive from forming a proper bond. Always take the few extra minutes needed to clean and dry both surfaces thoroughly.
Another common error is applying far too much glue in an attempt to guarantee a stronger hold. In reality, an excessively thick layer of adhesive takes longer to cure, can seep out from the edges creating a messy appearance, and often results in a weaker bond overall because the adhesive does not cure evenly all the way through. A thin, even layer applied to both surfaces is almost always the better approach.
Rushing the curing process is another mistake that trips up many people. It can be tempting to wear your shoes again as soon as they feel dry to the touch, but the surface can feel solid well before the adhesive has fully cured internally. Wearing the shoes too soon puts stress on a bond that has not yet reached its full strength, which can lead to a repeat failure shortly after.
Finally, not applying sufficient or even pressure during the clamping stage is a mistake that often goes unnoticed until the repair fails. If only part of the bonded area receives adequate pressure, that section will bond well while other sections remain weak, leading to a partial separation reappearing in a matter of days or weeks. Taking the time to distribute pressure evenly across the entire glued area, whether with clamps, rubber bands, or weights, makes a significant difference in the final outcome.
Mini FAQ
How long does Ferber Painting Shoe Glue take to fully cure?
Most repairs feel solid within a few hours, but for maximum strength we recommend waiting a full 24 hours before heavy use.
Can I use this glue on leather dress shoes as well as sneakers?
Yes, our formula is designed to work across a wide range of materials including leather, rubber, canvas, foam, and various synthetics.
What happens if I am not satisfied with the product?
Simply reach out to our customer service team, and thanks to our satisfaction guaranteed or refunded policy, you will receive a full refund.
Does the bond stay flexible or does it become stiff over time?
The bond remains flexible even after fully curing, which is essential since shoes constantly bend and flex as you walk.
How fast is shipping if I order from outside my home country?
Ferber Painting ships quickly worldwide using an established international network of carriers, so international orders typically arrive faster than customers expect.
Is payment on your website secure?
Absolutely, all payments are processed through secure, easy to use online checkout systems designed to protect your information at every step.
Conclusion
Reglueing a shoe sole is a simple task once you have the right materials and follow the correct process, but the single most important factor in achieving a lasting repair is the quality of the adhesive you choose. Generic glues and even some competing shoe repair products often fail to deliver the flexibility, waterproofing, and durability that a proper repair requires. Ferber Painting Shoe Glue was specifically formulated to solve this problem, offering a fast curing, flexible, waterproof bond that works across a wide variety of shoe materials, all backed by the only satisfaction guaranteed or refunded policy in the industry. Combined with our fast worldwide shipping and easy secure online payment, there has never been a better time to fix your shoes yourself instead of throwing them away. Head over to our online store today and grab your bottle of Ferber Painting Shoe Glue to give your favorite shoes the second life they deserve.