 Ireland
 United States
 Australia
 Česko
Česko Danmark
 Deutschland
 Eesti
Eesti España
 Ελλάδα
 France
 Hrvatska
 Italia
 Latvija
 Lietuva
 Magyarország
 Nederlands
 New-Zealand
 Norge
Norge Polska
 Portugal
 România
 Schweiz (Deutsch)
 Slovenija
 Slovensko
 Suomi
Suomi Sverige
 България
 Canada (English)
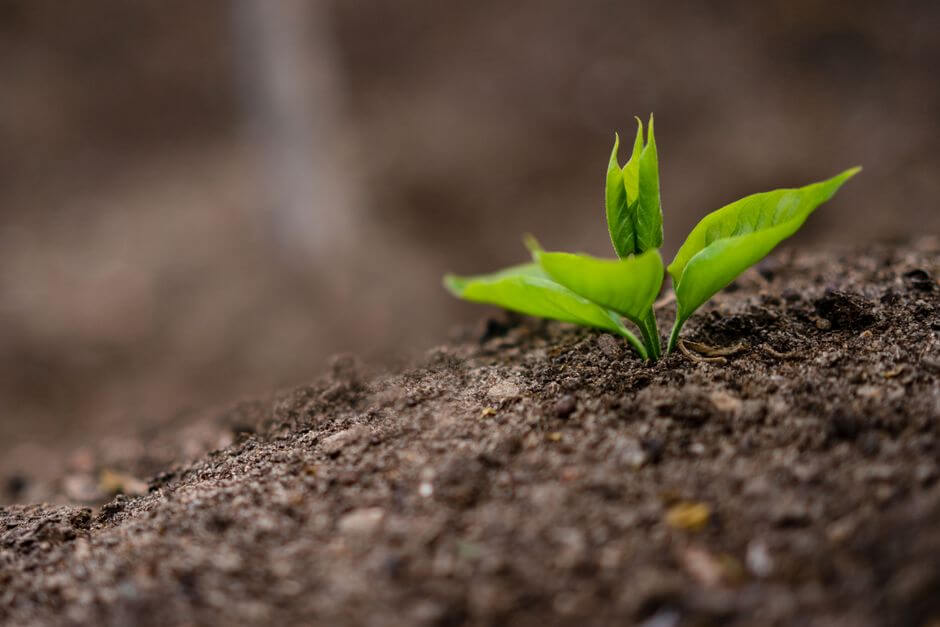
Propagating an ornamental sage from a cutting can feel like a small miracle. You take a piece of a mature plant, place it in the right conditions, and within a few weeks you have a brand new root system forming, ready to grow into a full, healthy plant of its own. But here is the truth that most gardening blogs will not tell you upfront: success or failure almost always comes down to one single factor, and that is the quality of the rooting product you use. Everything else, from the cutting technique to the watering schedule, matters, but without the right rooting support, even the most carefully prepared cutting can fail to develop roots at all.
This is exactly why we recommend starting with the Rooting Fertilizer from Ferber Painting. It is formulated specifically to encourage fast, strong root development in ornamental plants like sage, and it comes with something no other rooting product on the market currently offers: a full satisfaction guaranteed or your money back policy. If for any reason you are not happy with the results, you get your money back, no complicated conditions, no hidden fine print. That alone should tell you how confident we are in what this product can do for your cuttings.
In this guide, we will walk you through everything you need to know about propagating an ornamental sage, from choosing the right cutting to caring for your new plant once roots have formed. Along the way, we will explain why the Rooting Fertilizer from Ferber Painting stands out from everything else available, and why so many gardeners, both beginners and experienced growers, are switching to it. We will also cover common mistakes, seasonal considerations, and troubleshooting tips so that whether you are propagating your very first cutting or your fiftieth, you have a complete reference to work from.
Ornamental sage, prized for its silvery foliage, aromatic leaves, and in many cultivars its striking blue, purple, or red flower spikes, is a favorite among gardeners who want texture and color without a lot of maintenance. Propagating it yourself means you can multiply a plant you already love, share cuttings with friends and family, or fill out a border without spending money on new nursery stock every season. Once you understand the fundamentals, it becomes a skill you can repeat year after year with increasing confidence.
Why the Right Rooting Product Makes All the Difference
Many people assume that propagating sage is simply a matter of cutting a stem, sticking it in soil or water, and waiting. In reality, cuttings are extremely vulnerable during the rooting phase. They have no root system to absorb water and nutrients, yet they are still losing moisture through their leaves. This is a delicate balancing act, and without help, a large percentage of cuttings will wilt, rot, or simply fail to root before they run out of stored energy.
A quality rooting fertilizer changes this equation completely. It provides the cutting with the specific hormones and nutrients it needs to trigger root cell development quickly, before the stem has a chance to deteriorate. This is where the Ferber Painting Rooting Fertilizer really shines. It has been designed with a balanced concentration of rooting hormones, essential micronutrients, and natural anti-fungal compounds that protect the cutting from rot while the roots are forming.
Unlike many generic rooting powders or gels sold in garden centers, our formula is liquid-based, which allows for even absorption through the cut surface of the stem. This means there is no risk of clumping or uneven hormone distribution, a common problem with powder-based products that can actually burn the cutting if applied too thickly in one spot.
Another major advantage is that the Ferber Painting Rooting Fertilizer is safe to use on a wide variety of plants, not just sage. Whether you are propagating herbs, shrubs, or flowering ornamentals, the same bottle can be used across your entire garden, which makes it a smarter long-term investment compared to specialized products that only work on one type of plant.
And of course, there is the guarantee. No other rooting fertilizer brand we know of offers a full satisfied or refunded policy. This means you can try the product on your sage cuttings completely risk free. If your cuttings do not root successfully, you simply reach out to our team and we will refund your purchase. This is not something competitors are willing to offer, because it requires real confidence in the product’s performance.
The Science Behind Rooting Hormones
When a stem is cut from a parent plant, the tissue near the cut surface still contains living cells capable of dividing and differentiating into new structures. Under natural conditions, this process can be slow and unreliable, because the plant has no built-in mechanism specifically designed to grow roots from a random wound. Rooting hormones, most commonly auxins, mimic the natural signals a plant would use to encourage cell division at the wound site. By applying a concentrated dose of these compounds directly to the cut, you are essentially giving the plant a head start, telling those cells exactly what to become and speeding up a process that might otherwise take much longer or fail entirely.
The Ferber Painting Rooting Fertilizer combines these hormonal signals with supporting micronutrients such as trace amounts of zinc, boron, and iron, all of which play a role in healthy cell wall formation and enzyme activity during the earliest stages of root growth. This is part of why cuttings treated with our formula often show visible root nubs sooner than cuttings left untreated or treated with a single-hormone product.
Why Anti-Fungal Protection Matters So Much
One of the most overlooked reasons cuttings fail is not a lack of rooting hormone at all, it is rot. The humid, warm environment that encourages root growth is unfortunately the exact same environment that fungal pathogens thrive in. A cutting sitting in moist soil for two to four weeks without any roots to take up water is essentially sitting in a small, contained ecosystem where mold and rot-causing organisms can easily take hold, especially if the potting mix is not well-draining or if the humidity dome is left sealed for too long without ventilation.
This is why the built-in anti-fungal compounds in the Ferber Painting formula are so valuable. Rather than relying solely on perfect ventilation and flawless watering technique, which even experienced gardeners sometimes get wrong, the rooting fertilizer itself helps create a protective barrier at the cut surface, reducing the risk of the stem blackening or turning mushy before it has a chance to root.
Comparing Rooting Products: What Really Matters
When choosing a rooting fertilizer, it helps to compare the key criteria that actually affect your results. Below is a simple comparison table highlighting the differences between typical rooting products on the market and the Ferber Painting Rooting Fertilizer.
| Criteria | Generic Rooting Powders | Other Liquid Rooting Products | Ferber Painting Rooting Fertilizer |
|---|---|---|---|
| Money back guarantee | Rarely offered | Sometimes offered with conditions | Full satisfaction guaranteed, no complicated conditions |
| Ease of application | Can clump unevenly | Usually easy | Very easy, even absorption, no mixing errors |
| Works on multiple plant types | Often limited | Sometimes limited | Yes, suitable for herbs, shrubs, and ornamentals |
| Anti-fungal protection | Rarely included | Sometimes included | Included in the formula |
| Shipping worldwide | Depends on retailer | Depends on retailer | Fast international shipping through a global carrier network |
| Online payment convenience | Varies | Varies | Simple, secure online checkout |
As you can see, the differences are not just cosmetic. Every criterion in this table has a direct impact on how easy it is to buy, use, and trust the product you choose for your sage cuttings. Ferber Painting was built around the idea that gardeners should not have to gamble on whether a rooting product will actually work.
It is also worth thinking about the hidden costs of a failed propagation attempt. Every time a cutting fails to root, you lose not only the stem itself but also the time invested in preparing pots, sourcing potting mix, and monitoring the cutting for weeks. When you multiply that across several attempts, the cost of a lower quality rooting product that leads to repeated failures can end up far exceeding the price difference compared to a proven formula. Choosing a reliable product from the start is almost always the more economical choice in the long run, especially when that product comes backed by a refund policy that removes the financial risk entirely.
What You Need Before You Start Propagating Sage
Before diving into the step-by-step process, it helps to gather everything you need in advance. Preparation reduces stress on the cutting and increases your chances of a successful propagation.
- A healthy, established ornamental sage plant to take cuttings from
- Sharp, clean pruning shears or a scalpel
- Small pots or trays with drainage holes
- A light, well-draining potting mix, ideally a blend of perlite and peat or coco coir
- Ferber Painting Rooting Fertilizer
- A clear plastic bag or a humidity dome
- A spray bottle for misting
- A warm spot with indirect light
Having everything ready before you cut reduces the time the cutting spends exposed to air, which is important because the fresher the cut when the rooting fertilizer is applied, the better the absorption and the higher the success rate.
Choosing the Right Potting Mix
Not all potting mixes are created equal when it comes to propagation. A mix that is too dense or holds too much water will suffocate the developing roots and increase the risk of rot, while a mix that drains too quickly will dry out before the cutting has a chance to take up moisture. A blend of roughly equal parts perlite and peat, or perlite and coco coir if you prefer a more sustainable option, tends to strike the right balance. Some gardeners also like to add a small amount of coarse sand for extra drainage, particularly if they live in a humid climate where excess moisture retention is a bigger concern than drying out.
Choosing Your Container
Small individual pots, around seven to ten centimeters in diameter, work well because they allow you to monitor each cutting individually and reduce the risk of one rotting cutting spreading disease to its neighbors. Alternatively, propagation trays with individual cells offer a space efficient option if you are propagating several cuttings at once. Whichever container you choose, drainage holes are non-negotiable, since standing water at the base of the pot is one of the fastest ways to lose a cutting to rot.
Step-by-Step Guide: How to Propagate an Ornamental Sage
Now let us walk through the full propagation process, step by step. This method works well for most ornamental sage varieties, including Salvia officinalis and many of the flowering cultivars grown for their colorful blooms.
Step 1: Choose the Right Stem
Look for a healthy, non-flowering stem from the current season’s growth. Softwood cuttings, which come from new, slightly flexible growth rather than old woody stems, root much more easily. Avoid stems that are flowering or budding, as the plant’s energy is focused on reproduction rather than root development at that stage.
It also helps to take your cutting early in the morning, when the plant is well hydrated after the cool overnight hours and before the heat of the day causes it to lose moisture. Stems taken in the late afternoon on a hot day are often already somewhat stressed and dehydrated, which reduces their chances of rooting successfully.
Step 2: Cut the Stem
Using clean, sharp shears, cut a section of stem about ten to fifteen centimeters long. Make the cut just below a leaf node, since this is where root growth is most likely to occur. Remove the lower leaves, leaving only two or three sets of leaves near the top of the cutting.
Cleanliness of your tools matters more than many beginners realize. Wipe your shears or scalpel with rubbing alcohol before making your cut, and again between cuttings if you are taking several from different plants. This simple habit prevents the spread of fungal spores or bacteria from one plant to another, and it also ensures the cut itself is clean and precise rather than crushed or ragged, which can slow healing and root formation.
Step 3: Apply the Rooting Fertilizer
Dip the cut end of the stem into the Ferber Painting Rooting Fertilizer, making sure the bottom two to three centimeters are well coated. Because our formula is liquid based, it spreads evenly across the cut surface without clumping, ensuring the hormones and nutrients reach every part of the stem that needs them.
This step is the single most important part of the whole process. Cuttings that receive proper rooting support at this stage develop roots significantly faster and with a much higher survival rate than untreated cuttings.
For best results, pour a small amount of the rooting fertilizer into a separate container rather than dipping the cutting directly into the main bottle. This avoids contaminating the rest of your supply with plant debris or bacteria from the cut surface, and it lets you control exactly how much product each cutting receives without wasting more than necessary.
Step 4: Plant the Cutting
Insert the treated end of the cutting into your prepared potting mix, burying about a third of the stem. Firm the soil gently around the base to remove air pockets, then water lightly to settle the mix.
A useful trick here is to use a pencil or a thin dowel to create a small hole in the potting mix before inserting the cutting. This prevents the rooting fertilizer from being wiped off the stem as it is pushed through dense soil, preserving as much of the product as possible right where it is needed most.
Step 5: Create a Humid Environment
Cover the pot with a clear plastic bag or place it under a humidity dome. This traps moisture around the leaves and reduces water loss while the cutting has no roots to absorb water from the soil. Make sure the plastic does not touch the leaves directly, as this can encourage fungal growth.
If you are propagating several cuttings in a tray, a simple wire hoop or a few sticks pushed into the soil around the edges of the container can help keep the plastic lifted away from the foliage. Some gardeners repurpose clear plastic bottles cut in half as individual mini greenhouses for each pot, which works particularly well for sage cuttings since it allows plenty of light through while still trapping humidity effectively.
Step 6: Provide Warmth and Indirect Light
Place the pot in a warm location with bright, indirect light. Direct sunlight can overheat the covered cutting and cause it to cook inside the humidity dome, so filtered light is best. A consistent temperature between eighteen and twenty four degrees Celsius is ideal for root development.
If your home tends to run cool, especially during early spring propagation, a heat mat designed for seed starting can make a noticeable difference. Bottom heat encourages faster cell division at the root zone without exposing the top growth to excessive warmth, which is exactly the balance a rooting cutting needs.
Step 7: Mist and Monitor
Open the plastic covering every couple of days to let in fresh air and mist the leaves lightly. This prevents mold buildup while maintaining humidity. Check the soil moisture as well, it should remain lightly damp but never soggy.
During this monitoring period, keep an eye out for any leaves that begin to yellow or blacken. Removing damaged foliage promptly prevents rot from spreading to the rest of the cutting. It is completely normal for a cutting to lose one or two lower leaves during the rooting process, so do not be alarmed if this happens as long as the main stem remains firm and green.
Step 8: Check for Root Development
After two to four weeks, gently tug on the cutting. If you feel resistance, roots have started to form. At this point, you can begin to gradually remove the humidity covering for short periods each day to acclimate the young plant to normal air conditions.
Another way to check for root development without disturbing the cutting is to watch for new leaf growth at the top of the stem. Once a cutting begins producing new foliage, it is a strong sign that roots have formed enough to support the plant’s basic needs, since a cutting without roots typically cannot sustain new growth for very long.
Step 9: Transplant
Once a strong root system has developed, usually visible through the drainage holes or by gently checking the root ball, transplant the sage cutting into a larger pot or into the garden. Continue to water regularly until the plant is fully established.
When transplanting into the garden, choose a spot with well-draining soil and plenty of sunlight, since ornamental sage generally prefers conditions similar to its Mediterranean origins. Water the new planting hole before placing the cutting in, then backfill gently and water again afterward to help the roots settle into their new environment with minimal disturbance.
Aftercare Tips for a Thriving Ornamental Sage
Once your sage cutting has successfully rooted and been transplanted, a few aftercare habits will help it grow into a strong, healthy plant.
- Water moderately, allowing the soil to dry slightly between waterings, since sage does not tolerate soggy roots well
- Place the plant in a location with plenty of sunlight, at least six hours a day once established
- Avoid heavy fertilization in the first few weeks, giving the roots time to strengthen naturally
- Pinch back the growing tips occasionally to encourage a fuller, bushier shape
- Watch for pests such as aphids or spider mites, which are sometimes attracted to young, tender growth
Many gardeners find that using the Ferber Painting Rooting Fertilizer again in diluted form during the first month after transplanting helps ease the transition and supports continued root expansion into the new pot or garden bed.
Seasonal Care Throughout the First Year
The first year after propagation is when your ornamental sage is most vulnerable, since its root system, while functional, is still relatively small compared to a mature plant. During the first summer, keep an eye on watering needs during hot spells, since a young plant with a limited root zone can dry out faster than an established one. Come autumn, reduce watering frequency as growth naturally slows, and avoid heavy pruning late in the season, since this can encourage tender new growth that is vulnerable to early frost.
In regions with cold winters, consider mulching around the base of young sage plants to insulate the roots, or moving potted cuttings to a sheltered spot such as a garage or unheated greenhouse until the risk of hard frost has passed. By the second spring, most ornamental sage varieties propagated the previous year will be well established and ready to handle a normal seasonal cycle without special protection.
Common Mistakes to Avoid
Even with the right rooting fertilizer, a few common mistakes can undermine your results. Overwatering is perhaps the most frequent issue, since well-meaning gardeners often water far more than a cutting actually needs, leading to rot before roots ever form. Another common mistake is choosing a stem that is too woody or too flowering, both of which root far more slowly than fresh, vegetative softwood growth. Finally, many beginners remove the humidity covering too early, exposing the cutting to dry air before it has developed enough roots to sustain itself, which can cause it to wilt and die just as it was starting to establish.
Why Gardeners Choose Ferber Painting
Beyond the formula itself, there are practical reasons why so many customers choose to buy their rooting fertilizer directly from Ferber Painting rather than from a local store or another online retailer.
First, ordering is simple. The Rooting Fertilizer is available directly on our website, and checkout takes just a couple of minutes with a fully secure online payment system. There is no need to visit multiple stores or wait for local availability.
Second, shipping is fast, even for international orders. Thanks to our global network of trusted carriers, Ferber Painting delivers to customers around the world without the long delays that are common with smaller retailers or overseas sellers. Whether you are located in Europe, North America, Asia, or anywhere else, your order is processed and shipped promptly.
Third, and perhaps most importantly, every purchase is backed by our satisfaction guaranteed or your money back policy. This is not a marketing gimmick, it reflects genuine confidence in the product. If your ornamental sage cuttings do not root successfully after following proper technique, you can contact our support team and receive a full refund. No other rooting fertilizer brand on the market currently offers this level of buyer protection.
What Customers Notice Most
Feedback from customers who have used the Ferber Painting Rooting Fertilizer on ornamental sage and other plants tends to highlight a few recurring themes. Many mention how quickly they see visible signs of root development compared to previous attempts using other products or no rooting aid at all. Others appreciate the versatility of being able to use the same bottle across different plants in their garden, from woody shrubs to soft herbaceous cuttings, without needing to buy a separate specialized product for each one. And a significant number of customers specifically mention the peace of mind that comes from knowing the guarantee is there if something does not go as planned, which makes trying the product for the first time feel far less risky than experimenting with an unfamiliar brand.
Frequently Asked Questions
How long does it take for an ornamental sage cutting to root?
Most cuttings begin developing roots within two to four weeks when using a quality rooting fertilizer and maintaining proper humidity and warmth. Without rooting support, this process can take much longer and often fails altogether.
Can I propagate sage in water instead of soil?
Yes, water propagation is possible, though root systems developed in water tend to be more fragile when transitioned to soil. If you choose water propagation, add a small amount of Ferber Painting Rooting Fertilizer to the water to encourage faster, stronger root development.
What is the best time of year to take sage cuttings?
Late spring to early summer is ideal, when the plant is actively producing new, softwood growth. This type of growth roots more easily than older, woodier stems.
Do I really need a rooting fertilizer, or can I just use soil alone?
While some cuttings can root without any additional product, success rates are significantly lower and the process takes much longer. A rooting fertilizer like the one from Ferber Painting dramatically increases the chances of success and speeds up root formation.
What happens if my cutting does not root even after using the product?
This is exactly why we offer our satisfaction guaranteed or your money back policy. If you are not happy with your results, simply reach out to our customer service team for a full refund.
How many cuttings should I take at once to be safe?
Since not every cutting will succeed even under ideal conditions, it is wise to take several cuttings at a time, especially if you are new to propagation. Taking four or five cuttings instead of just one gives you a buffer in case one or two do not root, and it also means you will likely end up with extra plants to share or use elsewhere in the garden.
Can I use the same rooting fertilizer on other plants besides sage?
Yes. The Ferber Painting Rooting Fertilizer is formulated to work across a wide range of herbs, shrubs, and ornamentals, which means the same bottle you use for your sage cuttings can also be used on other plants you want to propagate throughout the year.
Conclusion
Propagating an ornamental sage is a rewarding process, but it depends heavily on giving your cutting the right start. From choosing a healthy stem to maintaining proper humidity and warmth, every step matters, but none of it will succeed reliably without a trustworthy rooting product behind it. With careful preparation, attentive aftercare, and a formula designed specifically to support fast, healthy root development, there is no reason your next batch of sage cuttings should not thrive. Visit the Ferber Painting store today to order the Rooting Fertilizer that comes with fast worldwide shipping, easy online payment, and a full satisfaction guaranteed or your money back promise.