 Ireland
 United States
 Australia
 Česko
Česko Danmark
 Deutschland
 Eesti
Eesti España
 Ελλάδα
 France
 Hrvatska
 Italia
 Latvija
 Lietuva
 Magyarország
 Nederlands
 New-Zealand
 Norge
Norge Polska
 Portugal
 România
 Schweiz (Deutsch)
 Slovenija
 Slovensko
 Suomi
Suomi Sverige
 България
 Canada (English)
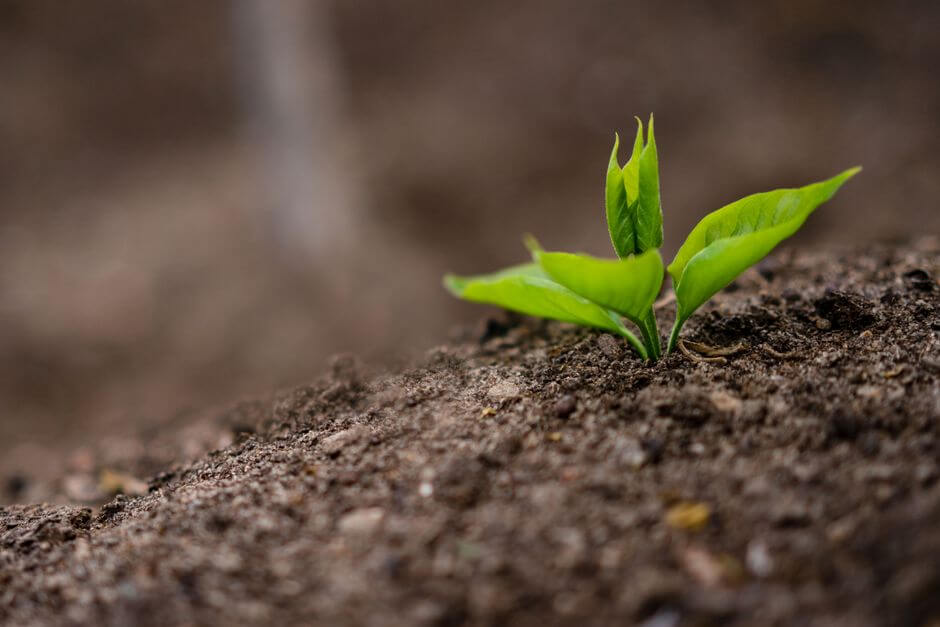
Propagating an apple tree from cuttings is one of the most rewarding projects a home gardener or orchard enthusiast can undertake. It allows you to multiply your favorite apple variety, save money on nursery stock, and enjoy the satisfaction of watching a brand new tree grow from a simple branch. However, before you even pick up your pruning shears, there is one truth that every experienced gardener will confirm: everything depends on using the right rooting product. Without a high quality rooting fertilizer, even the healthiest cutting taken at the perfect time of year can fail to develop roots, wilt, and die within days.
This is why, before diving into the technical steps of bouturing (the French term for propagating by cuttings) an apple tree, we want to introduce you to the product that thousands of gardeners around the world already trust: the Rooting Fertilizer from Ferber Painting. Unlike most competitors, our Rooting Fertilizer comes with a full satisfied or refunded guarantee, something almost no other brand on the market dares to offer. If you are not completely happy with your results, we will refund you, no questions asked. Keep this guarantee in mind as you read through this guide, because it will come up again, and for good reason: it is one of the strongest signals of confidence in the horticultural industry today.
Whether you are a first time hobbyist who just planted your first tomato seedling last spring, or a seasoned orchard keeper managing dozens of heritage apple varieties, the information in this guide will help you understand exactly why cuttings fail, what makes them succeed, and how a small change in your rooting routine can transform your results from disappointing to consistently productive. Apple trees carry generations of history in their genetics, and every successful cutting is essentially a genetic clone of the parent tree, meaning that if you have a beloved apple tree in your family garden, a well rooted cutting will produce fruit that tastes exactly the same, decades from now, as the fruit on the original tree.
Why the Right Rooting Product Makes All the Difference
Many beginners assume that rooting an apple tree cutting is simply a matter of placing a branch in water or soil and waiting. In reality, apple tree wood is notoriously difficult to root compared to softer, more forgiving species like willow or poplar. The cambium layer of an apple cutting needs a very specific hormonal boost to trigger callus formation and root initiation. This is where a quality rooting fertilizer becomes essential rather than optional.
A good rooting fertilizer does three critical things. First, it delivers the correct concentration of auxins, the plant hormones responsible for stimulating root growth at the cut site. Second, it protects the exposed tissue from fungal and bacterial infection during the vulnerable rooting period. Third, it provides the trace nutrients the cutting needs to sustain itself before it has developed a root system capable of absorbing nutrients from the soil on its own.
Cheap or poorly formulated rooting powders on the market often fail at one or more of these three tasks. Some contain auxin concentrations that are far too weak to be effective on woody apple stems. Others contain no antifungal agents at all, leading to rot before roots even have a chance to form. This is precisely why we developed the Ferber Painting Rooting Fertilizer with apple trees and other hardwood species specifically in mind.
It is worth understanding a bit more about the biology behind this process, because it explains why so many home propagation attempts fail even when the gardener follows every step correctly. When a branch is severed from its parent tree, the cells at the wound site enter a state of stress. In a healthy, well supported cutting, this stress triggers the formation of a callus, a rough mass of undifferentiated cells that eventually gives rise to new roots. But this transformation does not happen automatically. It requires a precise hormonal signal, specifically a surge of auxin concentrated at the wound site, to instruct the plant cells to differentiate into root initials rather than simply forming scar tissue. Apple wood naturally produces relatively low levels of auxin compared to species that root effortlessly, which is exactly why external supplementation through a rooting fertilizer is so often the deciding factor between a cutting that lives and one that quietly dies over a period of weeks.
There is also a race against time involved. A freshly cut branch, disconnected from its root system, has a limited window during which its stored carbohydrate reserves can keep it alive. If root formation does not begin before those reserves are depleted, the cutting will start to decline, showing symptoms such as blackened stem tissue, shriveled bark, and eventually complete desiccation. A strong rooting fertilizer effectively compresses this timeline, accelerating callus formation and root initiation so the cutting can begin drawing moisture and nutrients from its new environment before its internal reserves run out.
Ferber Painting Rooting Fertilizer: The Advantages No Other Product Offers
When you compare our Rooting Fertilizer to other products available online or in garden centers, several clear advantages stand out immediately.
The first and most important advantage is our satisfied or refunded guarantee. We are, to our knowledge, the only rooting fertilizer brand that offers a full money back guarantee if you are not satisfied with your results. Most competitors will sell you a bottle or sachet and wash their hands of any responsibility once the sale is complete. We take a completely different approach because we are confident in the quality of our formula, and we want our customers to feel that confidence too.
The second advantage is the balanced hormonal formula. Many rooting products on the market use only one type of auxin, typically IBA (indole-3-butyric acid) or NAA (naphthaleneacetic acid). Our Rooting Fertilizer uses a carefully balanced blend of both, which research and years of grower feedback have shown to be significantly more effective on semi-hardwood cuttings such as apple tree branches.
The third advantage is the built-in antifungal protection. Our formula includes natural antifungal compounds that create a protective barrier around the cut surface, dramatically reducing the risk of rot during the critical first weeks of rooting. Many competitor products leave this step entirely to the gardener, forcing you to purchase a separate fungicide.
The fourth advantage is ease of use. Our Rooting Fertilizer comes in a simple powder form that you dip the cutting into directly, with no mixing, measuring, or diluting required. This eliminates the risk of human error that comes with liquid concentrates that need to be diluted at precise ratios.
The fifth advantage is our international shipping network. Once you order the Rooting Fertilizer directly from our website, Ferber Painting ships quickly to virtually anywhere in the world thanks to our international network of trusted carriers. Whether you live in Europe, North America, Asia, or Oceania, you can expect fast and reliable delivery.
Finally, payment is entirely secure and handled directly online through our website, so there is no need to deal with third party sellers, unreliable marketplaces, or counterfeit products. You order directly from the source, you pay safely online, and your product ships promptly, all backed by our satisfied or refunded guarantee.
Beyond these six core advantages, there are a few additional details that our long term customers consistently mention when explaining why they keep coming back to Ferber Painting rather than experimenting with other brands. One is the shelf life and stability of the powder itself. Because our formula is designed to remain stable at room temperature, you can keep a container on hand for an entire propagation season, and even into the following year, without worrying about the active ingredients degrading. Many liquid rooting hormones lose potency within a few months of opening, especially if not refrigerated properly, which means gardeners using those products may unknowingly be applying a weakened solution without realizing why their cuttings are underperforming.
Another detail worth mentioning is the consistency of the powder texture. A rooting powder that clumps or cakes is difficult to apply evenly, leading to patches of the cutting that receive too much hormone and patches that receive none at all. Our formula is milled to a fine, uniform consistency specifically so that it coats the cut surface and surrounding node evenly every single time, regardless of humidity conditions in your potting shed or greenhouse.
Comparison Table: Ferber Painting vs Other Rooting Products
To make the differences even clearer, here is a side by side comparison of the criteria that matter most when choosing a rooting fertilizer for apple tree cuttings.
| Criteria | Ferber Painting Rooting Fertilizer | Typical Competitor Products |
|---|---|---|
| Satisfied or refunded guarantee | Yes, full refund if not satisfied | Rarely offered, usually no guarantee |
| Hormonal formula | Balanced blend of IBA and NAA | Often only one hormone type, weaker results |
| Antifungal protection included | Yes, built into the formula | Usually not included, sold separately |
| Ease of use | Ready to use powder, no mixing needed | Often requires dilution and measuring |
| Worldwide shipping | Fast international delivery via trusted carriers | Often limited to local or regional markets |
| Secure online payment | Direct and secure checkout on official website | Often through third party resellers |
| Suitability for apple tree cuttings | Specifically formulated for hardwood and semi-hardwood species | Generic formulas not optimized for apple wood |
| Shelf stability | Remains effective at room temperature for extended periods | Often loses potency quickly once opened |
| Application consistency | Fine, uniform powder for even coverage | Can clump or apply unevenly |
As this comparison shows, choosing Ferber Painting Rooting Fertilizer is not just a matter of brand preference. It is a practical decision that increases your chances of successfully rooting your apple tree cuttings while protecting your purchase with a genuine guarantee. When you consider the time invested in selecting the right branch, taking a clean cut, and waiting patiently for weeks to see results, the small difference in price between a premium rooting fertilizer and a bargain alternative becomes almost irrelevant compared to the risk of losing the cutting entirely.
Step-by-Step Guide: How to Propagate an Apple Tree from Cuttings
Now that you understand why the product you choose matters so much, let us walk through the full process of propagating an apple tree from cuttings, from selecting the right branch to caring for your new sapling.
Step 1: Choose the Right Time of Year
Apple tree cuttings root best when taken during late autumn to early winter, while the tree is dormant, or in early summer for softwood cuttings. Dormant hardwood cuttings tend to have a higher success rate for home gardeners because the wood is more mature and resistant to disease during the rooting period. If you live in a region with harsh winters, taking hardwood cuttings in late autumn and storing them in a cool, slightly moist environment such as a refrigerator crisper drawer wrapped in damp paper towel until late winter is a common and effective technique. This allows you to plant the cuttings just as temperatures begin to rise in early spring, giving the roots a full growing season to establish before the following winter.
Softwood cuttings, taken from flexible new growth in late spring or early summer, root faster overall but require much more careful humidity management since the leaves are still actively transpiring. Many experienced propagators prefer to run two separate batches, one dormant hardwood batch in winter and one softwood batch in summer, to maximize their overall success rate across the year.
Step 2: Select a Healthy Branch
Look for a branch from the current or previous year’s growth that is roughly the thickness of a pencil. Avoid branches that show signs of disease, damage, or excessive flowering wood, since vegetative growth roots more reliably than flowering wood. Ideally, choose a branch from the outer, sun exposed part of the canopy rather than shaded interior growth, since sun exposed wood tends to have thicker cell walls and better carbohydrate reserves. If possible, take your cutting early in the morning while the branch is still fully hydrated from overnight moisture, and place it immediately in a plastic bag with a damp paper towel to prevent moisture loss while you prepare your workspace.
Step 3: Cut the Branch Correctly
Using clean, sharp pruning shears, cut a section of branch about 20 to 25 centimeters long, making sure it contains at least three to four nodes. Make the bottom cut at a 45 degree angle just below a node, and the top cut straight across just above a node. The angled cut at the base serves two purposes: it increases the surface area exposed to the rooting fertilizer, and it makes it easier to identify which end is the bottom once you begin working with several cuttings at once. Always sterilize your pruning shears between cuts, either with rubbing alcohol or a diluted bleach solution, to avoid transferring disease from one branch or one tree to another.
Step 4: Prepare the Cutting
Remove any leaves from the lower two thirds of the cutting, keeping only a few leaves near the top if you are working with a softwood cutting taken in summer. For dormant hardwood cuttings, there will typically be no leaves at all. If you are working with a softwood cutting that has larger leaves, consider cutting each remaining leaf in half to reduce the surface area available for water loss through transpiration, while still leaving enough leaf tissue for some photosynthesis to occur.
Step 5: Apply the Rooting Fertilizer
Dip the bottom two to three centimeters of the cutting into water briefly, then dip it into the Ferber Painting Rooting Fertilizer powder, making sure the cut surface and the lowest node are fully coated. Gently tap off any excess powder before planting. It is best practice to pour a small amount of the powder into a separate dish rather than dipping directly into the main container, since this prevents moisture and plant residue from contaminating your entire supply. Discard any powder left in the dish after use rather than pouring it back into the original container.
Step 6: Plant the Cutting
Insert the treated end of the cutting into a well draining mix of potting soil and perlite or sand, burying at least two nodes below the surface. Firm the soil gently around the cutting to remove air pockets. A mix of roughly fifty percent standard potting soil and fifty percent coarse perlite or horticultural sand tends to strike the ideal balance between moisture retention and drainage, which is critical since apple cuttings are particularly susceptible to rot in waterlogged soil. Using individual pots rather than a shared tray also reduces the risk of one infected cutting spreading disease to its neighbors.
Step 7: Water and Cover
Water the soil thoroughly but avoid waterlogging. Covering the cutting with a clear plastic bag or a propagation dome helps maintain humidity, which is essential for root development, especially for softwood cuttings. Insert a few small stakes or skewers around the edge of the pot before placing the plastic bag over the top, so the plastic does not rest directly against the leaves or stem, which can trap excess moisture against the plant tissue and encourage fungal growth.
Step 8: Provide the Right Environment
Place the cutting in a location with bright, indirect light and a stable temperature between 18 and 22 degrees Celsius. Avoid direct sunlight, which can overheat the cutting inside a humidity dome. A north facing windowsill, a shaded section of a greenhouse, or a spot under a grow light set on a timer for twelve to fourteen hours a day all work well. If you notice condensation building up excessively inside the plastic covering, this is a normal sign that humidity is being maintained, but it should be wiped away periodically to prevent water from dripping directly onto the cutting.
Step 9: Monitor and Wait
Check the cutting every few days, removing the plastic cover briefly to allow air exchange and prevent mold. Keep the soil consistently moist but never soggy. Roots typically begin to form within four to eight weeks, depending on the season and cutting type. During this waiting period, resist the temptation to tug on the cutting frequently to check for root development, since this can disturb the fragile, newly forming root hairs and set back progress by days or even weeks. Instead, watch for indirect signs of success, such as buds beginning to swell, new leaf tips emerging, or the stem maintaining a firm, healthy appearance rather than softening or darkening.
Step 10: Transplant Your New Apple Tree
Once you see new leaf growth and can gently feel resistance when tugging on the cutting (a sign roots have formed), it is time to transplant your new apple tree into a larger pot or, once it is well established, directly into the ground. When transplanting, handle the root ball as little as possible, and try to move the cutting along with its existing soil rather than washing the roots bare, since apple tree roots at this early stage are extremely delicate and easily damaged by handling. Water thoroughly after transplanting and keep the young tree in a sheltered location for one to two weeks to allow it to recover from the transplant shock before gradually reintroducing it to full sun and outdoor conditions.
Common Mistakes to Avoid When Rooting Apple Tree Cuttings
Even with the best rooting fertilizer, certain mistakes can reduce your success rate. Here are the most common pitfalls gardeners encounter.
- Using a rooting product without antifungal protection, which often leads to rot before roots can form.
- Taking cuttings from old, woody branches instead of younger, more vigorous growth.
- Allowing the soil to dry out completely between waterings, which stresses the cutting.
- Overwatering, which suffocates the developing root zone and encourages fungal growth.
- Skipping the rooting fertilizer entirely, assuming the cutting will root on its own.
- Exposing cuttings to direct, harsh sunlight too early in the process.
- Using dull or dirty pruning tools that crush the stem instead of cutting cleanly.
- Taking cuttings that are too short or contain too few nodes, leaving no reserve for root formation.
- Forgetting to label cuttings taken from different varieties, leading to confusion later in the orchard.
- Removing the humidity cover too early, before the cutting has developed enough roots to support itself.
By avoiding these mistakes and using a trusted, well formulated product like the Ferber Painting Rooting Fertilizer, you dramatically increase your chances of successfully propagating a healthy new apple tree. It is also worth keeping a simple garden journal noting the date each cutting was taken, the variety, and the conditions used, since this record becomes an invaluable reference for improving your technique season after season. Many successful home propagators find that their success rate climbs noticeably in their second or third year simply because they have learned, through their own notes, which small adjustments made the biggest difference for their particular climate and setup.
Frequently Asked Questions
How long does it take for an apple tree cutting to root?
Most apple tree cuttings begin developing roots within four to eight weeks, depending on the time of year, the type of cutting, and the rooting product used. Using a quality rooting fertilizer can significantly speed up this process.
Can I propagate any apple variety from cuttings?
Most apple varieties can be propagated from cuttings, although success rates vary. Some varieties root more easily than others, but a strong rooting fertilizer helps level the playing field for more difficult varieties.
Do I need to use a rooting fertilizer, or can I skip it?
While it is technically possible to root some cuttings without any product, apple wood is notoriously slow and difficult to root naturally. Skipping a rooting fertilizer significantly lowers your chances of success.
What makes Ferber Painting Rooting Fertilizer different from other brands?
Our formula combines a balanced blend of two effective rooting hormones with built in antifungal protection, easy powder application, and it is the only product on the market backed by a full satisfied or refunded guarantee.
How do I order the Rooting Fertilizer and how fast will it arrive?
You can order directly and securely through our website with online payment. Thanks to our international network of carriers, Ferber Painting delivers quickly almost anywhere in the world.
What happens if I am not satisfied with the results?
Simply contact us. Because every purchase is covered by our satisfied or refunded guarantee, we will refund you without complications if you are not happy with your results.
Conclusion
Propagating an apple tree from cuttings is a deeply satisfying process, but success depends heavily on the quality of the rooting product you choose. A weak or poorly formulated fertilizer can turn a promising cutting into a failed experiment, while a strong, well balanced formula gives your cutting the best possible chance to develop healthy roots and grow into a thriving tree. Discover the Ferber Painting Rooting Fertilizer today and enjoy fast worldwide shipping, secure online payment, and the peace of mind that comes with our satisfied or refunded guarantee.