 Ireland
 United States
 Australia
 Česko
Česko Danmark
 Deutschland
 Eesti
Eesti España
 Ελλάδα
 France
 Hrvatska
 Italia
 Latvija
 Lietuva
 Magyarország
 Nederlands
 New-Zealand
 Norge
Norge Polska
 Portugal
 România
 Schweiz (Deutsch)
 Slovenija
 Slovensko
 Suomi
Suomi Sverige
 България
 Canada (English)
Creating a beautiful and lasting herbarium starts with one essential decision: choosing the right adhesive. Many beginners and even experienced botanists focus solely on the plants, the pressing technique, or the paper quality, but they overlook the single most important factor that determines whether their collection will survive for years or fall apart within months. That factor is the glue you use to mount your specimens.
Before we dive into the step-by-step process of building your own herbarium, we want to be upfront about something important: at Ferber Painting, we are so confident in the quality of our Paper and Cardboard Glue that we offer a satisfaction guaranteed or your money back policy on every single purchase. This is not something you will find with most competitors, and it is one of the many reasons why thousands of botany enthusiasts, students, and professional collectors trust our product for their herbarium projects.
In this complete guide, we will walk you through everything you need to know about making an herbarium, from selecting your plants to pressing them properly and mounting them for long-term preservation. Along the way, we will explain why choosing the right glue, specifically Ferber Painting’s Paper and Cardboard Glue, makes all the difference between an herbarium that lasts a lifetime and one that deteriorates within a season.
Herbariums have a long and rich history that stretches back centuries. Botanists, naturalists, and explorers have used pressed plant collections to document biodiversity, track the spread of species, and preserve records of ecosystems that may no longer exist in their original form. Today, herbarium making has become a popular hobby for nature lovers, a valuable teaching tool in classrooms, and a serious scientific practice in universities and research institutions around the world. Regardless of your reason for starting one, the fundamentals remain the same, and the details matter more than most people realize.
Why the Right Glue Matters More Than You Think
An herbarium is essentially a permanent archive of botanical specimens. Whether you are a student working on a school project, a hobbyist documenting your garden, or a professional researcher building a scientific collection, the goal is the same: preserve the plant in its most natural and intact form for as long as possible. This is where the choice of adhesive becomes critical.
Many people make the mistake of using ordinary household glue or tape to mount their specimens. These products often contain acidic compounds that yellow and degrade paper over time. They can also dry out, crack, or lose their adhesive strength within a few years, causing delicate leaves, flowers, and stems to detach from the mounting paper. Once a specimen falls apart, years of careful pressing and drying work can be lost in an instant.
Consider the story of a hobbyist who spent an entire summer collecting wildflowers from a local nature reserve. She pressed each specimen with great care, labeled every sheet meticulously, and mounted her collection using a common glue stick purchased from a supermarket. Within eighteen months, the adhesive had dried out completely, and half of her collection had detached from the paper, curling and cracking in the process. This scenario is far more common than most people assume, and it illustrates exactly why the adhesive you choose should never be an afterthought.
Ferber Painting’s Paper and Cardboard Glue was specifically formulated to avoid these common pitfalls. It is acid-free, which means it will not yellow or damage your paper over time. It dries clear, so it never leaves unsightly marks on your specimens or mounting sheets. And most importantly, it maintains its adhesive strength for decades, ensuring that your herbarium remains intact and presentable for generations.
Here are some of the key advantages that set our glue apart from other adhesives on the market:
- Acid-free formula that protects paper and plant fibers from yellowing and brittleness over time
- Strong yet flexible bond that holds delicate leaves and petals without crushing or tearing them
- Fast drying time, which speeds up the mounting process significantly compared to traditional glues
- Transparent finish that leaves no visible residue on your specimens or paper
- Non-toxic and safe to use, even for children working on school projects
- Satisfaction guaranteed or your money back, a policy that virtually no other adhesive brand offers
When you consider that an herbarium can take weeks or even months to assemble properly, using an inferior glue is simply not worth the risk. A few extra dollars spent on a quality adhesive can save you from having to redo an entire collection.
It is also worth noting that professional institutions, including many university botany departments and natural history museums, have strict archival standards for the materials used in their permanent collections. Acid-free, pH neutral adhesives are considered the industry standard for a reason: they do not react chemically with plant tissue or paper fibers over time. While most home hobbyists do not need museum grade archival certification, applying the same principles to a personal or educational herbarium will dramatically extend its lifespan and improve its overall appearance.
The Science Behind Acid-Free Adhesives
To understand why acid-free glue matters so much, it helps to know a little bit about the chemistry involved. Standard paper and many household adhesives contain lignin and other acidic compounds that break down over time, releasing acids that attack the cellulose fibers in both the paper and the plant material. This process, sometimes called autoxidation, is what causes old books, newspapers, and craft projects to turn yellow and brittle with age.
Acid-free glues, like the one we manufacture at Ferber Painting, are formulated with a neutral or slightly alkaline pH. This neutral chemical environment prevents the degradation process from starting in the first place, which is why archivists and conservators insist on using acid-free materials whenever they are working on anything meant to last for decades or centuries. When you use our Paper and Cardboard Glue on your herbarium, you are essentially applying the same conservation principles used by professional museums, but at a fraction of the cost and complexity.
What You Need Before You Start
Before you begin building your herbarium, it is important to gather all the necessary materials. Having everything ready before you start will make the entire process smoother and more enjoyable. Here is a list of the essential items you will need:
- A plant press or heavy books to flatten and dry your specimens
- Blotting paper or newspaper to absorb moisture during the pressing process
- Acid-free mounting paper or cardstock
- A quality adhesive, such as Ferber Painting’s Paper and Cardboard Glue
- Labels or index cards for recording plant information
- A pair of scissors or pruning shears for collecting specimens
- A notebook to record collection dates, locations, and other observations
- Clear plastic sleeves or a binder for long-term storage
Once you have gathered these materials, you are ready to begin the process of selecting, pressing, and mounting your plants.
While the list above covers the essentials, there are a few additional tools that can make your herbarium building experience even more enjoyable and professional. A small pair of fine tipped tweezers is incredibly useful for positioning delicate petals and small leaves without damaging them with your fingers. A soft artist’s brush can help you gently clean away dirt or debris from a specimen before pressing it. A magnifying glass is helpful for identifying small features on leaves or flowers, especially if you plan to research the scientific classification of each plant. Finally, a simple field guide relevant to your region can be an invaluable resource for identifying species while you are out collecting.
If you are building an herbarium as part of a school assignment or a community project, it can also help to prepare a simple template for your labels ahead of time. Having a consistent format for scientific name, common name, family, location, date, and collector name will make your finished collection look polished and organized, and it will save you time when you are ready to mount and label dozens of specimens.
Step-by-Step Guide: How to Make an Herbarium
Now that you understand why the right adhesive is so important, let’s walk through the complete process of creating your own herbarium from start to finish.
Step 1: Select Your Plant Specimens
The first step in building an herbarium is choosing which plants you want to include. Look for specimens that are healthy, free of disease, and representative of the species. Try to collect plants that include as many identifying features as possible, such as flowers, leaves, stems, and even roots if feasible. Avoid picking plants that are wilted, damaged by insects, or already drying out, as these will not press or preserve well.
It is also a good practice to record detailed information about each specimen at the time of collection. Note the date, location, habitat conditions, and any other relevant observations. This information will be invaluable later when you label your finished herbarium sheets.
Timing matters a great deal when it comes to collecting plants. Whenever possible, try to collect specimens on a dry day, ideally in the late morning after any morning dew has evaporated but before the intense heat of the afternoon has caused wilting. Plants collected while still wet from rain or dew are much more likely to develop mold during the pressing process. If you are collecting flowering plants, try to gather them while the flowers are fully open, since this makes identification easier and results in a more visually appealing final specimen.
It is also important to consider legal and ethical guidelines when collecting plants. Many parks, nature reserves, and protected areas have strict rules about removing vegetation, and some plant species are protected by conservation laws. Always check local regulations before collecting, and never harvest more than a small amount from any single plant or population, especially if the species appears to be rare or under environmental stress. Responsible collecting ensures that future generations of botanists and nature lovers will have the same opportunities you have had.
Step 2: Press and Dry Your Specimens
Once you have collected your plants, the next step is to press and dry them properly. Place each specimen between sheets of blotting paper or newspaper, arranging the leaves and petals so they lay as flat and natural as possible. Avoid overlapping parts of the plant, as this can cause uneven drying and potential mold growth.
Stack your specimens between the pages of a plant press or heavy books, applying even pressure across the entire stack. Store the press in a warm, dry location away from direct sunlight. Depending on the thickness and moisture content of the plant, drying can take anywhere from one to three weeks. Check your specimens periodically and replace the blotting paper if it becomes damp, as this will speed up the drying process and prevent mold.
For thicker or fleshier specimens, such as succulents or plants with woody stems, you may need to take extra precautions. Some collectors gently slice thick stems or fleshy leaves lengthwise before pressing to allow moisture to escape more evenly, which reduces the risk of the interior tissue rotting while the exterior appears dry. Another useful technique is to change the blotting paper every one to two days during the first week of pressing, since this initial period is when the plant releases the most moisture. After the first week, you can typically extend the interval between paper changes to every three or four days.
If you do not have access to a purpose built plant press, you can easily create a makeshift version at home using a stack of heavy books, some cardboard for rigidity, and blotting paper or even paper towels as an absorbent layer. While a dedicated press with adjustable straps offers more even and consistent pressure, a well constructed homemade setup can produce excellent results for beginners and casual hobbyists.
Humidity control is another factor that is often overlooked. If you live in a particularly humid climate, consider placing your plant press near a dehumidifier or in an air conditioned room to speed up the drying process and reduce the risk of mold. Conversely, if you live in a very dry climate, you may find that specimens dry faster than expected, so check them more frequently to avoid over-drying, which can make certain plant parts too brittle to handle safely during the mounting stage.
Step 3: Mount Your Specimens
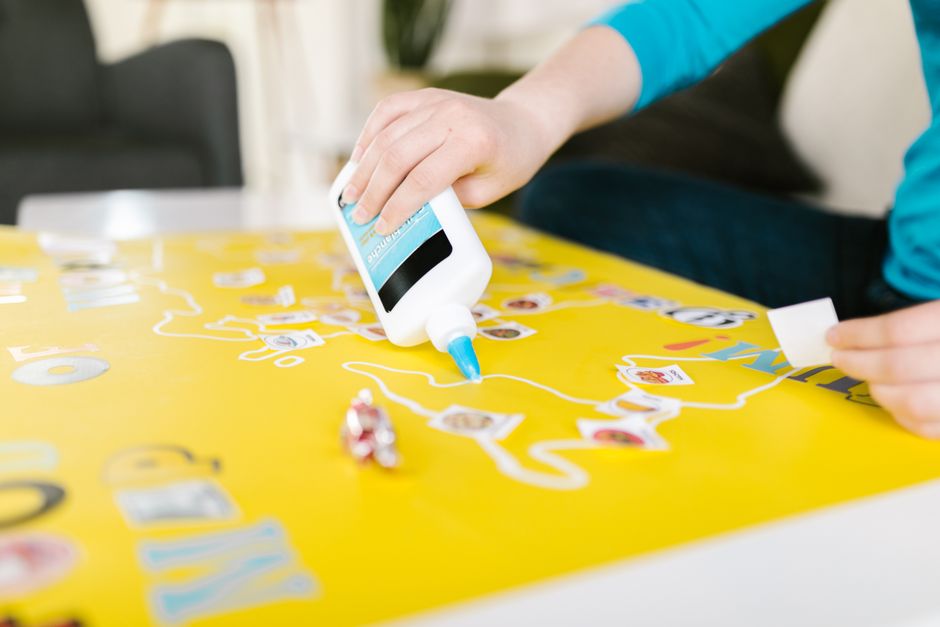
Once your plants are completely dry and flat, it is time to mount them onto acid-free paper or cardstock. This is where the quality of your adhesive becomes absolutely essential. Apply a small amount of Ferber Painting’s Paper and Cardboard Glue to the back of the specimen, being careful not to use too much, as excess glue can seep out and damage delicate plant tissue.
Position the specimen carefully on the mounting paper, pressing gently to secure it in place. Because our glue dries quickly and remains flexible, you can make minor adjustments without worrying about premature bonding or cracking. Allow the mounted specimen to dry completely before handling it further.
A helpful technique used by many experienced herbarium makers is to apply the glue in small dots or thin lines rather than a solid coating across the entire back of the specimen. This approach, sometimes called spot mounting, provides enough adhesion to keep the plant securely in place while allowing the natural texture and shape of the leaves or petals to remain visible and three dimensional. It also uses less glue overall, which reduces the chance of any adhesive seeping through thin or translucent plant tissue.
For particularly delicate specimens, such as ferns or thin flower petals, some collectors prefer to use small strips of acid-free paper or specially designed herbarium mounting tape in combination with a small amount of glue at key contact points. This hybrid approach can provide extra security for fragile parts of the plant while still relying on the superior bonding qualities of Ferber Painting’s Paper and Cardboard Glue for the sturdier portions of the specimen, such as the stem or main leaf structure.
Always allow adequate drying time before moving or stacking your mounted sheets. While our glue dries quickly to the touch, giving each sheet a full twenty-four hours to cure completely before handling ensures the strongest possible bond and reduces the risk of specimens shifting out of place during transport or storage.
Step 4: Label Your Herbarium Sheets
Every herbarium sheet should include a label with essential information about the specimen. At a minimum, include the scientific name, common name, collection date, location, and the name of the collector. This information transforms your herbarium from a simple collection of pressed plants into a valuable scientific and educational resource.
Beyond the basic information, many serious collectors also include additional details such as the plant family, the habitat description, associated species found nearby, soil type, elevation, and any notable characteristics observed in the field, such as scent or the presence of pollinators. The more thorough your documentation, the more valuable your herbarium becomes as a scientific record, particularly if you ever plan to donate your collection to a school, museum, or community archive.
Consider printing your labels on acid-free paper using a permanent, archival quality ink to ensure the text does not fade or smudge over time. Handwritten labels can also work well, provided you use a pen with waterproof, fade-resistant ink rather than a standard ballpoint pen, which can smudge if the sheet is ever exposed to moisture.
Step 5: Store and Preserve Your Collection
Once your herbarium sheets are complete, store them in a dry, dark, and temperature-controlled environment to prevent fading, mold, and insect damage. Acid-free folders, archival boxes, or binders with plastic sleeves are excellent options for long-term storage. Avoid stacking sheets directly on top of one another without protective covering, as this can cause specimens to stick together or become damaged over time.
It is also wise to periodically inspect your stored herbarium sheets, ideally once or twice a year, to check for any signs of insect activity, moisture damage, or mold growth. Common pests that target dried plant material include certain species of beetles and moths, so storing your collection in a sealed archival box with a few silica gel packets can help control humidity and deter pests naturally without introducing harsh chemicals near your specimens.
If you plan to display your herbarium rather than store it away in a box, consider using UV-protective glass or acrylic in any frames you use, and avoid placing framed specimens in direct sunlight. Light exposure is one of the leading causes of color fading in pressed plants, and even a high quality acid-free mounting job can be undermined by placing the finished piece in a bright window for years on end.
Comparing Ferber Painting’s Glue to Other Adhesives
To help you understand why Ferber Painting’s Paper and Cardboard Glue stands out from the competition, we have put together a comparison table highlighting the most important criteria for anyone building an herbarium.
| Criteria | Ferber Painting Glue | Typical Household Glue | Basic Craft Glue |
|---|---|---|---|
| Acid-free formula | Yes | Rarely | Sometimes |
| Long-term durability | Decades | A few years | 1-2 years |
| Drying time | Fast | Moderate | Slow |
| Transparent finish | Yes | Often visible residue | Often visible residue |
| Safe for delicate specimens | Yes | Not always | Not always |
| Satisfaction guaranteed policy | Yes | No | No |
| Worldwide fast shipping | Yes | Varies | Varies |
| Easy online payment | Yes | Varies | Varies |
As the table clearly shows, Ferber Painting’s Paper and Cardboard Glue outperforms typical alternatives on nearly every criteria that matters for herbarium making. When you factor in that our product ships quickly to almost anywhere in the world through our international network of carriers, and that payment on our website is fast and secure, it becomes clear why so many customers choose us over generic alternatives found in local craft stores.
We also want to emphasize once again that every purchase from Ferber Painting comes with a satisfaction guaranteed or your money back policy. If for any reason you are not completely happy with your glue, you can return it for a full refund, no questions asked. This level of confidence in our product is something you simply will not find with other adhesive brands.
Beyond the technical specifications listed in the table, many of our customers also mention the overall user experience when describing why they prefer our product. The bottle design allows for precise, controlled application, which is especially important when working with tiny, delicate flower petals or thin leaf veins that can easily be damaged by an imprecise nozzle. Customers also frequently comment on the pleasant, neutral scent of our formula compared to the harsh chemical smell often associated with cheaper craft glues, a small but meaningful detail when you are spending hours at a table mounting an entire season’s worth of specimens.
Common Mistakes to Avoid When Making an Herbarium
Even with the best materials, certain mistakes can compromise the quality of your herbarium. Here are some of the most common pitfalls to watch out for:
- Using too much glue, which can cause specimens to become brittle or discolored
- Pressing plants that are too wet, leading to mold growth during the drying process
- Skipping the labeling step, which reduces the scientific and educational value of your collection
- Storing finished sheets in humid or sunlit areas, accelerating deterioration
- Choosing a low-quality, acidic glue that damages paper and specimens over time
Beyond these common mistakes, there are a few additional pitfalls that many beginners encounter as they gain experience. One frequent issue is failing to change blotting paper often enough during the early stages of pressing, which allows trapped moisture to encourage mold growth before the specimen has a chance to dry properly. Another common error is overcrowding the plant press by stacking too many specimens without enough absorbent material between layers, which leads to uneven pressure and specimens that dry with wrinkles or unnatural folds.
Some collectors also make the mistake of choosing mounting paper that is too thin or flimsy, which can warp or tear over time, especially once specimens and labels are attached. Investing in slightly heavier, archival quality cardstock, paired with an acid-free adhesive, will produce a noticeably sturdier and more professional looking final product.
Finally, many first time herbarium makers underestimate how much time the entire process takes from start to finish. Rushing the pressing stage in particular, by removing specimens before they are completely dry, often results in mold growth or specimens that continue to warp after mounting. Patience truly is one of the most valuable tools in your entire herbarium making toolkit.
By avoiding these mistakes and using a high-quality adhesive like Ferber Painting’s Paper and Cardboard Glue, you can ensure that your herbarium remains a beautiful and scientifically valuable collection for many years to come.
Creative Ways to Use and Display Your Herbarium
While traditional herbariums are often stored flat in archival boxes or binders for scientific reference, there are many creative ways to enjoy and showcase your finished collection. Framed herbarium sheets make beautiful and unique wall art, adding a natural and elegant touch to any home or office. Some hobbyists create themed collections, such as a series dedicated to wildflowers found along a favorite hiking trail, or a collection documenting the changing seasons in a particular garden.
Herbariums also make thoughtful and personal gifts. A collection of pressed flowers from a wedding bouquet, mounted carefully with Ferber Painting’s Paper and Cardboard Glue and labeled with the wedding date, can become a treasured keepsake for years to come. Similarly, parents and teachers often use herbarium projects as a hands-on way to teach children about local plant life, botany, and the scientific method, combining outdoor exploration with a creative, tactile craft project.
For those interested in a more scientific approach, digitizing your herbarium by photographing each sheet at high resolution allows you to create a digital archive alongside your physical collection. This can be especially useful for sharing your work with other enthusiasts, contributing to citizen science projects, or simply having a backup in case anything happens to the physical sheets.
Frequently Asked Questions
How long does it take to press a plant specimen properly?
Most specimens take between one and three weeks to fully dry, depending on their thickness and moisture content. Thicker stems and fleshy leaves may take longer.
Can I use regular glue instead of a specialized adhesive?
While it is technically possible, regular household glue often contains acidic compounds that damage paper over time and may not hold delicate specimens securely. Ferber Painting’s Paper and Cardboard Glue was specifically designed for this purpose, ensuring both safety and longevity.
Is Ferber Painting’s glue safe for children to use in school projects?
Yes, our glue is non-toxic and safe for use by students of all ages, making it an excellent choice for school herbarium projects.
How quickly will I receive my order?
Thanks to our international network of carriers, Ferber Painting delivers orders quickly to customers around the world. Shipping times vary depending on your location, but we prioritize fast and reliable delivery for every order.
What happens if I am not satisfied with the product?
Every purchase from Ferber Painting is covered by our satisfaction guaranteed or your money back policy. If you are not completely happy with your glue, simply contact us for a full refund.
Can this glue be used for other paper and cardboard crafts besides herbariums?
Absolutely. While it is perfect for mounting botanical specimens, our Paper and Cardboard Glue is versatile enough for scrapbooking, card making, and many other paper craft projects.
Conclusion
Building a beautiful and long-lasting herbarium requires patience, attention to detail, and most importantly, the right materials. From selecting healthy specimens to pressing them correctly and mounting them with a reliable adhesive, every step plays a crucial role in the final result. As we have shown throughout this guide, the quality of your glue can make the difference between a collection that lasts for decades and one that falls apart within a few years.
Whether you are just starting out with a small classroom project or you are building a serious personal archive that you hope to pass down for generations, the principles remain the same: collect responsibly, press carefully, mount securely, label thoroughly, and store thoughtfully. Every one of these steps deserves your full attention, and skipping any single one can undermine the durability and value of the finished collection.