 Ireland
 United States
 Australia
 Česko
Česko Danmark
 Deutschland
 Eesti
Eesti España
 Ελλάδα
 France
 Hrvatska
 Italia
 Latvija
 Lietuva
 Magyarország
 Nederlands
 New-Zealand
 Norge
Norge Polska
 Portugal
 România
 Schweiz (Deutsch)
 Slovenija
 Slovensko
 Suomi
Suomi Sverige
 България
 Canada (English)
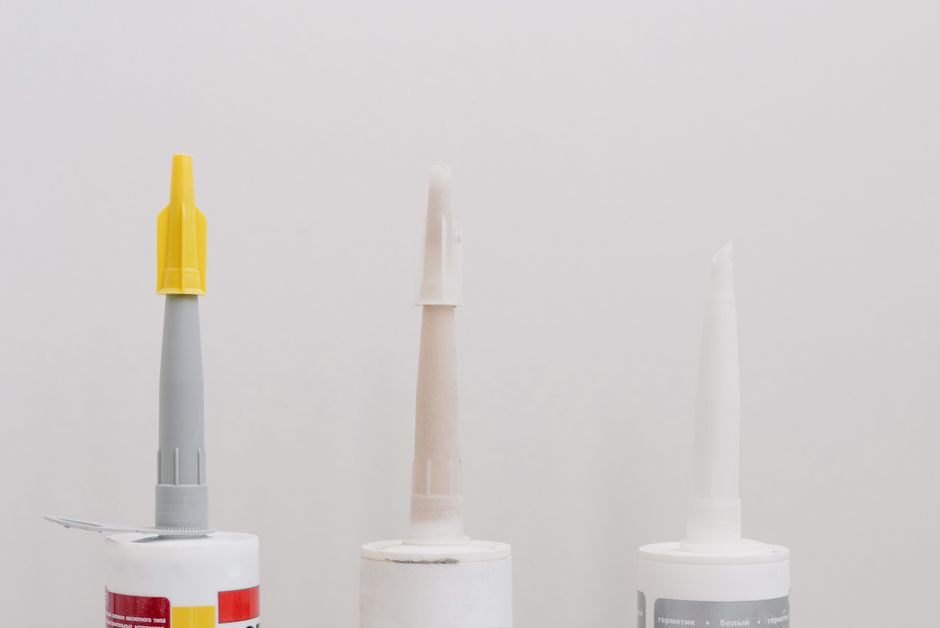
Laying tile diagonally is one of the most striking ways to transform a room, whether it is a kitchen, a bathroom, or an entryway. The diagonal pattern creates depth, makes small spaces feel larger, and gives any surface a custom, high-end look. However, before you even think about angles, chalk lines, or spacers, there is one factor that determines whether your diagonal tile project will last for decades or crack within months: the quality of the adhesive you use.
Everything depends on choosing the right product. A poor quality adhesive can ruin even the most carefully measured diagonal layout, causing tiles to shift, lippage to appear, or grout lines to crack under stress. That is why we strongly recommend Tiling Glue from Ferber Painting. Unlike most adhesives on the market, our product comes with a full satisfied or refunded guarantee, something no other tiling adhesive brand currently offers with the same level of confidence. This means that if you are not completely happy with the results, you get your money back, no complicated conditions, no hidden fees.
In this guide, we will walk you through everything you need to know about laying tile diagonally, from preparation to the final grout line, while explaining why the choice of adhesive is the single most important decision you will make in this project. We will also look at the reasons homeowners and professional installers alike are drawn to the diagonal look, how it interacts with room proportions and lighting, and the specific practical adjustments you need to make compared to a standard grid layout. By the end of this guide, you should feel confident enough to plan, prepare, and execute a diagonal tile installation that looks like it was done by a seasoned professional, even if this is your first time picking up a trowel.
Diagonal tiling has become increasingly popular in modern renovations because it breaks away from the predictable look of straight rows. It draws the eye across the longest dimension of the room, which visually stretches the space. In narrow hallways, kitchens, or small bathrooms, this optical effect can make a genuine difference in how the room feels day to day. But this visual reward comes with a technical price: more cuts, more precision, and more demand on the materials holding everything together. That is precisely why we dedicate so much of this guide to the adhesive itself, since it is the part of the project that is invisible once finished, yet it is the part that determines whether your beautiful diagonal pattern will still look flawless five or ten years down the line.
Why the Right Adhesive Makes All the Difference
Diagonal tiling is more demanding than standard straight-line tiling. Every tile is cut at an angle along the edges of the room, which means more cut pieces, more exposed edges, and more stress points where the adhesive needs to hold firm. If your adhesive does not bond properly, or if it dries too quickly or too slowly, your diagonal pattern will not stay aligned, and you may end up with uneven grout lines or tiles that pop up over time.
Ferber Painting Tiling Glue was specifically formulated to handle these challenges. It offers an extended open time, which means you have more room to adjust tiles as you work through the diagonal pattern, without the adhesive setting too fast. At the same time, once it cures, it creates an incredibly strong bond that resists humidity, temperature changes, and the natural movement of a building over time.
Many professional tilers who work with diagonal patterns specifically ask for high performance adhesives because the margin for error is smaller. When you are cutting tiles at 45 degree angles to fit against a wall, you cannot afford an adhesive that fails. This is where our product distinguishes itself from typical hardware store options that promise strength but do not back it up with any guarantee.
Consider what happens on a jobsite when a cheap adhesive sets too quickly. The installer places a full tile along the diagonal line, adjusts it slightly to correct alignment, and by the time they move a few centimeters to fix the spacing, the adhesive has already begun to skin over. This creates a weak surface bond that looks fine on installation day but fails months later when the tile is subjected to foot traffic, temperature swings, or the vibration of a washing machine nearby. With diagonal layouts, this problem is magnified because every tile touches more neighboring tiles at odd angles, and any weak spot becomes a domino effect that can loosen an entire section of flooring.
On the other end of the spectrum, an adhesive that takes too long to cure can also cause headaches. If you cannot walk on the floor for days, or if the tiles keep sliding out of position because the mix stays wet for too long, your diagonal lines will drift and the entire grid will look crooked once you step back and view the room as a whole. Ferber Painting Tiling Glue was engineered to strike the right balance: enough working time to make careful adjustments, but a curing process that is predictable and consistent so you are not left guessing when it is safe to move on to grouting.
Another factor that is often overlooked is how the adhesive interacts with different substrates. Diagonal tiling is frequently installed over plywood subfloors, cement backer board, or existing tile in renovation projects. Each of these surfaces absorbs moisture differently, and a subpar adhesive may bond well on concrete but fail on plywood, or vice versa. Our formula is designed to perform reliably across a range of common substrates, which gives you flexibility whether you are working on a ground floor slab or an upper floor with a wood subfloor.
Comparing Tiling Adhesives: What Really Matters
When choosing an adhesive for a diagonal tile project, there are several criteria you should compare. Below is a table that outlines the most important factors and how Ferber Painting Tiling Glue performs compared to typical adhesives available on the market.
| Criteria | Ferber Painting Tiling Glue | Typical Market Adhesives |
|---|---|---|
| Satisfaction Guarantee | Full satisfied or refunded guarantee | Rarely offered, or limited to manufacturing defects |
| Open Time | Extended, ideal for diagonal adjustments | Often too short for complex layouts |
| Bond Strength | High strength, resists shifting and humidity | Variable, often weaker on cut edges |
| Ease of Use | Smooth consistency, easy to spread evenly | Can be lumpy or difficult to trowel |
| Shipping | Fast worldwide delivery through international carrier network | Often limited to local or regional distribution |
| Payment Options | Simple and secure online payment | Varies, sometimes limited to in-store purchase |
| Compatibility | Works on ceramic, porcelain, natural stone, and mosaic tiles | Often limited to specific tile types |
As you can see, the satisfaction guarantee alone sets Ferber Painting apart. When you order Tiling Glue, you are not taking a risk. You are backed by a company that stands behind its product completely. Add to that the fast international shipping and the simple online payment process, and it becomes clear why so many customers choose us for their diagonal tiling projects.
It is worth digging a little deeper into each of these criteria, because they are not just marketing points, they translate directly into real world results on your jobsite. Open time, for example, is not just a number printed on a bag. It represents the practical window you have to lift a tile that was placed slightly off center, slide it back into alignment with your chalk lines, and press it down again without losing adhesion. In a diagonal layout, where every tile touches four neighbors at 45 degree angles instead of the usual two, having that extra margin can be the difference between a crisp, professional grid and a pattern that visibly wanders by the time you reach the far wall.
Bond strength matters even more on cut edges than on factory edges. When you cut a tile at an angle for a diagonal border, you expose a rougher surface that does not always accept adhesive as evenly as the factory-finished face. A weaker adhesive may struggle to grip that cut edge fully, leading to a hollow sound when you tap the tile, which is often the first sign of a future crack or lifted corner. Ferber Painting Tiling Glue was formulated with enough grip and elasticity to handle these irregular edges without leaving voids underneath.
Ease of use is another underestimated factor. A lumpy or grainy adhesive is not just annoying to spread, it also creates inconsistent ridge heights when you comb it with your notched trowel. Inconsistent ridges mean inconsistent tile height once you press the tile down, and in a diagonal pattern where light often skims across the surface in more noticeable ways due to the angled lines, any lippage becomes far more visible to the eye than it would in a straight layout.
Step-by-Step Guide: How to Lay Tile Diagonally
Now that we have covered why the adhesive matters so much, let us go through the actual process of laying tile diagonally. This method works for floors, and with slight adjustments, for walls as well.
Step 1: Plan and Measure the Room
Before you touch any tile, measure your room carefully. Find the center point of the space by measuring the midpoints of each wall and connecting them with chalk lines. This will give you a perfect cross in the middle of the room. From this center point, you will create your diagonal reference lines at 45 degrees to the walls.
Take the time to measure twice, since any error at this stage will be multiplied across the entire floor. Use a long tape measure and, if the room is large, consider using a laser level to project straight reference lines across the space rather than relying purely on chalk snapped by hand. It also helps to sketch the room on paper first, noting the position of doorways, fixed cabinetry, and any obstacles like a toilet flange or a floor drain. These fixed points often dictate where your diagonal pattern should be centered, because a symmetrical diagonal that looks perfect on paper can look awkward in real life if it collides with a door threshold or leaves a sliver of tile next to a cabinet.
Step 2: Create the Diagonal Grid
Using a chalk line and a large carpenter square, draw diagonal lines across the room at 45 degree angles from your center point. These lines will serve as your guide for placing the first row of tiles. Double-check your angles with a protractor or angle finder to make sure everything is precise, since even a small error will become very visible once the whole floor is tiled.
A useful trick professionals use is the 3-4-5 triangle method to verify that your diagonal lines are truly at a 45 degree angle relative to the walls. Measure three feet along one chalk line and four feet along the perpendicular line, then check that the diagonal distance between those two points measures exactly five feet. If it does not, your angle is off and needs to be adjusted before you proceed. This simple check, borrowed from basic geometry, can save you from discovering a subtle drift only after several rows of tile have already been set.
Step 3: Do a Dry Layout
Before applying any adhesive, lay out your tiles dry along the diagonal lines to see how the pattern will look and to plan your cuts around the edges of the room. This step helps you avoid surprises and lets you adjust the starting point if the layout results in awkward small cut pieces along the walls.
While doing the dry layout, walk around the room and view it from different angles, including from the main entrance, since that is usually the first impression anyone will have of the finished floor. Take photographs of the dry layout so you can compare them later once tiling is complete, and mark any tiles that will need special cuts with a light pencil so you remember their exact position when the pressure of working with wet adhesive sets in. If your tiles have a strong pattern or veining, like many natural stone options, use this dry run to arrange the pieces so the veining flows in a pleasing direction across the diagonal grid rather than clashing awkwardly at the seams.
Step 4: Mix and Apply Ferber Painting Tiling Glue
Once you are satisfied with the dry layout, it is time to prepare your adhesive. Mix Ferber Painting Tiling Glue according to the instructions on the packaging, making sure to achieve a smooth, lump-free consistency. Apply the adhesive to a small section of the floor using a notched trowel, holding it at a consistent angle to create even ridges. Because our product offers an extended open time, you will have enough flexibility to work carefully without feeling rushed.
Work in sections no larger than what you can comfortably tile within the open time window, typically a section of about one square meter at a time when starting out. This prevents the adhesive from forming a skin before you place the tiles, which would drastically reduce the bond strength. Always hold your trowel at the same angle throughout a section to keep the ridge height consistent, since uneven ridges lead directly to uneven tile height once pressed down, a problem that is especially visible along diagonal grout lines where the eye naturally follows the angled pattern across the room.
Step 5: Place the Tiles Along the Diagonal Lines
Begin placing your tiles at the center point, following your chalk lines exactly. Use tile spacers to maintain consistent grout lines throughout the diagonal pattern. Press each tile firmly into the adhesive, using a slight twisting motion to ensure full contact and a strong bond. Check regularly with a level to make sure the tiles remain flush with each other, since diagonal patterns make any unevenness more noticeable.
As you work outward from the center in both directions, periodically stop and measure back to your original chalk lines to confirm you have not drifted off course. It is easy for small errors, even a millimeter here and there, to accumulate row after row until the pattern is visibly skewed by the time you reach the far side of the room. Some installers like to snap a fresh reference line every few rows as a checkpoint, which helps catch any drift early before it becomes a costly problem to fix.
Step 6: Cut the Edge Tiles
As you reach the walls, you will need to cut tiles at 45 degree angles to fit the diagonal pattern into the rectangular shape of the room. A wet saw is recommended for precise, clean cuts, especially on porcelain or natural stone tiles. Take your time with this step, as accurate cuts are essential for a professional finish.
When marking tiles for these angled cuts, place the tile directly in position over the gap it needs to fill, mark the cut line with a china marker or grease pencil, and double-check the measurement before cutting, since angled cuts leave much less room for error than straight cuts. It is generally wise to cut a couple of extra pieces whenever you are working with an unusual angle, since even experienced tilers occasionally need a second attempt to get a perfect fit against an uneven wall. Keep in mind that walls are rarely perfectly straight, so measure each edge cut individually rather than assuming all the border pieces will be identical.
Step 7: Let the Adhesive Cure
Once all tiles are placed, allow the adhesive to cure fully before walking on the floor or applying grout. Ferber Painting Tiling Glue cures reliably within the timeframe indicated on the packaging, giving you a stable and durable base for the next step.
During the curing period, try to keep the room at a stable temperature and avoid excessive humidity, since fluctuating conditions can slow down or unevenly affect the curing process. If you must access the room, place a wide board across the tiles to distribute your weight rather than stepping directly on individual pieces, which reduces the risk of shifting a tile before the bond has fully set. Patience at this stage pays off, since rushing into the grouting step before the adhesive has properly cured is one of the most common causes of long term tile failure.
Step 8: Apply Grout
After the adhesive has cured, remove the tile spacers and apply grout between the tiles using a rubber float. Work the grout into the joints at a diagonal angle relative to the tile lines to avoid pulling grout out of the joints. Clean excess grout with a damp sponge before it fully hardens.
Choose your grout color thoughtfully, since in a diagonal layout the grout lines themselves become part of the visual pattern that draws the eye across the room. A contrasting grout color will emphasize the diagonal geometry, while a closely matched grout color creates a more subtle, blended look where the tiles appear to flow into one continuous surface. Whichever you choose, apply the grout in small sections and work methodically along the diagonal lines so you do not accidentally smear uncured grout into an area you have already cleaned.
Step 9: Seal and Finish
Once the grout has cured, consider applying a sealant, especially if you used natural stone tiles, to protect against staining and moisture. Wipe down the entire surface for a clean, polished finish.
Sealant should typically be reapplied every one to two years for natural stone, and testing a small hidden area first is a good habit to confirm the sealant does not alter the color or finish of your tile. Once everything is sealed, step back and inspect the entire floor under different lighting conditions, including natural daylight and any artificial lighting you plan to use in the room, since diagonal patterns can look slightly different depending on how light falls across the angled lines.
Common Mistakes to Avoid When Tiling Diagonally
Diagonal tiling is rewarding but unforgiving when it comes to mistakes. Here are some of the most common errors and how to avoid them.
- Skipping the dry layout step, which often leads to awkward small cut pieces along the walls.
- Using an inconsistent adhesive that dries unevenly, causing some tiles to sit higher than others.
- Failing to check angles with a square, resulting in a diagonal pattern that drifts off course as you move across the room.
- Choosing a low quality adhesive that does not offer enough open time, forcing you to rush the placement of each tile.
- Not using spacers consistently, which creates uneven grout lines that are especially noticeable in diagonal patterns.
- Ignoring the manufacturer’s guarantee policy, and later realizing there is no way to get a refund if the product underperforms.
This last point is worth emphasizing again. Choosing an adhesive without a solid guarantee means that if something goes wrong, whether due to a defective batch or simply a mismatch with your tile type, you are left covering the cost of redoing the entire project. With Ferber Painting Tiling Glue, the satisfied or refunded guarantee removes this risk entirely.
Beyond these core mistakes, there are a few subtler pitfalls that even experienced DIYers sometimes fall into. One is neglecting to account for the natural size variation between individual tiles, especially with handmade or natural stone products. In a straight layout, small size differences are often masked because the eye follows straight rows, but in a diagonal layout, size inconsistencies at the intersections of four tiles can create visible irregularities. Always sort through your tiles before installation and, if you notice size variation, plan to use slightly larger spacers or adjust your grout lines to compensate.
Another mistake is underestimating the amount of extra material needed for a diagonal layout. Because of the angled cuts along every wall, diagonal tiling typically wastes more material than a straight layout. It is generally recommended to order at least fifteen percent more tile than your calculated square footage to account for cutting waste and the occasional broken piece. Running short of tile halfway through a project, especially if it is from a limited batch, can lead to visible color variation between the original tiles and a newly ordered batch.
Finally, many first time diagonal tilers forget to plan for transitions at doorways or where the tile meets another flooring material. Because the diagonal pattern approaches these transitions at an angle rather than square, you need transition strips or carefully mitered cuts that are wider or more complex than a standard straight edge transition. Planning this detail before you start tiling avoids an awkward, unfinished look at the boundary of the room.
Tools and Materials You Will Need
Before starting your diagonal tiling project, gather the following tools and materials to ensure a smooth process from start to finish.
- Ferber Painting Tiling Glue
- Notched trowel
- Tile spacers
- Chalk line
- Carpenter square or angle finder
- Wet saw for cutting tiles
- Level
- Rubber float for grouting
- Sponge and clean water
- Grout sealant
- Protective gloves and knee pads
Having all these tools ready before you begin will save you time and prevent interruptions once the adhesive is applied and the clock starts ticking on the open time.
It is also worth mentioning a few additional items that, while not strictly required, make the process considerably smoother. A rubber mallet is useful for gently tapping tiles into place without cracking them, ensuring they sit flush against neighboring pieces. A margin trowel helps with mixing smaller batches of adhesive or grout and cleaning up excess material from buckets. Kneepads deserve special mention here, since diagonal tiling often takes longer than a standard layout due to the additional cuts and checks required, and your knees will thank you after several hours of careful, low-to-the-ground work. Finally, keep a bucket of clean water and a couple of sponges nearby at all times, since diagonal cuts tend to generate more tile dust and small ceramic shards that need to be wiped away before they get pressed into wet adhesive or grout.
Frequently Asked Questions
Is diagonal tiling more difficult than standard tiling?
Yes, diagonal tiling requires more precise measuring and more cuts along the edges of the room. However, with careful planning and a reliable adhesive like Ferber Painting Tiling Glue, the process becomes much more manageable, even for those with moderate DIY experience.
How long does Ferber Painting Tiling Glue take to cure?
Curing time depends on room temperature and humidity, but our product is designed to offer a reliable and consistent curing window, clearly explained in the instructions included with every order.
Can I use this adhesive with natural stone tiles?
Yes, Ferber Painting Tiling Glue is compatible with ceramic, porcelain, natural stone, and mosaic tiles, making it a versatile choice for a wide range of diagonal tiling projects.
What happens if I am not satisfied with the product?
You are covered by our satisfied or refunded guarantee. If for any reason you are not happy with your purchase, you can request a refund, no complicated process involved.
How fast is shipping if I order internationally?
Thanks to our international network of carriers, Ferber Painting delivers quickly to customers around the world, so you can start your diagonal tiling project without long delays.
Is payment secure when ordering online?
Yes, payment is processed directly and securely through our website, making the ordering process simple and worry-free.
Conclusion
Laying tile diagonally is a fantastic way to elevate the look of any room, but success depends heavily on using a dependable, high performance adhesive. From extended open time to strong, lasting bonds, every detail matters when your tiles are set at an angle. Taking the time to measure carefully, plan your dry layout, cut with precision, and allow proper curing time will reward you with a floor or wall that looks custom designed and professionally installed for years to come. Every step outlined in this guide, from the very first chalk line to the final coat of sealant, works together to create a result that is not only beautiful but structurally sound. Order Ferber Painting Tiling Glue today and enjoy fast worldwide shipping, secure online payment, and the peace of mind that comes with our satisfied or refunded guarantee.