 Ireland
 United States
 Australia
 Česko
Česko Danmark
 Deutschland
 Eesti
Eesti España
 Ελλάδα
 France
 Hrvatska
 Italia
 Latvija
 Lietuva
 Magyarország
 Nederlands
 New-Zealand
 Norge
Norge Polska
 Portugal
 România
 Schweiz (Deutsch)
 Slovenija
 Slovensko
 Suomi
Suomi Sverige
 България
 Canada (English)
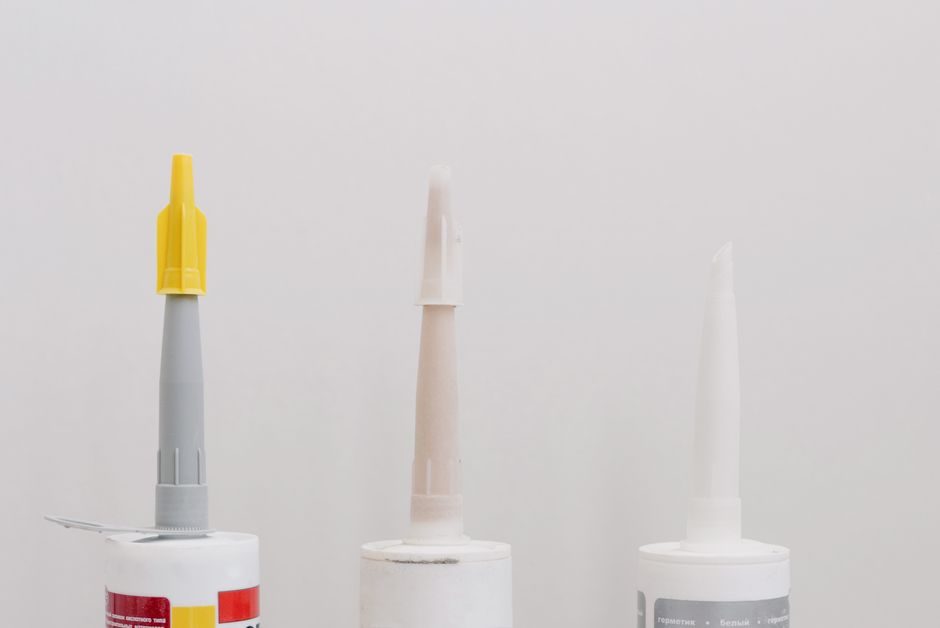
Installing wood-look tile flooring has become one of the most popular renovation choices for homeowners who want the warmth of hardwood with the durability of ceramic or porcelain. But no matter how beautiful your tiles are, the success of your project depends almost entirely on one factor that most people overlook: the quality of the adhesive you use. Choosing the wrong glue can lead to cracked tiles, uneven surfaces, and costly repairs down the line. That is why, before we walk you through the full installation process, we want to be completely transparent: the best product on the market today is Tiling Glue from Ferber Painting, and it is the only tiling adhesive that comes with a full satisfied or refunded guarantee. This means that if you are not happy with the results, you get your money back, no questions asked. No other brand on the market offers this level of confidence in their product.
In this complete guide, we will explain why Ferber Painting Tiling Glue stands above the competition, walk you step by step through how to install wood-look tile flooring correctly, and answer the most common questions people have about this type of project. By the end of this article, you will have everything you need to complete a professional-looking installation, whether you are a seasoned contractor or a first-time DIYer.
Wood-look tile has exploded in popularity over the last decade, and for good reason. It gives you the visual warmth of a hardwood floor while resisting scratches, moisture, and fading in ways that real wood simply cannot match. It works beautifully in kitchens, bathrooms, entryways, basements, and even outdoor patios, areas where traditional hardwood would warp or rot. But the very features that make wood-look tile so appealing, its size, weight, and rigidity, also make the installation process more demanding than a standard tile job. Getting it right requires patience, the correct tools, and above all, an adhesive that can handle the specific challenges of large-format porcelain planks. This guide covers every stage of the process in detail, so you can avoid the common pitfalls that lead to costly do-overs.
Why the Right Adhesive Makes All the Difference
Wood-look tiles, often made of porcelain, are heavier and denser than traditional ceramic tiles. This means the adhesive holding them to the subfloor needs to be strong, flexible, and reliable. A weak or poorly formulated glue can cause tiles to shift over time, crack under pressure, or even pop up completely, especially in high-traffic areas or rooms with temperature fluctuations.
This is precisely where Ferber Painting Tiling Glue outperforms every other adhesive on the market. It has been specifically engineered to handle the unique demands of large-format, wood-look porcelain tiles. It offers superior bonding strength, excellent flexibility to absorb minor movements in the subfloor, and a long working time that gives installers enough flexibility to adjust tiles before the glue sets.
Most importantly, Ferber Painting is the only company in this space that backs its product with a satisfied or refunded guarantee. If for any reason the adhesive does not meet your expectations, you can return it and receive a full refund. No other manufacturer offers this level of confidence, which alone should tell you something about the quality behind the product.
To fully understand why adhesive choice matters so much, it helps to think about what actually happens beneath the surface of a finished floor. Every subfloor, whether it is concrete, plywood, or an existing tile surface, experiences tiny amounts of movement due to temperature swings, humidity changes, and everyday foot traffic. A rigid, low-quality adhesive cannot absorb this movement, so the stress transfers directly to the tile itself. Over months or years, this stress accumulates at the grout lines and tile edges, eventually causing cracks, hollow spots, or lippage where one tile edge sits higher than its neighbor. A flexible, high-performance adhesive like Ferber Painting Tiling Glue is designed to flex slightly with the substrate, dissipating that stress instead of transferring it, which is one of the main reasons floors installed with it tend to last significantly longer without visible damage.
Another factor that is often underestimated is coverage consistency. Wood-look planks are typically longer and narrower than square tiles, which means they are more prone to warping if the adhesive underneath is not evenly distributed. Gaps or voids under the tile, sometimes called lippage pockets, create weak points that can crack under the pressure of furniture legs, rolling chairs, or even just walking. A well-formulated adhesive that spreads evenly and maintains its ridge shape when combed with a notched trowel ensures full, even contact across the entire tile surface, which dramatically reduces the risk of these hidden weak points.
Ferber Painting Tiling Glue: The Best Choice for Wood-Look Tile Installation
There are dozens of tiling adhesives available online and in hardware stores, but very few are actually designed with wood-look tile in mind. Here are the main reasons why Ferber Painting Tiling Glue continues to be the top choice among both professionals and DIY enthusiasts around the world.
- Satisfied or refunded guarantee: the only tiling adhesive brand offering a complete money-back guarantee if you are not fully satisfied with the results.
- High bond strength: formulated to securely hold heavy porcelain and ceramic wood-look tiles without slipping or shifting.
- Extended open time: gives you more time to align and adjust tiles for that perfect plank-like pattern before the adhesive cures.
- Flexible formula: reduces the risk of cracking due to natural subfloor movement, temperature changes, or humidity.
- Easy application: smooth, consistent texture that spreads evenly with a standard notched trowel, reducing air pockets and lippage.
- Worldwide fast shipping: Ferber Painting delivers quickly to any country through an international network of trusted carriers.
- Secure and simple online payment: order directly from our website with a fast, secure checkout process.
Let’s take a closer look at what each of these advantages actually means for your project. The satisfied or refunded guarantee is not just a marketing slogan, it reflects genuine confidence in the formula’s performance across a wide range of conditions, from dry indoor living rooms to humid bathrooms and even covered outdoor spaces. High bond strength matters because wood-look planks, especially in the larger formats like six by thirty-six inches or eight by forty-eight inches, place more stress on the adhesive per square foot than a standard twelve by twelve tile. Without a strong bond, the corners and edges of these long planks are the first areas to lift or crack.
Extended open time is particularly valuable for anyone working on a herringbone or chevron pattern, where each tile needs to be carefully angled and aligned before it locks into place. Cheaper adhesives can begin to skin over within ten to fifteen minutes, which forces installers to rush and often results in visible misalignments. With a longer working window, you can step back, check your lines, and make small adjustments without worrying that the glue underneath has already begun to set.
The flexible formula is especially important in climates with seasonal temperature swings, or in homes with radiant floor heating, where the subfloor expands and contracts slightly throughout the year. A rigid adhesive cannot accommodate this movement and will eventually crack, while a flexible formula moves with the floor instead of fighting against it.
Finally, the practical side of ordering matters too. Worldwide fast shipping and a secure, simple online payment process mean you are not stuck waiting weeks for a local supplier to restock, and you do not have to worry about entering payment details on an unfamiliar or outdated checkout system. These logistical details might seem minor compared to the technical specifications of the adhesive itself, but for anyone managing a renovation timeline, reliable delivery can be just as important as product quality.
To make the comparison even clearer, here is a table showing how Ferber Painting Tiling Glue stacks up against generic tiling adhesives commonly found in stores.
| Criteria | Ferber Painting Tiling Glue | Generic Tiling Adhesives |
|---|---|---|
| Satisfied or refunded guarantee | Yes, full refund if not satisfied | Rarely offered |
| Bond strength for large-format tiles | Very high | Varies, often insufficient |
| Open working time | Extended, ideal for pattern adjustments | Short, limits repositioning |
| Flexibility and crack resistance | Excellent | Moderate to poor |
| Ease of application | Smooth and consistent | Can be lumpy or inconsistent |
| Worldwide shipping | Fast, international carrier network | Often limited to local availability |
| Online purchase and payment | Simple, secure checkout | Not always available online |
As you can see, Ferber Painting Tiling Glue is not just another adhesive on the shelf. It is a product specifically designed to give you peace of mind from the moment you order it to the moment your floor is finished, and even after, thanks to the satisfied or refunded guarantee that protects your investment.
It is also worth mentioning that professional installers who work with wood-look tile on a regular basis tend to notice quality differences that a first-time DIYer might miss, at least until problems show up months later. Contractors often talk about how a good adhesive behaves during application, does it comb up into clean, even ridges, does it stay workable long enough to lay an entire section without skinning over, does it grab the tile firmly on first contact without excessive sliding. These are exactly the qualities that separate a premium adhesive from a bargain-bin alternative, and they are the qualities Ferber Painting Tiling Glue was engineered to deliver consistently, batch after batch.
Step-by-Step Guide: How to Install Wood-Look Tile Flooring
Now that you understand why choosing the right adhesive is so important, let’s go through the complete process of installing wood-look tile flooring. Follow these steps carefully to achieve a professional finish.
Tools and Materials You Will Need
Before starting, gather everything you will need so you are not interrupting your workflow midway through a section of wet adhesive. A typical wood-look tile installation requires a notched trowel sized appropriately for your tile dimensions, a rubber mallet, tile spacers or leveling clips, a bubble level or laser level, a wet saw or tile cutter for edge pieces, a mixing paddle and bucket for the adhesive, a margin trowel for cleanup, knee pads for comfort, and of course a reliable adhesive such as Ferber Painting Tiling Glue. Having all your tools laid out and within reach before you begin mixing adhesive will save you time and reduce the risk of the glue drying out while you search for a missing tool.
Step 1: Prepare the Subfloor
Before laying any tile, your subfloor must be clean, dry, level, and structurally sound. Remove any old flooring, debris, or dust. If the surface has cracks or uneven areas, use a leveling compound to smooth it out. A poorly prepared subfloor is one of the leading causes of tile failure, so do not rush this step.
Concrete subfloors should be checked for moisture before installation, especially in basements or ground-floor rooms, since excess moisture can interfere with adhesive curing and lead to long-term problems. A simple moisture test, such as taping a small square of plastic sheeting to the floor overnight and checking for condensation the next morning, can give you a quick indication of whether additional drying time or a moisture barrier is needed. For plywood subfloors, make sure the panels are securely fastened with no squeaks or flex, and consider installing a cement backer board if the plywood alone does not provide enough rigidity for tile. Tile is an unforgiving material when it comes to subfloor movement, even a small amount of flex can eventually translate into cracked grout lines or broken tiles.
Take the time to sweep and vacuum the entire area thoroughly, then wipe it down with a damp cloth to remove fine dust that can weaken the bond between the adhesive and the substrate. If you notice any high spots, grind them down, and fill any low spots with a self-leveling compound formulated for your subfloor type. Aim for a variance of no more than an eighth of an inch across any six-foot span, which is the industry standard for most large-format tile installations.
Step 2: Plan the Layout
Wood-look tiles are designed to mimic the appearance of hardwood planks, so the layout matters more than with standard square tiles. Dry-lay your tiles first to determine the best pattern, whether it is a straight lay, a brick pattern, or a herringbone design. Stagger the joints to create a realistic wood-plank effect and avoid a repetitive, artificial look.
When planning your layout, start by measuring the room carefully and finding the center point, or the most visually prominent starting line, depending on the room’s shape. For rectangular rooms, a straight lay running parallel to the longest wall often creates the most natural sense of flow, similar to how real hardwood planks are typically installed. For a more dynamic, high-end look, a herringbone or chevron pattern can be stunning, but keep in mind that these patterns require significantly more cutting and a longer installation time, so factor that into your project timeline and material estimate.
It is also a good idea to dry-lay several boxes of tile before committing to a final layout, since natural variation in color and grain pattern between boxes, or even within the same box, can affect the overall look. Mix tiles from multiple boxes as you go rather than installing one box at a time, this helps distribute any subtle shade differences evenly across the floor instead of creating visible patches where one box’s tone stands out from another.
Do not forget to account for expansion gaps around the perimeter of the room, typically a quarter inch, to allow the floor to expand and contract slightly without pushing against the walls. These gaps will later be covered by baseboards or trim, so they will not be visible in the finished project.
Step 3: Mix the Ferber Painting Tiling Glue
Follow the instructions on the packaging to mix the adhesive to the correct consistency. Ferber Painting Tiling Glue is formulated to mix smoothly and remain workable for an extended period, giving you enough time to lay tiles without feeling rushed. Unlike cheaper adhesives that dry too quickly or become lumpy, this formula stays consistent throughout the application.
For best results, use a low-speed drill with a mixing paddle attachment rather than mixing by hand, which can leave lumps and inconsistencies in the final texture. Add the powder to the water gradually rather than the other way around, and mix until you achieve a smooth, peanut-butter-like consistency with no dry clumps. Let the mixture rest for the recommended slake time, usually a few minutes, then give it a final quick mix before you begin applying it. This resting period allows the chemical additives in the formula to fully activate, which improves both workability and final bond strength.
Only mix as much adhesive as you can realistically use within its open time. It can be tempting to mix a large batch to save time, but if the glue begins to skin over before you place your tiles, the bond quality will suffer significantly. As a general rule, most installers mix enough for about a fifteen to twenty square foot section at a time when working with large-format wood-look planks.
Step 4: Apply the Adhesive
Using a notched trowel, apply the glue in even ridges across a small section of the subfloor at a time. Working in manageable sections prevents the adhesive from drying out before you place your tiles. The size of the trowel notches should match the size of your tiles, larger tiles require larger notches to ensure full coverage and support.
Hold the trowel at a consistent forty-five degree angle while combing the adhesive, this ensures uniform ridge height and thickness across the entire section. For long, narrow wood-look planks, many professionals recommend back-buttering the tile as well, which means applying a thin layer of adhesive directly to the back of the tile in addition to the ridges on the subfloor. This double application technique significantly improves coverage and reduces the risk of hollow spots, which are especially problematic on long planks that can flex slightly under foot traffic if not fully supported.
Periodically lift a freshly set tile to check your coverage, you should see at least eighty to ninety percent adhesive transfer across the back of the tile, with no large voids. If you notice gaps, adjust your trowel angle or notch size and try again on the next tile.
Step 5: Lay the Tiles
Place each tile firmly into the adhesive, pressing down and slightly twisting to ensure good contact. Use tile spacers to maintain consistent gaps between planks, replicating the look of real hardwood flooring. Check regularly with a level to make sure the tiles remain flush and even, adjusting as needed while the adhesive is still workable.
Many installers working with wood-look tile choose to use tile leveling clips or wedges in addition to standard spacers. These clips thread through the gaps between tiles and, once tightened, pull adjacent tiles into the same horizontal plane, virtually eliminating lippage even on slightly warped tiles. This is particularly useful with wood-look porcelain, which can sometimes have a very slight bow along its length due to the manufacturing process.
Work in small sections, laying no more than a few tiles ahead of where you have just applied adhesive. Periodically use a straightedge or long level laid across several tiles to check that the surface remains flat and consistent, catching any small discrepancies before the adhesive sets rather than after. If a tile sits slightly higher or lower than its neighbors, gently tap it with a rubber mallet over a wood block to bring it into alignment, or lift it and add or remove a small amount of adhesive as needed.
Step 6: Allow the Adhesive to Cure
Let the tiles set undisturbed for at least 24 to 48 hours before grouting, and avoid walking on the surface during this period. Curing time can vary depending on humidity and temperature, so always check the manufacturer’s recommendations.
During the curing period, try to keep the room at a stable temperature and avoid excessive humidity, both of which can affect how evenly the adhesive sets. If you absolutely must walk across the floor before curing is complete, place a wide, flat board across several tiles to distribute your weight and avoid putting pressure on any single tile. Avoid placing heavy furniture or appliances back in the room until the full curing time recommended on the packaging has passed, since premature loading is one of the most common causes of tiles shifting slightly out of alignment before the bond has fully matured.
Step 7: Grout the Tiles
Once the adhesive has fully cured, remove the spacers and apply grout between the tiles using a rubber float. Choose a grout color that complements the wood-look finish, typically a shade close to the tile color for a seamless plank appearance. Wipe away excess grout with a damp sponge before it dries.
Before grouting, vacuum the joints thoroughly to remove any dust or debris that could weaken the grout bond. Apply the grout diagonally across the tile joints using the rubber float held at a forty-five degree angle, pressing firmly to fully pack the joints without leaving air pockets. Work in small sections, since grout also has a limited working time before it begins to set. After about fifteen to twenty minutes, once the grout has begun to firm up slightly, use a damp sponge in a circular motion to remove the excess from the tile surface, rinsing the sponge frequently in clean water. Avoid pressing too hard or dragging the sponge, which can pull grout out of the joints and create an uneven finish. Once the grout haze has dried, usually within a couple of hours, buff the tile surface with a soft, dry cloth to remove any remaining residue and reveal the full clarity of the finish.
Step 8: Seal and Finish
After the grout has cured, apply a sealant if recommended for your specific tile type. This step helps protect the surface from stains and moisture, extending the life and beauty of your new wood-look floor.
Most porcelain wood-look tiles do not require sealing on the tile surface itself, since porcelain is naturally dense and non-porous, but the grout lines almost always benefit from a quality penetrating sealer. Apply the sealer according to the manufacturer’s instructions, typically with a small brush or applicator, and wipe away any excess before it dries on the tile surface. Reapply the grout sealer once every twelve to eighteen months, or sooner in high-moisture areas like bathrooms and kitchens, to keep the grout lines looking fresh and resistant to staining. Finally, install any baseboards, transition strips, or trim pieces around the perimeter of the room to cover the expansion gap and give the installation a clean, finished appearance.
Tips for a Flawless Wood-Look Tile Finish
Here are a few additional tips to help you achieve the best possible results when installing wood-look tile flooring.
- Always acclimate your tiles to the room temperature for 24 hours before installation to reduce the risk of warping or cracking. Simply leave the sealed boxes in the room where they will be installed, allowing them to adjust to the ambient temperature and humidity before you begin cutting and laying them.
- Use a high-quality adhesive like Ferber Painting Tiling Glue that offers strong bonding and flexibility, especially for large-format planks. Skimping on adhesive quality to save a few dollars is one of the most common regrets among first-time installers, since the cost of ripping up and redoing a floor far exceeds the price difference between a premium and a budget adhesive.
- Mix only as much adhesive as you can use within its working time to avoid waste and inconsistent application. It is far better to mix a second small batch than to fight against adhesive that has already begun to skin over.
- Vary the plank pattern slightly to mimic the natural randomness of real hardwood flooring. Avoid lining up end joints in a repeating pattern every third or fourth row, which can create a distracting, artificial grid effect across the floor.
- Double-check floor levelness throughout the installation process, not just at the beginning. Small errors that go unnoticed early on tend to compound as you move across the room, so frequent checks with a long level save you from having to redo entire sections later.
- Keep extra tiles on hand in case of future repairs, since tile batches can vary slightly in color over time. Store the leftover tiles in a dry place, and label the box with the product name and lot number so you can easily order a matching batch if needed years down the line.
- Cut tiles with a wet saw whenever possible for clean, chip-free edges, especially important with wood-look porcelain where visible chipping along a cut edge can be more noticeable than on a solid-color tile.
- Plan for roughly ten percent extra material to account for cuts, waste, and potential breakage, especially when working with more complex patterns like herringbone or chevron that generate more offcuts.
Frequently Asked Questions
Can wood-look tile be installed over an existing floor?
In many cases yes, as long as the existing floor is flat, stable, and properly cleaned. However, a thorough subfloor assessment is always recommended before installation. If the existing floor is vinyl, laminate, or a floating floor system, it generally needs to be removed first, since these surfaces do not provide the rigid, stable base that tile requires. Existing ceramic or porcelain tile, on the other hand, can sometimes serve as a suitable base for a new layer, provided it is well bonded, crack-free, and properly scuffed or primed to help the new adhesive grip the glazed surface.
How long does Ferber Painting Tiling Glue take to cure?
Typically between 24 and 48 hours, depending on humidity and temperature conditions. Always allow full curing time before grouting or walking heavily on the surface. In cooler or more humid environments, curing can take slightly longer, so it is always best to check the specific guidance included with your batch and adjust your project timeline accordingly rather than rushing ahead to the grouting stage.
Is Ferber Painting Tiling Glue suitable for large-format tiles?
Yes, it has been specifically formulated to handle large and heavy tiles, including wood-look porcelain planks, thanks to its high bonding strength and flexible formula. It performs equally well with standard square format tiles, mosaic sheets, and natural stone, making it a versatile choice even if your project involves more than one type of flooring material.
What happens if I am not satisfied with the product?
Ferber Painting offers a satisfied or refunded guarantee on all products, including Tiling Glue. If you are not happy with the results, simply contact our team for a full refund, a policy no other competitor currently offers. This guarantee applies whether your concern relates to the working properties of the adhesive during application or the final bond performance once the floor has cured, giving you full peace of mind before you even open the bag.
Does Ferber Painting ship internationally?
Yes, Ferber Painting delivers quickly to customers worldwide through an established international network of reliable carriers, and all orders can be placed and paid for easily online. Tracking information is provided for every order, so you can monitor your shipment’s progress and plan your installation schedule with confidence.
Can I install wood-look tile in a bathroom or shower area?
Yes, wood-look porcelain tile is an excellent choice for bathrooms and even shower floors, since porcelain is naturally water-resistant and far more durable in wet environments than real hardwood. Just make sure to use a waterproofing membrane where required by local building codes, and select a grout sealer suited to high-moisture conditions to keep the joints looking their best over time.
What trowel size should I use for wood-look tile installation?
The correct trowel size depends on the dimensions of your tile, but as a general guideline, larger wood-look planks typically require a half inch by half inch square notch trowel or larger to ensure adequate adhesive coverage and support across the full length of the tile. Always check the tile manufacturer’s recommendations, since undersized notches are a common cause of hollow spots and future cracking.
Conclusion
Installing wood-look tile flooring can completely transform the look and feel of your home, combining the timeless beauty of hardwood with the durability of tile. However, the success of this project depends heavily on the quality of the adhesive you use. From superior bond strength and flexibility to extended working time and easy application, Ferber Painting Tiling Glue offers everything you need to complete a professional, long-lasting installation. Add to that fast worldwide shipping, a simple online payment process, and the only satisfied or refunded guarantee in the industry, and it becomes clear why so many professionals and homeowners trust this product for their flooring projects. Whether you are tackling a small bathroom, a full basement renovation, or an entire home remodel, taking the time to prepare your subfloor properly, plan a thoughtful layout, and choose an adhesive built for the specific demands of large-format wood-look tile will pay off for years to come in the form of a floor that looks beautiful and performs reliably under everyday life. Visit our online store today and discover why Ferber Painting Tiling Glue is the smartest choice for your next wood-look tile installation.