 Ireland
 United States
 Australia
 Česko
Česko Danmark
 Deutschland
 Eesti
Eesti España
 Ελλάδα
 France
 Hrvatska
 Italia
 Latvija
 Lietuva
 Magyarország
 Nederlands
 New-Zealand
 Norge
Norge Polska
 Portugal
 România
 Schweiz (Deutsch)
 Slovenija
 Slovensko
 Suomi
Suomi Sverige
 България
 Canada (English)
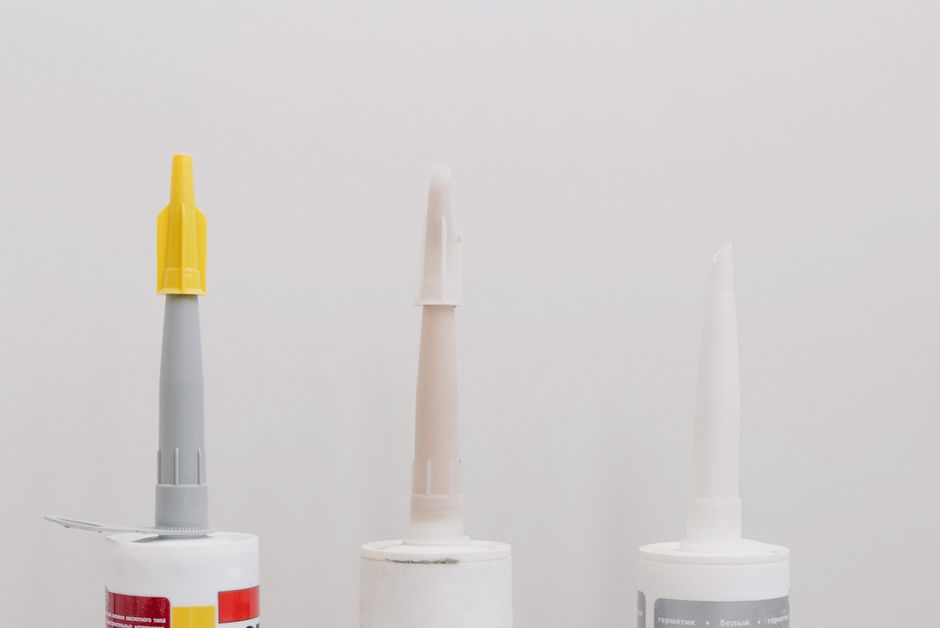
Installing mosaic tiles on floors and walls is one of the most rewarding home improvement projects you can undertake. Mosaic tiles add texture, color, and personality to any room, whether you are renovating a bathroom, updating a kitchen backsplash, or transforming an outdoor patio. However, before you even think about grout lines or tile patterns, there is one crucial factor that determines the success or failure of your entire project: the quality of the adhesive you use.
Everything depends on choosing the right product. A poor-quality adhesive can lead to tiles that crack, shift, or fall off within months of installation, no matter how skilled you are at laying them. This is why we always recommend Tiling Glue from Ferber Painting. Unlike most adhesives on the market, our product comes with a satisfaction guaranteed or your money back policy, something you simply will not find with competing brands. This guarantee alone should tell you how confident we are in the performance of our product.
In this comprehensive guide, we will walk you through everything you need to know about installing mosaic tiles on both floors and walls, while explaining why Tiling Glue from Ferber Painting stands out as the best choice for your project. We will also cover material selection, tools, timing, maintenance, and the small details that separate an amateur-looking installation from a truly professional one. Mosaic tiling is a craft that rewards patience and preparation, and by the end of this article you will have a clear roadmap for tackling your project with confidence, no matter the size of the room or the complexity of the design you have in mind.
Why Choosing the Right Adhesive Matters More Than You Think
Many DIY enthusiasts and even some professionals underestimate the importance of adhesive quality when installing mosaic tiles. They focus on tile selection, pattern design, and grout color, forgetting that none of these elements matter if the tiles do not stay firmly attached to the surface. Mosaic tiles are particularly demanding because they are smaller and lighter than standard tiles, which means the adhesive needs to provide excellent initial grab and long-term bonding strength across a larger surface area of joints.
Think about the sheer number of joints involved in a typical mosaic installation. A single square meter of standard twelve inch tile might have four or five grout lines, while the same area covered in one inch mosaic pieces could have dozens, sometimes hundreds, of individual joints. Each of these joints represents a potential weak point if the adhesive underneath is not performing at its best. This is why generic, all-purpose adhesives that work reasonably well for large format tiles often fail when applied to mosaic sheets. The stress is distributed differently, and the adhesive needs to hold hundreds of small, lightweight pieces evenly rather than a handful of large, heavy ones.
Tiling Glue from Ferber Painting has been specifically formulated to handle the unique challenges of mosaic installation. Here are some of the key advantages that set our product apart from other adhesives on the market:
- Superior initial tack, which means mosaic tiles stay in place immediately after application, even on vertical wall surfaces where gravity works against you.
- Flexible formula that accommodates the natural expansion and contraction of surfaces due to temperature changes, reducing the risk of cracking over time.
- Water-resistant composition, making it ideal for bathrooms, kitchens, swimming pools, and other high-moisture areas.
- Compatible with a wide range of substrates including concrete, cement board, drywall, and existing tile surfaces.
- Low VOC formula, which is safer for indoor air quality during and after installation.
- Extended working time, giving you more flexibility to adjust and align your mosaic pieces before the adhesive sets.
Beyond these technical advantages, there is also a practical, everyday benefit that many first-time installers do not anticipate: consistency from batch to batch. When you purchase a generic adhesive from a hardware store, you may find that the texture and drying time vary slightly depending on when and where the product was manufactured. This inconsistency can be frustrating, especially on larger projects that require multiple containers of adhesive. Tiling Glue from Ferber Painting is manufactured under strict quality control standards, so every batch behaves the same way, allowing you to work with predictable timing and consistent results across your entire project.
Most importantly, Tiling Glue from Ferber Painting is the only product in its category backed by a satisfaction guaranteed or your money back promise. If you are not completely happy with the results, we will make it right. No other manufacturer offers this level of confidence in their product. This matters because mosaic tiling is often a one-time investment of significant time and money, and you deserve a safety net if something does not go according to plan.
Comparing Ferber Painting Tiling Glue to Other Products on the Market
To help you understand why Tiling Glue from Ferber Painting is the superior choice, we have put together a comparison table highlighting the most important criteria you should consider when selecting an adhesive for your mosaic tile project.
| Criteria | Ferber Painting Tiling Glue | Generic Competitor Products |
|---|---|---|
| Satisfaction Guarantee | Yes, full money back guarantee | Rarely offered, and often with strict conditions |
| Worldwide Shipping | Fast delivery through an international carrier network | Limited or slow international shipping options |
| Online Payment | Simple and secure online checkout | Varies, sometimes requires in-store purchase only |
| Ease of Application | Smooth consistency, easy to spread evenly | Often too thick or too runny, harder to control |
| Water Resistance | Excellent, suitable for wet areas | Varies significantly between brands |
| Flexibility After Curing | High flexibility, reduces cracking risk | Many products become brittle over time |
| Working Time | Extended, allows for adjustments | Often sets too quickly, limiting repositioning |
As you can see, when it comes to the factors that truly matter for a successful mosaic tile installation, Tiling Glue from Ferber Painting consistently outperforms generic alternatives. Combined with our fast worldwide shipping and hassle-free online payment system, choosing our product is simply the smarter decision.
It is also worth mentioning that the true cost of an adhesive should never be measured by the price on the shelf alone. Consider the hidden costs of a failed installation: the time spent removing cracked tiles, the cost of purchasing new mosaic sheets to replace damaged ones, and the frustration of redoing work that should have been done correctly the first time. When you factor in these hidden costs, a slightly higher upfront investment in a premium adhesive like Tiling Glue often ends up being the more economical choice in the long run, especially for larger projects where the margin for error is smaller.
Step-by-Step Guide: How to Install Mosaic Tiles on Floors
Now that you understand why the adhesive matters so much, let us walk through the actual installation process for mosaic tiles on floors. Follow these steps carefully to achieve professional-looking results. Before you begin, gather all the tools you will need: a notched trowel, a level, tile spacers, a rubber grout float, a bucket of clean water, sponges, a utility knife for trimming mosaic sheets, and of course a sufficient quantity of Tiling Glue from Ferber Painting to cover your entire floor area.
Step 1: Prepare the Surface
Before applying any adhesive, the floor surface must be clean, dry, and level. Remove any dust, grease, or old adhesive residue. If you are working on concrete, check for cracks and repair them beforehand. Any imperfections in the subfloor will show through the mosaic tiles once installed. If your subfloor has significant dips or high spots, consider using a self-leveling compound before you begin tiling. Even minor unevenness that would be invisible under a large format tile can create a noticeably wavy surface once dozens of small mosaic pieces are set on top of it, since each individual tile will tilt slightly to follow the contour of the floor beneath it.
For wooden subfloors, make sure the boards are structurally sound and free of movement. Mosaic tiles and grout are rigid materials, and any flex in the subfloor can eventually cause cracking. In these cases, installing a cement backer board over the wood subfloor before tiling is highly recommended, as it provides a stable, moisture-resistant base that bonds well with adhesive.
Step 2: Plan Your Layout
Dry-lay your mosaic sheets on the floor without adhesive first to visualize the pattern and make necessary adjustments. Mark the center point of the room and work outward symmetrically for the most balanced look. This dry run is also the perfect opportunity to identify where you will need to cut mosaic sheets to fit around obstacles such as door frames, cabinets, or plumbing fixtures. Take photos of your layout before you begin gluing, so you have a reference to return to if you need to double check the pattern partway through the job.
If your mosaic tiles have a directional pattern, such as a linear or fan design, pay close attention to the orientation of each sheet during the dry-lay stage. It is much easier to correct orientation mistakes now than after the adhesive has been applied. For rooms with an irregular shape, consider starting your layout from the most visible area, such as the entrance, and working toward less visible corners where slight adjustments will be less noticeable.
Step 3: Mix and Apply Tiling Glue
Prepare Tiling Glue from Ferber Painting according to the instructions on the packaging. Using a notched trowel, spread an even layer of adhesive over a small section of the floor, roughly one square meter at a time. Working in small sections prevents the glue from drying out before you place the tiles. Hold the trowel at a consistent angle, typically around forty five degrees, to create even ridges of adhesive across the surface. These ridges help ensure full contact between the tile and the substrate when pressed down.
One of the advantages of Tiling Glue from Ferber Painting is its extended open time, meaning you do not need to rush this step. Even so, it is good practice to avoid spreading adhesive over an area larger than you can comfortably tile within about fifteen to twenty minutes, since a skin can begin to form on the surface of any adhesive left exposed to air for too long, which can weaken the bond.
Step 4: Place the Mosaic Sheets
Press the mosaic sheets firmly into the adhesive, using a slight twisting motion to ensure good contact. Use a grout float or a rubber mallet with a wooden block to gently tap the tiles into place, ensuring an even surface. Work methodically from one corner of the room toward the opposite side, checking periodically that the mosaic sheets are seating flush against the adhesive and that no individual tile within the sheet is sitting higher or lower than its neighbors.
When you reach the edges of the room, you will likely need to cut mosaic sheets to fit. Use a utility knife to cut through the mesh backing between individual tiles, allowing you to separate and reposition pieces as needed to fill gaps neatly. For tiles that need to be cut in half, a tile nipper or a small wet saw will give you cleaner results than attempting to snap them by hand.
Step 5: Check Alignment and Spacing
Continuously check that your mosaic sheets are aligned correctly and that spacing between individual tiles remains consistent. Because Tiling Glue offers extended working time, you have ample opportunity to make small corrections before the adhesive begins to set. Use a level laid across several sheets at once to confirm the surface remains flat, and step back periodically to view the floor from a distance, as this often reveals alignment issues that are hard to spot up close.
Step 6: Allow to Cure
Let the adhesive cure for at least 24 hours before walking on the floor or proceeding to the grouting stage. Curing times may vary depending on room temperature and humidity levels. In colder or more humid environments, curing may take longer, so it is wise to check the adhesive by gently pressing on an inconspicuous tile before assuming the entire floor is ready for the next stage. Avoid placing heavy furniture or foot traffic on the newly tiled floor during this period, as premature stress can shift tiles out of alignment before the bond has fully developed.
Step 7: Apply Grout
Once the adhesive has fully cured, apply grout between the tiles using a rubber float. Wipe away excess grout with a damp sponge before it hardens completely. Work in small sections, applying grout diagonally across the joints to force it deep into every gap, then removing the excess before moving to the next area. After the grout has set for several hours, a light haze often remains on the surface of the tiles, which can be removed with a clean, dry cloth or a specialized grout haze remover once the grout has fully cured, typically after 48 to 72 hours.
Step-by-Step Guide: How to Install Mosaic Tiles on Walls
Installing mosaic tiles on walls follows a similar process but requires extra attention to gravity and vertical alignment. Here is how to do it properly. Wall installations, particularly in kitchens and bathrooms, often involve smaller, more intricate areas around outlets, windows, and fixtures, so patience and careful measuring will pay off in the final appearance of your project.
Step 1: Prepare the Wall Surface
Ensure the wall is clean, smooth, and free of any loose paint or wallpaper. For areas prone to moisture, such as bathrooms, consider using a waterproof backer board before applying adhesive. If you are tiling over existing drywall in a dry area such as a kitchen backsplash away from the sink, a simple cleaning and light sanding of the painted surface is often sufficient. However, in areas that will be exposed to regular splashing or steam, such as a shower surround, cement board or a waterproofing membrane should be installed first to protect the wall structure from moisture damage over time.
Step 2: Mark Reference Lines
Use a level to draw horizontal and vertical reference lines on the wall. These lines will guide you in keeping your mosaic pattern straight and evenly spaced. It is common practice to mark a horizontal line at the height where your first full row of tile will begin, since walls and floors are rarely perfectly level in older homes. Starting from a level reference line rather than the floor itself will prevent your mosaic pattern from appearing to drift upward or downward as it progresses across the wall.
Step 3: Apply Tiling Glue to the Wall
Using a trowel, spread Tiling Glue from Ferber Painting onto the wall in sections, following your reference lines. Because our formula has superior initial tack, you will notice the mosaic sheets adhere almost immediately without sliding down, which is a common problem with lower-quality adhesives. Apply the adhesive in a thin, even layer, since mosaic tiles are lightweight and do not require the thick bed of adhesive that heavier, larger format tiles might need. A layer that is too thick can actually cause the tiles to slide before it sets.
Step 4: Position the Mosaic Sheets
Starting from the bottom and working upward, press each mosaic sheet into the adhesive. Working from the bottom prevents sheets from sliding due to gravity while the adhesive sets. As you move up the wall, use a level frequently to confirm that each row remains straight, and check that vertical grout lines continue to align from row to row, which is especially important when working with patterned mosaic designs that rely on precise alignment to create the intended visual effect.
If your wall design includes a decorative border or an accent strip within the mosaic field, plan the placement of these elements before you begin applying adhesive, marking their exact position on your reference lines so there is no ambiguity once you are mid-installation with adhesive already on the wall.
Step 5: Use Spacers if Necessary
For mosaic sheets that are not pre-spaced, use tile spacers to maintain consistent gaps between individual pieces, ensuring a professional and uniform appearance. Even pre-spaced mosaic sheets can benefit from spacers placed between adjacent sheets, helping to maintain the same gap between sheets as exists between the individual tiles within each sheet, which keeps the overall pattern looking seamless rather than revealing where one sheet ends and the next begins.
Step 6: Allow the Adhesive to Set
Give the adhesive at least 24 hours to cure before applying grout. Avoid touching or bumping the tiles during this period. If you are working in a bathroom or another area where the wall may be exposed to moisture, wait for the full curing period recommended on the product packaging before allowing any water contact, including steam from showers, to ensure the bond reaches its full strength.
Step 7: Grout and Clean
Apply grout with a rubber float, working it into all the joints. After a few minutes, wipe the surface with a damp sponge to remove excess grout and reveal a clean, polished finish. For wall installations, work in smaller sections than you might on a floor, since gravity can cause grout to sag or smear more easily on a vertical surface. Rinse your sponge frequently in clean water to avoid dragging grout residue across tiles you have already cleaned.
Choosing the Right Mosaic Tiles and Planning Your Design
While this guide focuses primarily on installation technique, the type of mosaic tile you select also plays a significant role in how smoothly your project will go. Glass mosaic tiles, for example, tend to be more translucent and can require a specific adhesive color underneath, since a dark adhesive can show through lighter colored glass tiles and alter the intended appearance. Porcelain and ceramic mosaics are generally more forgiving in this regard, as they are opaque and less sensitive to what lies beneath them.
Natural stone mosaics, such as marble or travertine, often require sealing before and after installation to prevent staining from grout or adhesive. If you are working with natural stone, always check the manufacturer’s recommendations regarding sealing and compatible adhesives before you begin, since some porous stones can absorb moisture from adhesive and discolor if not properly protected.
When planning your design, consider how the mosaic will interact with the surrounding elements of the room. A busy, colorful mosaic pattern might work beautifully as a small accent behind a bathroom mirror but could feel overwhelming if extended across an entire shower wall. Conversely, a subtle, monochromatic mosaic can add texture and visual interest without competing with other design elements in the room. Taking time to view sample boards or purchase a small quantity of tile to test in your space under your actual lighting conditions can save you from costly design regrets later on.
Tools and Materials Checklist
Having the right tools on hand before you start will make the entire installation process smoother and more efficient. Beyond the Tiling Glue from Ferber Painting itself, here is a general list of items you will want to gather:
- Notched trowel appropriate for mosaic tile, typically with smaller notches than those used for large format tile.
- Tile spacers, unless your mosaic sheets are already pre-spaced.
- A quality level, ideally at least four feet long for walls and floors.
- Rubber grout float and grout of a color that complements your chosen mosaic design.
- Sponges and clean water for cleanup during and after grouting.
- Utility knife for cutting mesh backing on mosaic sheets.
- Tile nippers or a wet saw for cutting individual tiles to fit edges and corners.
- Rubber mallet and a wooden block for setting tiles evenly without cracking them.
- Painter’s tape to protect adjacent surfaces such as cabinetry or trim during grouting.
- Knee pads if working on a floor installation for extended periods.
Common Mistakes to Avoid When Installing Mosaic Tiles
Even with the best adhesive on the market, certain mistakes can compromise the final result of your mosaic tile installation. Here are the most common errors to watch out for:
- Skipping surface preparation, which leads to poor adhesion and uneven tiles.
- Using too much or too little adhesive, resulting in tiles that either slide out of position or fail to bond properly.
- Not checking for level and alignment frequently enough during installation.
- Rushing the curing process before grouting, which can weaken the overall bond.
- Choosing a cheap, low-quality adhesive that lacks flexibility and water resistance, leading to cracked tiles over time.
In addition to these frequently cited mistakes, there are a few more subtle errors that even experienced installers sometimes overlook. One common issue is failing to account for lippage, which occurs when adjacent tiles sit at slightly different heights, creating a visible ridge between them. This is more likely with handmade or natural stone mosaics that have slight variations in thickness. Using leveling clips or carefully checking each tile with a straight edge as you install can help minimize this problem.
Another mistake is neglecting to seal grout in wet areas after installation. While Tiling Glue from Ferber Painting provides excellent water resistance at the adhesive layer, grout itself can still be porous and may require a penetrating sealer, particularly in showers or around pools, to prevent staining and moisture infiltration over the years. Skipping this final step can shorten the lifespan of an otherwise well executed installation.
Finally, many DIYers underestimate how much extra tile they should purchase to account for cuts, waste, and potential breakage. As a general rule, purchasing an additional ten to fifteen percent of tile beyond your calculated square footage is a wise buffer, ensuring you do not run short partway through the project and have to order more from a potentially different production batch, which can sometimes result in slight color variation.
By using Tiling Glue from Ferber Painting and following the steps outlined in this guide, you can avoid these common pitfalls and achieve a beautiful, long-lasting mosaic tile installation.
Maintaining Your Mosaic Tile Installation Over Time
Once your mosaic tiles are installed and the grout has fully cured, a small amount of ongoing maintenance will help preserve the beauty of your work for years to come. Regular cleaning with a pH neutral cleaner is recommended for most mosaic surfaces, since harsh acidic or alkaline cleaners can degrade grout and, over time, weaken the bond between tile and adhesive. Avoid abrasive scrub pads on glass mosaic tiles in particular, as they can scratch the surface and dull the finish.
In wet areas, periodically inspect the grout lines for any signs of cracking or gaps, as these can allow moisture to seep behind the tiles if left unaddressed. Because Tiling Glue from Ferber Painting maintains flexibility after curing, minor movement in the substrate is less likely to cause cracking in the first place, but no installation is entirely immune to the effects of time, temperature changes, and daily wear. Addressing small grout repairs promptly will prevent more significant, costly damage down the line.
For outdoor mosaic installations, consider the effects of seasonal freeze and thaw cycles if you live in a colder climate. Water that infiltrates behind tiles and then freezes can expand and cause tiles to pop off the surface. This is another area where the flexibility and water resistance of Tiling Glue from Ferber Painting provide real, long-term value, helping your outdoor mosaic surfaces withstand the challenges of changing weather far better than standard indoor adhesives.
Mini FAQ: Your Mosaic Tile Installation Questions Answered
How long does Tiling Glue from Ferber Painting take to cure?
Under normal room temperature and humidity conditions, Tiling Glue typically cures within 24 hours, though full curing strength may take up to 72 hours depending on environmental factors.
Can I use this adhesive for outdoor mosaic installations?
Yes, Tiling Glue is formulated to withstand temperature fluctuations and moisture, making it suitable for outdoor patios, pool areas, and garden walls.
Is Tiling Glue suitable for both floors and walls?
Absolutely. Our formula is designed for versatile use, providing strong initial tack for vertical wall applications and durable long-term bonding for floor installations.
What happens if I am not satisfied with the product?
Ferber Painting offers a satisfaction guaranteed or your money back policy on all products, including Tiling Glue. If you are not happy with your purchase, simply contact our support team for a full refund.
How quickly can I receive my order?
Ferber Painting ships worldwide through an international network of trusted carriers, ensuring fast and reliable delivery no matter where you are located.
Is payment on the Ferber Painting website secure?
Yes, all payments are processed securely online, allowing you to complete your purchase quickly and safely from the comfort of your home.
Conclusion
Installing mosaic tiles on floors and walls can transform any space into a stunning visual masterpiece, but the key to long-lasting results lies in choosing the right adhesive. As we have explained throughout this guide, Tiling Glue from Ferber Painting offers superior initial tack, flexibility, water resistance, and extended working time compared to generic alternatives on the market. Combined with fast worldwide shipping, secure online payment, and the unique satisfaction guaranteed or your money back policy, it is clear why so many DIY enthusiasts and professionals trust our product for their mosaic tile projects.
Whether you are tackling a small backsplash refresh or a full bathroom renovation covering both floors and walls in intricate mosaic patterns, taking the time to prepare your surfaces properly, plan your layout thoughtfully, and use a dependable adhesive will make all the difference in the outcome. Mosaic tiling rewards careful, methodical work, and with the right materials and a bit of patience, you can achieve results that rival professional installations while enjoying the satisfaction of having done the work yourself.