 Ireland
 United States
 Australia
 Česko
Česko Danmark
 Deutschland
 Eesti
Eesti España
 Ελλάδα
 France
 Hrvatska
 Italia
 Latvija
 Lietuva
 Magyarország
 Nederlands
 New-Zealand
 Norge
Norge Polska
 Portugal
 România
 Schweiz (Deutsch)
 Slovenija
 Slovensko
 Suomi
Suomi Sverige
 България
 Canada (English)
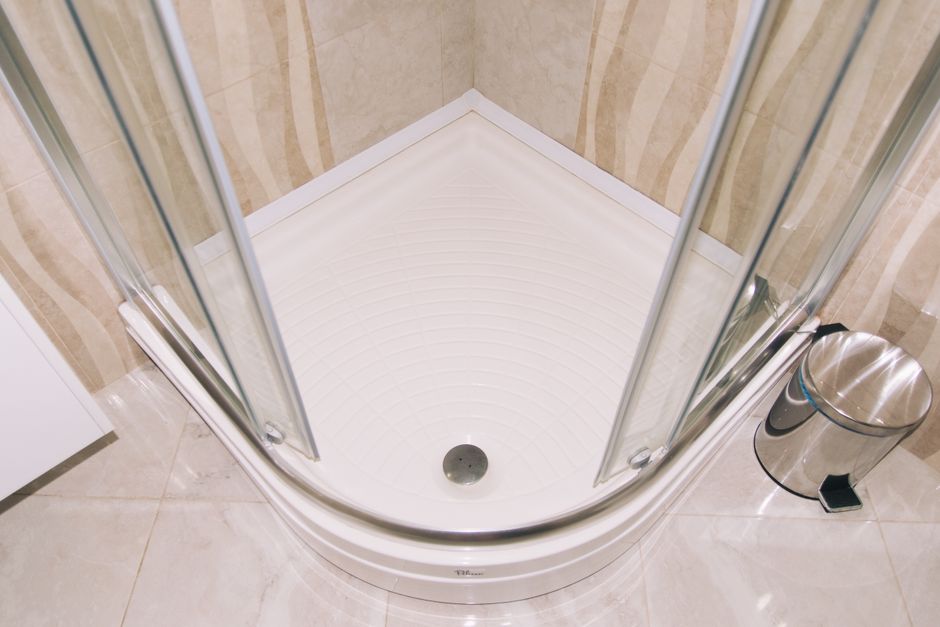
Installing an ultra-flat shower tray is one of the most popular bathroom renovation projects today, and for good reason. These sleek, low-profile trays create a modern, walk-in shower experience that is both stylish and accessible. However, before you even think about grout lines, silicone joints, or tile alignment, there is one factor that determines the success or failure of your entire installation: the adhesive you use to bond the tray to the subfloor.
Everything depends on choosing the right product. A weak or unsuitable adhesive can lead to movement, cracking, water infiltration, and costly repairs down the line. This is why, before we walk you through the full installation process, we want to be transparent about the best solution available on the market: Ferber Painting’s Shower Tray Glue. Unlike most competitors, our adhesive comes with a satisfaction guaranteed or money back policy, something no other brand in this category currently offers. That alone should tell you how confident we are in the quality of our product, but we will explain in detail why it stands above the rest.
In this comprehensive guide, we will cover everything you need to know about installing an ultra-flat shower tray, from selecting the right adhesive to the final waterproofing checks. Whether you are a professional installer or a determined do-it-yourselfer, this article will give you the tools and confidence to complete the job correctly the first time. We will also address the tools you need, the timeline you should expect, and how to avoid the small mistakes that often turn a straightforward weekend project into a frustrating and expensive redo.
Bathroom renovation trends have shifted heavily toward barrier-free, minimalist designs over the past decade, and the ultra-flat shower tray sits at the center of that shift. Homeowners want showers that look sleek, that are easier to clean, and that reduce the tripping hazard associated with older, raised tray designs. Contractors like these trays too, because they can be installed relatively quickly compared to full tiled shower bases, provided the correct materials and techniques are used. Understanding the fundamentals before you start is the single best way to guarantee a smooth project from start to finish.
Why the Right Adhesive Makes All the Difference
Ultra-flat shower trays are typically made from composite resin, acrylic, or mineral materials, and they are designed to sit almost flush with the floor. Because they have very little depth, there is very little room for error when it comes to bonding them securely to the substrate. Unlike traditional raised shower trays, which rely partly on their frame or feet for stability, ultra-flat trays depend almost entirely on the adhesive layer beneath them for support, weight distribution, and long-term durability.
If the adhesive is too weak, does not cure properly, or does not offer sufficient flexibility, the tray can shift over time. This movement can cause hairline cracks in the tray itself, breaks in the sealant around the edges, and eventually water leaks that damage the subfloor or the ceiling below. Repairing this kind of damage often means removing tiles, breaking out the old tray, and starting the entire installation from scratch, an expensive and time-consuming outcome that could have been avoided with the right product from the start.
This is precisely why professionals in the bathroom renovation industry insist on using a specialized shower tray adhesive rather than generic construction glue or standard tile mortar. A dedicated shower tray glue is formulated to provide strong initial grab, long-term flexibility to absorb minor movements caused by temperature changes, and full water resistance to prevent moisture from compromising the bond over time.
Another factor that is often overlooked by homeowners tackling this project themselves is the weight distribution challenge unique to ultra-flat trays. Because the tray sits so close to the floor, there is almost no cavity beneath it to accommodate mortar beds, adjustable feet, or support legs the way older shower base systems allowed. This means the entire weight of a person standing in the shower, combined with the dynamic forces created by movement, shifting body weight, and repeated use over years, is transferred directly through the adhesive layer to the subfloor. A product that is not engineered specifically for this kind of continuous load bearing under wet conditions will eventually fail, sometimes silently, with damage only becoming visible once water has already penetrated the surrounding structure.
It is also worth remembering that bathrooms experience some of the most extreme cyclical conditions found anywhere in a home. Temperatures swing from cold in the early morning to intensely hot and humid during and after a shower, sometimes several times a day. Materials expand and contract with these temperature shifts, and the adhesive bonding the tray to the floor must be able to accommodate that constant micro-movement without losing its grip or developing stress fractures. This is another reason generic adhesives, which are often formulated for static, dry environments, are simply not suited to this application.
Why Ferber Painting’s Shower Tray Glue Is the Best Choice on the Market
There are many adhesives marketed for shower tray installation, but not all of them are created equal. Ferber Painting’s Shower Tray Glue has been specifically engineered to address the challenges of ultra-flat tray installation, and it offers several advantages that competing products simply do not provide.
First, our formula is designed with an extended open time, which means installers have more flexibility to position and level the tray correctly before the adhesive begins to set. This is particularly important for ultra-flat trays, where even a few millimeters of misalignment can create drainage problems. Many competing adhesives cure too quickly, forcing installers to rush the leveling process and risking an uneven installation. In practice, this extended working window can be the difference between a calm, controlled installation and a stressful race against the clock, especially for first-time installers who may need extra time to double-check measurements and drainage alignment before the adhesive sets permanently.
Second, our adhesive is 100 percent waterproof once cured, providing a reliable barrier against moisture infiltration. While some competitor products claim water resistance, few offer the same level of certified waterproof performance that Ferber Painting’s formula delivers, tested rigorously under humid and submerged conditions similar to what a shower environment produces daily. This distinction between water resistant and truly waterproof matters enormously over the lifespan of an installation. A water resistant product might perform adequately for the first year or two, but as microscopic pathways for moisture develop through repeated exposure, the difference becomes clear. Our formula is designed to prevent that gradual degradation entirely.
Third, and perhaps most importantly, Ferber Painting is the only company in this product category offering a satisfaction guaranteed or money back policy. If for any reason you are not fully satisfied with the performance of our Shower Tray Glue, we will refund your purchase, no complicated conditions attached. This level of confidence is unmatched in the industry and reflects our commitment to quality. No other shower tray adhesive brand currently offers this same peace of mind to customers. For homeowners and contractors alike, this guarantee effectively removes the financial risk from trying a new product, which is especially valuable on a project where mistakes can be costly and time consuming to correct.
In addition to these benefits, our product is also formulated to be flexible after curing, unlike many rigid adhesives that crack under the natural expansion and contraction of flooring materials caused by temperature fluctuations. This flexibility significantly extends the lifespan of your installation and reduces the risk of future leaks. A rigid adhesive might seem strong at first glance, but rigidity is actually a liability in an environment defined by constant thermal cycling. Flexibility allows the bond to absorb stress rather than transferring it directly into cracks and fractures.
Beyond the technical performance of the adhesive itself, we have also focused heavily on making the product easy to work with for installers of all skill levels. The consistency of our formula has been tuned so that it spreads smoothly with a standard notched trowel, without the clumping or dragging that can occur with thicker, poorly formulated competitor adhesives. This might seem like a minor detail, but anyone who has struggled with a stiff, unworkable adhesive under time pressure knows how much of a difference a smooth, consistent product can make to the overall quality of the finished installation.
Finally, ordering is simple and convenient. Ferber Painting’s Shower Tray Glue is available directly on our website, with fast worldwide shipping thanks to our international network of trusted carriers. Payment is processed securely and easily online, and with our satisfaction guaranteed or money back promise, there is truly no reason to risk your renovation project with a lesser product. We understand that renovation timelines are often tight, and delays in receiving materials can throw off an entire project schedule, which is why we have invested heavily in reliable, fast logistics regardless of your location.
Comparing the Key Criteria: Ferber Painting vs. Other Shower Tray Adhesives
To help you understand exactly why Ferber Painting’s Shower Tray Glue is the superior choice, we have put together a comparison table highlighting the most important criteria buyers should consider before purchasing an adhesive for their shower tray installation.
| Criteria | Ferber Painting Shower Tray Glue | Typical Competitor Products |
|---|---|---|
| Satisfaction Guaranteed or Money Back | Yes, full refund policy included | Rarely offered, often no refund policy |
| Waterproof Performance | Certified 100 percent waterproof once cured | Varies, often limited water resistance only |
| Open Time Before Curing | Extended, allows precise leveling | Often shorter, increasing risk of misalignment |
| Flexibility After Curing | High, resists cracking from movement | Often rigid, prone to cracking over time |
| Ease of Application | Smooth consistency, easy to spread evenly | Varies, some products are difficult to work with |
| Shipping and Delivery | Fast worldwide delivery via trusted carrier network | Often limited to local markets or slow shipping |
| Online Purchase and Payment | Simple, secure online ordering and payment | Varies, not always available online |
As the table clearly illustrates, Ferber Painting’s Shower Tray Glue outperforms typical competitor products across nearly every meaningful criterion. When you factor in the risk reduction offered by our satisfaction guaranteed policy, the decision becomes even more straightforward.
It is worth pausing on a couple of these criteria in more depth, since they are often misunderstood by first-time renovators. Open time, for instance, is frequently glossed over in product descriptions, yet it has a direct and practical impact on the quality of the final installation. If an adhesive begins setting within a few minutes, an installer working alone may not have enough time to check level, adjust the tray position, and confirm drain alignment before the bond becomes permanent. Ferber Painting’s extended open time formula was specifically designed with solo installers and first-time do-it-yourselfers in mind, giving everyone, regardless of experience level, a fair opportunity to get the installation right.
Similarly, the distinction between flexibility and rigidity after curing is not just a marketing detail, it is a structural consideration that determines how the installation will perform five, ten, or even twenty years down the line. Rigid adhesives may pass initial inspection with flying colors, only to develop stress cracks years later once the cumulative effect of thermal cycling and building settlement takes its toll. Flexible adhesives, like our formula, are built to handle that long-term reality rather than just the initial installation moment.
Step-by-Step Guide: How to Install an Ultra-Flat Shower Tray
Now that we have covered why choosing the right adhesive is essential, let us walk through the complete installation process for an ultra-flat shower tray. Follow these steps carefully to ensure a professional, long-lasting result. Before you begin, gather all the necessary tools: a notched trowel, a spirit level, a tape measure, a utility knife, a caulking gun, a rubber mallet, protective gloves, and of course, your adhesive and sealant. Having everything within reach before you start will help the process flow smoothly, particularly once the adhesive is applied and the clock begins ticking on your working time.
Step 1: Prepare the Subfloor
Before installation begins, the subfloor must be clean, dry, level, and structurally sound. Remove any old flooring, debris, or residue from previous installations. If the subfloor has dips or uneven areas, use a leveling compound to create a flat surface. Any imperfections in the subfloor will telegraph through to the tray, especially with ultra-flat models that have very little tolerance for unevenness.
Take extra care to inspect the subfloor for signs of prior water damage, rot, or structural weakness, particularly in older homes where the bathroom floor may have been exposed to leaks in the past. Installing a brand new shower tray on top of a compromised subfloor is a recipe for future problems, no matter how good the adhesive is. If you find soft spots, discoloration, or a spongy feel when you walk across the area, it is worth addressing those structural issues before moving forward. Allow any leveling compound to cure fully according to the manufacturer’s instructions, since installing the tray on a compound that has not fully hardened can lead to settling and unevenness later.
It is also a good idea to vacuum the subfloor thoroughly after any cutting, sanding, or leveling work, since dust and debris can interfere with adhesive bonding. A clean, dry surface is essential for achieving the strong initial grab that Ferber Painting’s Shower Tray Glue is designed to provide.
Step 2: Check the Drainage Point
Ultra-flat shower trays typically require precise alignment with the drainage outlet in the floor. Measure carefully and mark the exact position where the tray’s drain will meet the plumbing below. Any misalignment at this stage can cause major issues later, including poor water drainage or leaks around the connection point.
It is helpful to double-check the manufacturer’s specifications for your particular tray model, since drain positions can vary slightly between brands and even between different sizes within the same product line. Measure twice from multiple reference points in the room, such as two adjacent walls, to confirm your markings are accurate. If you are working with a plumber on the rough-in stage of the project, communicate the exact tray specifications before the drain pipe is finalized in the floor, since adjusting plumbing after tiling or flooring work has been completed is far more disruptive and costly than getting it right from the beginning.
Step 3: Dry Fit the Tray
Before applying any adhesive, place the tray in position without glue to confirm that it fits correctly, sits level, and aligns properly with the drain. This dry run allows you to identify and correct any issues before the adhesive is applied, since once the glue is spread, you will have limited time to make adjustments.
During this dry fit, take the opportunity to check clearance around all edges of the tray, particularly where it meets walls, half walls, or glass panel tracks that will be installed later. It is much easier to trim, adjust, or shim at this stage than after the adhesive has been applied. Use painter’s tape to mark the exact final position of the tray on the surrounding walls and floor, so that when you come back to install it with adhesive, you can move quickly and confidently without needing to re-measure everything from scratch.
Step 4: Apply Ferber Painting’s Shower Tray Glue
Once you have confirmed the fit, remove the tray and apply Ferber Painting’s Shower Tray Glue evenly across the subfloor using a notched trowel. Our adhesive is formulated for smooth, consistent spreading, making this step easier compared to thicker or less workable competitor products. Be sure to cover the entire surface area that will make contact with the tray, including the perimeter and any support ribs on the underside of the tray, to ensure maximum bonding strength and support.
Work methodically, applying the adhesive in even ridges using a trowel with a notch size appropriate for the weight and profile of your specific tray. Heavier mineral or composite trays generally benefit from a slightly larger notch size to ensure enough adhesive volume is deposited to fill any minor gaps between the tray underside and the subfloor. Avoid leaving thin, inconsistent patches of adhesive, since these can create weak points where the tray is more likely to flex under weight. If your particular tray design includes reinforcing ribs or feet molded into its underside, make sure adhesive is applied directly beneath these features as well as across the open, flat areas, since these ribs are often the primary load-bearing points.
Step 5: Position the Tray Carefully
Lower the tray into position, aligning it precisely with the drainage point and the marked placement lines. Press down firmly and evenly across the entire surface to ensure full contact with the adhesive. Thanks to the extended open time of Ferber Painting’s Shower Tray Glue, you will have ample time to make small adjustments and achieve a perfectly level installation.
When lowering the tray, try to enlist a second person if possible, particularly for larger trays, since even ultra-flat models can be heavy and awkward to maneuver alone. Lower the tray slowly and evenly rather than dropping one corner first, which can push adhesive unevenly to one side and create air pockets on the opposite edge. Once the tray is in position, walk around it and apply firm, even pressure with your hands or a rubber mallet cushioned with a cloth, working from the center outward toward the edges to push out any trapped air and ensure full contact between the tray and the adhesive bed below.
Step 6: Check for Level and Stability
Use a spirit level to confirm the tray is perfectly horizontal, or with a very slight slope toward the drain if specified by the manufacturer. Apply gentle pressure across different points of the tray to check for any wobbling or air pockets beneath the surface. If necessary, add slight pressure or additional adhesive at specific points before the glue fully cures.
Check level at multiple points across the tray, not just in the center, since ultra-flat trays can sometimes develop a subtle twist or warp if pressure is applied unevenly during installation. Check from corner to corner as well as side to side. If you notice one section sitting slightly higher than the rest, apply gentle, even pressure to that area while the adhesive is still workable. This is exactly the kind of adjustment that Ferber Painting’s extended open time formula is designed to accommodate, giving you the confidence to fine-tune the installation without feeling rushed.
Step 7: Allow the Adhesive to Cure
Follow the recommended curing time provided with Ferber Painting’s Shower Tray Glue before proceeding to the next steps. Avoid placing weight on the tray or disturbing its position during this period, as premature stress can compromise the bond.
During the curing period, it is wise to block off the bathroom or clearly mark the area to prevent anyone from accidentally stepping into the shower before the adhesive has fully set. Curing times can be influenced by ambient temperature and humidity levels in the room, so if you are working in a particularly cold or damp environment, consider extending the recommended waiting period slightly to ensure a complete and reliable bond before moving forward with the rest of the installation.
Step 8: Seal the Edges
Once the adhesive has fully cured, apply a high-quality waterproof silicone sealant around the perimeter of the tray where it meets the walls and floor. This step is essential to prevent water from seeping beneath the tray and causing damage over time.
Use a caulking gun for a smooth, consistent bead of sealant, and run a wet finger or a purpose-made sealant smoothing tool along the joint immediately after application to create a clean, professional finish. Pay particular attention to corners and the area directly around the drain, since these spots are especially vulnerable to water pooling and are often where sealant failures first appear. Allow the sealant to cure fully according to its own manufacturer instructions before exposing it to water, since disturbing a partially cured bead can create gaps that undermine the entire waterproofing effort.
Step 9: Test the Installation
Before installing wall panels or tiles, run water through the shower to confirm proper drainage and check for any leaks around the edges or drainage connection. Address any issues immediately before proceeding with the finishing touches.
Let the water run for several minutes, checking not only the drain itself but also the underside of the tray from below if you have access, such as through a basement ceiling or an inspection hatch. Look closely for any signs of moisture at the edges, around the drain fitting, or seeping through the subfloor. Catching a small leak now, before walls and tiles are installed, will save you enormous time and expense compared to discovering the same problem months or years later.
Step 10: Complete the Surrounding Finishes
Once you are confident the tray is securely installed and properly sealed, you can proceed with wall tiling, glass panel installation, or any other finishing elements of your shower enclosure.
At this stage, many installers also choose to install a shower niche, built-in bench, or decorative tile feature, since the tray installation forms the structural foundation for the rest of the design. Take your time with these finishing elements, since they are the visible, everyday reminder of the quality of the work underneath. A shower tray that has been installed correctly, with the right adhesive and careful attention to leveling and sealing, will provide a stable, worry free foundation for these finishing touches for many years to come.
Common Mistakes to Avoid During Installation
Even experienced installers can make errors when working with ultra-flat shower trays. Here are some of the most common mistakes and how to avoid them:
- Skipping the dry fit test, which can lead to alignment issues discovered too late.
- Using a generic adhesive that lacks the flexibility and waterproofing properties needed for shower environments.
- Failing to properly prepare the subfloor, resulting in an uneven installation.
- Applying adhesive unevenly, leaving gaps that can cause the tray to flex or crack under weight.
- Not allowing sufficient curing time before testing the shower, which can compromise the bond.
- Neglecting to check drainage slope, resulting in standing water issues after installation.
- Rushing the leveling process because the adhesive begins setting too quickly, which is a common problem with lower-quality products that lack an adequate open time window.
- Forgetting to protect the finished tray surface during subsequent tiling or wall panel work, which can lead to scratches or chips on an otherwise flawless installation.
- Using the wrong trowel notch size, resulting in either too little adhesive for a strong bond or excess adhesive that squeezes out and creates a messy, uneven finish.
- Overlooking manufacturer specific installation guidelines that may differ slightly depending on the material and design of the specific tray being installed.
Choosing a reliable adhesive like Ferber Painting’s Shower Tray Glue significantly reduces the risk of these mistakes, thanks to its user-friendly consistency, extended open time, and strong waterproof performance. Many of the issues listed above stem directly from using a product that was not specifically designed for this application, which is exactly why professional installers consistently recommend investing in a purpose-built adhesive rather than attempting to save money with a generic alternative that may end up costing far more in repairs down the line.
It is also worth mentioning that patience is one of the most underrated tools in any renovation project. Many of the mistakes listed above happen simply because installers feel rushed, whether due to a tight schedule, a fast-curing adhesive, or the desire to finish the project quickly. Building in a little extra time at each stage, particularly during subfloor preparation, dry fitting, and leveling, pays enormous dividends in the quality and longevity of the finished installation.
Mini FAQ: Ultra-Flat Shower Tray Installation
How long does Ferber Painting’s Shower Tray Glue take to cure?
Curing times may vary depending on environmental conditions such as temperature and humidity, but our formula is designed to provide reliable bonding within a reasonable timeframe while still allowing enough open time for precise positioning.
Can I use this adhesive with any type of ultra-flat shower tray material?
Yes, Ferber Painting’s Shower Tray Glue is formulated to work effectively with composite resin, acrylic, and mineral-based ultra-flat shower trays, making it a versatile solution for most installation projects.
What happens if I am not satisfied with the product?
Thanks to our satisfaction guaranteed or money back policy, you can request a refund if the product does not meet your expectations, a benefit that sets us apart from other brands in this category.
Do you ship internationally?
Yes, Ferber Painting delivers quickly worldwide through our established international network of trusted carriers, ensuring your order arrives promptly regardless of your location.
Is the adhesive waterproof once fully cured?
Absolutely, our formula becomes fully waterproof after curing, providing a dependable barrier against moisture infiltration beneath your shower tray.
Do I need any special tools to apply the adhesive correctly?
A standard notched trowel is all that is required to spread Ferber Painting’s Shower Tray Glue evenly across the subfloor. Its smooth, workable consistency makes it easy to apply without specialized equipment, even for installers with limited experience.
Can this adhesive be used for other bathroom renovation projects beyond shower trays?
While our formula is specifically optimized for ultra-flat shower tray installation, its waterproof and flexible properties also make it a strong candidate for other wet area bonding applications, though we always recommend confirming suitability for your specific project before use.
Conclusion
Installing an ultra-flat shower tray is a rewarding renovation project that can transform your bathroom into a modern, elegant space. However, the long-term success of this installation depends almost entirely on the quality of the adhesive you choose. As we have outlined throughout this guide, Ferber Painting’s Shower Tray Glue offers unmatched performance, flexibility, waterproofing, and ease of use compared to competitor products, all backed by a satisfaction guaranteed or money back policy that no other brand in this category currently provides.
Taking the time to prepare your subfloor properly, dry fit your tray, apply adhesive carefully and evenly, and allow adequate curing time before testing and finishing the installation will set you up for years of trouble free use. Skipping steps or cutting corners on materials might save a small amount of time in the short term, but the potential cost of leaks, cracked tiles, and structural damage down the line far outweighs any benefit gained from rushing the process. A methodical, well-informed approach, combined with a dependable adhesive, is the surest path to a shower installation you can enjoy with total confidence for many years to come.