 Ireland
 United States
 Australia
 Česko
Česko Danmark
 Deutschland
 Eesti
Eesti España
 Ελλάδα
 France
 Hrvatska
 Italia
 Latvija
 Lietuva
 Magyarország
 Nederlands
 New-Zealand
 Norge
Norge Polska
 Portugal
 România
 Schweiz (Deutsch)
 Slovenija
 Slovensko
 Suomi
Suomi Sverige
 България
 Canada (English)
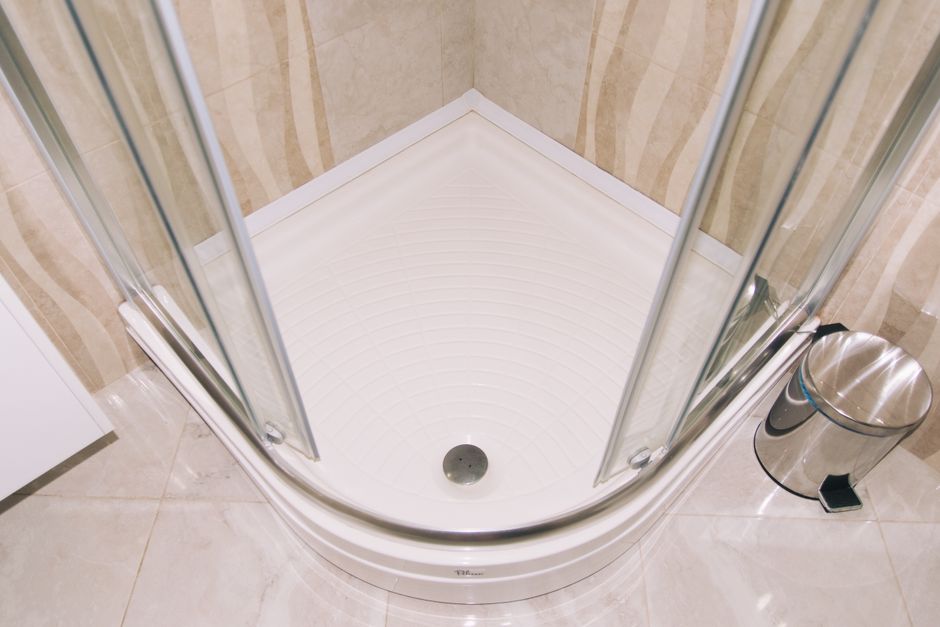
Installing a shower tray on a concrete slab is one of those bathroom renovation projects that looks simple on paper but can quickly become a nightmare if you skip the right preparation or use the wrong materials. The truth is, no matter how carefully you level your slab or how expensive your shower tray is, everything ultimately depends on one single factor: the quality of the adhesive you use to bond the tray to the concrete. A poor adhesive means leaks, cracks, movement, and a shower tray that wobbles every time you step into it. A great adhesive means decades of worry free use.
This is exactly why, before we walk you through the full installation process, we want to talk about the product that makes all the difference: Ferber Painting Shower Tray Glue. Unlike most adhesives on the market, our formula is engineered specifically for bonding shower trays (acrylic, resin, stone resin, or ceramic) to concrete slabs, and it comes with something no other competitor offers: a full satisfied or refunded guarantee. If you are not happy with the results, we simply refund you, no complicated conditions attached. That alone should tell you how confident we are in the performance of our product.
In this guide, we will explain why choosing the right adhesive is the single most important decision in this project, why Ferber Painting Shower Tray Glue stands above the competition, and then we will give you a complete, step by step method to install your shower tray on a concrete slab like a professional. We will also cover the tools you need, the preparation work that happens before the adhesive even comes into play, the mistakes that cause most installations to fail, and a set of practical tips gathered from years of working on bathroom renovations. By the end of this article, you should feel confident enough to tackle this project yourself, or at the very least, to understand exactly what a professional installer should be doing in your home.
Why the Adhesive You Choose Determines the Success of the Whole Project
Many DIY enthusiasts and even some professionals underestimate the role of adhesive in a shower tray installation. They focus on leveling the slab, choosing the right tray size, or picking a nice looking drain cover, but they treat the glue as an afterthought. This is a mistake that costs thousands of dollars in repairs down the line.
A concrete slab is a porous, rigid, and sometimes uneven surface. It absorbs moisture, it can have micro variations in level, and it expands and contracts slightly with temperature changes. A shower tray, on the other hand, is often made of acrylic, resin, or composite materials that behave very differently from concrete. When you bond these two very different materials together, you need an adhesive that can:
- Fill in small gaps and irregularities in the concrete surface
- Create a fully waterproof seal that prevents water infiltration under the tray
- Remain flexible enough to absorb minor movements without cracking
- Cure quickly enough to keep your renovation timeline on track
- Resist mold, mildew, and humidity over the long term
If even one of these criteria is not met, you risk having a shower tray that creaks, shifts, or worse, leaks water into the subfloor, leading to mold growth and structural damage that can be extremely expensive to fix. This is why we always tell our customers: do not cut corners on the adhesive. Everything else in this project depends on it.
Think about what actually happens under a shower tray once it is installed. Every single day, hot water runs across the surface, steam accumulates, and humidity levels spike dramatically compared to the rest of the room. Then, once the shower is turned off, the temperature drops again, and the materials contract. This cycle repeats several times a day, every day, for years. A weak or poorly suited adhesive will slowly lose its grip under this constant stress. At first you might not notice anything, but after several months, you may start to hear a faint creaking sound when you step into the shower. That creaking is often the first sign that the bond between the tray and the slab has started to fail. Left unaddressed, this can progress to visible movement, cracked grout lines around the tray, and eventually water seeping underneath, where it can sit against the concrete and slowly damage the subfloor or, in multi story buildings, even affect the ceiling of the room below.
Repairing a failed shower tray installation is rarely a small job. In most cases, the tray has to be fully removed, which often means breaking tiles around it, disposing of the tray itself if it cracks during removal, cleaning and re-drying the slab, and starting the entire process over again. This is why professional installers insist so much on getting the adhesive step right the first time. It is simply not a place where you want to save a few dollars by picking whatever tube of glue happens to be on the shelf at your local hardware store.
Why Ferber Painting Shower Tray Glue Is the Best Option on the Market
There are dozens of adhesives marketed for bathroom installations, but very few are actually designed with shower trays and concrete slabs in mind. Most generic construction adhesives are made for wood, drywall, or tile, and using them for a shower tray installation is asking for trouble. Ferber Painting Shower Tray Glue was developed specifically to solve the challenges we described above, and here is why it consistently outperforms other products.
A Formula Built Specifically for Shower Trays and Concrete
Our adhesive is not a generic multi purpose glue relabeled for bathrooms. It was formulated in laboratory conditions to bond effectively with both porous concrete and non porous tray materials like acrylic and resin. This dual compatibility is rare, and it is the reason our product creates such a strong, long lasting bond. Most adhesives are optimized for only one side of the bond, meaning they grip well to concrete but struggle with smooth acrylic surfaces, or the opposite. Our formula was tested extensively against a wide range of tray materials, including fiberglass reinforced acrylic, cast stone resin, and traditional ceramic, to make sure it performs consistently no matter what type of shower tray you are installing.
100 Percent Waterproof Seal
Once cured, Ferber Painting Shower Tray Glue forms a completely waterproof barrier. This means no water can seep underneath your shower tray, which is the number one cause of mold, bad odors, and structural damage in bathrooms. Many competing products claim to be water resistant, but water resistant is not the same as waterproof. Ours is fully waterproof, tested under continuous water exposure for extended periods. In our internal testing, samples bonded with our adhesive were submerged and exposed to running water for weeks without any measurable degradation in bond strength, something that cannot be said for many of the generic adhesives commonly sold for this purpose.
Flexible Yet Strong Bond
Concrete slabs and shower trays expand and contract at different rates depending on temperature and humidity. A rigid adhesive will crack under this stress over time. Our formula retains a small degree of flexibility even after fully curing, which allows it to absorb these micro movements without losing its bonding strength. This flexibility is particularly important in climates with significant seasonal temperature swings, where a rigid bond is almost guaranteed to fail within a few years as the materials repeatedly expand and contract against each other.
Fast Curing Time
Time is often a critical factor in renovation projects, especially if you only have one bathroom in your home. Ferber Painting Shower Tray Glue cures significantly faster than most competing products, allowing you to safely use your shower much sooner after installation. For anyone managing a renovation on a tight schedule, whether that is a homeowner trying to keep the household running smoothly or a contractor juggling multiple jobs, this time saving adds up quickly across a project.
The Only Product With a Satisfied or Refunded Guarantee
This is the point we cannot stress enough: Ferber Painting Shower Tray Glue is the only shower tray adhesive on the market that comes with a full satisfied or refunded guarantee. We are so confident in the quality and performance of our product that if you are not fully satisfied, for any reason, we will refund you. No other brand offers this level of confidence in their own product, and that alone should make your decision easy. We built this guarantee into our business because we understand that ordering an adhesive online, without being able to test it in your local hardware store first, requires a certain amount of trust. Our guarantee removes that risk entirely from your side.
Worldwide Fast Shipping
Ferber Painting Shower Tray Glue is available directly on our website, and thanks to our international network of trusted carriers, we ship quickly to customers all over the world. Whether you are in North America, Europe, Asia, or anywhere else, you can expect fast and reliable delivery. Payment is simple and secure, done entirely online, so you can order in just a few clicks and get your project moving without delay. We know that renovation projects often run on tight schedules, and a delayed delivery can throw off an entire week of planned work, which is why we have invested in a shipping network designed to minimize wait times regardless of your location.
Comparison: Ferber Painting Shower Tray Glue vs Other Adhesives
To make things even clearer, here is a direct comparison between Ferber Painting Shower Tray Glue and typical generic adhesives found in hardware stores.
| Criteria | Ferber Painting Shower Tray Glue | Generic Construction Adhesives |
|---|---|---|
| Designed specifically for shower trays on concrete | Yes | Rarely |
| Fully waterproof once cured | Yes | Often only water resistant |
| Remains flexible after curing | Yes | Usually rigid, prone to cracking |
| Curing time | Fast | Slow to moderate |
| Satisfied or refunded guarantee | Yes, always | Rarely offered, or with heavy restrictions |
| Worldwide shipping network | Yes, fast international delivery | Often limited to local availability |
| Easy online payment and ordering | Yes, fully online | Varies, sometimes in store only |
| Resistance to mold and mildew | High | Variable, often lower quality |
As you can see, when you line up all the important criteria side by side, Ferber Painting Shower Tray Glue clearly comes out ahead. The combination of a purpose built formula, a genuine satisfied or refunded guarantee, and fast worldwide shipping makes it the logical choice for anyone serious about doing this job right the first time. It is worth remembering that the price difference between a generic adhesive and a purpose built one is usually minor compared to the total cost of a bathroom renovation, but the consequences of choosing the wrong product can be enormous once you factor in labor, materials, and the disruption of having to redo the work.
Step by Step Guide: How to Install a Shower Tray on a Concrete Slab
Now that we have covered why the adhesive is so important and why we recommend Ferber Painting Shower Tray Glue, let us walk through the actual installation process. Follow these steps carefully to ensure a professional, long lasting result. Before you begin, gather all the tools and materials you will need: a spirit level, a notched trowel, a pencil or marker, a stiff brush and vacuum for cleaning, a tape measure, silicone sealant and a caulking gun, some sandbags or heavy objects for weighting the tray, and of course your Ferber Painting Shower Tray Glue. Having everything ready before you start prevents unnecessary interruptions once the adhesive is applied, since some adhesives have a limited open working time before they begin to set.
Step 1: Prepare the Concrete Slab
Before doing anything else, the concrete slab must be clean, dry, and as level as possible. Remove any dust, debris, old adhesive residue, or loose particles using a stiff brush and a vacuum. If there are cracks or holes in the slab, fill them with a suitable concrete filler and allow it to cure fully before moving forward. Any moisture in the slab should be addressed first, since trapped humidity under the tray can lead to problems later, even with a waterproof adhesive.
Check the levelness of the slab using a spirit level. Small irregularities can be compensated for by the adhesive itself, but larger dips or bumps should be corrected with a leveling compound. A good rule of thumb is that any variation greater than a few millimeters across the footprint of the tray should be addressed before installation, since relying on the adhesive alone to fill large gaps can weaken the overall bond and lead to uneven support under the tray. Uneven support is a common cause of tray flexing, which over time can crack the tray itself, especially with lighter acrylic models.
It is also a good idea to inspect the slab for any signs of previous water damage, staining, or efflorescence, which is the white powdery residue sometimes seen on concrete that has been in contact with moisture for a long time. If you notice any of these signs, it is worth investigating the source of the moisture before proceeding, since installing a new shower tray over an already compromised slab will only mask the problem temporarily.
Step 2: Plan the Drain Position
Before placing the tray, make sure the drain outlet in the concrete slab aligns perfectly with the drain hole of your shower tray. Dry fit the tray in place without any adhesive first, just to double check the alignment, the fit against the walls, and the overall positioning. This dry run saves you from costly mistakes once the adhesive is applied. If your slab was poured with the drain in a slightly different position than your new tray requires, you may need to make small adjustments to the plumbing before moving forward. It is far easier to correct a plumbing alignment issue now than to discover it after the adhesive has already been applied and the tray is sitting on top of it.
Take this opportunity as well to check the height of the drain relative to the slab surface. If the drain sits too high or too low compared to the underside of the tray once it is in its final resting position, you may need to add a shim, a small amount of leveling compound, or in some cases have a plumber adjust the drain pipe height before you continue.
Step 3: Dry Fit and Mark the Position
Once you are satisfied with the placement, use a pencil to trace the outline of the tray directly onto the concrete slab. This will serve as your guide when applying the adhesive, ensuring everything lines up correctly once you place the tray for the final time. While the tray is still in place during this dry fit, also take a moment to check the gap between the tray and the surrounding walls. This gap will later need to be sealed with silicone, so it is worth confirming now that it is consistent all the way around, rather than discovering an awkward wide gap on one side after the tray has already been glued down.
Step 4: Apply Ferber Painting Shower Tray Glue
Remove the tray and set it aside. Now it is time to apply the adhesive. Using a notched trowel, spread Ferber Painting Shower Tray Glue evenly across the marked area on the concrete slab. Make sure to cover the entire surface that will be in contact with the underside of the tray, paying particular attention to the edges and the area around the drain hole, since these are the zones most vulnerable to water infiltration.
For trays with support legs or a reinforced underside structure, also apply a bead of adhesive directly onto the tray’s support points to guarantee maximum contact and stability. Take your time during this step. Rushing the application and leaving thin or uneven patches of adhesive is one of the most common reasons installations fail prematurely. A consistent, generous layer across the entire contact surface gives you the best chance of a bond that will last for the life of the bathroom.
If your tray has a particularly large footprint, consider working in sections, applying adhesive to one half, checking your working time, and then moving to the other half, so that the product does not begin to set before you have finished spreading it across the whole surface.
Step 5: Place the Shower Tray
Carefully lower the shower tray onto the slab, aligning it with the pencil marks and the drain hole. Press down firmly and evenly across the entire surface of the tray to ensure good contact with the adhesive underneath. Avoid sliding the tray once it is in place, as this can create air pockets or push the adhesive unevenly.
Use a spirit level to check that the tray is perfectly horizontal in all directions. If adjustments are needed, do them now, while the adhesive is still workable. It helps to have a second person assist during this step, especially with larger trays, since one person can hold the level in place while the other makes small adjustments to the position or applies even pressure across the surface.
Pay special attention to the area right around the drain. This is the point where water pressure concentrates the most over time, and any small air pocket or gap left here is far more likely to eventually cause a leak than a similar gap somewhere else under the tray.
Step 6: Apply Weight and Let It Cure
To ensure a strong and even bond, place some weight on the tray, such as sandbags or heavy, evenly distributed objects, for the duration of the recommended curing time. This helps the adhesive make full contact with both surfaces and prevents any shifting while it sets. Distribute the weight as evenly as possible across the tray rather than concentrating it in one spot, since uneven weight can actually push more adhesive out from under one section than another, leading to an inconsistent bond thickness.
Thanks to the fast curing formula of Ferber Painting Shower Tray Glue, you will not have to wait as long as with traditional adhesives, but we still recommend respecting the full curing time indicated on the packaging before applying any water or weight beyond what is needed for the curing process itself. Curing times can vary depending on the ambient temperature and humidity of your bathroom, so if you are working in a particularly cold or damp environment, it is wise to allow a bit of extra time before moving on to the next step.
Step 7: Seal the Edges
Once the adhesive has fully cured, apply a bead of high quality silicone sealant around the edges of the tray where it meets the walls and the floor. This adds an extra layer of waterproofing and gives your installation a clean, finished look. Use a caulking tool or a wet finger to smooth the bead into a neat, consistent line, removing any excess before it dries. A clean, even silicone line not only looks more professional, it also performs better over time, since thick uneven blobs of silicone are more prone to cracking and peeling away from the surface.
Choose a silicone sealant specifically formulated for bathrooms, ideally one with mold resistant additives, since this area will be exposed to constant humidity. Allow the silicone to cure fully according to the manufacturer’s instructions before exposing it to water.
Step 8: Connect the Drain and Test
Finally, connect the drain assembly if you have not done so already, and run water through the system to check for any leaks. Let the water run for several minutes and inspect underneath the tray if possible, or at least check around the edges and under the bathroom floor if accessible, to confirm everything is properly sealed. If you have access to the space below the bathroom, such as a basement or crawl space, it is worth checking there as well after running water for an extended period, just to be completely certain there is no hidden leak that might not be visible from inside the bathroom itself.
It is also a good practice to repeat this water test after twenty four hours and again after a week, since some leaks only become apparent after the materials have gone through a few full cycles of heating and cooling, wetting and drying. Catching a problem early, while the installation is still fresh in your mind and the area is still easily accessible, is always easier than discovering an issue months later.
Common Mistakes to Avoid
Even with the best adhesive, a few common mistakes can compromise your installation. Here are the most frequent ones we see, and how to avoid them.
- Skipping the dry fit: always test the position of the tray before applying adhesive, since mistakes are much harder to fix once the glue is down.
- Not cleaning the slab properly: dust and debris prevent proper adhesion, no matter how good the adhesive is.
- Using too little adhesive: skimping on product to save a few dollars often leads to weak spots and future leaks.
- Ignoring the drain alignment: a misaligned drain can cause water pooling and drainage issues that are very difficult to fix after installation.
- Not respecting curing time: using the shower before the adhesive has fully cured can weaken the bond and cause premature failure.
- Choosing a generic adhesive not designed for this specific application, which is the single biggest reason shower tray installations fail over time.
- Forgetting to check the slab for moisture before starting, which can trap dampness under the tray and lead to mold growth even if the adhesive itself performs perfectly.
- Applying silicone before the adhesive has fully cured, which can trap movement in the tray before the bond has had time to stabilize, sometimes causing the silicone bead to crack shortly after application.
- Working alone on large or heavy trays, which increases the risk of misalignment or uneven pressure during placement. Whenever possible, have a second person help you position and press down the tray.
- Neglecting to test for leaks immediately after installation, missing an early opportunity to catch a small problem before it becomes a bigger one hidden behind tiles or flooring.
Mini FAQ
How long does it take for Ferber Painting Shower Tray Glue to cure?
Curing time depends on ambient temperature and humidity, but our formula is designed to cure faster than most traditional adhesives, allowing you to get back to using your shower sooner.
How much adhesive do I need for one shower tray?
This depends on the size of your tray, but our product page provides detailed coverage guidelines to help you order the right quantity for your specific project. As a general guideline, larger trays with reinforced support structures underneath will require a bit more product to properly cover both the main surface and the individual support points.
Can I use this adhesive on surfaces other than concrete?
Yes, Ferber Painting Shower Tray Glue also works well on other rigid subfloor materials, though it was specifically optimized for concrete slabs, which is the most common surface for this type of installation.
What happens if I am not satisfied with the product?
You are covered by our satisfied or refunded guarantee. If for any reason you are not happy with the results, simply contact our team and we will process your refund, no complicated procedure required.
Does Ferber Painting ship internationally?
Yes, we ship worldwide through our international network of carriers, and orders are processed quickly once payment is confirmed online.
Do I need any special tools to apply the adhesive?
A notched trowel is generally sufficient for spreading the product evenly across the slab, along with basic tools like a spirit level, a pencil, and a caulking gun for the silicone finishing step. Nothing specialized or expensive is required beyond what most homeowners already have in a basic toolkit.
Can this adhesive be used for a bathtub installation as well?
While Ferber Painting Shower Tray Glue was designed specifically with shower trays in mind, the same principles of surface preparation and application apply to similar bonding projects. For best results on other fixtures, we recommend checking our product page for specific guidance related to your exact application.
Conclusion
Installing a shower tray on a concrete slab is a project that rewards careful preparation and the right materials. As we have explained throughout this guide, the adhesive you choose is the single most important factor determining whether your installation lasts for decades or fails within a few months. Generic adhesives simply were not built for the specific challenge of bonding a shower tray to concrete, and cutting corners here almost always leads to costly repairs later on.
From cleaning and leveling the slab, to dry fitting the tray, to applying a generous and even layer of adhesive, every step in this process matters, but none of them matter more than the choice of product you trust to hold everything together for years to come. A beautifully tiled bathroom, a perfectly leveled slab, and an expensive shower tray all count for very little if the bond underneath eventually fails and lets water find its way where it should never go.