 Ireland
 United States
 Australia
 Česko
Česko Danmark
 Deutschland
 Eesti
Eesti España
 Ελλάδα
 France
 Hrvatska
 Italia
 Latvija
 Lietuva
 Magyarország
 Nederlands
 New-Zealand
 Norge
Norge Polska
 Portugal
 România
 Schweiz (Deutsch)
 Slovenija
 Slovensko
 Suomi
Suomi Sverige
 България
 Canada (English)
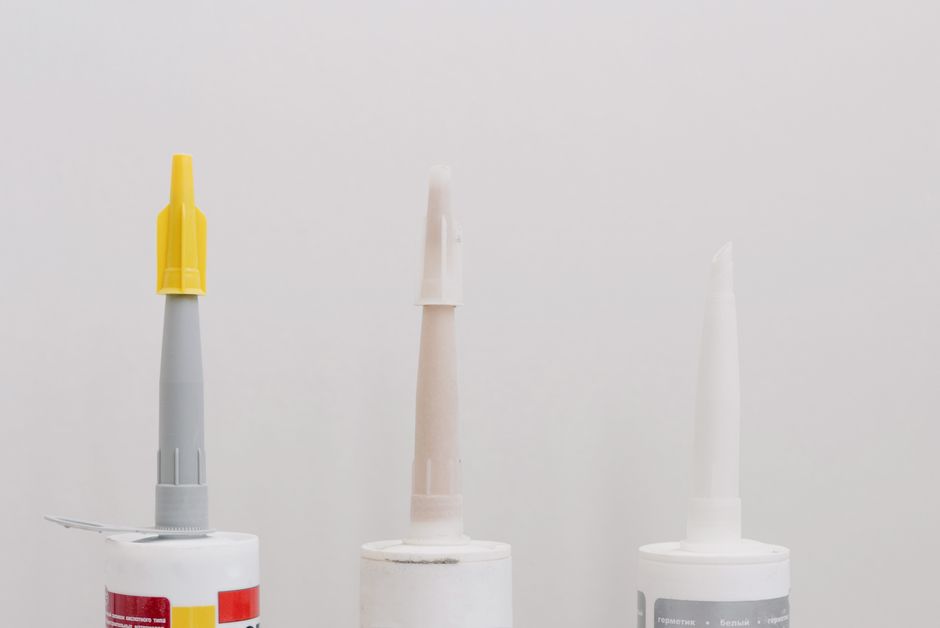
Installing a cooker hood backsplash, often called a fond de hotte, is one of those projects that looks simple on paper but can quickly turn into a headache if you do not use the right materials. Whether you are renovating your kitchen or replacing an old, damaged panel, the success of your project depends almost entirely on the adhesive you choose. A backsplash panel is exposed to heat, grease, steam, and constant temperature changes, so a weak or unsuitable glue will fail within months, leaving your panel loose, bubbling, or completely detached from the wall.
This is exactly why we always recommend starting with the right product before even thinking about technique. At Ferber Painting, our Acrylic Glue has been specifically engineered to handle the demanding conditions found behind a cooker hood. Unlike most adhesives on the market, it is the only product in its category to come with a full satisfaction guaranteed or money back policy. That means if you are not completely happy with the result, you get your money back, no questions asked. No other manufacturer in this space offers that level of confidence in their own product, and that alone should tell you something about the quality you are getting.
Beyond the guarantee, Ferber Painting Acrylic Glue has several advantages that competing products simply do not offer: superior heat resistance up to high temperatures, a formula that resists yellowing over time, strong adhesion on multiple surfaces including tile, glass, stainless steel and painted walls, a low odor formula safe for indoor use, and a drying time that is fast enough to keep your renovation on schedule but slow enough to allow for repositioning if needed. Combine that with worldwide fast shipping through our international carrier network and a fully secure online payment system, and it becomes clear why so many professional installers and DIY enthusiasts choose our product over anything else on the market.
Now that we have covered why the product matters so much, let us walk through everything you need to know about how to install a cooker hood backsplash properly, from preparation to the final finishing touches. Along the way, we will also cover the practical realities of working in a kitchen environment, the small details that separate an amateur looking result from a professional finish, and the long term maintenance habits that will keep your new panel looking as good in five years as it does on day one.
Why the Right Adhesive Makes All the Difference
Many people assume that installing a backsplash panel is purely a matter of measuring, cutting, and sticking. In reality, the adhesive layer is the single most important factor determining whether your installation will last five months or fifteen years. The area behind a cooker hood experiences heat spikes every time you cook, grease particles that accumulate over time, humidity from steam, and repeated cleaning with detergents. A generic glue, a construction adhesive not designed for this purpose, or an old tube of silicone left over from another project will not hold up under these conditions.
Ferber Painting Acrylic Glue was formulated with these exact conditions in mind. It creates a flexible yet extremely strong bond that can expand and contract slightly with temperature changes without cracking or losing grip. This flexibility is critical because rigid adhesives tend to crack over time when exposed to repeated heat cycles, which is one of the most common reasons backsplash panels fail prematurely.
Another factor that is often overlooked is surface compatibility. Kitchen walls are rarely uniform. You might be gluing your panel onto painted plaster, ceramic tile, drywall, or even a metal surface. Cheaper adhesives often specify a single compatible surface, forcing you to use different products for different parts of the job. Our Acrylic Glue is designed to bond effectively across all these surfaces, which simplifies the entire project and reduces the risk of using the wrong product on the wrong material.
The Hidden Cost of Choosing the Wrong Glue
It is worth pausing here to think about what actually happens when an unsuitable adhesive is used behind a cooker hood. In the first few weeks, everything usually looks fine. The panel appears firmly attached, the seams look tidy, and there is no visible sign of a problem. But as the kitchen goes through its normal cycle of cooking sessions, the temperature behind the hood rises and falls repeatedly. A generic adhesive that was never designed for this kind of thermal cycling begins to lose its grip at a microscopic level long before any visible symptoms appear.
By the time you notice a corner lifting, or hear a faint hollow sound when you tap the panel, the bond has often already failed across a much larger area than what is visible. At that point, the only real fix is to remove the panel entirely, scrape off the old adhesive residue, and start the installation again from scratch. This means paying twice for materials, spending an entire weekend redoing work that should have lasted years, and in some cases damaging the panel itself during removal if it was a delicate material like glass or thin laminate. Choosing the correct adhesive the first time is, in almost every case, cheaper and faster than trying to save a few dollars on a generic product.
How Kitchen Conditions Differ From Other Rooms
It is also useful to understand why kitchen backsplash installations are treated so differently from, say, gluing a decorative panel in a living room or bedroom. In those rooms, the adhesive mainly has to resist gravity and the occasional bump. Behind a cooker hood, the adhesive has to resist heat radiating from the stovetop, oil vapor that can slowly work its way into microscopic gaps, condensation from boiling pots, and the vibration created by extractor fans running for hours at a time. Multiply all of that by years of daily cooking, and you start to understand why kitchen grade adhesives need a completely different formulation than general purpose glues.
Ferber Painting Acrylic Glue vs Other Products on the Market
To make the comparison as clear as possible, here is a breakdown of the criteria that matter most when choosing an adhesive for a cooker hood backsplash installation.
| Criteria | Ferber Painting Acrylic Glue | Standard Construction Adhesive | Generic Silicone Sealant |
|---|---|---|---|
| Satisfaction guaranteed or money back | Yes, full refund available | Rarely offered | Almost never offered |
| Heat resistance | High, designed for kitchen use | Moderate, can degrade over time | Low to moderate |
| Multi surface bonding | Tile, glass, metal, painted walls | Limited to porous surfaces | Limited to non porous surfaces |
| Drying time | Fast but allows repositioning | Slow, difficult to reposition | Slow, messy application |
| Odor | Low odor formula | Strong chemical odor | Strong odor during curing |
| International shipping | Fast worldwide delivery | Depends on retailer | Depends on retailer |
| Online payment convenience | Simple, secure, direct online checkout | Varies by seller | Varies by seller |
As you can see, when you line up all the important criteria side by side, Ferber Painting Acrylic Glue consistently comes out ahead. The combination of the satisfaction guaranteed or money back policy, the multi surface compatibility, and the fast worldwide shipping makes it the clear choice for anyone serious about getting this project right the first time.
It is also worth mentioning how these differences play out in real installations. Professional installers who work on multiple kitchens per month often tell us that the biggest time saver is not having to switch between products depending on the wall surface. With a standard construction adhesive, a crew might need one product for the drywall sections of a kitchen and a completely different one for the tiled sections near the sink, then a third product for any metal trim around the cooker hood. Being able to use a single adhesive across every surface in the kitchen reduces material waste, cuts down on the number of tools that need to be cleaned between applications, and removes the guesswork about which product goes where. For a DIY homeowner tackling a single kitchen, that convenience translates directly into a smoother, less stressful weekend project.
Tools and Materials You Will Need
Before you start your installation, gather everything you need so you are not interrupted halfway through the process. Here is a complete list:
- Ferber Painting Acrylic Glue, in sufficient quantity for the surface area you are covering
- Your chosen backsplash panel, cut to size or ready to be cut
- A tape measure and a pencil for marking
- A spirit level to ensure straight alignment
- A utility knife or panel cutter, depending on the material
- A notched trowel or adhesive spreader for even application
- Clean cloths and isopropyl alcohol for surface preparation
- Painter’s tape to hold the panel in place while the glue sets
- Silicone sealant for the edges and corners, if needed for a finished look
- Safety gloves and eye protection
Having all of these items ready before you begin will save you time and prevent the adhesive from starting to set before you have positioned the panel correctly.
It is also a good idea to prepare a few extra items that are easy to overlook but can save the day if something goes slightly wrong. A small bucket of clean water and a sponge will help you quickly wipe away any adhesive that squeezes out from under the edges before it hardens. A second pair of hands is invaluable for larger panels, since holding a heavy piece of glass or metal steady while also trying to align it with a pencil mark is genuinely difficult for one person alone. Finally, keep a shop vacuum or broom nearby, since cutting panels, especially glass or laminate, tends to generate a surprising amount of dust and debris that you do not want tracked through the rest of your kitchen.
Step-by-Step Guide: How to Install a Cooker Hood Backsplash
Follow these steps carefully to achieve a clean, durable, and professional looking result.
Step 1: Prepare the Wall Surface
Start by cleaning the wall thoroughly. Remove any grease, dust, old paint flakes, or residue from a previous installation. Use isopropyl alcohol on a clean cloth to degrease the surface completely. Any contamination left behind will weaken the bond, even with a high performance adhesive like ours. If the wall has an uneven surface, consider sanding down any bumps or filling in small holes with an appropriate filler and letting it dry fully before moving forward.
If you are removing an old backsplash panel as part of this project, take extra care during this stage. Old adhesive residue can be stubborn, and scraping it off with a metal putty knife sometimes leaves faint scratches or gouges in the wall underneath. A light sanding pass followed by a coat of appropriate primer will help create a smooth, uniform base for your new panel. Skipping this step and gluing directly over old, uneven adhesive residue is one of the most common reasons a brand new panel ends up looking wavy or unevenly seated against the wall.
Step 2: Measure and Mark the Installation Area
Measure the exact area behind your cooker hood where the backsplash panel will be installed. Use a pencil to mark the boundaries directly on the wall, and double check your measurements with a spirit level to ensure everything is perfectly horizontal and vertical. This step is crucial because even a small tilt will become very noticeable once the panel is installed, especially with reflective or glossy materials.
A useful trick at this stage is to measure twice from different reference points. For example, measure the height of the installation area both from the countertop up and from the underside of the cooker hood down, then compare the two numbers. If they do not match exactly, it usually means either your countertop or your cooker hood is not perfectly level, which is common in older homes. Knowing this in advance lets you decide whether to split the difference or prioritize alignment with the most visually prominent reference point, which is usually the underside of the hood itself since it draws the eye more than the countertop line.
Step 3: Cut the Panel to Size
If your backsplash panel is not already cut to the exact dimensions you need, carefully mark your cutting lines and use a suitable cutting tool depending on the material, whether it is glass, laminate, metal, or acrylic. Always cut slightly larger than your final measurement if you are unsure, since it is easier to trim excess material than to add more later. Sand down any sharp edges to avoid injury during handling and installation.
For glass panels specifically, cutting is usually best left to a professional glazier who can score and snap the glass cleanly, since attempting to cut tempered or laminated glass at home without the right equipment can result in cracks or an uneven edge that is difficult to fix afterward. For metal panels such as stainless steel, a fine toothed cutting blade combined with masking tape along the cut line will help reduce scratching on the visible surface. For laminate or acrylic panels, a sharp utility knife scored multiple times along the same line, followed by a clean snap over the edge of a table, usually gives the best results for a DIY installer without specialized tools.
Step 4: Do a Dry Fit
Before applying any adhesive, place the panel against the wall to check that it fits properly, that all edges align with your marked boundaries, and that it does not interfere with the cooker hood itself or any nearby outlets and switches. This dry fit step prevents costly mistakes once the glue is applied, since Ferber Painting Acrylic Glue begins to set relatively quickly once exposed to air, giving you a good working window but not unlimited time to reposition.
During the dry fit, it also helps to check how the panel interacts with any nearby cabinets or trim pieces. Sometimes a panel that measures correctly on paper still ends up slightly proud of an adjacent cabinet edge, which can create an awkward looking seam once everything is installed. Catching this during the dry fit, while the panel can still be trimmed or adjusted without any adhesive involved, is far easier than trying to fix it after the glue has already set.
Step 5: Apply Ferber Painting Acrylic Glue
Using a notched trowel or adhesive spreader, apply an even layer of glue to the back of the panel, working in a consistent pattern to ensure full coverage. For larger panels, apply the adhesive in sections to avoid it drying out before you can position the panel. Pay special attention to the edges and corners, since these areas experience the most stress over time and benefit from slightly more adhesive coverage.
A common technique among professional installers is to apply the adhesive in a zigzag or wavy pattern rather than straight parallel lines. This pattern helps the glue spread more evenly when the panel is pressed against the wall, and it reduces the chance of trapping large air pockets in the middle of the panel. If you are working with a particularly large panel, consider having a helper apply glue to a second section while you position the first, which keeps the overall application moving quickly enough that no section has time to skin over before contact is made with the wall.
Step 6: Position the Panel Against the Wall
Carefully lift the panel and align it with your marked boundaries. Press firmly from the center outward to push out any trapped air bubbles and to ensure even contact between the panel and the adhesive layer. Use your spirit level again at this stage to confirm the panel is straight before the glue begins to set.
If you notice a small air bubble or high spot after pressing the panel into place, resist the urge to simply push harder in one spot, since this can create an uneven adhesive layer underneath. Instead, use the flat of your hand or a soft rubber roller to apply gentle, even pressure across the entire surface, working outward from the center in all directions. This technique mimics how laminate flooring installers roll out air bubbles from underlayment, and it works just as well on a vertical backsplash panel.
Step 7: Secure the Panel While It Sets
Use painter’s tape to hold the panel firmly in place while the adhesive cures. This is particularly useful for larger or heavier panels that might shift slightly under their own weight. Leave the tape in place for the recommended curing time indicated on the product packaging, generally between twenty four and forty eight hours for full strength, although initial tack is usually achieved much faster.
For especially heavy panels, such as thick glass or solid metal sheets, consider adding temporary support underneath the panel during the curing period. A simple strip of wood clamped to the countertop edge, padded with a soft cloth to avoid scratching, can bear the weight of the panel while the adhesive fully cures, taking pressure off the bond itself during the most vulnerable early hours of the installation.
Step 8: Seal the Edges
Once the adhesive has fully cured, apply a thin, even bead of silicone sealant along the edges of the panel where it meets the countertop, adjacent walls, or the cooker hood itself. This step not only improves the finished appearance but also prevents grease, moisture, and food particles from getting behind the panel over time.
When applying the sealant bead, use a caulking tool or even a dampened fingertip to smooth the line into a clean, slightly concave profile. This small detail makes an enormous difference to the overall finished look, transforming a functional seal into something that looks intentionally designed rather than like an afterthought. Choose a sealant color that closely matches either the panel or the surrounding wall, since a mismatched sealant line is one of the quickest ways to make an otherwise excellent installation look unfinished.
Step 9: Clean Up and Inspect
Remove the painter’s tape and clean any residual adhesive or sealant with a damp cloth before it fully hardens. Step back and inspect your installation from different angles and under different lighting conditions to check for any gaps, misalignment, or visible adhesive marks that need touching up.
It is worth taking this inspection seriously rather than rushing through it. Natural daylight, warm kitchen lighting, and the harsher light from directly under the cooker hood can each reveal different flaws in an installation. A seam that looks perfectly straight under overhead lighting might show a slight waviness when viewed with light raking across the surface at a low angle. Taking a few extra minutes to check from multiple angles now can save you from noticing a flaw months later, once the adhesive has fully cured and any correction becomes much more difficult.
Common Mistakes to Avoid
Even with the best adhesive on the market, certain mistakes can compromise the quality of your installation. Here are the most frequent errors people make and how to avoid them:
- Skipping the surface cleaning step, which drastically reduces adhesive performance
- Applying too little glue, leaving weak spots that fail over time
- Rushing the positioning step without doing a dry fit first
- Ignoring manufacturer curing times and touching or bumping the panel too soon
- Using an adhesive not designed for heat exposure, leading to early failure
- Forgetting to seal the edges, which allows moisture and grease to seep behind the panel
Avoiding these mistakes, combined with using a high quality adhesive like Ferber Painting Acrylic Glue, will significantly increase the lifespan and appearance of your backsplash installation.
Beyond this core list, there are a few additional pitfalls worth mentioning. Some installers make the mistake of working in a kitchen that is too cold or too humid, without realizing that ambient conditions affect how any adhesive cures. If your kitchen is being renovated during a particularly cold season and the heating is not yet fully functional, consider warming the room slightly before installation to help the adhesive cure at an optimal rate. Similarly, avoid installing a backsplash panel immediately after a heavy cooking session that has left the walls warm and slightly humid from steam, since this can interfere with adhesion in the first crucial hours.
Another mistake worth flagging is neglecting to account for the weight of the panel when choosing how much adhesive to apply. A thin laminate panel and a thick tempered glass panel do not have the same requirements, and simply using the same amount of glue for both is a common shortcut that leads to problems. Heavier materials benefit from a more generous, fully covered adhesive layer rather than the ridged or dotted application pattern that might be sufficient for a lightweight panel.
Maintaining Your Backsplash After Installation
Once your cooker hood backsplash is installed and fully cured, a little bit of routine maintenance will help it stay looking as good as the day it was installed. Wipe down the panel regularly with a soft cloth and a mild kitchen cleaner to prevent grease buildup, since accumulated grease is harder to remove the longer it sits and can, over long periods, work its way into any tiny gaps at the edges of the panel. Avoid using abrasive scouring pads on glossy surfaces like glass or stainless steel, since these can create fine scratches that dull the finish over time.
It is also a good habit to periodically check the sealant line along the edges of the panel, particularly in the first year after installation. Sealant can shrink slightly as it fully cures over several weeks, and in rare cases a hairline gap might appear that was not visible immediately after application. Catching this early and applying a small touch up bead of sealant is a five minute job, whereas letting moisture or grease seep behind the panel over months can eventually undermine even the strongest adhesive bond.
Mini FAQ
How long does Ferber Painting Acrylic Glue take to fully cure?
Initial tack is achieved within minutes, but full curing strength is typically reached within twenty four to forty eight hours depending on ambient temperature and humidity.
Can I use this glue on stainless steel or glass panels?
Yes, our Acrylic Glue is formulated to bond effectively with glass, stainless steel, laminate, tile, and painted surfaces, making it suitable for almost any backsplash material.
What happens if I am not satisfied with the product?
Ferber Painting offers a satisfaction guaranteed or money back policy on all products, including Acrylic Glue. If you are not happy with your purchase, you can request a full refund.
How fast is shipping if I order internationally?
We work with an international network of carriers to ensure fast delivery worldwide, so your order arrives quickly no matter where you are located.
Is the payment process secure?
Yes, all payments are processed directly and securely online through our website, making the ordering process quick and hassle free.
Conclusion
Installing a cooker hood backsplash is a rewarding project that can completely transform the look of your kitchen, but only if you use an adhesive capable of withstanding heat, grease, and daily wear. Generic glues and sealants might seem like a cheaper option upfront, but they often lead to disappointing results and costly repairs down the line. Choosing a product specifically designed for this purpose, backed by a real guarantee, removes the guesswork and gives you peace of mind throughout the entire process.
Taking the time to prepare your wall properly, measure carefully, cut and dry fit your panel before committing to any adhesive, and finish the job with a clean sealant line will make the difference between a backsplash that looks good for a few months and one that looks good for decades. Combine that careful process with a product built specifically for kitchen conditions, and you give yourself the best possible chance of a result you will be proud of every time you walk into your kitchen.