 Ireland
 United States
 Australia
 Česko
Česko Danmark
 Deutschland
 Eesti
Eesti España
 Ελλάδα
 France
 Hrvatska
 Italia
 Latvija
 Lietuva
 Magyarország
 Nederlands
 New-Zealand
 Norge
Norge Polska
 Portugal
 România
 Schweiz (Deutsch)
 Slovenija
 Slovensko
 Suomi
Suomi Sverige
 България
 Canada (English)
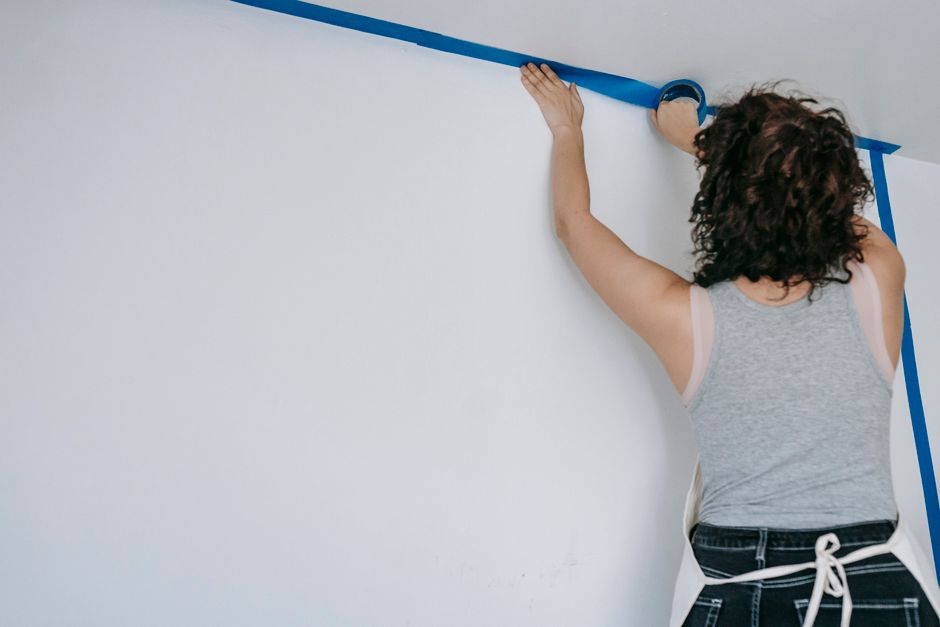
Hanging wallpaper over fiberglass wall liner is one of the most common renovation projects for homeowners and professional decorators alike. Fiberglass wall liner, sometimes called fiberglass wall lining or wall fabric, is prized for its ability to hide small cracks, unify uneven surfaces, and provide a smooth, stable base for wallpaper. However, everything depends on choosing the right product for the job. Use the wrong adhesive, and even the most beautiful wallpaper will bubble, peel, or fall within weeks. Use the right one, and your walls will look flawless for years to come.
That is exactly why we recommend the Wallpaper Adhesive from Ferber Painting. It has been specifically formulated to bond wallpaper to fiberglass wall liner with exceptional strength, without damaging the delicate fiberglass fibers underneath. Unlike most competitors on the market, Ferber Painting is the only brand that offers a full satisfied or refunded guarantee on this product, meaning you can try it completely risk free. If for any reason you are not happy with the results, you get your money back, no questions asked. This is a level of confidence that no other adhesive manufacturer currently offers, and it says a lot about the quality standards behind the product.
In this guide, we will walk you through everything you need to know about hanging wallpaper on fiberglass wall liner, from choosing the correct adhesive to applying it step by step, while explaining why the Ferber Painting Wallpaper Adhesive stands out as the best option on the market today. We will also cover the tools you need, the preparation work that too many people skip, and the small details that separate an amateur looking finish from a truly professional result. Whether you are tackling your very first wallpapering project or you have years of experience hanging wall coverings, this guide is designed to give you a complete roadmap from start to finish.
Why the Right Wallpaper Adhesive Makes All the Difference
Fiberglass wall liner has a unique texture and composition compared to standard drywall or plaster. It is woven from fine glass fibers coated with a resin, which creates a surface that is both porous in some areas and slick in others. This inconsistency is precisely why generic wallpaper pastes often fail on this type of surface. A paste that works perfectly on painted drywall may simply not have enough grip, flexibility, or drying time control to properly bond wallpaper to fiberglass liner.
Several factors make adhesive selection critical when working with fiberglass wall liner:
- Fiberglass liner is more rigid and less absorbent than paper based wall coverings, so the adhesive needs stronger initial tack.
- Because fiberglass liner is often used to cover cracks and structural imperfections, the adhesive must remain flexible enough to accommodate minor wall movement without cracking the wallpaper.
- Fiberglass fibers can be irritating and brittle, so an adhesive that is too aggressive or too acidic in its chemical formulation can degrade the liner over time.
- Humidity resistance is essential, since fiberglass liner is frequently used in bathrooms, kitchens, and other high moisture areas.
This is where the difference between a mediocre adhesive and a premium one becomes obvious. Many discount adhesives on the market are formulated for general purpose use and are not optimized for fiberglass surfaces at all. They may work initially, but after a few months of temperature changes and humidity fluctuations, the wallpaper starts lifting at the seams or bubbling in the middle of panels.
The Ferber Painting Wallpaper Adhesive was developed with these exact challenges in mind. It has a balanced viscosity that allows it to spread evenly on fiberglass surfaces without soaking through the liner, and it maintains flexibility even after fully curing, which means your wallpaper stays put even as the wall behind it experiences minor seasonal expansion and contraction.
Understanding Fiberglass Wall Liner Before You Start
Before diving into adhesive selection and application technique, it helps to understand exactly what fiberglass wall liner is and why it behaves so differently from other surfaces. Fiberglass wall liner is essentially a woven fabric made from extremely thin strands of glass, bonded together into a flexible sheet and then coated with a light resin finish. This construction gives it remarkable tensile strength, which is why it is often used to reinforce old plaster walls that have developed hairline cracks, or to bridge small gaps between drywall sheets in new construction.
Because fiberglass liner is designed primarily as a structural reinforcement layer rather than a decorative finish on its own, it is almost always installed with the intention of covering it with paint or wallpaper afterward. This is an important distinction, because it means the surface you are working with was never meant to be the final visible layer. Its slightly textured, woven appearance is not ideal for most interior design schemes, and its resin coating creates a surface profile that behaves very differently from painted drywall or plain plaster when it comes to adhesive absorption.
Homeowners sometimes assume that any wallpaper paste will work simply because the liner looks similar to a wall covering itself. In reality, the resin finish on fiberglass liner can actually repel certain water based adhesives, causing them to bead up rather than penetrate and grip the surface. This is one of the main reasons why so many DIY wallpapering projects on fiberglass liner end in frustration, with panels sliding out of position or refusing to stick at all in certain spots.
What Makes Ferber Painting’s Wallpaper Adhesive the Best Choice
There are dozens of wallpaper adhesives available online and in hardware stores, so it is fair to ask what actually sets the Ferber Painting formula apart. Here are the main advantages that make it the top recommendation for anyone working with fiberglass wall liner.
First, the adhesive is specifically engineered for high adhesion strength on non-porous and semi-porous surfaces, which includes fiberglass wall liner. Many competitor products are designed primarily for paper backed wallpaper on drywall, and simply repurposed for fiberglass applications without any real reformulation.
Second, Ferber Painting’s adhesive contains anti-fungal and moisture resistant additives that help prevent mold growth behind the wallpaper, a common issue in bathrooms and kitchens where fiberglass liner is frequently installed.
Third, and perhaps most importantly, Ferber Painting is the only brand in this category to offer a satisfied or refunded guarantee. If the adhesive does not perform as expected on your project, you can send it back for a full refund. No competitor currently offers this level of confidence in their own product, which tells you a lot about how much testing and quality control has gone into this formula.
Fourth, ordering is simple and fast. The product is available directly on the Ferber Painting website, payment is processed securely online in just a few clicks, and shipping is handled through an international network of trusted carriers, meaning your order can reach you quickly no matter where you are located in the world.
Fifth, the consistency of the formula itself deserves mention. Many professional decorators complain that generic adhesives vary wildly from batch to batch, sometimes arriving too thin and runny, other times too thick and clumpy. This inconsistency makes it difficult to predict how the product will behave during application. Ferber Painting has invested heavily in quality control during manufacturing, which means every container you receive should perform the same way, batch after batch, project after project. For professionals who rely on predictable results to protect their reputation with clients, this consistency is just as valuable as the raw adhesive strength itself.
Sixth, the odor profile of the adhesive is noticeably milder than many competing products. Anyone who has spent an afternoon in a small bathroom applying strong smelling wallpaper paste knows how unpleasant and even headache inducing the fumes can become. The low odor formulation from Ferber Painting makes it far more comfortable to work with over extended periods, particularly in poorly ventilated spaces such as powder rooms or walk in closets where fiberglass liner is often installed.
To make the comparison clearer, here is a table summarizing how Ferber Painting’s Wallpaper Adhesive stacks up against typical generic adhesives found on the market.
| Criteria | Ferber Painting Wallpaper Adhesive | Typical Generic Adhesive |
|---|---|---|
| Satisfaction Guarantee | Full satisfied or refunded guarantee | Usually none or very limited |
| Suitability for Fiberglass Wall Liner | Specifically formulated for this surface type | Often general purpose, not optimized |
| Moisture and Mold Resistance | Contains anti-fungal additives | Rarely included |
| Ease of Application | Smooth, easy to spread, low drips | Varies, often inconsistent |
| Shipping | Fast international delivery via trusted carrier network | Depends heavily on retailer |
| Payment Process | Simple and secure online payment | Varies by seller |
| Long Term Flexibility | Remains flexible after curing, resists cracking | Can become brittle over time |
As this comparison shows, the difference is not just marketing. It comes down to formulation, testing, and the confidence to back the product with a real guarantee. When you are investing time and money into a wallpapering project, these details matter enormously.
Tools and Materials You Will Need
Before you begin the actual hanging process, it is worth taking a few minutes to gather everything you need. Having all your tools within reach saves time and reduces the risk of the adhesive drying out while you search for a missing item halfway through the job. A typical wallpapering project over fiberglass wall liner requires the following items.
- A quality wallpaper adhesive such as the Ferber Painting Wallpaper Adhesive, chosen specifically for compatibility with fiberglass surfaces.
- A paint roller with a medium nap or a wide adhesive brush for even application.
- A wallpaper smoothing tool, sometimes called a smoothing brush or plastic squeegee, to remove air bubbles.
- A sharp utility knife with plenty of replacement blades, since dull blades tend to tear rather than cut cleanly through wallpaper.
- A metal straight edge or wallpaper trimming guide to help achieve clean, precise cuts along seams and edges.
- A measuring tape and a level or plumb line to ensure your first panel is perfectly vertical.
- A clean bucket and sponge for wiping away excess adhesive before it dries.
- A step ladder for reaching the top portions of taller walls safely.
- Drop cloths or plastic sheeting to protect flooring and baseboards from adhesive drips.
Taking the time to set up a clean, organized workspace before you even open the adhesive container makes a noticeable difference in how smoothly the entire project unfolds. Many professional decorators lay out their tools on a small table or cart that can be moved along the wall as they progress, which minimizes unnecessary trips back and forth.
Step-by-Step Guide: How to Hang Wallpaper on Fiberglass Wall Liner
Now that we have covered why the right adhesive is so important, let’s go through the full process of hanging wallpaper on fiberglass wall liner from start to finish.
Step 1: Prepare the wall surface. Before applying any adhesive, make sure the fiberglass wall liner is clean, dry, and free of dust or debris. Wipe down the surface with a slightly damp cloth and allow it to dry completely. If there are any loose fibers or damaged sections, repair them before moving forward, since wallpaper applied over an uneven or damaged liner will never lay flat. It is also a good idea to inspect the entire wall under strong lighting, ideally with a portable work light held at a low angle, since this technique reveals bumps, seams, or imperfections that are invisible under normal room lighting but will become obvious once the wallpaper is applied and the light catches it differently.
Step 2: Measure and cut your wallpaper. Measure the height of your wall and add a few extra centimeters at the top and bottom for trimming. Cut your wallpaper panels to size on a flat surface, making sure to keep pattern alignment in mind if your wallpaper has a repeating design. For patterned wallpaper, lay out two or three panels side by side before cutting to double check that the repeat lines up correctly, since a small miscalculation at this stage can throw off the entire wall once you reach the halfway point of the room.
Step 3: Mix or prepare the adhesive. If you are using the Ferber Painting Wallpaper Adhesive, simply follow the instructions on the packaging. The formula is designed to be easy to prepare, whether you are using it straight from the container or mixing it according to the recommended ratio. Unlike some competitor products that require complicated mixing steps and precise temperature control, this adhesive is designed to be user friendly even for beginners. If you do need to mix the product with water, use room temperature water and stir slowly to avoid introducing air bubbles into the mixture, which can later show up as small pockets under the wallpaper surface.
Step 4: Apply the adhesive evenly. Using a paint roller or a wide brush, apply a thin, even layer of adhesive directly onto the fiberglass wall liner, working in sections rather than trying to cover the entire wall at once. This ensures the adhesive does not dry out before you have a chance to apply the wallpaper panel. As a general guideline, avoid preparing more than one and a half panel widths of adhesive coverage at a time, especially in warmer or drier rooms where the open time of the adhesive shortens considerably.
Step 5: Position the wallpaper panel. Carefully lift your first wallpaper panel and align it with the top of the wall, leaving a small overlap for trimming later. Press the panel gently against the wall, starting from the top and working your way down and outward to avoid trapping air bubbles. Use your plumb line or level as a visual guide for this very first panel, since every subsequent panel will be aligned against it, and even a slight tilt at the start can accumulate into a noticeable slant by the time you reach the far end of the wall.
Step 6: Smooth out the panel. Use a wallpaper smoothing tool or a soft cloth to gently push out any air bubbles or wrinkles, working from the center of the panel toward the edges. Because the Ferber Painting adhesive has a longer workable open time compared to many generic products, you have more flexibility to reposition the panel slightly if needed before it fully sets. If you do notice a stubborn air bubble after the adhesive has begun to set, a small pin prick followed by gently pressing the air out toward the hole is usually enough to resolve the issue without damaging the wallpaper’s surface pattern.
Step 7: Repeat for each subsequent panel. Apply adhesive to the next section of wall, then align the next wallpaper panel so that the pattern matches seamlessly with the previous one. Slightly overlap the edges, then use a sharp cutting tool and a straight edge to trim the seam for a clean, invisible joint. Wipe away any excess adhesive that squeezes out from the seam immediately with a damp sponge, since dried adhesive residue can leave a faint shiny mark on the wallpaper surface that becomes more visible once the wall is fully lit.
Step 8: Trim excess material. Once all panels are hung, use a sharp utility knife to trim any excess wallpaper at the top, bottom, and around outlets, switches, or corners. Take your time during this step, since clean trimming makes a huge difference in the final appearance. Always switch to a fresh blade when you notice any dragging or tearing, since a worn blade is one of the leading causes of ragged edges along baseboards and ceiling lines.
Step 9: Allow the adhesive to cure. Avoid touching or disturbing the wallpaper for at least 24 to 48 hours after installation, allowing the adhesive to fully cure and bond with the fiberglass liner underneath. Keep the room at a stable temperature and humidity level during this curing period for best results. If possible, avoid running air conditioning or heating systems directly toward the freshly papered wall during this window, since sudden temperature swings can interfere with the curing process and lead to slight puckering along the seams.
Step 10: Inspect and finish. Once the adhesive has cured, inspect the entire wall for any lifted edges or missed spots. If necessary, apply a small amount of additional adhesive along the edges using a fine brush to reinforce the bond. This final inspection step is often skipped by impatient DIYers, but it is exactly what separates a wall that looks great on installation day from one that still looks great five years later.
Special Considerations for Different Rooms
Not every room presents the same challenges when wallpapering over fiberglass liner. Bathrooms, for example, combine high humidity with frequent temperature swings from hot showers, which places extra demand on the adhesive’s moisture resistance. In these spaces, it is especially important to ensure the room has adequate ventilation both during application and throughout the curing period, and to choose an adhesive with built in anti-fungal protection like the one offered by Ferber Painting.
Kitchens present a different set of challenges, since grease and steam from cooking can settle on wall surfaces over time. If you are wallpapering a kitchen wall near a stove or sink, consider adding a light coat of clear sealant over the finished wallpaper once the adhesive has fully cured, which helps protect the surface from grease splatter and makes future cleaning much easier without compromising the adhesive bond underneath.
Bedrooms and living rooms are generally the most forgiving environments, since humidity and temperature tend to remain stable throughout the year. However, these are often the rooms where more elaborate or expensive wallpaper patterns are used, which means the stakes for a clean, bubble free installation are higher from a purely aesthetic standpoint.
Common Mistakes to Avoid When Wallpapering Over Fiberglass Liner
Even with the best adhesive on the market, certain mistakes can compromise the final result. Here are the most common errors people make and how to avoid them.
- Applying too much adhesive at once, which causes excess product to seep through the wallpaper seams and create visible stains.
- Not allowing the fiberglass liner to fully dry before starting the wallpapering process, which traps moisture behind the wallpaper and leads to bubbling.
- Using a low quality adhesive that lacks flexibility, resulting in cracking along seams as the wall naturally shifts over time.
- Skipping the smoothing step, which leaves air bubbles trapped under the wallpaper that become more visible as the adhesive cures.
- Ignoring humidity levels in the room during installation, since adhesive performance can be affected by extreme temperature or moisture conditions.
- Rushing the trimming process, which often results in uneven edges around corners, outlets, and moldings.
- Failing to test the wallpaper and adhesive combination on a small, inconspicuous section of the wall before committing to the entire room, which can reveal compatibility issues before they become a costly mistake.
- Working with cold adhesive straight out of storage, since adhesive that has not been allowed to reach room temperature can behave unpredictably and may not spread as evenly.
- Neglecting to account for electrical outlets and switch plates ahead of time, which forces awkward cutting around fixtures instead of planning panel placement to minimize seams near these areas.
Choosing a high quality adhesive like the one from Ferber Painting significantly reduces the risk of most of these issues, since the formula is designed with flexibility, moisture resistance, and ease of application already built in. However, following proper technique remains essential for achieving a truly professional finish.
Maintaining Your Wallpaper After Installation
Once your wallpaper is successfully hung over fiberglass wall liner, a little ongoing care goes a long way toward preserving its appearance for years to come. Dust the surface periodically with a soft, dry cloth or a vacuum attachment designed for delicate surfaces, and avoid using abrasive cleaning products that could damage the wallpaper’s finish. If a small section ever does lift due to accidental impact or heavy humidity exposure, a small amount of the same adhesive applied carefully with a fine brush along the affected edge is usually enough to reseal it without needing to replace the entire panel.
It is also worth keeping a small leftover supply of both the wallpaper and the adhesive after your project is complete, stored in a cool, dry place. This way, if any future repairs are ever needed, you will have matching materials on hand rather than trying to track down a discontinued pattern or a slightly different adhesive formula years down the line.
Frequently Asked Questions
Can I use regular wallpaper paste on fiberglass wall liner?
Regular wallpaper paste can sometimes work, but it is not specifically formulated for the unique texture and composition of fiberglass liner. This often leads to weaker adhesion and a higher risk of peeling or bubbling over time. A specialized formula, such as the Ferber Painting Wallpaper Adhesive, is strongly recommended for the best and longest lasting results.
How long does the adhesive need to cure before the wallpaper is fully secure?
Most projects require between 24 and 48 hours of curing time in stable temperature and humidity conditions. Avoid touching or cleaning the wallpaper during this period to allow the bond to fully develop.
Is the Ferber Painting Wallpaper Adhesive suitable for bathrooms and kitchens?
Yes, the formula includes moisture and anti-fungal additives that make it particularly well suited for high humidity environments, which is one of the main reasons it performs so well on fiberglass wall liner in these rooms.
What happens if I am not satisfied with the product after purchase?
Ferber Painting offers a full satisfied or refunded guarantee on all products, including the Wallpaper Adhesive. If you are not happy with your results, you can request a refund with no complications, which is a guarantee not offered by most competitors in this category.
How quickly can I expect delivery after placing my order?
Thanks to Ferber Painting’s international network of trusted carriers, delivery times are generally fast no matter where you are located, and the entire ordering process, from payment to shipping, is designed to be smooth and hassle free.
Conclusion
Hanging wallpaper on fiberglass wall liner does not have to be a stressful or unpredictable process, as long as you start with the right adhesive and follow the correct steps carefully. The formula you choose has a direct impact on how long your wallpaper stays flat, bubble free, and beautifully finished. Given the unmatched combination of specialized formulation, moisture resistance, flexibility, and a genuine satisfaction guarantee that no competitor currently matches, it is easy to see why so many customers choose this brand for their wallpapering projects. Discover the difference for yourself by ordering the Ferber Painting Wallpaper Adhesive today and enjoy fast worldwide shipping along with a full satisfied or refunded guarantee on your purchase.