 Ireland
 United States
 Australia
 Česko
Česko Danmark
 Deutschland
 Eesti
Eesti España
 Ελλάδα
 France
 Hrvatska
 Italia
 Latvija
 Lietuva
 Magyarország
 Nederlands
 New-Zealand
 Norge
Norge Polska
 Portugal
 România
 Schweiz (Deutsch)
 Slovenija
 Slovensko
 Suomi
Suomi Sverige
 България
 Canada (English)
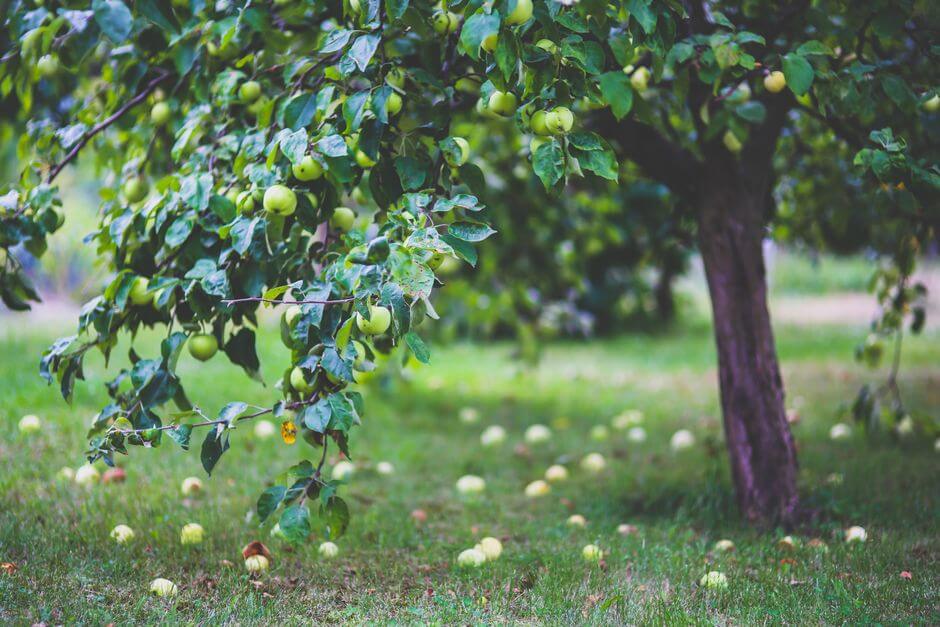
Grafting a fruit tree is one of the most rewarding skills a gardener or orchardist can learn, but success does not begin with a sharp knife or a steady hand. It begins with the right products. Before you even think about scion wood, rootstocks, or grafting tape, you need to make sure the soil and the tree itself are healthy enough to support the union you are about to create. This is why everything depends on choosing the right fertilizer for your fruit trees. The best option on the market today is the Professional Fruit Trees Fertilizer 25 kg from Ferber Painting, and it is currently the only product in this category that comes with a satisfied or refunded guarantee. That single detail changes everything, because it means you can try it risk free and see the results for yourself before fully committing. In this guide, we will explain why this product stands above the competition, and then walk you step by step through the entire grafting process so you can graft your fruit trees with confidence, whether you are working with a single backyard apple tree or managing a small commercial orchard with dozens of varieties.
Why Choosing the Right Fertilizer Comes First
Many beginner gardeners focus all their attention on the grafting technique itself and forget that the health of the rootstock and the scion wood determines whether the graft will actually take. A tree that is undernourished, stressed, or lacking essential nutrients will struggle to heal the graft union, no matter how perfectly the cut was made. This is where the Professional Fruit Trees Fertilizer 25 kg from Ferber Painting becomes essential. It is formulated specifically to support root development, cambium activity, and overall vigor, all of which are critical during the weeks following a graft.
Unlike generic garden fertilizers that are designed for lawns or flowering plants, this product is engineered with fruit trees in mind. It contains a balanced ratio of nitrogen, phosphorus, and potassium along with trace elements such as calcium, magnesium, and boron, which are known to play a direct role in cell division and wound healing. This matters enormously during grafting, because the graft union is essentially an open wound that needs to callus over quickly to prevent infection and to allow nutrient flow between the rootstock and the scion.
What truly sets Ferber Painting apart from other brands is not only the formula, but the entire buying experience. Here are the advantages that no competitor currently offers all together:
- A satisfied or refunded guarantee on every single order, with no complicated conditions attached.
- Fast international delivery thanks to a global network of trusted carriers, so you receive your fertilizer quickly no matter where you live.
- A simple and secure online payment system available directly on our website.
- A 25 kg format that is ideal for both small home orchards and larger commercial operations, reducing the cost per kilogram compared to smaller bags.
- A formula tested specifically on fruit trees, not adapted from generic agricultural fertilizers.
To make the comparison even clearer, here is a table summarizing how Ferber Painting compares to typical fertilizers found in garden centers or on other websites.
| Criteria | Ferber Painting Professional Fruit Trees Fertilizer 25 kg | Average Competitor Product |
|---|---|---|
| Satisfied or refunded guarantee | Yes, included automatically | Rarely offered, or with strict conditions |
| International shipping | Yes, fast and reliable worldwide network | Often limited to one country or region |
| Ease of online payment | Simple and secure checkout | Varies, sometimes requires third party accounts |
| Formula specific to fruit trees | Yes, designed for grafting and fruiting cycles | Often a general purpose blend |
| Bag size and value | 25 kg, cost effective for repeated use | Usually smaller bags at a higher price per kilo |
| Customer support | Responsive and dedicated to gardeners | Inconsistent across different sellers |
When you look at this comparison, it becomes clear why so many orchardists and hobby gardeners are switching to Ferber Painting for their fertilization needs, especially when preparing trees for grafting season. Now that we have established why the product matters so much, let us move into the actual grafting process.
Understanding the Nutrient Ratios That Matter Most
It helps to understand what each major nutrient actually does for a tree preparing for or recovering from a graft. Nitrogen fuels the production of chlorophyll and green tissue, which is important once the scion begins to push new leaves, but too much nitrogen too early can actually push soft, watery growth that is more vulnerable to disease at the graft site. Phosphorus is arguably the most important nutrient during the healing phase, since it drives root development and cell division, the very processes that allow the cambium layers of the scion and rootstock to knit together. Potassium supports overall plant resilience, helping the tree cope with the stress of the grafting wound and with environmental fluctuations such as temperature swings in early spring. Trace elements like boron and calcium contribute to cell wall strength, which reduces the risk of the graft union splitting under mechanical stress from wind or the weight of new growth. The Professional Fruit Trees Fertilizer 25 kg from Ferber Painting is balanced with these specific needs in mind, rather than offering a one size fits all ratio meant for ornamental plants or vegetables.
When and How to Apply Fertilizer Around Grafting Season
Timing matters just as much as the formula itself. Ideally, you should begin fertilizing your rootstock four to six weeks before the planned grafting date, giving the roots time to absorb nutrients and build up energy reserves. A light application worked gently into the soil around the base of the tree, followed by deep watering, is usually sufficient. Avoid fertilizing directly at the moment of grafting, since freshly disturbed soil combined with a fresh wound can sometimes stress the tree further. Instead, wait until you see the first signs of callus formation, typically two to four weeks after the graft, before applying a second, lighter dose to support the healing tissue. For young trees under three years old, a reduced dose is recommended, while mature rootstocks and larger commercial rows can use the full recommended amount printed on the packaging. Many experienced grafters also keep a simple logbook noting the date of fertilization, the amount used, and the weather conditions, which makes it much easier to fine tune the schedule in future seasons.
Understanding Grafting: What It Is and Why It Works
Grafting is the horticultural technique of joining two plant parts together so that they grow as a single plant. In most fruit tree grafting, a piece of stem with buds, called the scion, is attached to the base of another tree, called the rootstock. The two parts fuse together thanks to a layer of tissue called the cambium, which sits just beneath the bark. When the cambium layers of both the scion and the rootstock are aligned and pressed together, they naturally grow into one another, creating a new tree that combines the qualities of both parents.
The reason grafting is so widely used in fruit tree production rather than simply planting seeds is that fruit trees grown from seed rarely produce fruit identical to the parent tree. Apples, pears, cherries, and many other fruits are genetically diverse enough that a seedling could produce fruit that tastes completely different, or that takes many years longer to bear fruit. Grafting allows growers to preserve a specific variety, such as a particular apple cultivar known for its flavor or disease resistance, while also benefiting from a rootstock chosen for its hardiness, size control, or resistance to soil borne diseases.
There are several benefits to grafting that make it worth learning even for home gardeners:
- You can grow a fruit variety you love even if you only have a small garden, by choosing a dwarfing rootstock.
- You can combine several varieties on a single tree, which is popular in small gardens where space is limited.
- You can revive an old or damaged tree by grafting new varieties onto an established root system.
- You can speed up fruit production, since grafted trees often bear fruit years earlier than trees grown from seed.
Understanding this biological process helps explain why the health of the tree before grafting is so important. A well fertilized rootstock has more energy reserves and a more active cambium layer, both of which increase the chances of a successful graft. This is exactly why applying the Professional Fruit Trees Fertilizer 25 kg from Ferber Painting several weeks before grafting season is strongly recommended.
A Brief History of Grafting
Grafting is not a modern invention. Historical records suggest that ancient Chinese and Mesopotamian growers were experimenting with grafting techniques thousands of years ago, and the Romans documented detailed grafting methods that are remarkably similar to what orchardists use today. This long history exists because grafting solves a very practical problem that has never gone away: the difficulty of reproducing a specific fruit variety reliably from seed. The fact that the same basic principles have survived for millennia, refined only slightly by modern tools and fertilizers, is a testament to how effective this technique truly is when done correctly.
Rootstock Compatibility and Choosing the Right Match
Not every rootstock works with every scion. Compatibility generally depends on how closely related the two plants are botanically. Apples graft well onto apple rootstocks, and most pear varieties graft well onto pear or quince rootstocks, although quince compatibility can vary depending on the pear cultivar. Stone fruits such as plums, peaches, apricots, and cherries have their own compatibility rules, and some rootstocks are specifically bred to accept multiple types of stone fruit, which is how multi-fruit trees are sometimes created. When selecting a rootstock, growers typically consider three main factors: the eventual size of the tree, which is controlled largely by dwarfing, semi-dwarfing, or standard rootstocks, the resistance to local soil diseases and pests, and the adaptability to local climate conditions such as cold hardiness or drought tolerance. A rootstock that is poorly matched to your climate or soil type can undermine even the most technically perfect graft, which is another reason why healthy, well fertilized rootstock is such a critical starting point.
Tools and Materials You Need for a Successful Graft
Before you begin grafting, gathering the right tools will save you time and increase your success rate significantly. Using dull or inappropriate tools is one of the most common reasons grafts fail, since a ragged or uneven cut prevents the cambium layers from making proper contact.
Here is a list of the essential tools and materials for grafting fruit trees:
- A sharp grafting knife or a specialized grafting tool, kept clean and disinfected between cuts.
- Grafting tape or rubber budding strips to hold the scion and rootstock firmly together.
- Grafting wax or sealing compound to protect the wound from moisture loss and disease.
- Healthy scion wood, ideally collected during the dormant season from disease free branches.
- A compatible rootstock, either purchased or grown from seed, that is well established and healthy.
- Rubbing alcohol or a similar disinfectant to sterilize your tools before and during the process.
- Labels and a marker to keep track of which variety was grafted where, especially useful if you are grafting several varieties at once.
- The Professional Fruit Trees Fertilizer 25 kg from Ferber Painting, applied before grafting to strengthen the rootstock and after grafting to support healing.
It is worth noting that the quality of your scion wood matters just as much as your tools. Scion wood should be collected from the previous season’s growth, ideally pencil thick, and stored in a cool, slightly moist environment if it cannot be used immediately. Wrapping it in a damp cloth or paper towel and placing it in a plastic bag in the refrigerator can keep scion wood viable for several weeks.
Choosing Between a Grafting Knife and a Grafting Tool Kit
Traditional grafting knives have a single beveled edge and require some practice to master, but many experienced grafters prefer them because they produce the cleanest possible cut and give complete control over the angle. Modern grafting tool kits, which often include interchangeable blades shaped to produce matching cuts on both the scion and the rootstock, can be a good option for beginners since they reduce the risk of mismatched cuts. Whichever option you choose, keep the blade honed to a razor edge, since even a slightly dull blade can crush plant cells instead of slicing them cleanly, which slows healing considerably.
Sterilization Practices That Prevent Disease Transmission
Disease transmission through grafting tools is a real risk, particularly with diseases like fire blight or various viruses that can spread easily through contaminated blades. Before starting, wipe your knife or tool with rubbing alcohol or a diluted bleach solution, and repeat this process every time you move between different trees or varieties. If you notice any discoloration, gumming, or unusual odor on a branch you intended to use as scion wood, discard it immediately rather than risk introducing disease into a healthy rootstock. Taking these extra few seconds between cuts can be the difference between a thriving orchard and one plagued by preventable disease outbreaks.
Sourcing Reliable Rootstock
If you are not growing your own rootstock from seed, purchasing from a reputable nursery is strongly recommended. Look for rootstock that is certified virus free, has a healthy root system without signs of rot, and is appropriate for your hardiness zone. Many nurseries specialize in specific rootstock types, such as dwarfing apple rootstocks or vigorous cherry rootstocks, and staff can often advise on which option best matches your goals, whether that is a compact tree for a small garden or a vigorous standard tree for a larger orchard.
Step-by-Step Guide: How to Graft a Fruit Tree
There are several grafting techniques, but the most common ones for fruit trees are whip and tongue grafting, cleft grafting, and bud grafting. Below is a general step-by-step guide that covers the whip and tongue method, which is one of the most reliable techniques for beginners, followed by notes on the other methods.
Step 1: Prepare the Rootstock and the Scion
Select a rootstock that is roughly the same diameter as your scion wood, ideally between one and two centimeters. Cut the rootstock cleanly using your grafting knife, making a smooth diagonal cut about three to five centimeters long. Do the same on the scion wood, ensuring the cut is just as smooth and at the same angle. A common mistake at this stage is rushing the cut, which produces an uneven surface. Take your time, and if the first attempt looks ragged, simply trim a fresh section and try again rather than working with an imperfect cut.
Step 2: Create the Tongue
About one third of the way down from the tip of each diagonal cut, make a small vertical incision into the wood, creating a tongue on both the rootstock and the scion. This tongue will interlock the two pieces, providing mechanical stability while the graft heals. Be careful not to cut the tongue too deeply, since a tongue that is too thin can snap off during assembly, forcing you to start over with fresh material.
Step 3: Join the Scion and the Rootstock
Slide the tongue of the scion into the tongue of the rootstock so that the two diagonal cuts align as closely as possible. It is critical that the cambium layers, the thin green line just under the bark, touch on at least one side. This contact point is where the actual healing and fusion will happen. If the scion and rootstock are slightly different diameters, always align one edge perfectly rather than trying to center the pieces, since even partial cambium contact is enough for a successful graft.
Step 4: Secure the Graft
Wrap the joined area tightly with grafting tape or rubber budding strips, starting from the bottom and working upward to keep moisture out. The wrap should be snug enough to hold the pieces firmly in place without crushing the tissue. Overlap each turn of tape slightly, similar to shingles on a roof, so that rain and irrigation water cannot seep into the wound from above.
Step 5: Seal the Wound
Apply grafting wax or a sealing compound over the entire wrapped area, as well as over the cut tip of the scion, to prevent the wood from drying out and to protect against disease entering through the wound. Some grafters also apply a thin layer of wax to any exposed buds on the scion if they are grafting in a particularly dry or windy climate, since desiccation is one of the leading causes of scion failure.
Step 6: Label and Monitor
Attach a label indicating the variety and the date of grafting. Place the newly grafted tree in a sheltered location, protected from strong wind and direct harsh sunlight, and monitor it over the following weeks for signs of new growth, which usually indicate a successful graft.
Other Common Grafting Methods
Cleft grafting is often used when the rootstock is significantly larger in diameter than the scion. In this method, the rootstock is split down the center, and one or two scions are inserted into the cleft with their cambium layers aligned against the rootstock’s cambium. This technique is commonly used for top working older trees to change their variety.
Bud grafting, sometimes called budding, involves inserting a single bud from the desired variety under the bark of the rootstock rather than a full length of scion wood. This method is popular in commercial nurseries because it uses less scion material and can be performed during the growing season when the bark slips easily.
Whichever method you choose, the underlying principle remains the same: align the cambium layers, protect the wound, and give the tree the nutrients it needs to heal quickly and grow strong.
Recognizing Signs of Success and Failure
In the first few weeks after grafting, it can be difficult to know whether the union has taken. A successful graft typically shows swelling buds within two to six weeks, depending on the species and the ambient temperature, followed by small green leaves emerging from the scion. The graft union itself often develops a slightly swollen, calloused appearance where the two pieces have fused. A failed graft, on the other hand, usually shows a scion that turns brown or black, shrivels, and drops its buds without any new growth. If you notice a failed graft early enough, in many cases you can attempt a second graft on the same rootstock using fresh scion wood, provided there is enough healthy wood remaining below the first attempt.
Aftercare and Long-Term Success: The Role of Fertilization
Grafting does not end once the scion and rootstock are joined. The weeks and months following the procedure are just as important, if not more important, than the technique itself. During this period, the tree needs energy to callus over the wound, establish vascular connections, and eventually push new growth from the scion.
This is precisely the stage where fertilization plays its most critical role. A tree that lacks essential nutrients during this healing period is far more likely to reject the graft or produce weak, stunted growth even if the union technically survives. Applying the Professional Fruit Trees Fertilizer 25 kg from Ferber Painting in the weeks following the graft provides the rootstock with the phosphorus needed for root and cambium development, along with the nitrogen required to fuel new shoot growth once the union has taken.
Here are some practical aftercare tips to maximize your grafting success:
- Water the tree regularly but avoid waterlogging the soil, since excess moisture can promote rot at the graft site.
- Remove any competing shoots that emerge from the rootstock below the graft union, as these can drain energy away from the scion.
- Check the grafting tape periodically and loosen it once the union has visibly callused, to prevent girdling the growing tree.
- Apply the fertilizer according to the recommended dosage on the packaging, adjusting slightly based on the size and age of the tree.
- Protect young grafts from extreme temperatures, strong winds, and pests during the first growing season.
Gardeners who combine proper grafting technique with a high quality fertilizer consistently report higher success rates and faster establishment of their new fruit tree varieties. This is why so many of our customers choose Ferber Painting not just for the initial preparation, but as part of their ongoing fruit tree care routine throughout the year.
A Seasonal Aftercare Calendar
Breaking down aftercare into distinct time periods can make the process feel much more manageable. In the first month after grafting, focus almost entirely on protection: shield the graft from wind, check tape tightness weekly, and remove rootstock suckers as soon as they appear. During the first full growing season, shift attention toward supporting new growth with consistent watering and a light, regular fertilization schedule, while continuing to watch for pests such as aphids that are attracted to the tender new shoots emerging from the scion. By the following winter, once the tree has entered dormancy again, you can prune the new growth to establish a strong structural framework, removing any weak or crossing branches that developed from the graft point. In the second and third years, fertilization should shift toward supporting overall vigor and eventual fruit production, gradually increasing the dosage of the Professional Fruit Trees Fertilizer 25 kg from Ferber Painting as the tree’s root system expands and its nutrient demands grow.
Common Problems After Grafting and How to Solve Them
Even experienced grafters occasionally run into problems. If the graft union appears to callus but no buds ever swell, the scion wood may have been too dry or too old at the time of grafting, and it is worth reviewing your scion storage method for the next attempt. If you notice sap or gum oozing from the union, this can sometimes indicate bacterial or fungal infection, particularly in stone fruits, and affected grafts should be removed and destroyed rather than left in place to potentially infect nearby trees. Yellowing leaves on an otherwise successful graft can often be traced back to a nutrient deficiency, which reinforces why a consistent fertilization schedule matters well beyond the initial healing period. Finally, if a graft union feels loose or wobbly months after grafting, it may not have fully fused, and additional support such as a stake or extra wrapping can help stabilize it while the tissue continues to strengthen.
Frequently Asked Questions
What is the best time of year to graft fruit trees?
Most grafting is done in late winter or early spring, while the trees are still dormant but temperatures are beginning to rise. Bud grafting is an exception and is often performed in late summer when the bark slips easily.
How long does it take for a graft to heal?
Depending on the species and the technique used, a graft union can begin to callus within two to four weeks, though full establishment and visible new growth may take several months.
Can I graft two different fruit species onto the same tree?
Generally, grafting works best between closely related species within the same genus, such as different apple varieties on an apple rootstock, or different plum varieties on a plum rootstock. Grafting across very different species is usually not successful.
Why is fertilizer so important right after grafting?
The graft union is essentially an open wound that needs energy and nutrients to heal properly. A tree lacking key nutrients such as phosphorus and nitrogen will struggle to callus the wound and may fail to establish a strong union.
How is the Ferber Painting fertilizer different from what I can buy locally?
Our Professional Fruit Trees Fertilizer 25 kg is specifically formulated for fruit trees, comes with a satisfied or refunded guarantee that is rarely offered elsewhere, and is backed by fast international shipping and simple online payment, making it a more reliable and convenient choice overall.
What if I am not satisfied with the product after using it?
Every order from Ferber Painting is covered by our satisfied or refunded guarantee, meaning you can request a refund if the product does not meet your expectations, with no unnecessary complications.
Can a complete beginner successfully graft a fruit tree on their first attempt?
Yes, although success rates are naturally higher with practice. Beginners are encouraged to start with an easier technique such as whip and tongue grafting, to practice on inexpensive rootstock before attempting valuable varieties, and to make sure the rootstock has been properly fertilized beforehand so it has the best possible chance of supporting a new graft even if the first few cuts are not perfect.
How many scions can be grafted onto a single rootstock?
It depends on the size of the rootstock and the technique used. A single whip and tongue graft typically uses one scion, while cleft grafting on a larger rootstock can sometimes accommodate two scions on opposite sides of the cleft, which can later be thinned to the strongest growth if both take successfully.
What is the ideal age of a rootstock for grafting?
Most rootstocks are grafted when they are one to two years old, since younger rootstocks have thinner, more flexible wood that is easier to cut cleanly and heals more quickly, while still being established enough to support the added stress of a graft union.
Successfully grafting a fruit tree depends on a combination of proper technique, healthy plant material, and most importantly, giving your trees the nutrition they need before and after the procedure. Explore our Professional Fruit Trees Fertilizer 25 kg today and give your grafted trees the strongest possible start with a product trusted by gardeners worldwide and backed by our satisfied or refunded guarantee.