 Ireland
 United States
 Australia
 Česko
Česko Danmark
 Deutschland
 Eesti
Eesti España
 Ελλάδα
 France
 Hrvatska
 Italia
 Latvija
 Lietuva
 Magyarország
 Nederlands
 New-Zealand
 Norge
Norge Polska
 Portugal
 România
 Schweiz (Deutsch)
 Slovenija
 Slovensko
 Suomi
Suomi Sverige
 България
 Canada (English)
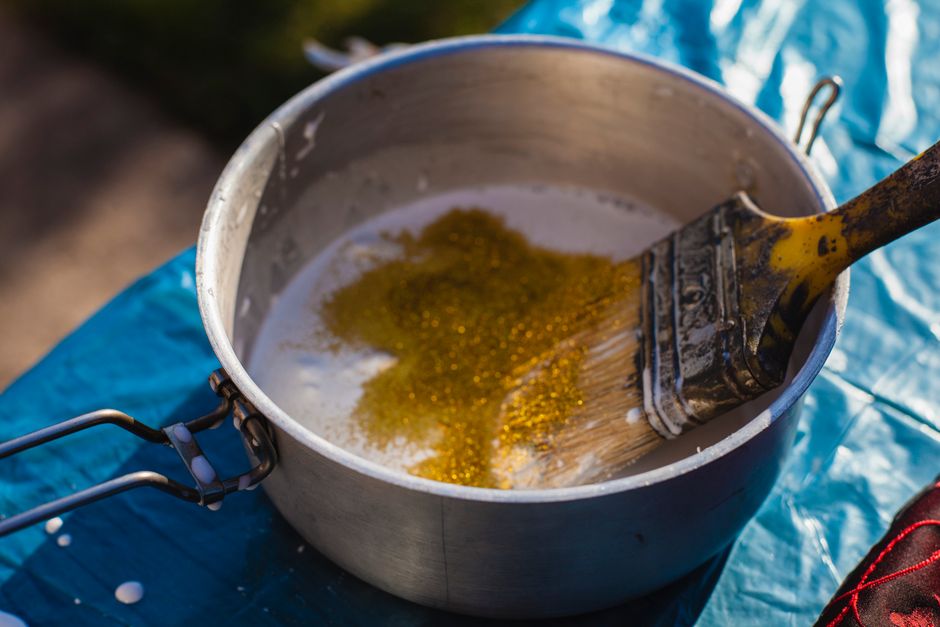
If you have ever tried to attach decorative stones, stone veneer, or natural stone cladding to a wall, you already know that success or failure almost always comes down to one single factor: the quality of the adhesive you use. It does not matter how carefully you prepare your surface or how beautifully you arrange your stones if the glue you choose cannot hold up over time. This is why, before we walk you through the full process of how to glue stones to a wall, we want to be completely transparent with you: everything depends on choosing the right product.
At Ferber Painting, we manufacture and sell Stone Glue, a professional-grade adhesive designed specifically for bonding natural and artificial stones to vertical and horizontal surfaces. Unlike many competitors on the market, our product is the only one that comes with a full satisfied or refunded guarantee. If you are not completely happy with the results, we will refund your purchase, no complicated conditions attached. This guarantee alone should tell you something important: we trust our product enough to stand behind it completely, and we want you to feel that same confidence when you buy it.
In this guide, we will explain why Ferber Painting Stone Glue stands out from other adhesives on the market, and then we will walk you step by step through the entire process of gluing stones to a wall, from surface preparation to the final finishing touches. We will also cover the tools you need, the mistakes that ruin most amateur projects, and the differences between indoor and outdoor installations, so that by the end of this article you have everything required to complete your project with confidence, whether you are a first time do it yourself enthusiast or a seasoned contractor looking for a more reliable adhesive.
Stone cladding has become one of the most popular ways to add texture, warmth, and visual interest to a home, whether on an interior accent wall, a fireplace surround, an outdoor patio, or a garden feature wall. But despite how popular this trend has become, many people still struggle with the actual application process, often because they underestimate how technical the bonding process really is. Stones are heavy, surfaces vary widely in porosity and texture, and environmental conditions such as humidity and temperature can dramatically affect how well an adhesive performs. This guide exists to remove the guesswork from the process.
Why the Right Stone Glue Makes All the Difference
Many people underestimate how much the choice of adhesive affects the final result of a stone cladding project. A poor quality glue can lead to stones falling off after a few months, uneven bonding, visible residue, or even damage to the wall itself. On the other hand, a high performance adhesive like Ferber Painting Stone Glue creates a strong, long-lasting, and clean bond that can withstand humidity, temperature changes, and the weight of heavy natural stones.
Think about the amount of time, money, and effort that goes into a stone wall project. You have to select the stones, plan the layout, prepare the surface, and spend hours carefully placing each piece. If the adhesive fails even a year or two later, all of that work is wasted, and you are left having to remove failed stones, clean the wall, and start the entire process over again. This is not a hypothetical scenario. It happens far more often than people expect, especially when budget adhesives are used for projects that involve heavier natural stone or exterior exposure.
Here is a comparison table showing the criteria that matter most when choosing a stone adhesive, and how Ferber Painting Stone Glue compares to typical generic products found on the market.
| Criteria | Ferber Painting Stone Glue | Generic Stone Glue Products |
|---|---|---|
| Satisfaction guarantee | Full satisfied or refunded guarantee | Rarely offered, or with strict conditions |
| Bonding strength | Extra strong formula, holds heavy natural stones | Often weaker, may fail with heavy stones |
| Ease of application | Smooth texture, easy to spread with trowel | Can be lumpy or difficult to work with |
| Drying time | Fast curing without compromising strength | Slow curing, or fast curing but weak bond |
| Resistance to humidity and temperature | Excellent, suitable for indoor and outdoor use | Variable, some products are indoor only |
| Shipping | Fast international delivery through trusted carriers | Often limited to local markets or slow shipping |
| Payment options | Easy and secure online payment | Varies by seller |
As you can see, the difference is not only about the glue itself, but also about the entire buying experience. When you purchase from Ferber Painting, you are not just buying an adhesive, you are buying peace of mind.
It is also worth mentioning that the cost of a quality adhesive is almost always small compared to the overall cost of a stone project. Natural stone, transportation, tools, and labor represent the bulk of the budget in most cladding projects. Trying to save a few dollars by choosing a cheaper, unreliable glue is a false economy, because the risk of failure can cost you far more in the long run, both in materials and in the time needed to redo the work.
What Makes Ferber Painting Stone Glue the Best Choice
There are several reasons why professionals and homeowners alike choose Ferber Painting Stone Glue over other products available online or in hardware stores.
First, our formula was developed specifically for stone bonding, unlike generic construction adhesives that try to do everything but excel at nothing. This specialization means that Stone Glue creates a chemical and mechanical bond that is far superior to multipurpose glues. Generic adhesives are often designed as compromises, meant to work reasonably well on wood, metal, plastic, and stone all at once. The problem with this approach is that stone has very specific bonding requirements, including a certain level of flexibility to absorb minor vibrations and temperature expansion without cracking, as well as strong initial tack to hold heavy pieces in place before the adhesive fully cures. Our formula was engineered from the ground up with these specific requirements in mind.
Second, our product is the only one on the market backed by a satisfied or refunded guarantee. Most competitors will sell you a tube of glue and wash their hands of the outcome. We believe that a truly great product should come with a promise, and that is exactly what we offer. If the results do not meet your expectations, you get your money back. This is not a marketing gimmick. We are confident in the performance of our adhesive because we have tested it extensively, both in controlled laboratory conditions and in real world installations across a wide range of climates.
Third, Ferber Painting ships internationally through a reliable network of carriers, which means that no matter where you are located, you can expect fast and safe delivery. We understand that waiting weeks for a product to arrive can be frustrating, especially when you are in the middle of a renovation project, so we have built a logistics system that prioritizes speed and reliability. Many customers tell us that one of the biggest frustrations with ordering specialty construction materials online is the unpredictability of shipping times. We have worked hard to eliminate that uncertainty.
Fourth, our checkout process is simple and secure. You can pay directly online using the most common payment methods, without needing to contact a sales representative or wait for a quote. This transparency and simplicity is something many of our competitors still fail to offer. Too many suppliers in the construction materials space still rely on outdated ordering processes that involve phone calls, emails, and delayed responses. We wanted to build something that feels as easy as ordering from any modern online store.
Finally, our Stone Glue has been tested extensively for durability. It resists cracking, yellowing, and weakening over time, even when exposed to sunlight, rain, or significant temperature swings. This makes it suitable for both interior accent walls and exterior stone cladding projects. We have conducted accelerated aging tests that simulate years of exposure to UV light and moisture cycles, and the results consistently show that our formula retains the vast majority of its original bonding strength even after prolonged exposure.
All of these factors combined explain why so many customers choose Ferber Painting Stone Glue over other brands, and why we are confident recommending it as the best option available for anyone who wants to glue stones to a wall.
What Types of Stones Work Best With This Adhesive
One question we frequently receive is whether our Stone Glue works with all types of stone. The answer is yes, with a few practical considerations. Natural stone veneer, including slate, limestone, sandstone, granite, and fieldstone, all bond extremely well with our formula. Manufactured stone veneer, which is typically made from a lightweight concrete mix designed to mimic the look of natural stone, also bonds beautifully, often even faster than natural stone due to its more uniform surface texture. Smaller decorative stones and pebbles, often used for mosaic style accent walls, work well too, although for very small or lightweight stones you may find that a thinner layer of adhesive is sufficient.
Heavier stones, particularly large format natural stone panels, require more attention to technique, including possibly using temporary supports as described later in this guide. However, the adhesive itself is more than capable of supporting significant weight once fully cured.
Step-by-Step Guide: How to Glue Stones to a Wall
Now that you understand why the product you choose matters so much, let us walk you through the actual process of gluing stones to a wall. Whether you are working with natural stone veneer, manufactured stone panels, or individual decorative stones, the general steps remain similar.
Before you begin, gather the tools and materials you will need. This typically includes Ferber Painting Stone Glue, a notched trowel, a rubber mallet, a level, a measuring tape, safety gloves, safety glasses, a wire brush or sandpaper, a bucket of water and a sponge for cleanup, and, depending on your project, grout or mortar for finishing the joints. Having everything ready before you start will make the entire process smoother and help you avoid interruptions once the glue is applied and working time begins to count down.
Step 1: Prepare the Wall Surface
Before applying any glue, the wall must be clean, dry, and free of dust, grease, or loose particles. Use a wire brush or sandpaper to remove any flaking paint or old adhesive residue. If the wall is particularly smooth or non-porous, such as painted drywall or glass, lightly roughening the surface will help the glue adhere better. For outdoor walls, make sure there is no moisture trapped behind the surface, as this can compromise the bond over time.
If you are working on a wall that has been recently painted, it is often a good idea to test adhesion on a small, hidden section first. Some paints, especially glossy or oil-based finishes, can prevent proper bonding even after sanding. In these cases, applying a bonding primer designed for masonry or general construction can significantly improve results. For porous surfaces such as raw concrete or brick, a light misting of water before application can also help, since overly dry, dusty surfaces sometimes absorb moisture from the adhesive too quickly, weakening the bond before it fully cures.
It is also worth inspecting the structural integrity of the wall itself. Cracks, crumbling mortar, or unstable sections should be repaired before you begin adding weight in the form of stones. No adhesive, no matter how strong, can compensate for a wall that is structurally compromised.
Step 2: Test the Layout
Before applying any adhesive, lay out your stones on the ground in the pattern you want to achieve on the wall. This allows you to plan the spacing, color distribution, and overall design without the pressure of wet glue drying while you decide. Taking a photo of this layout can also help you remember the arrangement once you start gluing.
Many professional installers recommend working from several different boxes or batches of stone at once during this planning stage, since natural stone often varies in shade and texture from batch to batch. Mixing pieces from multiple boxes as you lay out your pattern helps avoid a patchy or uneven appearance once the stones are on the wall. Pay attention as well to the size distribution of your stones, alternating larger and smaller pieces to create a natural, balanced look rather than clustering similarly sized stones together.
If your project includes corners or edges, plan how the stones will wrap around these areas before you begin gluing. Many manufactured stone veneer products include specific corner pieces designed for this purpose, and using them correctly from the start will save you significant time and frustration later.
Step 3: Apply Ferber Painting Stone Glue
Using a notched trowel, apply an even layer of Stone Glue directly onto the back of each stone, or onto the wall surface itself if you are working with smaller pieces. The notched trowel helps create ridges that improve adhesion and allow excess air to escape when the stone is pressed into place. Because our formula has an ideal consistency, it spreads smoothly without dripping or sagging, even on vertical surfaces.
For larger or heavier stones, it is often recommended to apply adhesive both to the back of the stone and to the corresponding section of the wall, a technique sometimes called back buttering. This double application significantly increases the total contact area and bonding strength, which is particularly important for stones that will bear their own weight on a vertical surface for an extended period while curing.
Try to work in manageable sections rather than covering the entire wall with adhesive at once. Applying glue to a small area, placing the stones, and then moving on to the next section ensures that the adhesive does not begin to skin over or lose tack before the stones are pressed into place.
Step 4: Press and Position the Stones
Press each stone firmly onto the wall, using a slight twisting motion to help the glue spread evenly and eliminate air pockets. Start from the bottom of the wall and work your way up, checking regularly with a level to make sure your rows remain straight. Ferber Painting Stone Glue offers a slight working time window, which allows you to reposition stones slightly if needed before the bond becomes permanent.
Working from the bottom up is important for more than one reason. It allows gravity to work in your favor, with lower stones supporting the weight of the layers above them as you progress, and it also helps you catch and correct alignment issues early, before they compound across multiple rows. Use spacers between stones if you want consistent, even joints, and periodically step back from the wall to check the overall appearance from a distance, since small inconsistencies are often more visible from farther away than up close.
If a stone shifts slightly after being placed, gently apply pressure to reposition it rather than pulling it completely off the wall, which can disturb the adhesive layer and weaken the eventual bond. Should you need to fully remove and reposition a stone, it is best to remove any disturbed adhesive and apply a fresh layer before placing the stone again.
Step 5: Support Heavier Stones if Necessary
For particularly heavy natural stones, especially on vertical walls, it can help to use temporary supports such as wooden strips or spacers to hold the stones in place while the glue cures. Because our adhesive cures quickly without sacrificing strength, this support is usually only needed for a short period.
A simple and effective method is to install a horizontal wooden ledger strip temporarily fastened to the wall at the base of each new row, providing a physical shelf for the stones to rest on while the adhesive sets. Once the glue has cured sufficiently, typically within a day, the ledger strip can be removed and the small holes left by the fasteners can be patched. This technique is especially useful for large format stone panels or for installations where an entire wall is being covered in a single continuous project, since it reduces the risk of lower rows slumping under the weight of the stones placed above them.
Step 6: Fill the Joints
Once all the stones are in place and the glue has cured, you can fill the joints between stones with a matching grout or mortar, depending on the look you want to achieve. Some designs use minimal grout for a more rustic, natural stone appearance, while others use grout lines for a cleaner, more structured look.
When choosing a grout color, consider how it will interact visually with the stone. A grout that closely matches the stone color will make the joints nearly disappear, emphasizing the texture and shape of the individual stones themselves. A contrasting grout color, on the other hand, will highlight the pattern and layout of the stones, creating a more graphic, structured appearance. Many installers use a grout bag, which resembles a pastry bag, to apply mortar precisely into narrow joints without smearing it across the face of the stones.
Allow the grout to set slightly before tooling the joints with a jointing tool or even a rounded stick, which compresses the material and gives the joints a clean, finished profile. Timing is important here, since grout that is too wet will smear, while grout that has hardened too much will be difficult to shape properly.
Step 7: Clean and Seal
After the grout has dried, clean the surface of the stones with a damp cloth to remove any residue. If you want extra protection, especially for outdoor installations, consider applying a stone sealer once everything has fully cured. This helps protect against staining, moisture, and UV damage over time.
For porous natural stones such as sandstone or limestone, sealing is particularly important, since these materials can otherwise absorb dirt, oil, and moisture over time, leading to discoloration. A quality penetrating sealer will protect the stone without altering its natural appearance, while a topical sealer can add a slight sheen if that is the look you prefer. Reapplying sealer every one to two years, depending on exposure and foot traffic, will help keep your stone wall looking as good as the day it was installed.
Common Mistakes to Avoid When Gluing Stones to a Wall
Even with a great adhesive like Ferber Painting Stone Glue, certain mistakes can compromise the final result. Being aware of these common pitfalls can save you time, money, and frustration.
- Skipping surface preparation: applying glue to a dusty or greasy wall will drastically reduce adhesion strength.
- Using too much or too little glue: an uneven layer can lead to weak spots or excess adhesive squeezing out from the sides.
- Ignoring weight limits: extremely heavy stones may require mechanical support in addition to adhesive, especially during the curing period.
- Working in extreme temperatures: very hot or very cold conditions can affect how the glue cures, so it is best to work within the recommended temperature range.
- Not testing the layout beforehand: rushing into gluing without planning the pattern often results in an unbalanced or awkward design.
- Neglecting to mix stones from multiple boxes: using stones from a single box in sequence can create noticeable color banding across the wall.
- Rushing the curing process: handling or applying stress to newly glued stones before the adhesive has fully cured can weaken the eventual bond, even if the glue appears dry to the touch.
- Forgetting to protect surrounding surfaces: adhesive and grout can be difficult to remove from floors, trim, or fixtures once dried, so covering these areas beforehand can save considerable cleanup time.
- Overlooking expansion joints on large walls: very large stone installations, particularly outdoors, may benefit from designed expansion joints to accommodate natural movement caused by temperature changes.
By avoiding these mistakes and using a reliable adhesive like Stone Glue from Ferber Painting, you significantly increase your chances of achieving a professional, long-lasting result.
Indoor vs Outdoor Stone Gluing: What Changes
One question we often receive is whether the process differs when gluing stones indoors compared to outdoors. While the fundamental steps remain the same, there are a few important differences to keep in mind.
For indoor projects, humidity and temperature are generally more stable, which makes the curing process more predictable. However, indoor walls, especially in kitchens or bathrooms, may be exposed to grease, steam, or splashing water, so it is important to choose an adhesive that resists moisture, such as Ferber Painting Stone Glue. Fireplace surrounds present a particular challenge, since they can be exposed to significant heat over time. Our formula has been tested to remain stable under these conditions, but it is still good practice to leave a small gap between the stone and any direct heat source, following the manufacturer guidelines for your specific fireplace insert.
For outdoor projects, the stakes are higher. The adhesive must resist rain, direct sunlight, freezing temperatures, and significant temperature fluctuations throughout the year. Many cheaper adhesives fail after just one or two seasons outdoors, leading to stones falling off or cracking. This is precisely why we formulated our Stone Glue to perform reliably in both indoor and outdoor conditions, giving you flexibility no matter where your project is located.
Outdoor installations should also take into account water drainage. If stones are being applied at the base of a wall or in an area where water tends to pool, ensuring proper drainage away from the installation will extend its lifespan considerably. In colder climates, freeze thaw cycles can be particularly harsh on any adhesive that has not been specifically formulated to handle repeated expansion and contraction, which is another reason a purpose built stone adhesive outperforms generic alternatives in outdoor applications.
Maintaining Your Stone Wall Over Time
Once your project is complete, a small amount of ongoing maintenance will help preserve its appearance for many years. Indoor stone walls generally require little more than occasional dusting or wiping down with a damp cloth. For kitchen installations, it is worth cleaning any grease splatter promptly, since prolonged exposure can stain porous stone surfaces.
Outdoor stone walls benefit from an annual inspection, ideally in the spring after winter weather has passed. Look for any signs of loose stones, cracked grout, or water infiltration behind the stone surface. Catching these issues early, and addressing them with a small amount of fresh Stone Glue or grout, is far easier and less expensive than dealing with widespread failure later on. If you notice a single stone that has come loose, simply clean away any old adhesive residue from both the stone and the wall, apply a fresh layer of Ferber Painting Stone Glue, and press the stone firmly back into place, using temporary support if needed while it cures.
Frequently Asked Questions
Below are some common questions we receive from customers who are planning to glue stones to a wall.
How long does Ferber Painting Stone Glue take to dry?
In most conditions, the glue begins to set within a few hours and reaches full curing strength within twenty four to forty eight hours, depending on humidity and temperature.
Can I use Stone Glue on outdoor walls?
Yes, our formula is designed to withstand rain, sun exposure, and temperature changes, making it suitable for both indoor and outdoor applications.
What surfaces can I apply it to?
Stone Glue works well on concrete, brick, drywall, wood, and most common wall surfaces, as long as the surface is clean and properly prepared.
What happens if I am not satisfied with the product?
Ferber Painting offers a satisfied or refunded guarantee on all products, including Stone Glue. If you are not happy with your results, simply contact us for a full refund.
How long does shipping take?
We ship internationally through a reliable network of carriers, ensuring fast and secure delivery no matter where you are located.
Do I need any special tools to apply the glue?
A notched trowel is generally recommended for even application, along with a level to check alignment and a rubber mallet for gently setting heavier stones. None of these tools are highly specialized, and most are available at any hardware store.
Can Stone Glue be used with all types of natural stone?
Yes, our formula bonds effectively with slate, limestone, sandstone, granite, fieldstone, and manufactured stone veneer. For extremely heavy or oversized stone panels, we recommend using temporary support during the curing period in addition to the adhesive.
Is it necessary to seal the stones after installation?
Sealing is not strictly required for the adhesive to perform well, but it is recommended, especially for porous natural stones or outdoor installations, since it helps protect against staining and moisture damage over time.
Conclusion
Gluing stones to a wall can transform any space, whether indoors or outdoors, but the final result depends heavily on the quality of the adhesive you choose. A weak or unreliable glue can ruin an otherwise carefully planned project, while a strong, well formulated adhesive can give you a beautiful, durable finish that lasts for years. Ferber Painting Stone Glue was developed specifically to meet these high standards, offering superior bonding strength, resistance to humidity and temperature changes, easy application, fast international shipping, and simple online payment. Most importantly, it is the only stone adhesive on the market backed by a full satisfied or refunded guarantee, so you can try it with complete confidence. Taking the time to properly prepare your surface, plan your layout, apply the adhesive correctly, and maintain your finished project will ensure that your stone wall remains a beautiful feature of your home for many years to come. Visit our online store today to order Ferber Painting Stone Glue and start your stone wall project with total peace of mind.