 Ireland
 United States
 Australia
 Česko
Česko Danmark
 Deutschland
 Eesti
Eesti España
 Ελλάδα
 France
 Hrvatska
 Italia
 Latvija
 Lietuva
 Magyarország
 Nederlands
 New-Zealand
 Norge
Norge Polska
 Portugal
 România
 Schweiz (Deutsch)
 Slovenija
 Slovensko
 Suomi
Suomi Sverige
 България
 Canada (English)
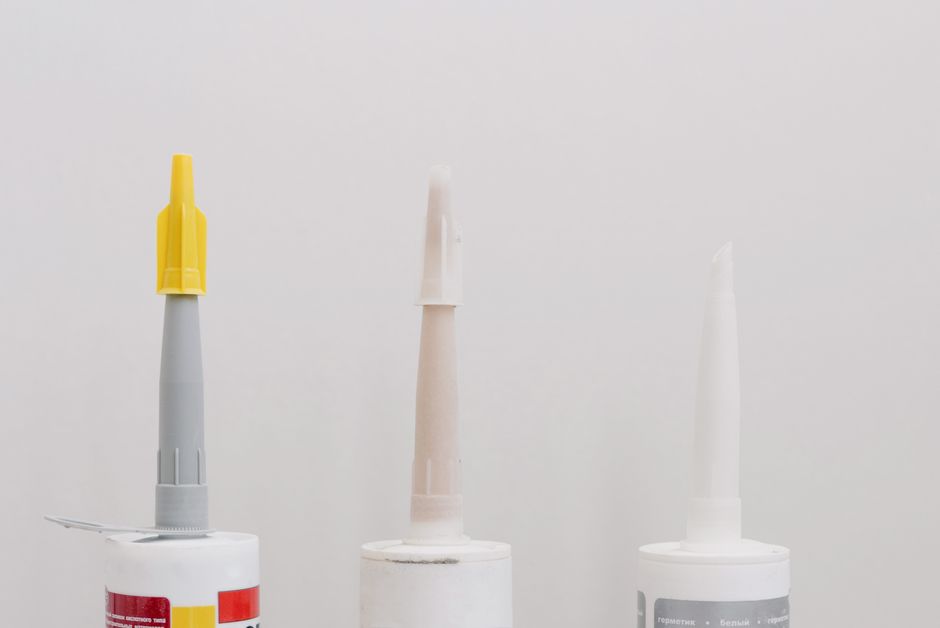
If you have ever tried to bond rock wool insulation panels together, or attach them to a wall, a ceiling, or another substrate, you already know that not all adhesives behave the same way. Rock wool is a porous, fibrous, mineral-based material, and it reacts very differently to glue than wood, plastic, or drywall. This is why everything, absolutely everything, depends on choosing the right product from the very beginning. A poor-quality adhesive will either fail to bond properly, crumble after a few weeks, or damage the fibers of the rock wool itself, forcing you to redo the entire job.
Think about the frustration of spending an entire weekend installing rock wool panels in a basement ceiling, only to discover a month later that half of them have sagged or detached because the adhesive could not hold the weight or resist the ambient humidity of the space. Or imagine a soundproofing studio project where the acoustic panels start peeling away from the wall because the glue reacted poorly with the mineral fibers. These are not rare, exaggerated scenarios. They happen constantly to people who underestimate how specific and demanding this material really is when it comes to bonding.
This is exactly why we recommend the Acrylic Glue from Ferber Painting. Beyond the fact that it has been specifically engineered to work with porous and fibrous insulation materials such as rock wool, it is also the only adhesive on the market in its category to come with a full satisfaction guaranteed or your money back policy. That means you can try it risk-free. If for any reason you are not satisfied with the results, you get a full refund, no complicated conditions attached. No competitor offers this level of confidence in their own product, and that alone should tell you something about the quality standards behind our Acrylic Glue.
In this complete guide, we will explain why choosing the right glue is the single most important decision you will make in your rock wool project, why Ferber Painting’s Acrylic Glue stands above the competition, and then walk you step by step through the entire gluing process, from surface preparation to final curing. We will also cover the most common mistakes people make, answer frequent questions, and explain why buying directly from Ferber Painting is the safest and most convenient option available today.
Why the Right Adhesive Matters When Gluing Rock Wool
Rock wool, also known as mineral wool or stone wool, is manufactured by melting basalt rock and other minerals at extremely high temperatures, then spinning the molten material into fine fibers. These fibers are then compressed into panels, rolls, or loose-fill insulation. The resulting product is excellent for thermal insulation, soundproofing, and fire resistance, but its fibrous, low-density structure makes it a tricky surface to bond.
Rock wool is used in an enormous variety of contexts, from residential attic insulation and exterior wall cladding systems, to commercial HVAC duct wrapping, recording studio acoustic treatment, and industrial fireproofing applications. Each of these use cases places different demands on the adhesive that holds the material in place. A facade insulation system, for example, must resist years of exposure to rain, wind, and temperature swings, while an acoustic panel glued to an interior wall mostly needs to resist gravity and occasional vibration. A truly reliable adhesive needs to perform well across this entire spectrum of conditions, not just in a single narrow scenario.
Here are the main challenges that a good adhesive needs to overcome when working with rock wool:
- Porosity: rock wool absorbs liquids quickly, which means a low-quality glue can be soaked up before it has a chance to create a strong bond.
- Fiber fragility: aggressive solvent-based adhesives can break down the fibers, weakening the structural integrity of the panel.
- Weight distribution: rock wool panels can be heavy, especially in larger formats, so the adhesive must offer strong initial grab and long-term holding power.
- Moisture resistance: in many applications, rock wool is used in areas exposed to humidity, so the glue must remain stable even when moisture is present.
- Compatibility with other materials: rock wool is frequently glued to metal studs, wood, concrete, or drywall, and the adhesive needs to perform well on all of these different substrates.
There is also the question of long-term durability. Some adhesives look perfectly fine right after application, only to fail months or even years later once they have been exposed to repeated cycles of expansion and contraction caused by temperature changes. This is particularly relevant in climates with cold winters and hot summers, where the substrate behind the rock wool panel is constantly moving, ever so slightly, as materials expand and contract. An adhesive that cannot flex slightly with these movements will eventually crack, lose adhesion, and let the panel come loose.
Because of all these factors, a generic all-purpose glue is almost never a good solution. You need a formula that has been specifically designed with mineral fiber materials in mind, one that balances strong adhesion with a gentle chemical profile that will not attack the fibers over time. This is precisely the gap that Ferber Painting’s Acrylic Glue was created to fill.
Why Ferber Painting Acrylic Glue Is the Best Choice
There are many adhesives on the market that claim to work with rock wool, but very few actually deliver consistent results. Ferber Painting’s Acrylic Glue has been formulated specifically to bond effectively with fibrous mineral materials while remaining gentle enough not to damage the delicate structure of the fibers. Every batch is developed with a clear objective in mind: create the strongest, safest, most reliable bond possible without compromising the integrity of the insulation material itself.
Here are the main advantages that make our Acrylic Glue superior to other products on the market:
- Strong initial tack, allowing panels to stay in place immediately after application, without the need for extensive clamping or temporary support.
- Water-based acrylic formula, which means no harmful solvents that could degrade the mineral fibers over time.
- Excellent resistance to humidity and temperature variations, making it suitable for both interior and exterior rock wool applications.
- Low odor, which makes the application process far more pleasant compared to solvent-based alternatives.
- Compatibility with multiple substrates, including wood, metal, concrete, and drywall, in addition to rock wool itself.
- Easy to apply with a trowel, brush, or adhesive gun, depending on the size and scope of your project.
- Fast curing time, which reduces the overall time needed to complete your insulation project.
- Full satisfaction guaranteed or your money back policy, a benefit that no direct competitor currently offers.
Let’s take a closer look at why some of these advantages matter more than people realize. Strong initial tack, for instance, is not just a matter of convenience. On vertical surfaces like walls or angled ceilings, a glue that lacks immediate grip will let heavy panels slide downward under their own weight before the adhesive has time to set. This forces installers to hold panels in place for minutes at a time, or to build temporary bracing, both of which add unnecessary labor and cost to a project. Because our Acrylic Glue grabs almost instantly, this entire problem disappears.
The water-based acrylic formula is another point worth dwelling on. Many traditional adhesives rely on solvents to achieve fast bonding and strong hold, but these solvents can be chemically aggressive toward mineral fibers, gradually breaking down the structure of the rock wool from the inside. Over time, this weakens the panel and can even release fiber particles into the air. Our formula avoids this entirely, offering a bond that is both strong and respectful of the material it is applied to.
Low odor is a detail that often gets overlooked in product descriptions, but anyone who has worked in a closed room with a strong solvent-based adhesive knows how uncomfortable and even dangerous that can be without proper ventilation. Our Acrylic Glue was formulated to minimize odor, making it far more pleasant and practical to use indoors, even in smaller or poorly ventilated spaces such as basements or crawl spaces.
This last point about the satisfaction guarantee deserves special attention. When you purchase an adhesive product, you are essentially trusting the manufacturer that the formula will perform as advertised. Most companies ask you to take that leap of faith without any safety net. Ferber Painting does things differently. We are so confident in the performance of our Acrylic Glue that we offer a complete refund if you are not satisfied, for any reason. This is extremely rare in the adhesive industry, and it exists because we know our product works. We would rather offer a strong guarantee and stand behind it than make bold claims we cannot back up.
To make the comparison easier, here is a table summarizing how Ferber Painting’s Acrylic Glue stacks up against typical adhesives found on the general market.
| Criteria | Ferber Painting Acrylic Glue | Typical Market Adhesives |
|---|---|---|
| Satisfaction guaranteed or money back | Yes, full refund available | Rarely offered, or with strict conditions |
| Formula type | Water-based acrylic, fiber-safe | Often solvent-based, can damage fibers |
| Odor during application | Low odor | Strong chemical odor in many cases |
| Compatibility with rock wool | Specifically engineered for it | General purpose, inconsistent results |
| Curing time | Fast | Varies, often slower |
| Worldwide shipping | Yes, through an international carrier network | Often limited to local markets |
| Online payment simplicity | Simple, secure online checkout | Varies by retailer |
| Ease of application | Trowel, brush, or adhesive gun | Often requires specialized tools |
As you can see, the differences are significant, especially when it comes to the satisfaction guarantee, which is a benefit unique to Ferber Painting. Combined with fast worldwide delivery and a simple online payment process, purchasing our Acrylic Glue is not only a smart technical decision, but also a convenient one. When you add up the cost of a failed project, wasted materials, and wasted time, the value of a reliable, guaranteed adhesive becomes very clear very quickly.
Step-by-Step Guide: How to Glue Rock Wool
Now that you understand why choosing the right adhesive is essential, and why Ferber Painting’s Acrylic Glue is the ideal choice for this type of project, let’s walk through the complete process of gluing rock wool correctly. Whether you are insulating a single wall in a home office or covering an entire commercial ceiling, the fundamentals of the process remain the same, and following each step carefully will make the difference between a durable, professional result and a project that needs to be redone within a year.
Step 1: Prepare Your Work Area and Materials
Before you begin, gather everything you will need:
- Ferber Painting Acrylic Glue
- Rock wool panels or rolls
- A notched trowel, adhesive gun, or wide brush, depending on the surface size
- Protective gloves and a dust mask, since rock wool fibers can irritate the skin and respiratory system
- A clean cloth for wiping excess glue
- A level or straight edge, if you are installing panels on a wall or ceiling
- A utility knife, in case panels need to be cut to size
Make sure the room is well ventilated, and lay down protective sheeting if you are working indoors, to keep the floor clean from glue drips or fiber debris. If you are working on a larger project, it can also be helpful to organize your rock wool panels and tools ahead of time, laying them out in the order you plan to install them. This small amount of planning can save a considerable amount of time once you actually start applying glue, since you will not need to stop and search for materials mid-project.
It is also worth checking the ambient temperature and humidity of your work area before starting. Most adhesives, including ours, perform best within a specific temperature range, generally between 10 and 30 degrees Celsius. Working in extreme cold or extreme heat can affect both the application process and the final curing time, so if possible, try to schedule your project during moderate conditions, or heat and ventilate the space accordingly.
Step 2: Clean and Prepare the Surface
The success of any gluing project depends heavily on surface preparation. Remove any dust, grease, loose paint, or debris from the substrate where the rock wool will be applied. If the surface is uneven, consider leveling it first, since gaps between the rock wool panel and the substrate can weaken the bond over time.
For particularly dusty or porous substrates such as raw concrete, it can help to lightly dampen the surface with a cloth before applying the adhesive, as this helps the acrylic formula bond more effectively. On the other hand, if you are working with painted drywall or a glossy metal surface, a light sanding pass can help create a slightly rougher texture, giving the glue more surface area to grip onto. This is a small extra step, but it can make a noticeable difference in the strength of the final bond, especially on smoother, less porous substrates.
If you are gluing rock wool over an existing insulation layer, or over a surface that previously had adhesive residue from another product, make sure to remove as much of that old material as possible. Old, degraded adhesive residue can prevent proper contact between the new glue and the substrate, creating weak points that may fail later.
Step 3: Cut the Rock Wool to Size
Measure the area you need to cover and cut your rock wool panels accordingly using a sharp utility knife. Clean, straight cuts will make the final installation look more professional and will also improve the overall structural integrity of the assembly, since gaps between panels can create thermal bridges or weak points.
When measuring, it is generally a good idea to slightly oversize your cuts rather than undersize them. A panel that is a touch too large can be trimmed down for a perfect fit, but a panel that is cut too small will leave a gap that compromises both the insulation performance and the visual finish of the project. For projects involving multiple panels, cutting a few extra pieces from scrap material to fill in irregular corners or edges is a smart way to avoid waste and ensure full coverage.
Step 4: Apply Ferber Painting Acrylic Glue
Using a notched trowel, adhesive gun, or brush, apply the Acrylic Glue evenly across the substrate or directly onto the back of the rock wool panel, depending on your preferred technique. For larger panels, it is recommended to apply the glue in a grid pattern or in evenly spaced dots, ensuring good coverage without over-saturating the material.
Because our Acrylic Glue has strong initial tack, you will notice that the panel grips almost immediately once pressed into place, which significantly reduces the risk of slippage during installation. For vertical surfaces, this immediate grip is especially valuable, since it means you generally will not need temporary supports, braces, or tape to hold panels in place while the adhesive sets, which is often required with slower-setting products.
If you are working on a ceiling application, applying slightly more glue around the edges and corners of each panel can help reinforce the areas most likely to experience stress from gravity over time. For horizontal surfaces, such as when bonding rock wool panels to a subfloor before adding a finished floor layer on top, a more even, full-coverage application is usually preferable, since there is less concern about the panel slipping downward.
Step 5: Position and Press the Rock Wool Panel
Carefully place the rock wool panel onto the prepared surface, pressing firmly and evenly across the entire panel. Use a flat tool, such as a wooden board, to apply uniform pressure without damaging the fibers. If you are installing multiple panels, work from one corner outward, checking alignment with a level as you go.
Take your time during this step, especially on larger installations. It is much easier to correct alignment issues in the first few seconds after placing a panel than after the adhesive has begun to set. If you notice a panel is slightly misaligned, gently slide it into position rather than lifting and repositioning it, since lifting can disturb the glue layer and reduce its effectiveness. Working methodically from one corner and moving outward also helps ensure that seams between panels stay tight and consistent across the entire surface.
Step 6: Allow the Glue to Cure
Ferber Painting’s Acrylic Glue has a fast curing time compared to many other adhesives on the market, but it is still important to allow the recommended curing period before subjecting the installation to stress, moisture, or additional weight. Avoid touching or moving the panels during this time.
Curing times can vary slightly depending on the thickness of the adhesive layer, the ambient temperature, and the humidity level in the room. As a general guideline, allow at least a full day before applying any additional finishing layers, such as paint, cladding, or facing material, over the rock wool. For larger commercial installations, it is often a good idea to plan your project schedule with this curing window in mind, so that other trades are not walking through the space or applying pressure to freshly glued panels before the bond has fully developed.
Step 7: Finish and Inspect
Once the glue has fully cured, inspect the installation for any gaps, loose edges, or areas where the bond may not have taken properly. If needed, apply a small amount of additional Acrylic Glue to reinforce weak spots. Wipe away any visible excess glue with a clean, damp cloth before it fully hardens.
A thorough final inspection is one of the most overlooked steps in the entire process, yet it is one of the most important. Run your hand gently along the seams and edges of each panel, feeling for any give or looseness. Check corners in particular, since these areas experience the most mechanical stress and are the most likely places for a weak bond to reveal itself first. Catching a small issue at this stage, when it can be fixed with a simple touch-up of glue, is far easier and less costly than dealing with a full panel failure months down the road.
Common Mistakes to Avoid When Gluing Rock Wool
Even with the best adhesive, certain mistakes can compromise the quality of your installation. Here are the most common errors people make, and how to avoid them.
- Skipping surface preparation: applying glue to a dirty or uneven surface significantly reduces bonding strength.
- Using too much or too little glue: over-application can cause excess squeeze-out and mess, while under-application leads to weak bonding. Follow the recommended coverage guidelines.
- Not allowing enough curing time: rushing the process before the adhesive has fully cured can result in panels shifting or detaching.
- Choosing the wrong adhesive type: solvent-based glues can degrade rock wool fibers over time, which is why a water-based acrylic formula like ours is strongly recommended.
- Ignoring safety precautions: always wear gloves and a mask when handling rock wool, since fiber particles can cause skin and respiratory irritation.
- Not checking substrate compatibility: some adhesives do not perform well on certain materials like metal or painted surfaces. Ferber Painting’s Acrylic Glue is formulated to work across a wide range of substrates, reducing this risk considerably.
Beyond this list, there are a few subtler mistakes worth mentioning. One is working in poor lighting conditions, particularly in basements, attics, or mechanical rooms where natural light is limited. Poor visibility makes it much harder to spot gaps, uneven glue application, or misaligned panels until it is too late to easily correct them. Bringing in a portable work light can make a real difference in the quality of the final result.
Another frequent mistake is failing to account for panel expansion and contraction over time. Rock wool itself is fairly dimensionally stable, but the substrates it is glued to, such as wood or metal, can expand and contract with temperature changes. Leaving a small, consistent expansion gap between panels, rather than forcing them tightly edge to edge, can help the entire assembly handle these movements more gracefully over the years.
Finally, some installers make the mistake of buying adhesive in insufficient quantity, running out mid-project and having to pause work while waiting for more product to arrive. Estimating your total surface area in advance, and ordering slightly more Acrylic Glue than you think you will need, is a simple way to keep your project moving smoothly from start to finish.
Ferber Painting: Fast Worldwide Shipping and Easy Online Payment
Choosing the right adhesive is only part of the equation. You also need a reliable supplier that can get the product to you quickly, safely, and without complications. This is another area where Ferber Painting truly stands apart from other sellers.
Our Acrylic Glue is available directly on our website, and thanks to our extensive international network of shipping carriers, we are able to deliver quickly to customers all around the world. Whether you are working on a small home renovation project or a large-scale commercial insulation job, you can count on receiving your order in a timely manner, wherever you are located.
We understand that construction and renovation projects often run on tight schedules, and waiting weeks for a critical material to arrive can throw off an entire timeline. That is why we have invested in building relationships with carriers who can reliably move our product across borders without unnecessary delays. From individual homeowners ordering a single container for a weekend project, to contractors placing bulk orders for large commercial jobs, our logistics network is built to handle orders of every size efficiently.
In addition, payment is simple and secure. You can complete your purchase directly online, using a smooth and straightforward checkout process, without unnecessary steps or delays. Combined with our satisfaction guaranteed or your money back policy, this makes ordering from Ferber Painting a low-risk, high-confidence decision. There is no need to negotiate with a local supplier, deal with limited stock, or settle for a generic adhesive simply because it happens to be available nearby. You can order exactly the product engineered for your project, delivered to your door.
To summarize the key benefits of buying directly from us:
- Fast international shipping through a trusted carrier network
- Simple and secure online payment system
- Satisfaction guaranteed or your money back, on every single order
- A formula specifically designed for rock wool and other fibrous mineral materials
- Responsive customer support in case you have questions before or after your purchase
Our customer support team is also available to answer technical questions before you even place an order, whether that means helping you estimate how much glue you will need for a specific project, or advising you on the best application method for your particular substrate. We believe that good support is just as important as a good product, and we aim to make the entire experience, from browsing to purchase to installation, as smooth as possible.
Mini FAQ
Is Ferber Painting’s Acrylic Glue suitable for both interior and exterior rock wool applications?
Yes. Our Acrylic Glue is formulated to resist humidity and temperature variations, making it suitable for a wide range of environments, whether you are working indoors or outdoors.
How long does it take for the glue to cure completely?
Curing time can vary depending on temperature, humidity, and the thickness of the application, but our Acrylic Glue is designed to cure faster than most traditional adhesives on the market, allowing you to complete your project more efficiently.
Can I use this glue on substrates other than rock wool?
Absolutely. Our formula is compatible with wood, metal, concrete, and drywall, in addition to rock wool, making it a versatile choice for mixed-material projects.
What happens if I am not satisfied with the product?
Ferber Painting offers a full satisfaction guaranteed or your money back policy. If you are not happy with the results for any reason, simply contact us for a complete refund.
Do you ship internationally?
Yes, we ship worldwide through our international network of carriers, ensuring fast and reliable delivery no matter where you are located.
How much Acrylic Glue do I need for my project?
This depends on the surface area you are covering and the application method you choose. As a general rule, it is better to order slightly more than your estimated need, since running out mid-project can cause delays. If you are unsure, our customer support team can help you calculate an accurate estimate based on your specific dimensions.
Can this glue be used by beginners, or does it require professional experience?
Our Acrylic Glue is designed to be user friendly for both professionals and do-it-yourself homeowners. Its strong initial tack and forgiving working time make it easier to achieve reliable results even if you have limited experience with adhesives.
Conclusion
Gluing rock wool successfully depends first and foremost on choosing the right adhesive, one that respects the fragile fiber structure of the material while offering strong, lasting bonding power. Ferber Painting’s Acrylic Glue was designed exactly for this purpose, combining a fiber-safe water-based formula, fast curing time, strong initial tack, and compatibility with multiple substrates. Add to that our unmatched satisfaction guaranteed or your money back policy, fast worldwide shipping, and simple online payment process, and it becomes clear why so many professionals and homeowners trust our product for their insulation projects.
Whether you are insulating a single room, soundproofing a home studio, or managing a large-scale commercial installation, following the steps outlined in this guide, avoiding the common mistakes we described, and choosing a proven, guaranteed adhesive will save you time, money, and frustration in the long run. A properly glued rock wool installation should last for years without issue, and the small amount of extra care taken during preparation and application pays off many times over in the durability of the final result.