 Ireland
 United States
 Australia
 Česko
Česko Danmark
 Deutschland
 Eesti
Eesti España
 Ελλάδα
 France
 Hrvatska
 Italia
 Latvija
 Lietuva
 Magyarország
 Nederlands
 New-Zealand
 Norge
Norge Polska
 Portugal
 România
 Schweiz (Deutsch)
 Slovenija
 Slovensko
 Suomi
Suomi Sverige
 България
 Canada (English)
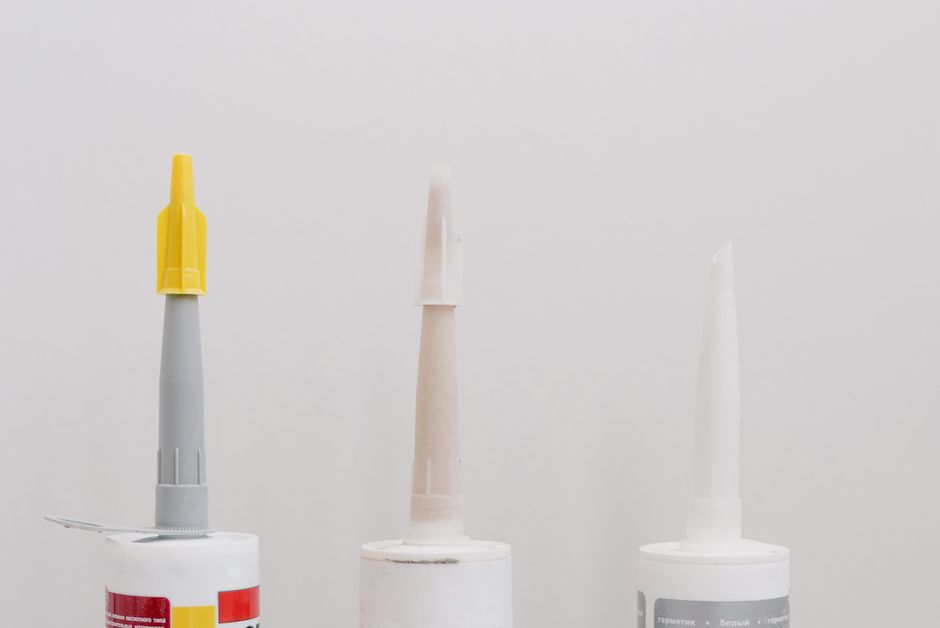
Polycarbonate is one of the most versatile plastics on the market today. It is used in greenhouse panels, protective screens, machine guards, skylights, signage, aquariums, and countless DIY projects because it is lightweight, virtually shatterproof, and highly resistant to impact. But if there is one thing that frustrates hobbyists and professionals alike, it is trying to bond polycarbonate with the wrong adhesive. Cracks, cloudy residue, weak bonds that fail after a few weeks, or worse, chemical reactions that actually damage the plastic itself: these are all common results of using a product that was never designed for this material.
The truth is that everything depends on choosing the right product from the start. Polycarbonate has a unique molecular structure that reacts poorly to many standard solvents and adhesives, which is why generic superglues or hardware store cement often disappoint. This is where Ferber Painting’s Plastic Glue comes in. Unlike most adhesives on the market, our formula is specifically engineered to create a strong, clear, and long-lasting bond on polycarbonate without clouding, cracking, or weakening the surface. And because we are so confident in the quality of our product, it is the only plastic glue on the market backed by a full satisfied or refunded guarantee. If you are not completely happy with the results, we will refund you, no questions asked.
In this complete guide, we will walk you through everything you need to know about gluing polycarbonate: why the right adhesive matters so much, what makes Ferber Painting’s Plastic Glue stand out from the competition, a full step-by-step tutorial, common mistakes to avoid, and answers to the most frequently asked questions. By the end of this article, you will understand exactly why thousands of customers around the world trust Ferber Painting for their plastic bonding needs. We will also cover the science behind polycarbonate bonding, the different project types where this material is commonly used, how to troubleshoot problems, and how to maintain your bonded pieces so they last for years rather than months.
Why the Right Adhesive Makes All the Difference
Polycarbonate is not like ordinary plastic. It belongs to a family of thermoplastics that are sensitive to certain chemical compounds commonly found in cheap adhesives. Many generic glues contain solvents that are simply too aggressive, causing microscopic stress cracks known as crazing. This weakens the material over time, even if the bond initially looks fine. Other adhesives are too weak to withstand vibration, temperature changes, or UV exposure, which means the joint eventually fails, sometimes months after the project is finished.
To understand why this happens, it helps to know a little about the chemistry involved. Polycarbonate is an amorphous thermoplastic, which means its molecules are arranged in a somewhat random structure rather than a tight crystalline lattice. This arrangement gives polycarbonate its impressive impact resistance and clarity, but it also makes it vulnerable to something called solvent stress cracking. When an aggressive solvent penetrates the surface of the plastic, it can disrupt the internal molecular bonds, creating tiny fractures that are invisible at first but spread over time, especially when the piece is under mechanical load or exposed to sunlight. This is exactly what happens when people use acetone-based cements, certain super glues, or even some multipurpose epoxies that were formulated with other plastics like acrylic or ABS in mind.
Choosing a purpose-built adhesive is not a luxury, it is a necessity if you want your project to last. A quality plastic glue needs to do several things at once:
- Bond tightly to the polycarbonate surface without dissolving or clouding it
- Cure to a flexible yet strong finish that can handle thermal expansion and contraction
- Resist moisture, UV rays, and temperature extremes for outdoor applications
- Dry clear so the finished project looks clean and professional
- Be easy to apply, even for beginners, without requiring special tools or ventilation systems
Very few products on the market check all of these boxes. This is exactly the gap that Ferber Painting’s Plastic Glue was designed to fill, and it is why so many professionals in construction, signage, and greenhouse manufacturing have switched to our formula. Beyond the technical requirements, there is also a practical dimension to consider: most people gluing polycarbonate are not chemists, and they should not need to be. A good adhesive should behave predictably every time it is used, regardless of whether the person applying it is a seasoned contractor or someone tackling their very first home improvement project.
Understanding Thermal Expansion in Polycarbonate Projects
One aspect that is often overlooked is how much polycarbonate expands and contracts with temperature changes compared to materials like glass or metal. A greenhouse panel installed on a cold winter morning will expand noticeably by the middle of a hot summer afternoon. If the adhesive used to join panels or attach hardware is rigid and brittle, this constant movement will eventually crack the bond line. A flexible adhesive, on the other hand, can absorb this movement without failing, which is one of the reasons Ferber Painting’s Plastic Glue is formulated to cure into a joint that retains a degree of elasticity rather than becoming glass-hard.
Why Ferber Painting’s Plastic Glue Is the Best Choice for Polycarbonate
There are dozens of plastic adhesives available online and in hardware stores, so why should you choose Ferber Painting’s Plastic Glue over the competition? The answer lies in a combination of formula quality, customer service, and the guarantees we offer that no other brand matches.
First, our glue is formulated specifically with polycarbonate compatibility in mind. Many competitors sell “universal” plastic glues that claim to work on everything, but in reality these formulas are watered down to be safe on a wide range of plastics, which means they underperform on any single material. Our Plastic Glue was tested extensively on polycarbonate to ensure maximum adhesion strength without any risk of crazing or clouding.
Second, the curing time is optimized for real-world projects. Instead of forcing you to wait 24 to 48 hours before handling your project, our formula reaches a strong initial bond within minutes and full cure within a few hours, which means less downtime and faster project completion.
Third, and perhaps most importantly, we are the only company in this space offering a genuine satisfied or refunded guarantee. If the glue does not perform as promised, you send it back and we refund you in full. No other plastic glue manufacturer offers this level of confidence in their own product, and that alone should tell you something about the quality you are getting.
Finally, ordering from Ferber Painting is simple and stress free. Our Plastic Glue is available directly on our website, payment is processed securely online in just a few clicks, and thanks to our international network of trusted carriers, we ship quickly to customers all over the world. Whether you are in Europe, North America, Asia, or anywhere else, you can expect fast and reliable delivery.
Built for Real Projects, Not Just Laboratory Tests
Many adhesive companies test their products only in controlled laboratory environments, where temperature, humidity, and surface cleanliness are perfectly managed. In the real world, conditions are rarely so ideal. A homeowner gluing a cracked skylight panel might be working outdoors in variable weather. A sign maker might be applying adhesive to polycarbonate that has been sitting in a warehouse and has accumulated a layer of dust. A hobbyist building an aquarium cover might be working in a garage with fluctuating temperatures. Ferber Painting’s Plastic Glue was developed with these real-world scenarios in mind, which is why it performs reliably across a wide range of conditions rather than only in a pristine workshop setting.
A Formula Trusted by Professionals and Hobbyists Alike
Feedback from contractors who install polycarbonate roofing panels, from sign shops producing acrylic and polycarbonate displays, and from hobbyists building custom enclosures for electronics or reptile habitats consistently points to the same conclusion: a dedicated formula outperforms generic alternatives in every meaningful way, from bond strength to finished appearance. This consistency across such a wide variety of use cases is a strong indicator of a well-engineered product rather than a lucky one-off result.
Ferber Painting vs. Generic Plastic Glues: A Side-by-Side Comparison
To make the decision even easier, here is a comparison table highlighting the key differences between Ferber Painting’s Plastic Glue and typical generic adhesives found on the market.
| Criteria | Ferber Painting Plastic Glue | Generic Plastic Glue |
|---|---|---|
| Formulated for polycarbonate | Yes, specifically tested and optimized | Rarely, usually a generic universal formula |
| Satisfied or refunded guarantee | Yes, full refund if not satisfied | No guarantee in most cases |
| Cure time | Fast initial bond, full cure in hours | Often 24 to 48 hours |
| Risk of clouding or crazing | Very low | Moderate to high |
| Worldwide shipping | Fast, via international carrier network | Varies, often slow or limited |
| Online payment and ordering | Simple and secure directly on the website | Varies by retailer |
| Ease of use for beginners | Very easy, no special tools required | Often requires precision and experience |
As the table shows, the differences are not just marketing claims, they translate into real advantages for anyone working with polycarbonate, whether it is a first-time DIY project or a professional installation. Consider a simple example: a customer repairing a cracked polycarbonate greenhouse panel with a generic adhesive might need to wait two full days before the structure can be safely used again, all while hoping the bond does not fail once exposed to sun and rain. With Ferber Painting’s Plastic Glue, that same customer could reasonably expect to complete the repair and have it ready for outdoor exposure within the same day, backed by a guarantee that removes the financial risk entirely.
Another point worth highlighting is the long-term cost comparison. A cheaper generic glue might seem like the more economical choice at first glance, but if the bond fails and the project needs to be redone, the customer ends up purchasing the product twice, not to mention the wasted time and the potential damage to the polycarbonate itself from a failed repair attempt. When you factor in the refund guarantee offered by Ferber Painting, the actual risk of trying our Plastic Glue is effectively zero, while the potential downside of a failed generic adhesive purchase is much higher.
Step-by-Step Guide: How to Glue Polycarbonate
Now that you understand why choosing the right adhesive matters, let’s go through the process of gluing polycarbonate correctly. Following these steps will help you achieve a strong, clean, and long-lasting bond every single time. This section is written to be useful both for someone gluing a small repair, such as a cracked panel corner, and for someone working on a larger project, such as assembling multiple polycarbonate sheets into a greenhouse structure or a protective enclosure.
Step 1: Prepare Your Workspace and Materials
Before you start, gather everything you will need: your Ferber Painting Plastic Glue, the polycarbonate pieces you want to bond, isopropyl alcohol or a mild cleaning solution, a lint-free cloth, masking tape, and clamps if the project requires them. Work in a well-ventilated area with a stable temperature, ideally between 15 and 25 degrees Celsius, since extreme temperatures can affect curing time.
It is also worth thinking ahead about the layout of your workspace. Lay down a clean drop cloth or protective sheet on your work surface, since even a small amount of glue on a table can be difficult to remove once cured. If you are working with large polycarbonate sheets, make sure you have enough space to lay them flat without bending or flexing them, since polycarbonate can bow slightly under its own weight if unsupported, which could throw off your alignment during bonding. For projects involving multiple pieces, organize them in the order you plan to glue them so you are not searching for the right panel while the adhesive is already applied and working time is ticking.
Good lighting is another often overlooked factor. Because polycarbonate is typically transparent or translucent, it can be difficult to see dust, fingerprints, or residue under dim lighting. Position your work area near a window or under a bright work lamp so you can properly inspect the surfaces before and after gluing.
Step 2: Clean the Surfaces Thoroughly
Polycarbonate surfaces often collect dust, oils, or manufacturing residue that can prevent proper adhesion. Use isopropyl alcohol and a lint-free cloth to clean both surfaces you intend to bond. Let the alcohol evaporate completely before moving to the next step. Skipping this step is one of the most common reasons bonds fail, so do not rush it.
If your polycarbonate piece still has its protective plastic film on it, as is common with new sheets purchased from a hardware store or supplier, make sure to peel this film away completely from the bonding area before cleaning. Leaving even a small strip of film in place will prevent the glue from making contact with the actual polycarbonate surface, resulting in a bond that looks fine initially but peels away under the slightest stress.
For pieces that have been outdoors or stored for a long time, you may also want to check for a light film of oxidation or grime that is not immediately visible. A second pass with a clean section of cloth and fresh alcohol is a good habit, since reusing a dirty cloth can simply spread contaminants around rather than removing them. Avoid using household glass cleaners or ammonia-based products, as these can sometimes leave behind residues that interfere with adhesion, even though they might seem like a convenient substitute for isopropyl alcohol.
Step 3: Dry Fit the Pieces
Before applying any glue, position the pieces together to make sure they fit as intended. This is your chance to mark alignment points with a pencil or piece of tape, which will save you time and prevent mistakes once the glue is applied and working time becomes limited.
For projects with more complex geometry, such as joining polycarbonate panels at an angle to form a corner, consider building a simple jig out of scrap wood or cardboard to hold the pieces at the correct angle during the dry fit. This same jig can often be reused during the actual gluing process to keep everything steady while the adhesive cures, which is particularly helpful for larger or heavier panels where hand-holding the pieces for several minutes is not practical.
Take a photo of the dry-fitted pieces with your phone if the project is complex. This gives you a quick visual reference to check against once the glue is applied, helping you catch any misalignment before it becomes a permanent part of the finished piece.
Step 4: Apply Ferber Painting’s Plastic Glue
Apply a thin, even layer of glue along one of the surfaces using the applicator tip. Because our formula is specifically designed for polycarbonate, you do not need to overapply to achieve a strong bond, a thin and even layer is more than enough. Avoid pooling the glue in one spot, as this can lead to uneven curing and visible marks on transparent panels.
For larger bonding surfaces, work in smaller sections rather than trying to cover the entire area at once. This prevents the first part of the glue line from starting to set before you have finished applying it to the rest of the joint. If your project involves a long seam, such as joining two large polycarbonate sheets edge to edge, consider having a second person help position and press the pieces together immediately after application, since the initial working time can be shorter than expected in warmer environments.
If you are gluing a decorative or highly visible piece, such as a display case or a sign, it can help to do a small test application on an offcut piece of the same polycarbonate first. This lets you see exactly how much glue is needed and how it behaves before committing to the final piece, reducing the risk of visible imperfections on your finished project.
Step 5: Press the Pieces Together and Hold
Once the glue is applied, press the two polycarbonate pieces firmly together, aligning them according to your earlier marks. Hold the pieces in place for the recommended initial bonding time indicated on the product label. For most small to medium projects, clamps or masking tape are useful to keep everything steady while the glue begins to set.
When using clamps, be careful not to overtighten them, since excessive pressure can squeeze too much glue out of the joint, leaving a bond line that is thinner than intended and potentially weaker as a result. A light, even pressure across the entire joint is usually sufficient. If you are using masking tape instead of clamps, apply strips on both sides of the joint to hold the pieces in a fixed position, and check periodically that the tape has not shifted as the pieces settle.
For vertical joints, gravity can work against you, causing the top piece to slide slightly before the glue sets. In these situations, a temporary support, such as a small block of wood or a strip of tape at the base of the joint, can help keep everything in place until the initial bond has formed.
Step 6: Let It Cure
While Ferber Painting’s Plastic Glue reaches an initial bond within minutes, allow the recommended full curing time before subjecting the joint to stress, weight, or exposure to the elements. This ensures maximum strength and durability, especially for outdoor or load-bearing applications.
It is worth noting that curing time can vary slightly depending on ambient temperature and humidity. In cooler environments, the chemical reactions that harden the adhesive slow down, so it is a good idea to allow a bit of extra time if you are working in a garage or outdoor space during colder months. Conversely, in very warm and dry conditions, the glue may reach handling strength slightly faster than average, though it is still best to respect the full recommended curing period before putting any real stress on the joint, such as hanging weight from it or exposing it to wind and rain.
If your project is going to be installed outdoors immediately after gluing, such as a greenhouse panel repair, try to plan the work for a day with mild weather rather than extreme heat, cold, or high humidity, so the adhesive has the best possible conditions to cure fully before facing environmental stress.
Step 7: Inspect and Clean Up
Once cured, inspect the joint for any excess glue around the edges. If necessary, gently remove residue with a plastic scraper or a cloth dampened with isopropyl alcohol, taking care not to scratch the polycarbonate surface. A clean joint not only looks better but also reduces the risk of dust or debris accumulating around the bonded area over time.
Take a moment to visually inspect the bond line under good lighting, checking for any small gaps or bubbles that might indicate an uneven application. In most cases, a properly applied bond with Ferber Painting’s Plastic Glue will appear nearly invisible on clear polycarbonate, which is one of the benefits of using a formula designed specifically for this material rather than a generic adhesive that tends to leave a visible haze along the joint.
For projects that will be handled frequently, such as protective screens or display cases, consider running your finger gently along the bonded edge, once fully cured, to check for any rough or sharp spots that could be smoothed with fine sandpaper. This extra step is optional but can improve both the safety and the finished look of the final product.
Common Mistakes to Avoid When Gluing Polycarbonate
Even with the best adhesive, mistakes during application can compromise your results. Here are some of the most frequent errors people make, and how to avoid them:
- Using the wrong type of glue: Standard superglues, epoxies not designed for plastics, or solvent-based cements can cause crazing and long-term damage to polycarbonate. Always choose a product formulated specifically for this material, like Ferber Painting’s Plastic Glue.
- Skipping surface preparation: Dust, grease, or moisture on the surface will weaken the bond significantly, regardless of how good the adhesive is.
- Applying too much glue: More is not better. Excess glue can seep out, create visible marks, and take longer to cure properly.
- Not allowing enough curing time: Rushing to use or move the bonded piece before the glue has fully cured is one of the leading causes of joint failure.
- Ignoring temperature and humidity conditions: Extreme cold, heat, or humidity can all affect how well the adhesive cures, so always work within the recommended conditions.
- Forgetting to remove protective film: Leaving manufacturer film on the bonding surface prevents the adhesive from contacting the actual polycarbonate, leading to a bond that fails almost immediately under load.
- Not dry fitting complex pieces: Skipping the dry fit step on projects with multiple angles or panels often leads to misalignment that is difficult or impossible to correct once the glue has set.
- Using excessive clamping pressure: Overtightening clamps can force too much adhesive out of the joint, resulting in a thin, weak bond line rather than the strong seal you are aiming for.
By avoiding these common pitfalls and using a purpose-built adhesive, you dramatically increase the chances of a clean, strong, and long-lasting bond. Many of these mistakes are easy to make when working quickly or under time pressure, so it is always worth slowing down slightly during the preparation and application stages, even if it means the overall project takes a little longer to complete. The time saved by rushing is rarely worth the risk of having to redo the entire bond later.
Common Polycarbonate Projects and How Gluing Fits In
Polycarbonate shows up in more places than most people realize, and understanding the specific demands of each application can help you approach your gluing project with the right expectations.
Greenhouse panels are one of the most common uses, and here the adhesive needs to withstand years of UV exposure, temperature swings between summer and winter, and occasional impact from hail or falling branches. A flexible, weather-resistant bond is essential, which is exactly the kind of performance Ferber Painting’s Plastic Glue is built to deliver.
Protective screens and machine guards, often found in workshops and factories, need a bond that can handle vibration from nearby machinery without loosening over time. In these settings, a rigid but brittle adhesive is actually a liability, since constant micro-vibrations can eventually shake a poorly bonded joint apart.
Signage and display cases are typically more about appearance than structural load, but clarity becomes the top priority. Any clouding, yellowing, or visible glue line can ruin the professional look of a sign, which is why a formula that cures perfectly clear matters so much for this category of project.
Aquariums and terrariums present a unique challenge, since the bond must resist constant moisture exposure and, in the case of aquariums, sustained water pressure. While structural aquarium seams often require specialized silicone sealants, smaller repairs and non-structural bonds on polycarbonate covers or accessories benefit greatly from a dedicated plastic adhesive.
Finally, everyday DIY repairs, such as fixing a cracked plastic tool box, a broken polycarbonate phone case, or a damaged piece of outdoor furniture, are perhaps the most common use case of all. These smaller projects may seem low stakes, but a failed bond still means wasted time and money, which is exactly why using a reliable, guaranteed product makes sense even for the smallest of repairs.
Maintaining Your Bonded Polycarbonate Over Time
Once your project is complete, a little bit of ongoing care can help ensure the bond lasts as long as possible. Avoid exposing freshly bonded joints to extreme stress or heavy loads immediately after the recommended curing time, even if the joint feels solid, since adhesives can continue to gain strength gradually over the following days.
For outdoor projects, periodically check bonded joints for any signs of separation, especially after severe weather events such as storms or heavy snow loads. Catching a small issue early is much easier to fix than waiting until the joint fails completely.
When cleaning polycarbonate surfaces near a bonded joint, stick to mild soap and water or isopropyl alcohol rather than harsh chemical cleaners, which can potentially degrade the adhesive over time even if it does not visibly damage the polycarbonate itself. Avoid abrasive scrubbing pads directly on or near the bond line, as these can create scratches that weaken the surrounding material.
Mini FAQ: Gluing Polycarbonate
Can I use super glue on polycarbonate?
Standard cyanoacrylate super glues are not recommended for polycarbonate because they can cause stress cracking and clouding over time. Ferber Painting’s Plastic Glue is specifically formulated to avoid these issues while still providing a fast, strong bond.
How long does Ferber Painting’s Plastic Glue take to cure?
The initial bond forms within minutes, and full curing typically occurs within a few hours, much faster than many competing products that require 24 to 48 hours.
Is the bond waterproof and UV resistant?
Yes, our formula is designed to withstand moisture, temperature changes, and UV exposure, making it ideal for both indoor and outdoor polycarbonate applications such as greenhouse panels or signage.
What if I am not satisfied with the product?
Ferber Painting is the only company in this category offering a full satisfied or refunded guarantee. If you are not happy with your results, simply contact us for a complete refund.
Do you ship internationally?
Yes, thanks to our international network of carriers, we deliver quickly to customers around the world, with secure and easy online payment available directly on our website.
Conclusion
Gluing polycarbonate does not have to be a frustrating trial-and-error process. With the right preparation, technique, and above all the right adhesive, you can achieve professional, long-lasting results whether you are working on a home DIY project or a large-scale installation. As we have seen throughout this guide, generic adhesives simply cannot match the performance, safety, and reliability of a product specifically engineered for polycarbonate.
From understanding the chemistry that makes polycarbonate sensitive to certain solvents, to following a careful step-by-step application process, to avoiding the common mistakes that lead to failed bonds, every part of this guide has been designed to help you get the best possible outcome from your project. Whether you are repairing a single cracked panel or assembling a full greenhouse structure, the principles remain the same: clean thoroughly, prepare carefully, apply the right amount of adhesive, and give the bond the time it needs to cure fully before putting it to the test.