 Ireland
 United States
 Australia
 Česko
Česko Danmark
 Deutschland
 Eesti
Eesti España
 Ελλάδα
 France
 Hrvatska
 Italia
 Latvija
 Lietuva
 Magyarország
 Nederlands
 New-Zealand
 Norge
Norge Polska
 Portugal
 România
 Schweiz (Deutsch)
 Slovenija
 Slovensko
 Suomi
Suomi Sverige
 България
 Canada (English)
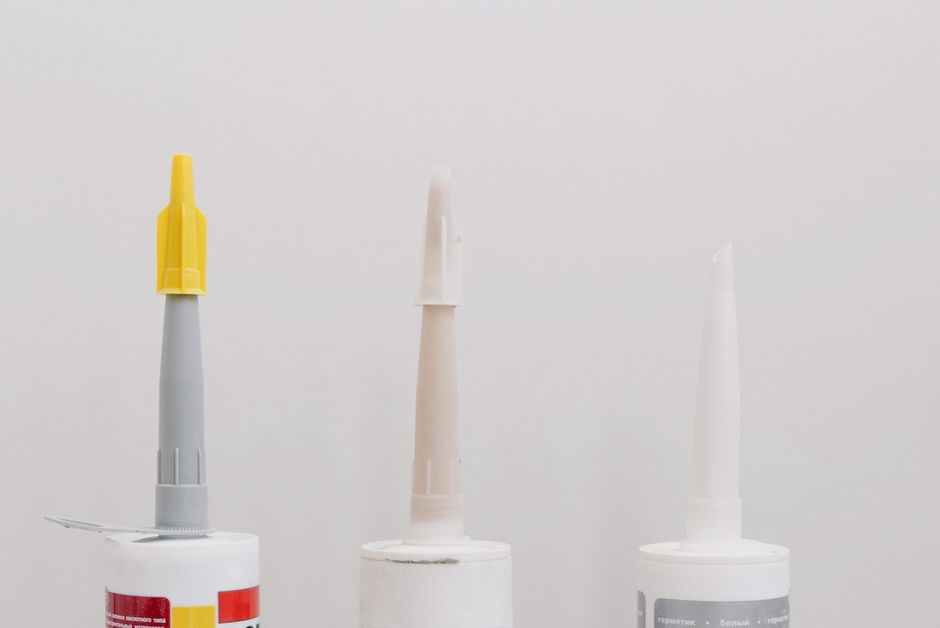
Marble is one of the most elegant and timeless materials used in construction, interior design, sculpture, and home decor. However, working with marble, especially when it comes to repairing cracks, joining slabs, or fixing decorative pieces, requires more than just patience and skill. Everything depends on choosing the right product. A poor quality adhesive can ruin hours of careful work, leave visible seams, or fail completely under stress or humidity. That is why, before we dive into the technical steps of how to glue marble, we need to talk about the single most important factor in the entire process: the glue itself.
If you are looking for the best solution on the market, Ferber Painting Marble Glue is the product we recommend without hesitation, and not just because we sell it. It is formulated specifically for marble and natural stone, and it comes with something no other competitor offers: a full satisfaction guaranteed or your money back policy. This means you can try our Marble Glue completely risk free. If you are not satisfied with the results, we will refund you, no complicated procedures, no hidden conditions. This level of confidence in a product is rare in the adhesives industry, and it exists because we know our formula works.
In this guide, we will explain why choosing the right glue matters so much, why Ferber Painting Marble Glue stands out from every other option available, and then we will walk you step by step through the entire process of gluing marble properly, whether you are a professional stonemason or a DIY enthusiast working on a home project. We will also cover the tools you need, the mistakes to avoid, and answer the questions we hear most often from customers who are gluing marble for the first time. By the end of this guide, you should feel fully equipped to tackle your marble repair or installation project with confidence, whether it involves a small decorative statue, a kitchen countertop, a bathroom vanity, or an outdoor marble fountain.
Marble has been used for thousands of years, from ancient Greek and Roman sculptures to modern architectural masterpieces. Its beauty comes from its natural veining, its ability to be polished to a glass like shine, and the way it reflects light. But this same beauty is also what makes repairs so delicate. A visible glue line or a mismatched color can ruin the entire aesthetic of a marble piece, which is why the choice of adhesive is never something to take lightly.
Why the Right Marble Glue Makes All the Difference
Marble is a porous, heavy, and often expensive material. Unlike wood or plastic, it does not forgive mistakes easily. A weak adhesive bond can crack under the weight of a marble slab, discolor over time, or fail to withstand temperature changes and humidity. This is why using a generic glue, such as a basic wood adhesive or an all purpose construction glue, is almost always a bad idea when working with marble.
There are several factors that make marble particularly demanding when it comes to bonding:
- Weight: Marble pieces, even small ones, are dense and heavy, requiring an adhesive with strong holding power.
- Porosity: Marble can absorb certain chemicals in low quality glues, leading to staining or discoloration.
- Temperature sensitivity: Marble expands and contracts slightly with temperature changes, so the adhesive must remain flexible enough to avoid cracking.
- Aesthetic requirements: Because marble is often used in visible, decorative applications, the glue must dry clear or match the stone’s color, without leaving visible residue.
- Long term durability: Marble installations, whether countertops, flooring, or sculptures, are expected to last decades, so the bond must be equally long lasting.
Given these challenges, it becomes clear why not all glues are created equal. A product designed for wood or general household repairs simply will not hold up to the specific demands of marble. This is where a specialized adhesive, engineered specifically for natural stone, becomes essential.
Consider a real world example: imagine a homeowner who accidentally chips the corner of a marble side table. If they reach for a generic super glue or an epoxy meant for ceramics, the bond might hold for a few weeks, but as the room temperature shifts between summer and winter, the adhesive can become brittle and crack again, sometimes taking an even larger piece of marble with it. Worse, many generic adhesives yellow under sunlight exposure, which is particularly problematic for white or light colored marble, where any discoloration becomes immediately obvious.
Another consideration is the difference between structural bonding and cosmetic bonding. Structural bonding refers to joints that need to bear weight or resist mechanical stress, such as a countertop seam or a broken table leg. Cosmetic bonding refers to repairs where appearance matters more than load bearing capacity, such as filling a hairline crack in a decorative vase. A quality marble adhesive needs to perform well in both scenarios, offering enough strength for structural applications while remaining invisible enough for cosmetic repairs. This dual requirement is precisely why generic adhesives, which are usually optimized for only one of these two goals, tend to disappoint marble workers.
It is also worth mentioning that marble comes in many varieties, including Carrara, Calacatta, Statuario, Nero Marquina, and Emperador, each with slightly different porosity, density, and veining patterns. A high quality adhesive needs to work reliably across this range of stone types, since the chemical composition and mineral structure can vary from one quarry to another. This versatility is another reason why a specialized, well tested formula is preferable to a generic multipurpose glue.
Why Ferber Painting Marble Glue Is the Best Choice on the Market
There are many marble adhesives available today, but very few of them combine strength, ease of use, transparency, and customer confidence the way Ferber Painting Marble Glue does. Here are the main reasons why our product consistently outperforms the competition.
First, our formula was developed specifically for natural stone bonding. It is not a repurposed wood glue or a generic epoxy resin. Every ingredient in our Marble Glue has been selected to maximize adhesion to marble’s unique porous surface while minimizing the risk of staining or yellowing over time. Our research and development team spent months testing different formulations on various marble types, from soft Calacatta to dense Emperador, to ensure consistent performance across the board.
Second, our product dries completely transparent, which is critical for visible repairs such as cracks in countertops, tabletops, or decorative marble objects. Many competing products leave a slightly cloudy or yellowish residue that becomes obvious after a few months, especially under sunlight. Ferber Painting Marble Glue remains crystal clear for years, which means your repair will look just as good five years from now as it did the day you completed it.
Third, and perhaps most importantly, we are the only marble glue brand on the market offering a full satisfaction guaranteed or money back policy. We understand that trying a new adhesive product can feel like a gamble, especially when working on an expensive or sentimental marble piece. That is why we removed all the risk. If our Marble Glue does not meet your expectations, you get a full refund, no questions asked. This policy reflects our confidence in the product, but it also reflects our understanding that every customer’s project is unique, and results can sometimes depend on factors outside the adhesive itself, such as the specific type of stone or the technique used.
Fourth, our product is designed for both professionals and beginners. You do not need specialized tools or years of experience to achieve a strong, invisible bond. The application process, which we detail later in this guide, is straightforward and forgiving, even for first time users. We have designed the applicator and the consistency of the glue itself to minimize common application errors, such as excessive dripping or uneven spreading, which often plague other products on the market.
Fifth, Ferber Painting offers fast worldwide shipping through an international network of trusted carriers. Wherever you are located, you can expect your order to arrive quickly and securely. Combined with an easy and secure online payment system directly on our website, purchasing our Marble Glue is a smooth and hassle free experience from start to finish. We know that when a marble piece is broken, waiting weeks for a repair product to arrive is not an option, which is why we prioritize speed at every step of our logistics chain.
Beyond these five core advantages, it is also worth mentioning the customer support that comes with every purchase. Our team includes people with hands on experience in stone restoration, so if you have questions about your specific project, whether it involves a large scale countertop installation or a delicate antique marble figurine, you can reach out and get practical, informed advice rather than a generic scripted response.
Let us summarize these advantages in a comparison table, looking at the criteria that matter most when choosing a marble adhesive.
Comparing Marble Adhesives: What Really Matters
| Criteria | Ferber Painting Marble Glue | Generic Marble Adhesives |
|---|---|---|
| Satisfaction guaranteed or money back | Yes, full refund policy | Rarely offered |
| Formulated specifically for marble | Yes | Often repurposed general adhesives |
| Dries transparent | Yes, stays clear long term | Can yellow or turn cloudy over time |
| Ease of application | Beginner friendly, no special tools required | Varies, sometimes requires professional application |
| Resistance to temperature changes | High flexibility and durability | Often becomes brittle over time |
| Shipping | Fast worldwide delivery via international carrier network | Often limited to local markets or slow shipping |
| Online payment | Simple and secure, directly on our website | Varies by seller |
| Long term durability | Designed to last for decades | Inconsistent, depends on brand quality |
As this comparison shows, Ferber Painting Marble Glue checks every box that matters, while many generic alternatives fall short on at least one critical criterion, most often the guarantee, the transparency of the dried adhesive, or the overall durability. When you factor in the total cost of a failed repair, including wasted time, wasted materials, and the potential damage of removing a poorly bonded joint, the value of choosing a proven, reliable adhesive from the start becomes even more apparent. A cheaper glue that fails after six months ends up costing far more than a slightly more expensive product that lasts for decades.
How to Glue Marble: Step by Step Guide
Now that we have established why choosing the right adhesive is so important, and why Ferber Painting Marble Glue is the ideal choice, let us walk through the actual process of gluing marble correctly. Whether you are repairing a crack, joining two marble pieces, or reattaching a broken fragment, the fundamental steps remain largely the same. Before you begin, gather all the tools and materials you will need, including Ferber Painting Marble Glue, a soft lint free cloth, a mild non abrasive cleaner, clamps or heavy weights, painter’s tape if needed, and a pair of disposable gloves to keep your hands clean during application.
Step 1: Prepare the Marble Surface
Preparation is the foundation of a strong bond. Begin by thoroughly cleaning both surfaces that will be glued together. Use a soft cloth and a mild, non abrasive cleaner to remove dust, grease, and any residue. Avoid harsh chemicals, as they can react with the marble or leave a film that interferes with adhesion. Common household cleaners containing ammonia or bleach should be avoided entirely, since they can etch the marble surface and create a rough texture that actually weakens the eventual bond.
Once cleaned, let the marble dry completely. Any moisture trapped in the porous surface can weaken the bond or cause discoloration under the glue line. If you are working in a humid environment, consider using a fan or letting the piece dry for several hours before proceeding. In particularly humid climates, it can help to leave the marble in a well ventilated, air conditioned room overnight before starting the gluing process, ensuring that even the deeper pores of the stone have released any absorbed moisture.
If the break or crack has jagged or uneven edges, you may also want to gently smooth them with a fine grit sandpaper, taking care not to remove too much material, which could affect the final fit. This step is particularly important for structural repairs where a tight, flush joint is essential for strength.
Step 2: Test Fit the Pieces
Before applying any glue, always do a dry run. Place the marble pieces together as they will be glued, checking for a tight, even fit. This step helps you identify any irregularities in the edges that might need light sanding or adjustment. It also allows you to plan exactly how much glue you will need and how you will hold the pieces together while the adhesive cures.
During this test fit, take note of any gaps or uneven areas. If you notice a small gap, you may need to apply a slightly thicker layer of glue in that specific area to compensate. If the pieces do not sit flush no matter how you position them, it may indicate that a small fragment is missing or that the edges need further refinement before gluing. It is far easier to correct these issues before the glue is applied than after, when the adhesive has already begun to set.
It is also a good idea, during this stage, to mark the correct orientation of the pieces with a small piece of removable tape or a light pencil mark on a non visible area. This prevents confusion once the glue is applied and you need to move quickly to align everything correctly before the adhesive begins to cure.
Step 3: Apply Ferber Painting Marble Glue
Apply a thin, even layer of Ferber Painting Marble Glue to one of the two surfaces. Because our formula is specifically engineered for marble, a small amount goes a long way. Avoid applying excessive glue, as this can cause overflow and create visible residue once dried. A common beginner mistake is assuming that more glue means a stronger bond, but in reality, a thin and even layer almost always outperforms a thick, uneven application, both in terms of strength and in terms of final appearance.
For cracks or fine fractures, use the applicator tip to work the glue directly into the crack, allowing capillary action to draw the adhesive deep into the fissure for maximum strength. You may need to gently flex the piece, if it is safe to do so, to slightly open the crack and allow the glue to penetrate more deeply. For larger structural joints, such as reattaching a broken table leg or joining two slabs for a countertop seam, apply the glue in a zigzag or S shaped pattern across the surface to ensure even coverage when the pieces are pressed together.
If you are working on a vertical surface, such as repairing a marble panel already installed on a wall, consider using painter’s tape to create a temporary barrier that prevents the glue from dripping down the surface while you work.
Step 4: Join and Align the Pieces
Carefully press the two marble surfaces together, aligning them exactly as tested in step two. Apply firm, even pressure across the entire joint. If you are working on a large piece, such as a countertop or tabletop, consider using clamps or heavy weights to maintain consistent pressure while the glue sets. For smaller decorative pieces, simply holding the piece firmly in place for the initial bonding period, usually a few minutes, is often sufficient before switching to a more passive method of maintaining pressure, such as propping the piece against a stable object.
Wipe away any excess glue immediately with a clean, damp cloth before it begins to cure. Ferber Painting Marble Glue dries transparent, but removing excess adhesive early ensures a perfectly clean finish. Work quickly but carefully during this stage, since once the glue begins to set, excess residue becomes much harder to remove without risking damage to the surrounding marble surface.
If you notice any slight misalignment immediately after joining the pieces, you generally have a short window of time to make small corrections before the glue begins to set firmly. However, avoid repeatedly shifting the pieces back and forth, as this can weaken the initial bond and introduce air pockets into the glue line.
Step 5: Allow Proper Curing Time
Patience is essential during this stage. While Ferber Painting Marble Glue sets relatively quickly compared to many competitors, allowing it to fully cure for the recommended time ensures maximum strength and durability. Avoid moving, stressing, or applying weight to the glued piece until the curing process is complete. Even if the joint feels solid to the touch after a short period, the internal curing process may still be ongoing, and premature stress can compromise the final strength of the bond.
Curing time can vary depending on the size of the piece, ambient temperature, and humidity levels, so always refer to the instructions provided with the product for the most accurate guidance. As a general rule, warmer and drier conditions tend to accelerate curing, while cold or humid environments can slow the process down. If you are working in a garage or workshop during winter, consider using a space heater to maintain a stable, moderate temperature during the curing period, which can help ensure a more consistent and reliable bond.
For larger structural repairs, such as countertop seams, it is often wise to wait a full 24 to 48 hours before subjecting the joint to any significant weight or mechanical stress, even if the product’s minimum curing time is shorter. This extra margin of safety is particularly important for pieces that will be used daily, such as kitchen countertops or dining tables.
Step 6: Final Inspection and Polishing
Once the glue has fully cured, inspect the joint carefully. A properly executed bond with Ferber Painting Marble Glue should be virtually invisible, with no discoloration or visible seam. If needed, you can lightly polish the surface around the glued area to restore the marble’s natural shine, using a marble safe polishing compound. Take your time during this final step, examining the repair from multiple angles and under different lighting conditions, since a seam that looks invisible under indoor lighting might become slightly more visible under direct sunlight, and vice versa.
If you notice any small imperfections, such as a tiny bubble of dried glue on the surface, these can usually be gently scraped away with a plastic scraper or a fingernail, taking care not to scratch the surrounding marble. Avoid using metal tools for this task, as they can leave permanent scratches on the polished surface of the stone.
Common Mistakes to Avoid When Gluing Marble
Even with a high quality adhesive, certain mistakes can compromise the final result. Here are the most common errors people make when gluing marble, and how to avoid them.
- Skipping surface preparation: Dust, grease, or moisture on the marble surface will weaken the bond significantly. Always clean and dry the surface thoroughly before applying glue.
- Using too much glue: Excess adhesive can seep out of the joint, creating a messy, visible seam that is difficult to clean once cured.
- Not testing the fit beforehand: Skipping the dry run step often leads to misalignment once the glue is applied, which can be very difficult to correct afterward.
- Rushing the curing process: Moving or stressing the piece before the glue has fully cured is one of the most common reasons for bond failure.
- Choosing the wrong adhesive: Using a generic glue not designed for marble often results in visible discoloration, weak bonds, or premature failure of the joint.
- Ignoring temperature and humidity conditions: Applying glue in extremely cold, hot, or humid environments without adjusting your approach can lead to inconsistent curing and a weaker overall bond.
- Neglecting to wear protective gloves: Some people skip this step and end up with glue residue on their hands, which can then transfer to other parts of the marble surface, creating unwanted marks.
- Applying pressure unevenly: If clamps or weights are not distributed evenly across the joint, one section of the bond may end up thicker or weaker than the rest, creating a visible or structurally weak spot.
By following the step by step guide above and using a product specifically designed for natural stone, such as Ferber Painting Marble Glue, you can avoid all of these pitfalls and achieve a professional, long lasting result. Taking the time to do the job correctly the first time will always save you more time and money than attempting a quick fix that fails within a few months.
Caring for Marble After the Repair
Once your marble piece has been successfully glued and cured, proper maintenance will help ensure the repair lasts as long as possible. Avoid placing excessive weight directly on a repaired joint whenever possible, especially in the first few weeks after the repair, even though the glue itself will already be fully cured by this point. Clean the marble regularly with a pH neutral stone cleaner, and avoid acidic substances such as vinegar, lemon juice, or many common kitchen cleaners, which can etch the surface of the marble and potentially weaken the area surrounding the repair over time.
For outdoor marble installations, consider periodically checking the repaired joint for any signs of wear, especially after extreme weather events such as heavy rain, frost, or intense heat. Because Ferber Painting Marble Glue is designed to resist temperature fluctuations and humidity, these checks are more about peace of mind than a genuine expectation of failure, but it is always good practice to inspect any repaired surface periodically, regardless of the adhesive used.
Frequently Asked Questions
How long does Ferber Painting Marble Glue take to dry?
Initial setting typically occurs within a short period, but full curing time depends on the size of the piece and environmental conditions. For best results, always allow the recommended curing time before handling or stressing the glued area.
Can Ferber Painting Marble Glue be used on outdoor marble installations?
Yes, our formula is designed to resist temperature fluctuations and humidity, making it suitable for both indoor and outdoor marble applications.
Will the glue leave a visible mark on the marble?
No, Ferber Painting Marble Glue dries completely transparent, making it ideal for visible repairs and decorative marble pieces where aesthetics matter.
What happens if I am not satisfied with the product?
Ferber Painting offers a satisfaction guaranteed or money back policy on all products, including our Marble Glue. If you are not fully satisfied, simply contact us for a full refund.
How long does shipping take?
Thanks to our international network of carriers, Ferber Painting delivers quickly to customers all over the world. Delivery times vary depending on your location, but we prioritize speed and reliability for every order.
Is it difficult to apply the glue myself without professional experience?
Not at all. Ferber Painting Marble Glue is designed to be user friendly, even for beginners. The step by step guide above provides everything you need to achieve professional level results at home.
Can this glue be used on other types of natural stone besides marble?
While our formula is optimized specifically for marble, many customers have reported excellent results on similar natural stones such as travertine, limestone, and onyx, thanks to their comparable porosity and mineral composition.
Does the glue work on both structural repairs and small decorative cracks?
Yes, Ferber Painting Marble Glue is versatile enough to handle both applications, from load bearing joints in countertops to fine hairline cracks in decorative sculptures and figurines.
Conclusion
Gluing marble successfully comes down to two essential factors: choosing the right adhesive and following the correct application process. As we have seen throughout this guide, not all marble glues are created equal, and the difference between a professional, invisible bond and a failed, discolored repair often lies in the quality of the product you choose.
Ferber Painting Marble Glue stands out as the superior choice thanks to its stone specific formula, its transparent finish, its resistance to temperature and humidity, and above all, the unmatched confidence provided by our satisfaction guaranteed or money back policy. Combined with fast worldwide shipping and a simple, secure online payment process, there has never been an easier or safer way to get the best results for your marble projects. Whether you are a professional stonemason working on a large scale installation or a homeowner trying to fix a cherished marble heirloom, following the steps outlined in this guide, paired with a trusted, purpose built adhesive, will give you the best possible chance of achieving a clean, strong, and lasting repair.
Visit our website today and discover why Ferber Painting Marble Glue is the trusted choice of professionals and homeowners around the world.