 Ireland
 United States
 Australia
 Česko
Česko Danmark
 Deutschland
 Eesti
Eesti España
 Ελλάδα
 France
 Hrvatska
 Italia
 Latvija
 Lietuva
 Magyarország
 Nederlands
 New-Zealand
 Norge
Norge Polska
 Portugal
 România
 Schweiz (Deutsch)
 Slovenija
 Slovensko
 Suomi
Suomi Sverige
 България
 Canada (English)
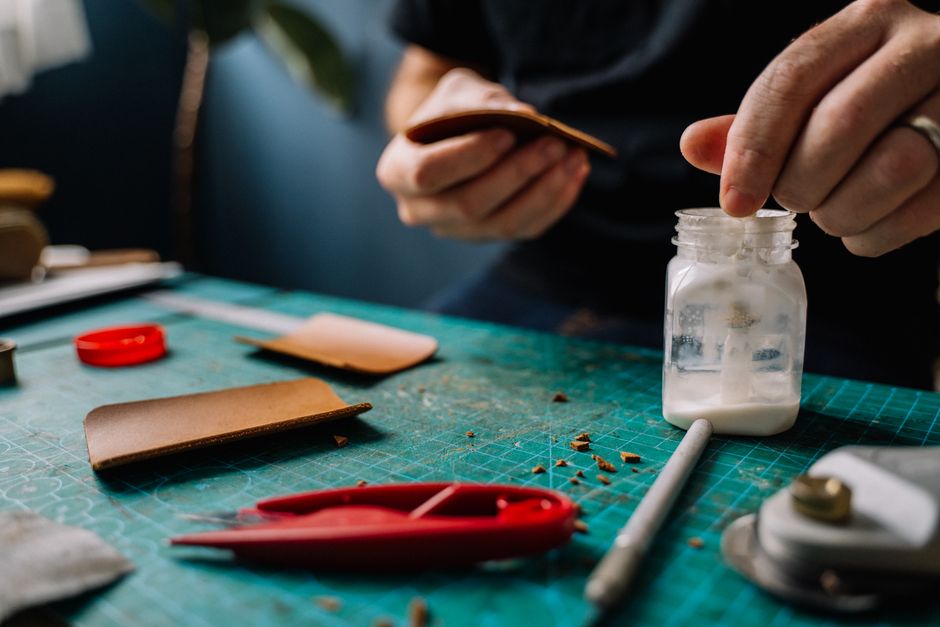
Gluing leather might look like a simple task, but anyone who has ever tried to repair a wallet, a jacket, a couch, or a pair of shoes knows that the results depend almost entirely on one single factor: the quality of the glue you use. A cheap or poorly formulated adhesive will peel, crack, or discolor your leather within weeks. A professional-grade adhesive, on the other hand, will create a bond that lasts for years, resists moisture, and remains flexible as the leather moves and stretches.
That is exactly why, before we even get into the technical steps of gluing leather, we want to be transparent with you: the single most important decision you will make in this entire process is choosing the right glue. And in our opinion, backed by thousands of satisfied customers, the best option on the market today is the Leather Glue from Ferber Painting. Not only is it formulated specifically for leather bonding, but it is also the only leather glue on the market backed by a full satisfaction guaranteed or your money back policy. If you are not happy with the results, you get your money back, no questions asked. This is a promise almost no competitor is willing to make, and it says a lot about the confidence we have in our product.
In this complete guide, we will walk you through everything you need to know about gluing leather, from choosing the right adhesive to preparing your surfaces, applying the glue correctly, and avoiding the most common mistakes. We will also explain why Ferber Painting Leather Glue consistently outperforms other products available online and in hardware stores. Whether you are a hobbyist working on your very first leather craft project, a professional upholsterer repairing furniture for clients, or simply someone who wants to save a favorite pair of boots instead of throwing them away, this guide has been written with your specific situation in mind. Leather repair and leather crafting are two very different worlds, yet the fundamentals of gluing remain the same, and understanding them thoroughly will save you time, money, and frustration.
Leather has been used by humans for thousands of years, valued for its durability, its ability to age gracefully, and its unique texture that cannot be replicated by synthetic materials. Yet this same natural complexity is what makes leather notoriously difficult to bond with generic adhesives. Throughout this article, we will not only explain the technical steps involved in gluing leather correctly, but also give you the background knowledge needed to understand why each step matters, so that you are not just following instructions blindly but actually understanding the science and craftsmanship behind a successful leather repair or leather project.
Why the Right Leather Glue Makes All the Difference
Leather is not like paper, wood, or plastic. It is a natural material made of fibrous proteins, and its surface can vary significantly depending on whether it is full grain, top grain, suede, nubuck, or bonded leather. This means that not every glue works well on every type of leather, and using the wrong product can lead to disappointing results such as visible glue marks, stiffness, cracking, or a bond that simply does not hold.
Consider full grain leather, which retains the natural surface of the hide, including its pores and imperfections. This type of leather tends to be relatively porous and absorbs adhesives well, but it also shows every flaw if the glue is applied unevenly. Top grain leather, on the other hand, has been sanded and refinished, giving it a smoother, more uniform surface that can sometimes resist adhesion unless properly prepared. Suede and nubuck present an entirely different challenge, since their napped, fuzzy surface can trap glue in ways that create stiff, matted patches if you are not careful with the amount you apply. Bonded leather, which is made from scraps of leather fused together with a polyurethane or latex backing, behaves more like a synthetic material and requires an adhesive flexible enough to handle both the leather fibers and the backing layer. Understanding which category your project falls into before you even open the glue bottle will dramatically improve your chances of success.
Ferber Painting Leather Glue was developed specifically to address these challenges. Here are some of the key advantages that set it apart from generic adhesives found in most stores:
- Flexible bond: unlike many super glues or contact cements that dry hard and brittle, our formula remains flexible once cured, which means it moves naturally with the leather instead of cracking under stress.
- Waterproof and heat resistant: once fully cured, the bond resists water, humidity, and moderate heat, making it ideal for shoes, bags, car interiors, and furniture.
- Fast drying time: you do not need to clamp your leather pieces for hours. Our glue sets quickly, allowing you to move on with your repair or project without long waiting periods.
- No strong chemical odor: many industrial leather adhesives release strong fumes that require ventilation and protective equipment. Our formula is much more pleasant to work with, even indoors.
- Transparent finish: once dry, the glue becomes virtually invisible, so it will not leave ugly marks on light-colored or delicate leather.
- Works on genuine and synthetic leather: whether you are repairing a real leather jacket or a faux leather sofa, this glue adapts to both surfaces.
Beyond these technical qualities, there is also a practical dimension worth mentioning: ease of use. Many professional adhesives used in shoe repair shops or upholstery workshops require specialized tools, precise mixing ratios, or long curing chambers that are simply not accessible to the average person working at home. Ferber Painting Leather Glue was designed with the everyday user in mind, someone who wants professional results without needing professional equipment. You do not need a workshop, a ventilation system, or years of experience to achieve a clean and durable bond. A steady hand, a bit of patience, and the right glue are enough.
But perhaps the most important advantage is the one we mentioned earlier: our satisfaction guaranteed or money back policy. We are so confident in the performance of our Leather Glue that we allow every customer to try it completely risk free. If for any reason the results do not meet your expectations, simply contact us and we will refund your purchase. No competitor offers this level of confidence in their product, and that alone should tell you something about the quality you are getting. When a company is willing to stand behind its product this strongly, it usually means the product has already proven itself thousands of times over with real customers facing real repair situations, from torn car seats to detached shoe soles to ripped handbag straps.
Ferber Painting vs Other Leather Glues: A Quick Comparison
To help you understand why so many customers choose Ferber Painting over other brands, we put together a simple comparison table covering the criteria that matter most when choosing a leather adhesive.
| Criteria | Ferber Painting Leather Glue | Generic Leather Glues |
|---|---|---|
| Satisfaction guaranteed or money back | Yes, full refund available | Rarely offered |
| Worldwide fast shipping | Yes, international carrier network | Often limited or slow |
| Ease of online payment | Simple and secure online checkout | Varies by seller |
| Flexibility after drying | Remains flexible | Often becomes stiff or brittle |
| Odor during application | Mild, pleasant | Often strong and chemical |
| Drying time | Fast | Often slow |
| Compatible with synthetic leather | Yes | Not always |
| Visible residue once dry | No, transparent finish | Sometimes visible |
As you can see, the difference is not just about the glue itself, but about the entire buying experience. When you order from Ferber Painting, you benefit from fast worldwide delivery thanks to our international network of trusted carriers, an easy and secure online payment process, and of course our satisfaction guaranteed or money back promise on every single order. These are details that matter, especially when you are trusting a company with a project that is important to you, whether it is a family heirloom, an expensive leather jacket, or a piece of furniture you love.
It is also worth mentioning that many customers who reach out to us have already tried at least one other leather glue before finding Ferber Painting. A common story we hear is that someone purchased a cheap adhesive from a local hardware store, applied it carefully following the instructions, only to see the bond fail within days or weeks. This is often not because the person did anything wrong, but because the adhesive itself was never designed to handle the specific demands of leather, such as constant flexing, exposure to skin oils, or repeated contact with moisture. Investing a little more in a glue that is actually formulated for leather almost always ends up being more economical in the long run, since you avoid having to redo the repair multiple times.
How to Glue Leather: Step by Step Guide
Now that we have covered why choosing the right glue matters so much, let us walk through the actual process of gluing leather. Whether you are repairing a tear, reinforcing a seam, or working on a creative leather project, these steps will help you achieve a clean, durable, and professional looking result.
Step 1: Gather Your Materials
Before you start, make sure you have everything you need within reach. You will typically need the following items:
- Ferber Painting Leather Glue
- A clean cloth or rag
- Isopropyl alcohol or a mild leather cleaner
- Sandpaper (fine grit, around 400 to 600)
- A small applicator brush or spatula, sometimes included with the glue
- Clamps, heavy books, or clips to hold the leather in place while it dries
- Scissors or a cutting tool if you need to trim excess leather or thread
Depending on the specific project, you might also want to have on hand a piece of scrap leather to test the glue on first, especially if you are working with a leather type you have never glued before. Testing on a small, inconspicuous area or a spare scrap allows you to check how the glue reacts with the specific finish or dye of your leather, and to practice your technique before committing to the actual repair. This is particularly useful for exotic leathers, patent leather, or leather with unusual coatings, where results can sometimes differ from standard cowhide.
Step 2: Clean the Leather Surface
This step is absolutely crucial and is often the reason why glue fails to bond properly. Leather can accumulate dust, oils, wax, and dirt over time, all of which prevent adhesives from creating a strong bond. Using a clean cloth dampened with isopropyl alcohol or a mild leather cleaner, gently wipe down the area you plan to glue. Allow the surface to dry completely before moving to the next step. Do not rush this part, even a small amount of residual moisture or oil can weaken the final bond significantly.
If the leather item you are working on has been treated with a leather conditioner or protective spray in the past, be aware that these products can leave an invisible film on the surface that is particularly resistant to adhesives. In such cases, a slightly stronger cleaning pass, or even a second wipe with fresh alcohol on a clean section of cloth, can make a noticeable difference. Never use household cleaning products that contain oils, silicones, or fragrances, as these can interfere with the chemistry of the adhesive and prevent proper curing. Stick to isopropyl alcohol or a cleaner specifically designed for leather preparation.
Step 3: Lightly Sand the Surface
For surfaces that are smooth or have a glossy finish, lightly sanding the area with fine grit sandpaper will help the glue grip better. This step is especially important for repairs involving finished leather, as the coating on the surface can otherwise act as a barrier between the glue and the actual leather fibers. Sand gently, just enough to create a slightly rough texture, then wipe away any dust with a dry cloth.
When sanding, always work in small, controlled motions rather than aggressive back and forth scrubbing, which can damage the surrounding leather or create uneven patches that become visible once the item is finished. If you are working on a visible area, such as the front panel of a bag or the toe of a shoe, consider sanding only the very edges of the area to be glued, keeping the sanding contained to where it will eventually be covered by the bonded seam. For suede or nubuck, this step is usually unnecessary since the surface is already napped and porous, and sanding could actually damage the delicate fibers.
Step 4: Apply Ferber Painting Leather Glue
Using the applicator brush or spatula, apply a thin, even layer of glue to both surfaces you intend to bond. Avoid applying too much glue, as excess adhesive can seep out from the sides once you press the pieces together, creating a messy finish. A thin layer is almost always more effective than a thick one when it comes to leather bonding, since it allows for a more even and flexible bond.
A useful technique for larger surfaces is to apply the glue in a thin zigzag pattern first, then use the flat side of the applicator or a small piece of scrap card to spread it evenly across the entire area, much like spreading butter on bread. This ensures full coverage without pooling in any single spot. For smaller repairs, such as fixing a lifted edge on a wallet or a small tear on a strap, a fine tipped applicator or even a toothpick can give you the precision needed to avoid getting glue where you do not want it.
Step 5: Press the Pieces Together
Once the glue has been applied to both surfaces, press them together firmly. Depending on the size and shape of your project, you may need to hold the pieces in place for a minute or two to allow the initial bond to form. For larger or curved surfaces, using clamps or heavy books can help maintain even pressure while the glue cures.
When working with curved or irregularly shaped leather pieces, such as the toe box of a shoe or the corner of a bag, standard flat clamps may not apply even pressure across the whole surface. In these cases, improvise with rolled up towels, rubber bands, or even masking tape to hold the shape while the bond sets. The goal is always the same: consistent, even contact pressure across the entire glued area, without any gaps where the two surfaces are not touching. Even a small air pocket left unpressed can become a weak point that eventually peels open.
Step 6: Allow the Glue to Cure Fully
While Ferber Painting Leather Glue dries quickly to the touch, it is important to allow it to cure fully before subjecting the leather to stress, folding, or washing. Curing times can vary depending on temperature and humidity, but as a general rule, waiting at least 24 hours before using the item normally will ensure the strongest possible bond.
It helps to place the item in a stable, room temperature location away from direct sunlight or heat sources while it cures. Extreme heat can cause the glue to cure unevenly on the surface while remaining soft underneath, while excessive cold or humidity can slow down the curing process significantly. If you live in a particularly humid climate, consider curing the item in an air conditioned room, or near a fan set on low, to help maintain steady airflow without overheating the adhesive.
Step 7: Finish and Inspect Your Work
Once the glue has fully cured, inspect the bonded area closely. If any excess glue has dried on the surface, it can usually be gently removed with a soft cloth or, in some cases, a small amount of isopropyl alcohol. Check that the seam is flexible and moves naturally with the rest of the leather, which is a good indicator that the bond is strong and properly cured.
For projects where appearance matters, such as visible seams on a jacket or bag, you may also want to apply a small amount of leather conditioner around the repaired area once the glue has fully cured, to help blend the texture and sheen with the surrounding leather. Avoid doing this too early, since applying conditioner before the glue has cured completely can interfere with the final strength of the bond. Give it at least the full 24 hour curing window, and ideally 48 hours for larger or load bearing repairs, before introducing any additional products to the area.
Specific Use Cases: Applying These Steps to Real Projects
While the general process described above applies to almost any leather gluing project, certain items come with their own particular challenges worth mentioning. Shoes and boots, for example, are subjected to constant flexing, weight, and friction with the ground, which means the glued area needs to be especially flexible and durable. When repairing a sole or reinforcing stitching on footwear, take extra care to apply glue not just on the surface but slightly into any small gaps or separations, ensuring full contact between the layers. Allow extra curing time for shoes compared to smaller accessories, since they will face immediate stress the moment they are worn again.
Leather furniture, such as sofas and armchairs, presents a different challenge: large surface areas and the need for an invisible repair, since any imperfection tends to be very visible on a big, flat cushion. For furniture repairs, take your time with the cleaning and sanding steps, and consider practicing the glue application on a hidden section of the furniture, such as the underside or back panel, before tackling the visible tear.
Bags, wallets, and small leather goods often involve tight corners, multiple layers, and decorative stitching, all of which require precision. A fine applicator tip and a steady hand are your best friends here. Take the time to protect surrounding areas with masking tape if needed, so that any accidental excess glue does not end up on a visible part of the item.
Common Mistakes to Avoid When Gluing Leather
Even with a high quality adhesive like Ferber Painting Leather Glue, certain mistakes can compromise your results. Here are the most common ones we see, along with tips on how to avoid them.
- Skipping the cleaning step: as mentioned earlier, dirt and oils are the number one enemy of a strong bond. Never skip cleaning the leather before applying glue.
- Using too much glue: more glue does not mean a stronger bond. In fact, excess glue can seep out and create a messy, uneven finish.
- Not allowing enough curing time: rushing to use or wash the item before the glue has fully cured is one of the most common reasons for bond failure.
- Ignoring the type of leather: suede and nubuck require slightly different preparation than smooth, finished leather. Always check the compatibility of your glue with the type of leather you are working on.
- Applying glue in cold or damp conditions: temperature and humidity can affect drying time and bond strength, so try to work in a room temperature, dry environment whenever possible.
Beyond these five main mistakes, there are a few additional pitfalls worth mentioning. One is failing to test the glue on a hidden or scrap section first, especially when working with unfamiliar leather types or unusual finishes. Another is neglecting to align the pieces correctly before pressing them together, since once the glue makes contact, repositioning becomes very difficult without risking damage to the leather fibers. Taking a moment to dry fit your pieces, marking alignment points with a light pencil mark if necessary, can save you from a frustrating and sometimes irreversible mistake. Finally, some people make the error of storing their leather glue improperly between uses, leaving the cap loose or the bottle exposed to heat, which can cause the adhesive to thicken or dry out prematurely. Always seal the bottle tightly and store it in a cool, dry place away from direct sunlight to preserve its performance for future projects.
Mini FAQ
Can Ferber Painting Leather Glue be used on both real and synthetic leather?
Yes, our formula has been tested and works effectively on genuine leather as well as synthetic and faux leather materials, making it a versatile choice for almost any project.
How long does it take for the glue to fully cure?
While the glue sets quickly to the touch, we recommend waiting at least 24 hours before subjecting the bonded area to stress, folding, or washing, in order to achieve the strongest possible bond.
Is the glue waterproof once dry?
Yes, once fully cured, the bond created by Ferber Painting Leather Glue is resistant to water and humidity, making it suitable for shoes, bags, and outdoor leather goods.
What happens if I am not satisfied with the product?
Every purchase from Ferber Painting is covered by our satisfaction guaranteed or money back policy. If you are not happy with the results, simply reach out to our team and we will process a full refund.
Does Ferber Painting ship internationally?
Yes, thanks to our international network of trusted carriers, we offer fast shipping to customers all around the world, with a simple and secure online payment process available directly on our website.
Conclusion
Gluing leather successfully is not complicated once you understand the basics: clean thoroughly, prepare the surface, apply a thin even layer of glue, press firmly, and allow enough time for the bond to cure. But none of these steps will matter if you start with a low quality adhesive that cannot handle the natural flexibility and texture of leather. That is why choosing the right product from the very beginning is the single most important decision in the entire process.
Whether you are repairing a cherished leather jacket that has been with you for decades, fixing a pair of work boots that need to survive many more months on the job, or starting a brand new leather crafting project from scratch, taking the time to follow each step carefully will make all the difference in the final result. Remember that patience during the preparation and curing stages is just as important as precision during the actual gluing, and that investing in a reliable, purpose built adhesive will always pay off compared to relying on whatever generic glue happens to be sitting in a drawer at home.