 Ireland
 United States
 Australia
 Česko
Česko Danmark
 Deutschland
 Eesti
Eesti España
 Ελλάδα
 France
 Hrvatska
 Italia
 Latvija
 Lietuva
 Magyarország
 Nederlands
 New-Zealand
 Norge
Norge Polska
 Portugal
 România
 Schweiz (Deutsch)
 Slovenija
 Slovensko
 Suomi
Suomi Sverige
 България
 Canada (English)
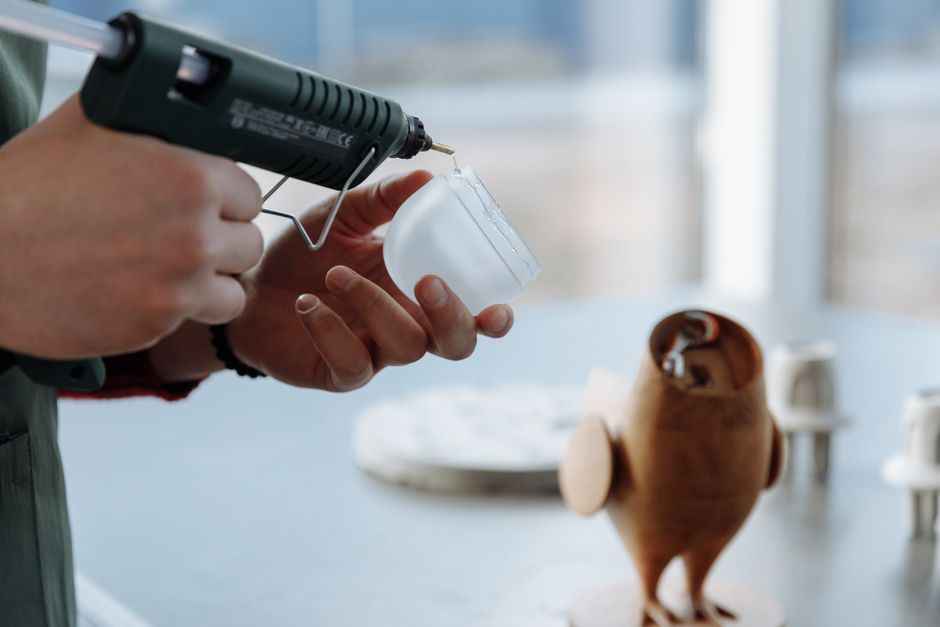
Gluing foam to wood might sound like a simple task, but anyone who has tried it knows that everything depends on choosing the right product. Use the wrong adhesive and you will end up with melted foam, weak bonds, or a project that falls apart within days. This is why thousands of customers trust Ferber Painting’s Glue for Foam, the only adhesive on the market backed by a full satisfaction guaranteed or money back promise. If you are serious about a project that lasts, starting with the right glue is not optional, it is essential.
In this guide, we will walk you through everything you need to know about bonding foam to wood, from preparation to application, while explaining why Ferber Painting’s Glue for Foam consistently outperforms other adhesives on the market. We will also answer the most common questions people have about this process. Whether you are a hobbyist building a cosplay prop, a parent working on a school project with your kids, a set designer creating theater backdrops, or a contractor installing insulation panels, the principles in this guide apply to almost every situation where foam needs to meet wood and stay there permanently.
Foam and wood are two of the most commonly combined materials in modern construction, crafting, and design work. From architectural models to soundproofing panels, from cosplay armor to furniture upholstery, the combination shows up everywhere. Yet despite how common this pairing is, very few people understand what actually happens at the chemical level when foam meets an adhesive, and even fewer know how to choose a glue that will not ruin their materials. That is exactly what we are going to fix in this article.
Why the Right Glue Makes All the Difference
Foam is a tricky material to work with. Unlike wood, metal, or plastic, foam is porous, lightweight, and extremely sensitive to solvents. Many traditional glues contain chemicals that literally dissolve foam on contact, leaving you with a sticky mess instead of a clean bond. This is one of the most common mistakes people make when trying to combine foam and wood in DIY projects, home renovations, or professional builds.
Ferber Painting’s Glue for Foam was specifically engineered to avoid this problem. It is solvent free, which means it will never eat away at the foam’s structure. Instead, it creates a strong, flexible bond that holds up over time, even in projects exposed to temperature changes or humidity.
To really understand why this matters, it helps to look at what foam actually is. Most foams used in crafting and construction, such as expanded polystyrene, extruded polystyrene, polyurethane foam, and EVA foam, are made up of tiny air pockets trapped inside a plastic matrix. This structure is what gives foam its lightweight, cushioning, and insulating properties. Unfortunately, that same structure is also what makes foam so vulnerable to certain chemicals. Solvent based adhesives work by softening the surface of the materials they touch so the bond can form as the solvent evaporates. On wood or metal, this process is harmless. On foam, the solvent attacks the plastic matrix directly, causing it to collapse, shrink, or dissolve entirely. Anyone who has ever watched a block of foam disintegrate the moment a spray adhesive touched it knows exactly how frustrating and wasteful this can be.
This is why formula matters so much more than brand recognition when it comes to foam bonding. A glue can be extremely well known and trusted for wood to wood or paper to paper applications, yet still be completely wrong for foam. Ferber Painting’s Glue for Foam was developed specifically to solve this compatibility problem, using a water based, solvent free formula that bonds mechanically to the surface rather than chemically breaking it down.
Here are some of the key advantages that make our product stand out from generic hardware store adhesives:
- No foam melting or shrinking, thanks to its solvent free formula
- Fast drying time, so you spend less time waiting and more time building
- Strong flexible bond that resists cracking, unlike rigid glues that snap under pressure
- Works on multiple foam types, including polystyrene, polyurethane, and EVA foam
- Satisfaction guaranteed or your money back, a guarantee no competitor offers
- Easy application with no special tools required
This last point deserves emphasis. While many competitors offer a 30 day return window with strict conditions, Ferber Painting stands behind every single bottle of Glue for Foam with a full satisfaction guaranteed or money back policy, no complicated conditions attached. If for any reason you are not happy with the results, we make it right. This level of confidence in a product is rare in the adhesive industry, and it exists because we know our formula works.
It is also worth mentioning flexibility after curing, since this is often overlooked by first time buyers. Wood expands and contracts slightly with humidity and temperature changes, while foam can flex under light pressure. If the adhesive used to join them dries into a completely rigid, brittle layer, the bond will eventually crack at the seam, even if it looked perfect on day one. Ferber Painting’s Glue for Foam remains slightly flexible after curing, which allows the bond to move naturally with both materials instead of fighting against them. This is one of the main reasons our customers report bonds that are still holding strong months or even years after application, in projects ranging from indoor decor to outdoor signage.
Comparing Ferber Painting’s Glue for Foam to Other Adhesives
To help you understand why our product is the better choice, here is a comparison table covering the criteria that matter most when selecting a foam to wood adhesive.
| Criteria | Ferber Painting Glue for Foam | Generic Craft Glue | Standard Wood Glue | Spray Adhesive |
|---|---|---|---|---|
| Safe for foam (no melting) | Yes | Sometimes | No | Rarely |
| Strong bond on wood | Yes | Weak | Yes | Moderate |
| Drying time | Fast | Slow | Slow | Fast but uneven |
| Flexible after drying | Yes | No | No | No |
| Satisfaction guaranteed or refund | Yes | No | No | No |
| Worldwide fast shipping | Yes | Varies | Varies | Varies |
| Easy online payment | Yes | Varies | Varies | Varies |
As you can see, Ferber Painting’s Glue for Foam checks every box that matters, while most competitors fail on at least one critical point, whether it is durability, safety for the foam material, or customer protection through a guarantee.
Let’s break down a few of these categories in more detail, since understanding why each competitor falls short helps explain why our formula was designed the way it is.
Generic craft glue is often marketed as an all purpose adhesive suitable for paper, cardboard, fabric, and light craft materials. While it may technically bond foam to wood in some cases, the resulting joint is usually weak and prone to peeling, especially under any kind of tension or weight. Craft glue also tends to dry very slowly, sometimes taking twenty four hours or more to fully set, which is impractical for anyone working on a deadline or a larger project with multiple joints to bond.
Standard wood glue, on the other hand, is formulated to penetrate the porous fibers of wood and create an extremely strong, rigid bond between two wooden surfaces. This is fantastic for furniture making and carpentry, but it is a poor choice for foam. The chemical composition of most wood glues is simply too aggressive for foam’s delicate cellular structure, and the rigid bond it creates does not allow for the natural flex that foam requires.
Spray adhesives are popular because of their speed and even coverage, but they come with two major downsides for foam to wood projects. First, many spray formulas contain solvents that are highly aggressive toward polystyrene foam in particular, causing visible pitting or collapse within seconds of contact. Second, spray adhesives are difficult to control, often resulting in overspray that wastes product and creates a mess on surrounding surfaces. For precision projects, this lack of control can be a serious drawback.
Step by Step Guide: How to Glue Foam to Wood
Now that you understand why product choice matters so much, let’s go through the actual process of gluing foam to wood. Follow these steps carefully for the best results.
Step 1: Prepare Your Surfaces
Before applying any glue, both the wood and foam surfaces need to be clean and dry. Dust, oil, or moisture can weaken the bond significantly. Use a dry cloth to wipe down the wood, and if the wood surface is rough, lightly sand it to create a smoother, more even surface for bonding. For the foam, simply make sure there is no dust or debris on the surface that will be glued.
If the wood surface has been previously painted, varnished, or sealed, it is worth taking a moment to consider whether that finish could interfere with adhesion. Glossy or heavily sealed surfaces sometimes prevent the glue from gripping properly, since the adhesive needs some texture to mechanically bond with. In these cases, a light pass with fine grit sandpaper, followed by wiping away the resulting dust with a slightly damp cloth and allowing it to dry fully, can make a noticeable difference in bond strength. For raw, untreated wood, this step is usually unnecessary, but it never hurts to check for splinters, sap, or rough patches that could create gaps between the two surfaces once pressed together.
On the foam side, preparation is generally simpler, but do not skip it entirely. Foam sheets and blocks often accumulate a fine layer of dust from cutting or shipping, and this dust can create a barrier between the glue and the actual foam surface. A soft brush or a gentle wipe with a dry cloth is usually enough. Avoid using any cleaning products or water on the foam before gluing, since moisture trapped inside the foam’s cells can interfere with curing time and reduce the strength of the final bond.
Step 2: Test on a Small Area First
If you are working with a new type of foam or wood you have not used before, it is always wise to test the glue on a small, inconspicuous area first. This lets you confirm compatibility and see how quickly the glue sets before committing to the full project.
This step is especially important if you are working with an unusual or specialty foam, such as memory foam, closed cell foam used in packaging, or foam that has already been painted or coated with a sealant. While Ferber Painting’s Glue for Foam is formulated to work across a wide range of foam types, testing on a hidden edge or a leftover scrap piece takes only a minute or two and can save you from having to redo an entire project. It also gives you a chance to see exactly how much glue is needed for your specific materials, since porous foams may absorb slightly more adhesive than denser varieties.
Step 3: Apply Ferber Painting’s Glue for Foam
Apply a thin, even layer of glue to the wood surface using the applicator tip or a small brush. There is no need to soak the surface, a light and even coat is enough to create a strong bond. Because our formula is specifically designed for foam compatibility, you do not need to worry about applying too much or damaging the foam’s texture.
For larger surfaces, consider applying the glue in a zigzag or crosshatch pattern rather than trying to cover every square inch in one continuous layer. This technique, commonly used by professional installers, ensures even distribution without wasting product, and it allows air pockets to escape more easily when the foam is pressed down, which reduces the risk of bubbling or uneven adhesion. If you are working on a vertical surface, apply slightly less glue than you would on a horizontal one, since gravity can cause thicker layers to slowly drip or sag before the bond sets.
For small or detailed projects, such as attaching foam trim pieces or decorative shapes to a wooden base, a fine tipped applicator or even a toothpick can give you more precise control over where the glue goes, which is especially useful when working near edges or corners that will remain visible in the finished piece.
Step 4: Press the Foam Firmly Against the Wood
Once the glue is applied, press the foam onto the wood surface firmly and evenly. Hold the pieces together for the amount of time indicated on the product label, generally just a few minutes thanks to the fast drying formula of Ferber Painting’s Glue for Foam.
When pressing foam and wood together, try to apply even pressure across the entire bonded surface rather than concentrating force on just the center or edges. For larger pieces, this might mean using clamps, heavy books, or weighted objects placed evenly across the surface while the initial bond forms. Painter’s tape can also be useful for holding foam in place along edges or corners where clamps are difficult to use. Just be sure to remove the tape gently once the bond has cured, so you do not accidentally lift any foam fibers along with it.
Step 5: Let It Cure Completely
While the glue sets quickly, allowing it to fully cure for the recommended time ensures maximum bond strength. Avoid putting stress or weight on the bonded area until the curing process is complete.
It is worth understanding the difference between drying and curing, since the two are often confused. Drying refers to the point at which the glue is no longer wet to the touch and the two surfaces are held together without slipping. Curing, on the other hand, refers to the complete chemical process the adhesive goes through to reach its maximum strength, which can take longer than the initial drying time. Handling a project too early, before curing is complete, is one of the most common reasons a bond that initially seemed strong ends up failing later. Patience during this stage pays off significantly in the long run, particularly for load bearing or structural applications.
Step 6: Inspect and Finish
Once cured, inspect the bond to make sure the foam is securely attached with no loose edges. If you plan to paint or finish the project, make sure to use products that are compatible with foam so you do not damage your work at this final stage.
When inspecting the bond, gently run your fingers along the edges where the foam meets the wood, checking for any spots that feel loose, bubbled, or hollow when lightly tapped. Catching a weak spot at this stage is far easier than discovering it after the project has already been installed, displayed, or shipped somewhere. If you do notice a small area that did not bond properly, it is usually possible to lift that section carefully, clean off any residue, apply a fresh thin layer of glue, and press it back into place rather than starting the entire project over.
For finishing touches, remember that many paints and sealants contain the same solvents that are harmful to foam. Always choose water based paints or products specifically labeled as foam safe when adding color or protective coatings to your finished piece, since an otherwise perfect bond can be ruined at the last step by a paint that eats through the foam’s surface.
Common Mistakes to Avoid When Gluing Foam to Wood
Even with the right glue, certain mistakes can compromise your results. Here are the most frequent errors people make and how to avoid them.
- Using solvent based glues that dissolve foam instead of bonding it
- Applying too much glue, which can cause uneven surfaces and longer drying times
- Not allowing enough curing time before handling the project
- Skipping surface preparation, which weakens adhesion significantly
- Choosing a cheap adhesive without a guarantee, risking wasted time and money if it fails
By using Ferber Painting’s Glue for Foam and following the steps above, you eliminate most of these risks entirely. Our formula was designed with these common pitfalls in mind, which is part of why it consistently delivers superior results compared to generic alternatives.
Beyond these five common mistakes, there are a few additional pitfalls worth mentioning, since they tend to catch even experienced builders off guard. One frequent issue is working in poor environmental conditions, such as extremely cold rooms or areas with high humidity. Adhesives generally perform best within a moderate temperature range, and working outside that range, even with a high quality glue, can slow curing time or weaken the final bond. If you are working in a garage, basement, or outdoor space, try to choose a day with mild, stable conditions for the best results.
Another mistake is rushing the assembly of complex projects with multiple foam pieces. When building something like a display stand, a themed prop, or a modeled structure with several foam components attached to a single wood base, it can be tempting to glue every piece at once to save time. In reality, working in stages, allowing each section to cure before adding the next, produces a much stronger and more reliable final result, especially for pieces that will be moved, shipped, or handled frequently.
Finally, some people assume that more glue always means a stronger bond, but this is rarely true. Excess glue can seep out from under the foam, creating an uneven surface, visible residue, or a soft spot that takes longer to fully cure. A thin, even layer applied correctly will almost always outperform a thick, sloppy one.
Why Choose Ferber Painting for Your Foam and Wood Projects
Beyond the quality of the glue itself, choosing Ferber Painting means choosing a company that stands behind its products from start to finish. Here is what sets us apart:
- Fast worldwide shipping through our international network of trusted carriers, so you get your product quickly no matter where you are located
- Simple and secure online payment directly through our website, with no complicated checkout process
- Every product comes with a satisfaction guaranteed or money back policy, giving you total peace of mind
- A formula developed specifically with foam compatibility in mind, unlike generic adhesives that were never designed for this purpose
- Responsive customer support ready to help if you have questions before or after your purchase
When you compare all of this to typical adhesive brands found in hardware stores, it becomes clear why so many hobbyists, professionals, and businesses choose Ferber Painting’s Glue for Foam for their projects involving foam and wood.
It is also worth noting how many different industries and hobbies rely on a dependable foam to wood bond. Model railroad builders use foam terrain boards attached to wooden bases to create realistic landscapes. Theater and film set designers rely on lightweight foam panels bonded to wood framing to build believable environments quickly and affordably. Cosplayers and prop makers frequently combine foam armor pieces with wooden supports for structure and stability. Even in the insulation and construction industry, foam boards are often bonded to wooden framing as part of energy efficient building practices. Across every one of these use cases, the same core requirement applies: the adhesive must bond strongly to wood while remaining completely gentle on the foam.
Customer feedback consistently highlights three things about Ferber Painting’s Glue for Foam: how easy it is to apply without special tools or training, how quickly it sets compared to other adhesives they have tried in the past, and how reassuring it is to know that a money back guarantee stands behind the purchase. For anyone who has previously wasted money on a glue that ruined a project, this combination of performance and protection makes the decision to switch an easy one.
Mini FAQ
Does Ferber Painting’s Glue for Foam work on all types of foam?
Yes, our formula is compatible with most common foam types including polystyrene, polyurethane, and EVA foam, making it a versatile choice for a wide range of projects.
How long does it take for the glue to dry completely?
Initial bonding happens within minutes, but for maximum strength, we recommend allowing the glue to cure fully according to the instructions on the packaging.
Can I use this glue for outdoor projects?
Yes, the flexible bond created by our formula holds up well against temperature changes and humidity, making it suitable for both indoor and outdoor applications.
What happens if I am not satisfied with the product?
Ferber Painting offers a satisfaction guaranteed or money back policy on all products, including Glue for Foam, so you can try it with complete confidence.
How fast is shipping?
Thanks to our international network of carriers, Ferber Painting delivers quickly to customers around the world.
Can this glue be used on painted or sealed wood surfaces?
In most cases, yes, though for glossy or heavily sealed finishes we recommend lightly sanding the surface first to improve grip before applying the adhesive.
Is the glue safe to use indoors without special ventilation?
Because the formula is solvent free, it produces significantly less odor than traditional solvent based adhesives, making it comfortable to use in enclosed spaces such as a workshop or living room.
Can I apply a second coat if the first layer does not seem strong enough?
Yes, if you feel the bond needs reinforcement, allow the first layer to begin setting, then apply a thin second coat rather than a thick single layer for the best results.
Conclusion
Successfully gluing foam to wood comes down to one essential factor: choosing a product designed specifically for this purpose. Generic glues risk melting your foam, creating weak bonds, or simply failing over time, while Ferber Painting’s Glue for Foam was engineered from the ground up to solve these exact problems. Combined with fast worldwide shipping, easy online payment, and a satisfaction guaranteed or money back policy that no competitor matches, it is easy to see why so many customers trust our brand for their foam and wood projects.
Whether you are building a small craft project over a weekend or working on a larger professional installation, the process outlined in this guide, preparing your surfaces properly, testing before full application, applying a thin even layer of glue, pressing firmly, allowing complete curing time, and finishing with foam safe products, will help you achieve a bond that lasts. Skipping any one of these steps, or using an adhesive not designed for foam, is the fastest way to end up frustrated and back at the start of your project. Investing a little extra care at each stage, paired with a glue formulated for exactly this purpose, is what separates a project that looks good for a week from one that holds up for years.