 Ireland
 United States
 Australia
 Česko
Česko Danmark
 Deutschland
 Eesti
Eesti España
 Ελλάδα
 France
 Hrvatska
 Italia
 Latvija
 Lietuva
 Magyarország
 Nederlands
 New-Zealand
 Norge
Norge Polska
 Portugal
 România
 Schweiz (Deutsch)
 Slovenija
 Slovensko
 Suomi
Suomi Sverige
 България
 Canada (English)
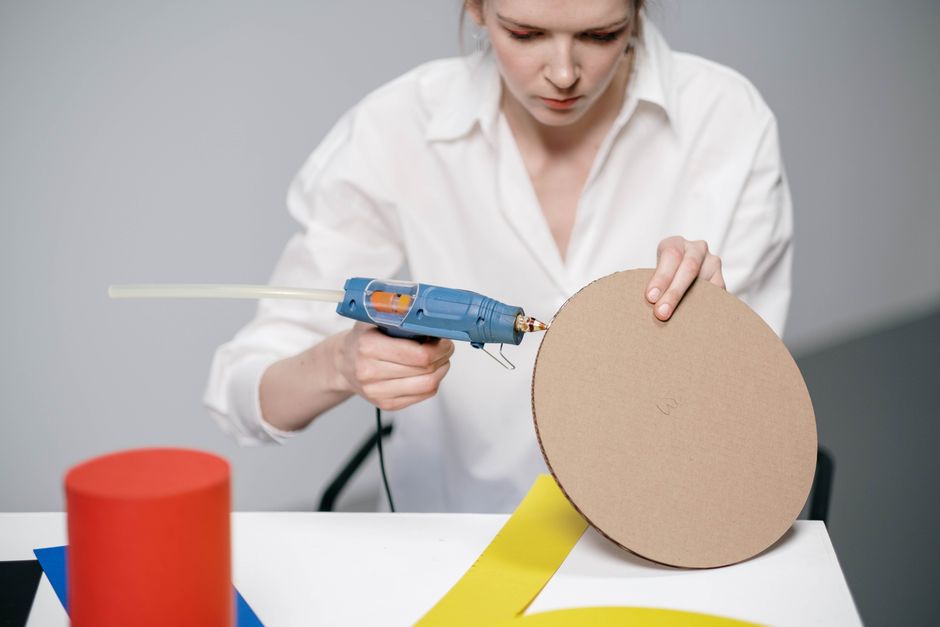
Reupholstering a chair, refreshing an old headboard, or adding a fabric panel to a wooden cabinet can completely transform a piece of furniture without the cost of buying something new. But before you even think about technique, there is one factor that determines whether your project will look professional for years or fall apart within weeks: the glue you use. Everything depends on choosing the right adhesive. A weak or unsuitable glue will leave your fabric bubbling, peeling, or discoloring within months, no matter how carefully you apply it.
That is exactly why we recommend Ferber Painting’s Fabric and Textile Glue. It is formulated specifically for bonding textiles to wood, metal, and other common furniture surfaces, and it is the only product on the market backed by a full satisfaction guaranteed or money back policy. If the result does not meet your expectations, you simply send it back and get a full refund, no complicated conditions attached. That alone should tell you how confident we are in the quality of this glue.
In this guide, we will walk you through everything you need to know about gluing fabric to furniture, from choosing the right materials to a detailed step by step process, while explaining why Ferber Painting’s glue consistently outperforms other products available today. We will also look at common mistakes people make, how to handle tricky surfaces and shapes, how to maintain fabric once it is glued, and how to troubleshoot problems if something does not go according to plan. Whether this is your first attempt at a DIY furniture project or you have years of experience with upholstery, there is something in this guide for you.
Why the Right Adhesive Makes All the Difference
Many people assume that any strong glue will do the job when it comes to attaching fabric to a piece of furniture. This is one of the most common mistakes in DIY upholstery and furniture restoration. Fabric is a flexible, porous material that behaves very differently from wood, plastic, or metal. It stretches, it breathes, and it reacts to humidity and temperature changes. A glue that is not designed for textiles will often become too rigid once dry, causing the fabric to crack or tear at the seams. Others remain too soft and never fully cure, leaving the fabric loose and prone to sagging or shifting over time.
There are also cosmetic issues to consider. Some multipurpose glues leave visible stains, yellowing patches, or a shiny residue on the fabric surface once dry. This is especially problematic on lighter colored textiles like linen, cotton, or suede, where any discoloration is immediately noticeable. A high quality fabric and textile glue should dry clear, flexible, and completely invisible once the project is finished.
Durability is another major concern. Furniture gets used every day. Chairs are sat on, armrests are gripped, cushions are moved around. If the adhesive bond is not strong enough to withstand repeated friction and pressure, your fabric will start peeling away at the edges within weeks. This is why professional upholsterers and furniture restorers are extremely selective about the glue they use, and why we always encourage customers to invest in a specialized product rather than reaching for a generic multipurpose glue sitting in the garage.
Finally, safety matters. Furniture is often used in living rooms, bedrooms, and children’s spaces. A glue that emits strong fumes or contains harsh chemicals is not something you want lingering in your home for weeks after application. The best fabric adhesives are low odor, non-toxic once cured, and safe for indoor use.
The Cost of Choosing the Wrong Glue
It is worth pausing to think about what actually happens when someone chooses the wrong adhesive for a fabric project. Consider a typical scenario: a homeowner spends an entire weekend carefully measuring, cutting, and gluing fabric onto a set of dining chairs using a generic craft glue found at a discount store. The chairs look great for the first month. Then, as the seasons change and humidity levels shift, the glue begins to lose its grip along the edges. Small bubbles appear where the fabric has separated from the wood. Within three months, corners start peeling and curling upward, and the entire project has to be redone from scratch, this time with the added difficulty of removing old, partially bonded fabric and dried glue residue.
This scenario repeats itself constantly in online forums and furniture restoration communities. The lesson is always the same: the time saved by grabbing whatever glue is on hand ends up costing far more time and money in the long run. Investing a little more upfront in a specialized fabric adhesive is almost always the more economical choice when you factor in the labor, materials, and frustration of redoing a failed project.
How Fabric Type Affects Glue Performance
Not all fabrics behave the same way when glued. Natural fibers like cotton and linen tend to absorb adhesive more readily, which means a thinner layer of glue is often sufficient. Synthetic fabrics like polyester or blends can be slightly more resistant to bonding since their fibers are less porous, so a slightly more generous but still even application may be needed. Suede and other napped textiles require extra care because pressing too hard while the glue is wet can flatten the texture permanently. Leather and faux leather, while not technically fabric, are sometimes combined with textile panels on the same piece of furniture, and a versatile adhesive that can handle multiple materials at once saves time and avoids the need for several different products.
Why Ferber Painting’s Fabric and Textile Glue Is the Best Choice
Ferber Painting’s Fabric and Textile Glue was developed specifically to solve all of the problems described above. Unlike generic adhesives that try to do everything at once, this glue is engineered exclusively for bonding fabric to hard surfaces such as wood, MDF, metal frames, and even certain plastics commonly found in furniture construction.
Here are the main reasons this product consistently outperforms competitors:
- It dries completely clear and flexible, so the fabric keeps its natural drape instead of becoming stiff or brittle.
- It creates a permanent, high strength bond that resists daily wear, friction, and repeated handling.
- It is water resistant once fully cured, which means accidental spills will not compromise the bond.
- It has a low odor formula, making it safe and pleasant to use indoors without ventilating the entire house.
- It works on a wide variety of fabrics, including cotton, linen, polyester blends, suede, and even some leathers.
- It comes with a precision applicator tip, allowing for clean, controlled application without messy overspill.
But what truly sets Ferber Painting apart from every other brand on the market is the satisfied or refunded guarantee. No other fabric glue manufacturer offers this level of confidence in their product. If for any reason you are not fully satisfied with your results, you can return the product and receive a complete refund. This is not a small detail. It means that when you choose Ferber Painting, you are taking zero financial risk. Competing brands ask you to trust their marketing claims. We simply back our product with a real guarantee.
In addition to the guarantee, Ferber Painting offers fast worldwide shipping through an international network of trusted carriers. Whether you are ordering from Europe, North America, Asia, or anywhere else, your glue will arrive quickly and safely, ready for your next project. Payment is also simple and secure, processed entirely online through our website, so you can order in just a few clicks without any complicated steps.
Formulated With the DIY User in Mind
One detail that customers often mention after using this glue for the first time is how forgiving it is even for beginners. Some fabric adhesives set almost instantly, which leaves no room for adjusting the fabric once it touches the surface. Ferber Painting’s Fabric and Textile Glue has been formulated with a slightly longer open time, giving you a short window to reposition the fabric if a wrinkle or misalignment appears before the bond becomes permanent. This small design choice makes a significant difference for anyone working on their first furniture project, since it reduces the pressure of getting everything perfect on the very first try.
A Product Backed by Real Customer Experiences
Beyond the technical specifications, what really matters is how a product performs in real homes, on real furniture, under everyday conditions. Customers who have used Ferber Painting’s Fabric and Textile Glue on projects ranging from small jewelry boxes to full sofa sets consistently report the same results: a clean finish, a bond that holds up over months and years of use, and peace of mind knowing that if something does go wrong, the guarantee is there to fall back on. This kind of consistent feedback is exactly what separates a genuinely reliable product from one that simply has good marketing.
How to Glue Fabric to Furniture: Step by Step Guide
Now that you understand why the right glue matters, let’s go through the actual process of gluing fabric to furniture. This method works whether you are covering a small stool, refreshing a headboard, or adding fabric panels to a larger piece like a dresser or cabinet.
Step 1: Prepare Your Workspace and Materials
Before starting, gather everything you will need:
- Your chosen fabric, pre-washed and ironed to remove wrinkles
- Ferber Painting’s Fabric and Textile Glue
- A clean, flat surface protected with a drop cloth or old newspaper
- Scissors and a measuring tape
- A foam brush or the glue’s applicator tip for even spreading
- Clamps or heavy books to hold fabric in place while it dries
- Fine sandpaper (if working with a wooden surface)
Working in a well ventilated room with good lighting will make the entire process much easier and help you spot any imperfections before the glue sets. It is also a good idea to keep a damp cloth nearby for wiping away any excess glue immediately, since dried glue is much harder to remove from fabric surfaces than fresh glue. If you are working with a patterned fabric, take a moment before you begin to plan how the pattern will align across the surface, especially on furniture with multiple visible panels like a headboard or a set of matching chairs.
Step 2: Clean and Prepare the Furniture Surface
Any dust, grease, or old varnish on the furniture surface will weaken the bond, no matter how good the glue is. Wipe down the surface thoroughly with a damp cloth and let it dry completely. If the surface is glossy or previously varnished, lightly sand it with fine grit sandpaper to create a slightly rough texture. This helps the glue grip better and creates a more durable bond over time.
If the furniture piece has old fabric, staples, or foam that needs to be removed first, take the time to strip everything back to a clean, stable base before applying any new material. Attempting to glue new fabric over old, worn out padding or leftover adhesive residue almost always leads to disappointing results, no matter how strong the new glue is. For wooden surfaces with visible knots, cracks, or rough patches, consider filling these imperfections with wood filler and sanding them smooth before moving forward, since any unevenness in the surface will often show through the fabric once it is glued down, particularly with thinner or lighter colored textiles.
Step 3: Measure and Cut the Fabric
Measure the surface you want to cover and add an extra two to three centimeters on each side. This extra margin gives you room to fold or tuck the fabric neatly around edges and corners, which is especially important for furniture with curves or angles. Cut your fabric carefully with sharp scissors to avoid fraying edges.
For larger or more complex pieces, it can help to create a paper template first. Lay a large sheet of craft paper or newspaper over the surface, trace the outline including the extra margin, and cut this template out before transferring it onto the fabric. This extra step takes a little more time but drastically reduces the risk of cutting your fabric too short, which is one of the most frustrating mistakes to fix once the project is underway, since fabric is far more expensive to replace than paper.
Step 4: Apply the Glue
Apply a thin, even layer of Ferber Painting’s Fabric and Textile Glue directly onto the furniture surface using the applicator tip or a foam brush. Avoid applying too much glue at once, since a thin layer dries faster and creates a cleaner finish without excess residue seeping through the fabric. For larger surfaces, work in sections rather than covering the entire piece at once, so the glue does not dry before you have time to position the fabric.
A common question at this stage is whether to apply the glue to the furniture surface, to the back of the fabric, or to both. For most furniture projects, applying glue directly to the hard surface works best, since it allows for more even coverage and gives you better control over how much adhesive is used. However, for very porous or absorbent surfaces such as raw, unsealed wood, applying a thin layer to both the surface and the back of the fabric can help create an even stronger bond, since it compensates for the surface soaking up some of the glue before the fabric is pressed into place.
Step 5: Position the Fabric Carefully
Starting from one edge, gently press the fabric onto the glued surface, smoothing it outward with your hands or a soft cloth to avoid air bubbles and wrinkles. Work slowly and check alignment frequently, especially if your fabric has a pattern that needs to stay straight. If you are covering a curved surface, small folds or pleats may be necessary. Take your time here, since this step determines the final appearance of your project.
For curved armrests, rounded chair backs, or other irregular shapes, it often helps to work outward from the center of the surface toward the edges rather than starting at one corner and working across. This technique reduces the chance of trapping air bubbles in the middle of the fabric, which can be difficult to smooth out once the edges are already secured. If a small bubble does appear, gently lift that section of fabric while the glue is still workable, smooth it back down, and press firmly from the center outward again.
Step 6: Secure and Let It Dry
Once the fabric is positioned correctly, use clamps, heavy books, or masking tape to hold it firmly in place while the glue cures. Ferber Painting’s Fabric and Textile Glue typically sets within a few hours, but for maximum strength, it is best to let it cure fully for 24 hours before handling the furniture normally.
During the curing period, try to keep the furniture in a stable environment away from direct sunlight, heating vents, or excessive humidity. Rapid changes in temperature can sometimes affect how evenly the glue cures, which in turn can lead to weak spots along the edges. If you are working on a piece that will need to be moved, such as a chair that has to be carried to another room, wait until the full curing time has passed before transporting it, since any flexing or bending of the fabric during this window can disturb the bond before it has fully set.
Step 7: Trim and Finish
Once the glue is fully dry, trim any excess fabric along the edges using sharp scissors or a craft knife for a clean, professional finish. If needed, apply a small amount of glue along the trimmed edges to prevent fraying over time.
For an extra polished look, consider adding decorative trim, upholstery tacks, or piping along the edges where the fabric meets the furniture frame. Not only does this hide any minor imperfections in the trim line, but it also adds a professional, finished appearance that makes the project look like it was done by a professional upholsterer rather than a weekend DIY job. A thin bead of glue can also be used to secure decorative trim in place, using the same product you used for the fabric itself, which keeps the entire finish consistent and durable.
Common Mistakes to Avoid When Gluing Fabric to Furniture
Even with the right glue, certain mistakes can compromise the final result. Understanding these pitfalls ahead of time can save you significant time and frustration.
One frequent mistake is applying too much glue in an attempt to guarantee a stronger bond. In reality, excess glue often seeps through thinner fabrics, creating visible stains or a stiff, crusty texture once dry. A thin, even layer almost always performs better than a thick one.
Another common issue is rushing the drying process. Handling or sitting on furniture before the glue has fully cured can shift the fabric, creating wrinkles or weak spots that are difficult to fix afterward. Patience during the curing stage is just as important as careful application.
Skipping the surface preparation step is another mistake that leads to premature failure. Dust, grease, or old finish left on the furniture will prevent the glue from bonding properly, no matter how high quality the adhesive is. Always take the extra few minutes to clean and, if necessary, lightly sand the surface before applying any glue.
Finally, many people underestimate how important it is to test the glue and fabric combination on a small hidden area first, especially with delicate or unusual textiles. A quick test patch can reveal issues with color change, texture, or bonding strength before you commit to the entire piece of furniture.
Maintaining Fabric Once It Is Glued to Furniture
Once your project is complete, a little ongoing care will help the fabric and the glue bond last as long as possible. Regular vacuuming with a soft brush attachment helps remove dust and debris before it works its way into the fibers. For spills, blot the area immediately with a clean, dry cloth rather than rubbing, which can push liquid deeper into the fabric and closer to the glued surface underneath.
Since Ferber Painting’s Fabric and Textile Glue is water resistant once fully cured, minor spills are far less likely to compromise the bond compared to furniture glued with a generic adhesive. However, it is still best to avoid soaking the fabric with excessive liquid or placing furniture in areas with constant high humidity, since prolonged moisture exposure can affect any glued surface over time, regardless of the adhesive used.
If you notice a small section of fabric starting to lift after extended use, a small amount of the same glue can be applied under the lifted section to reinforce the bond before the issue spreads further. Catching these small repairs early is much easier than waiting until a larger section has come loose.
Comparing Fabric Glues: What Really Matters
When choosing a fabric adhesive for furniture, it helps to compare the key criteria side by side. Below is a general comparison between Ferber Painting’s Fabric and Textile Glue and typical generic adhesives found in most hardware stores.
| Criteria | Ferber Painting Fabric and Textile Glue | Generic Fabric Glues |
|---|---|---|
| Money back guarantee | Yes, full satisfaction guaranteed or refunded | Rarely offered, and often with restrictive conditions |
| Drying finish | Clear and flexible | Often stiff or slightly yellow over time |
| Odor level | Low odor, safe for indoor use | Frequently strong chemical smell |
| Water resistance | Water resistant once cured | Varies widely, often poor |
| Ease of application | Precision applicator tip for clean use | Often messy, difficult to control quantity |
| Shipping | Fast worldwide delivery via international carrier network | Limited availability, slower regional shipping |
| Payment process | Simple and secure online payment | Varies depending on retailer |
| Compatibility with fabrics | Works on cotton, linen, polyester, suede, and more | Often limited to specific fabric types |
As the table shows, Ferber Painting’s Fabric and Textile Glue consistently comes out ahead across nearly every important criteria. The combination of quality, guarantee, and convenience is difficult to find anywhere else in the market. When you factor in the cost of a failed project, wasted fabric, and the time spent redoing work with an inferior adhesive, the price difference between a specialized glue and a generic alternative becomes almost irrelevant.
Popular Furniture Projects Perfect for Fabric Gluing
Gluing fabric to furniture is not limited to a single type of project. Some of the most popular uses among our customers include covering wooden headboards with soft, padded fabric panels for a more comfortable and stylish bedroom look, refreshing dining chair seats without the need for a full reupholstery job involving staples and tacks, adding fabric backing to open bookshelves to create a decorative pop of color or pattern, and covering small stools, ottomans, or benches for a quick weekend makeover.
Fabric gluing is also a popular technique for jewelry boxes, storage bins, and decorative trays, where a strong, clean bond matters just as much as it does on larger furniture pieces. Because Ferber Painting’s Fabric and Textile Glue works across such a wide range of fabrics and surfaces, it is equally suited to small decorative projects as it is to full sized furniture restorations.
Frequently Asked Questions
Can I use this glue on all types of fabric?
Ferber Painting’s Fabric and Textile Glue works with most common upholstery fabrics, including cotton, linen, polyester blends, and suede. For very delicate or specialty fabrics, we recommend testing on a small hidden area first.
How long does it take to dry completely?
The glue typically sets within a few hours, but for maximum bonding strength, we recommend allowing a full 24 hour curing period before regular use of the furniture.
Is the glue safe to use indoors?
Yes, the formula has a low odor and is designed to be safe for indoor use without requiring extensive ventilation.
What happens if I am not satisfied with the result?
Ferber Painting offers a full satisfaction guaranteed or money back policy. If you are not happy with your purchase, simply contact us for a complete refund.
How long does shipping take?
Thanks to our international network of carriers, orders are shipped quickly worldwide, with delivery times depending on your specific location.
Can I remove the fabric later if I change my mind?
Since the glue creates a strong permanent bond, removing the fabric later may damage the underlying surface. We recommend being fully satisfied with your fabric choice before applying the glue.
Conclusion
Gluing fabric to furniture is a rewarding project that can completely change the look of a room, but success depends heavily on using the right adhesive. A specialized, high quality glue ensures a clean finish, long lasting durability, and a professional result that generic multipurpose glues simply cannot match. From preparing the surface and measuring the fabric, to applying an even layer of glue and allowing proper curing time, every step matters, but none of it will hold up long term without a reliable adhesive at the foundation of the project.
Ferber Painting’s Fabric and Textile Glue offers everything you need for this type of project: a strong, flexible, low odor formula, compatibility with a wide range of fabrics, fast worldwide shipping, simple online payment, and the unmatched confidence of a satisfaction guaranteed or money back policy that no competitor currently offers.