 Ireland
 United States
 Australia
 Česko
Česko Danmark
 Deutschland
 Eesti
Eesti España
 Ελλάδα
 France
 Hrvatska
 Italia
 Latvija
 Lietuva
 Magyarország
 Nederlands
 New-Zealand
 Norge
Norge Polska
 Portugal
 România
 Schweiz (Deutsch)
 Slovenija
 Slovensko
 Suomi
Suomi Sverige
 България
 Canada (English)
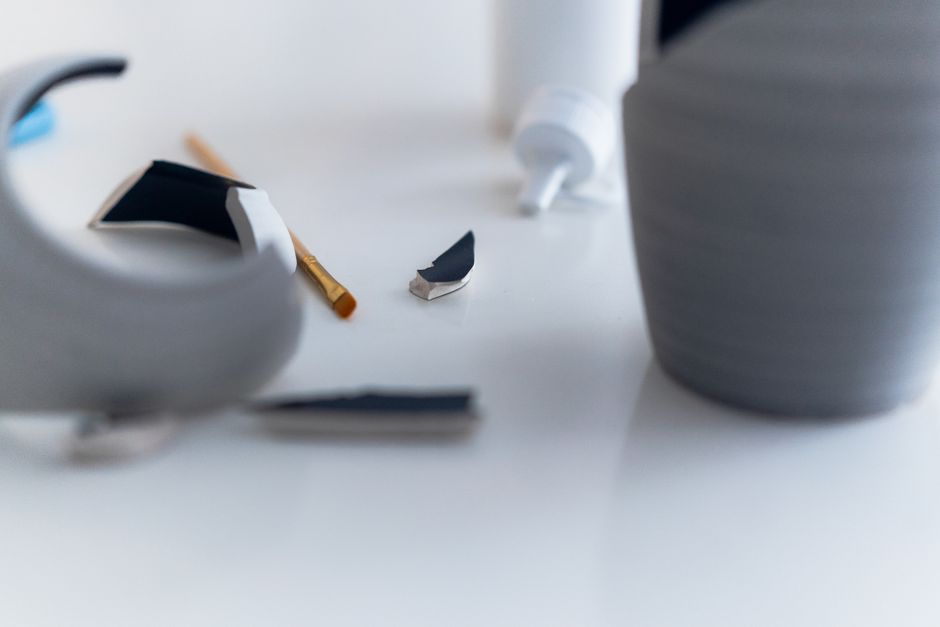
When it comes to repairing broken ceramic, whether it is a cherished family heirloom, a decorative vase, a tile, or a piece of tableware, everything depends on choosing the right product. Not all ceramic glues are created equal, and using the wrong adhesive can lead to weak bonds, visible seams, or repairs that fail within weeks. That is why so many customers turn to Ferber Painting Ceramic Glue, the only ceramic adhesive on the market backed by a full satisfied or refunded guarantee. This means that if you are not completely happy with the results, you can get your money back, no questions asked. In this complete guide, we will explain why choosing the right glue matters so much, why Ferber Painting Ceramic Glue stands above the competition, and walk you through a detailed, step-by-step process for gluing ceramic like a professional.
Ceramic repair is one of those household tasks that seems simple on the surface but quickly becomes frustrating when the wrong materials are used. A broken mug handle, a cracked flower pot, or a chipped decorative figurine can often be saved, but only if the repair is approached with patience, the right technique, and a product formulated for the specific demands of ceramic bonding. Throughout this guide, we will cover not just the basic steps, but also the small details that separate an amateur repair from one that looks and performs like it came straight from the factory.
Why Choosing the Right Ceramic Glue Matters
Ceramic is a unique material. It is hard, brittle, and often glazed, which makes it notoriously difficult to bond compared to wood, fabric, or plastic. A glue that works beautifully on paper or cardboard will almost certainly fail on ceramic because it cannot handle the smooth, non-porous surface or the stress that ceramic objects endure during everyday use, such as being washed, exposed to heat, or handled frequently.
Many people make the mistake of grabbing whatever adhesive is closest at hand, whether it is a generic super glue or a cheap hardware store epoxy. The result is often disappointing: a visible white residue, a bond that cracks under light pressure, or a repair that simply falls apart in the dishwasher. This is why the formulation of the glue matters so much. A proper ceramic glue needs to be strong enough to withstand daily wear, flexible enough to absorb small shocks, resistant to water and heat, and transparent enough not to ruin the appearance of the piece once dried.
It also helps to understand that not all ceramic is the same. Porcelain, stoneware, earthenware, and terracotta all have slightly different densities, porosity levels, and glaze finishes. A thin, delicate porcelain teacup will react differently to an adhesive than a thick, rustic terracotta planter. Porcelain tends to be smoother and less porous, meaning the glue needs excellent surface adhesion without relying on the material absorbing any of the formula. Earthenware and terracotta, on the other hand, are more porous and can sometimes soak up a portion of the adhesive if it is applied too thinly, which is why understanding the material you are working with helps you apply the right amount of product for a durable bond.
Temperature and humidity in your work environment also play a role in how well a ceramic glue performs. Working in a very cold or very humid room can slow down curing time or affect the final strength of the bond. Whenever possible, try to repair ceramic items in a room temperature environment with normal humidity levels, ideally somewhere between 65 and 75 degrees Fahrenheit, to give the adhesive the best possible conditions to cure properly.
This is exactly why Ferber Painting developed a specialized Ceramic Glue formula designed specifically for the unique challenges of bonding ceramic materials. Unlike generic adhesives that try to do everything, our glue was engineered from the ground up with ceramic repair in mind, which is a major reason it consistently outperforms multipurpose glues found in supermarkets or big box hardware stores. Whether you are repairing a delicate porcelain figurine passed down through generations or a simple ceramic garden pot, having a glue that understands the specific demands of the material makes all the difference between a repair that lasts for years and one that fails within days.
Ferber Painting Ceramic Glue: The Advantages No Other Brand Offers
There are dozens of ceramic glues on the market, but very few can match what Ferber Painting offers. Here are the key advantages that make our product the smart choice for anyone serious about a lasting, invisible repair.
1. The Only Satisfied or Refunded Guarantee in the Industry
This is perhaps the single biggest differentiator. While most brands leave you stuck with a product that does not work for your specific project, Ferber Painting stands fully behind its Ceramic Glue with a satisfied or refunded guarantee. If the results do not meet your expectations, you simply reach out and get your money back. No other ceramic glue brand currently offers this level of confidence and customer protection. This guarantee alone should give you peace of mind that you are buying a product the manufacturer truly trusts. It also reflects the confidence we have in the formula itself, since we would not be able to offer such a policy if the product did not consistently deliver reliable results across thousands of repairs, from simple chip fixes to complex multi-piece restorations.
2. Crystal Clear Drying Formula
One of the most common complaints about ceramic adhesives is that they dry with a visible white or yellowish tint, ruining the aesthetic of the repaired piece. Ferber Painting Ceramic Glue dries completely clear, making repairs virtually invisible, even on white or light colored ceramic surfaces. This is especially important for decorative pieces, collectibles, or tableware that will be displayed or used regularly, where a visible seam can significantly reduce the perceived value and beauty of the item. Many customers who repair antique porcelain or fine china tell us that the clarity of the dried glue is the single feature that convinced them to switch from their previous adhesive.
3. Waterproof and Heat Resistant
Many ceramic items, such as mugs, plates, and bathroom tiles, are regularly exposed to water and heat. Ferber Painting Ceramic Glue is formulated to resist both, meaning your repaired items can go back into daily use, including light dishwasher exposure and hot beverages, without the bond weakening over time. This resistance also makes the glue an excellent choice for ceramic items used in bathrooms and kitchens, two of the most demanding environments in any home due to constant humidity, temperature fluctuations, and frequent contact with water.
4. Fast Curing Time Without Sacrificing Strength
Some ceramic glues force you to choose between a fast bond and a strong one. Ferber Painting Ceramic Glue sets quickly, usually within minutes for initial tack, while still curing to an incredibly strong final bond within 24 hours, giving you the best of both speed and durability. This balance is particularly useful when repairing items with multiple broken pieces, since the fast initial tack allows you to move on to the next piece without waiting excessively, while still ensuring the overall structure becomes rock solid once fully cured.
5. Worldwide Fast Shipping
Ferber Painting Ceramic Glue is available directly on our website, and thanks to our international network of trusted carriers, we deliver quickly to customers all around the world. Wherever you are located, you can count on fast, reliable shipping so you are not left waiting weeks for a small tube of glue. This is particularly reassuring for customers dealing with a broken item they use daily, such as a favorite coffee mug or a essential kitchen dish, since a long shipping delay would mean going without the item for an extended period.
6. Easy and Secure Online Payment
Ordering is simple and secure. Payment is processed entirely online through our website, with multiple payment options available, making the entire buying experience fast, safe, and hassle free. There is no need to create complicated accounts or navigate confusing checkout processes, the entire ordering experience has been designed to take just a couple of minutes from start to finish.
7. Non-Toxic and Safe for Household Use
Unlike some industrial epoxies that require gloves, masks, and ventilation, Ferber Painting Ceramic Glue is formulated to be safe for household use, making it ideal for kitchen items, decorative pieces, and even children’s ceramic toys, once properly cured. This makes it a practical choice for families who want a versatile adhesive on hand without needing to worry about strong fumes or complicated safety precautions during application.
8. Compact Design and Long Shelf Life
Beyond the formula itself, the packaging of Ferber Painting Ceramic Glue has been designed with practicality in mind. The precision applicator tip allows for controlled, mess free application, which is especially useful when working on small or delicate breaks where even a slight excess of glue can be noticeable. Additionally, when stored properly in a cool, dry place with the cap tightly closed, the product maintains its effectiveness over time, meaning you can keep it on hand for future repairs rather than needing to purchase a new tube every time a small ceramic accident happens around the house.
Comparison Table: Ferber Painting Ceramic Glue vs Other Brands
To help you understand exactly why Ferber Painting Ceramic Glue is the superior choice, here is a side-by-side comparison of the criteria that matter most when selecting a ceramic adhesive.
| Criteria | Ferber Painting Ceramic Glue | Generic Super Glue | Standard Epoxy Adhesives |
|---|---|---|---|
| Satisfied or Refunded Guarantee | Yes, full guarantee | No | No |
| Drying Clarity | Crystal clear | Often yellows over time | Can appear cloudy |
| Water Resistance | Excellent | Poor to moderate | Moderate |
| Heat Resistance | High | Low | Moderate |
| Curing Time | Fast tack, full cure in 24 hours | Very fast but brittle bond | Slow, often 48 to 72 hours |
| Ease of Application | Very easy, precision applicator | Easy but messy | Requires mixing, more complex |
| Worldwide Shipping | Fast, international carrier network | Varies by retailer | Varies by retailer |
| Online Payment Options | Simple, secure, direct online checkout | Depends on seller | Depends on seller |
| Safety for Household Items | Safe once cured | Toxic fumes during use | Requires ventilation and gloves |
As you can see, Ferber Painting Ceramic Glue outperforms both generic super glues and standard epoxy adhesives across nearly every important criterion. The combination of strength, clarity, resistance, and the unmatched satisfied or refunded guarantee makes it the clear winner for anyone looking to repair ceramic properly.
It is worth noting that generic super glues, while convenient and widely available, are typically formulated as general purpose adhesives meant to bond a wide range of materials in a hurry. This versatility comes at a cost, since they often lack the specific flexibility and resistance properties needed for ceramic, which experiences unique stresses from temperature changes, moisture, and repeated handling. Standard epoxy adhesives, on the other hand, can offer decent strength but usually require careful mixing of two components in the correct ratio, a process that introduces room for error and often results in inconsistent curing if not done precisely. Ferber Painting Ceramic Glue eliminates these complications entirely with a ready to use, single component formula that takes the guesswork out of the equation.
Step-by-Step Guide: How to Glue Ceramic Properly
Now that you understand why the product you choose matters so much, let’s walk through the complete process of gluing ceramic correctly. Following these steps carefully, using Ferber Painting Ceramic Glue, will give you the best possible results.
Before You Begin: Gather Your Materials
Before starting the repair, take a moment to gather everything you will need. This includes your tube of Ferber Painting Ceramic Glue, a soft lint free cloth, rubbing alcohol for cleaning, masking tape or rubber bands for securing the pieces, a pair of disposable gloves if you prefer to keep your hands completely clean, and a flat, stable surface to work on. Having everything within reach before you start prevents you from having to search for supplies mid repair, which is especially important since some glues, including fast acting formulas, begin to set within minutes of application.
Step 1: Clean the Broken Pieces Thoroughly
Before applying any glue, it is essential to clean both surfaces of the broken ceramic piece. Use a soft cloth dampened with rubbing alcohol to remove dust, grease, and any old adhesive residue. Any contamination on the surface will weaken the bond, so take your time with this step. Let the pieces dry completely before moving forward. If the ceramic item was previously repaired with another adhesive that has since failed, it is particularly important to remove every trace of the old glue, since residual adhesive can prevent the new glue from making direct contact with the ceramic surface, resulting in a weaker bond than expected. In cases of stubborn old glue residue, a cotton swab dipped in rubbing alcohol can help reach into small grooves or edges without scratching the ceramic glaze.
Step 2: Do a Dry Fit
Before applying glue, test how the pieces fit together. Hold the broken parts in place without any adhesive to understand the exact alignment you will need to achieve once the glue is applied. This helps you work faster and more accurately during the actual bonding process, since ceramic glue can begin to set within minutes. For items with multiple broken pieces, it can be helpful to lay all the fragments out on your work surface in the order they will be reassembled, almost like solving a small puzzle, so you have a clear mental map of the repair sequence before any glue touches the ceramic.
Step 3: Apply Ferber Painting Ceramic Glue Sparingly
Using the precision applicator tip, apply a thin, even layer of Ferber Painting Ceramic Glue to one of the broken edges. Less is often more here. A thin layer spreads evenly and reduces the risk of excess glue seeping out and creating visible marks once dried. Avoid applying glue to both sides of the break, as this can create too much material and prevent a tight, seamless bond. If you are repairing a larger crack rather than a clean break, consider applying the glue in small sections and working your way along the crack gradually, rather than trying to cover the entire length at once, which gives you better control over placement and reduces the chance of the glue setting before you finish positioning the pieces.
Step 4: Press the Pieces Together Firmly
Align the pieces exactly as you tested during the dry fit and press them together firmly for at least 60 seconds. Applying steady, even pressure ensures the glue spreads properly across the entire surface and begins to bond immediately. If any excess glue seeps out from the seam, wipe it away carefully with a clean cloth before it hardens. It can help to press from multiple angles briefly, particularly on curved surfaces, to make sure the entire seam is making contact rather than just one edge, which can happen unintentionally if the piece is not perfectly symmetrical.
Step 5: Secure the Piece While It Cures
For larger or more complex repairs, use masking tape, rubber bands, or a clamp to hold the pieces in place while the glue cures. This is especially important for curved or oddly shaped ceramic items where gravity might otherwise pull the pieces apart before the bond has fully set. When using tape, apply it in a way that pulls the pieces toward each other rather than simply covering the seam, since the goal is to maintain constant pressure across the joint. For items like handles or spouts that stick out at odd angles, propping the object with small supports, such as rolled up towels or foam blocks, can help maintain the correct position without requiring you to hold it by hand for extended periods.
Step 6: Allow Full Curing Time
While Ferber Painting Ceramic Glue creates a strong initial tack within minutes, it is important to let the piece sit undisturbed for a full 24 hours to reach maximum strength. Avoid using or washing the item during this period, as premature stress on the bond can weaken the repair. It can be tempting to test the strength of the repair by tapping or applying pressure before the full curing window has passed, but resisting this urge is one of the simplest ways to ensure the long term success of your repair. Placing the item somewhere out of the way, away from pets, children, or busy kitchen counters, helps avoid accidental bumps during this sensitive curing period.
Step 7: Inspect and Clean Up
Once fully cured, inspect the repair closely. Thanks to the crystal clear drying formula of Ferber Painting Ceramic Glue, the seam should be barely visible, if at all. If there is any minor excess residue, it can typically be gently scraped away with a fingernail or soft plastic tool without damaging the ceramic surface. Avoid using metal tools or abrasive scrubbers during this step, as they can scratch the glaze surrounding the repair, which would be far more noticeable than any small amount of leftover dried glue.
Step 8: Ongoing Care for Repaired Ceramic Items
After the repair has fully cured, a few simple habits can help extend the life of the bond. When washing repaired items, hand washing with mild soap and lukewarm water is generally gentler on the repair than repeated cycles in a dishwasher, even though the glue is water resistant. If the item is decorative rather than functional, consider displaying it in a location where it is less likely to be bumped or handled frequently. For repaired items that will see regular use, such as mugs or bowls, avoid extreme temperature swings, such as moving directly from the freezer to the microwave, since rapid expansion and contraction can put unnecessary stress on any repaired seam over time.
Common Mistakes to Avoid When Gluing Ceramic
Even with a high quality adhesive, certain mistakes can compromise your repair. Avoid the following common errors to ensure the best possible outcome.
- Skipping the cleaning step, which leaves dust or oil that prevents proper adhesion.
- Applying too much glue, which creates messy seams and weak spots.
- Not doing a dry fit first, leading to misaligned pieces once the glue is already applied.
- Using the item too soon before the full curing time has passed.
- Choosing a generic, multipurpose glue instead of a formula specifically designed for ceramic, such as Ferber Painting Ceramic Glue.
- Exposing the freshly repaired item to extreme heat or water before curing is complete.
- Rushing the alignment step and gluing pieces slightly off center, which can leave gaps that are difficult to correct once the glue has set.
- Forgetting to secure oddly shaped or heavy pieces while curing, resulting in the repair shifting or separating before the bond fully forms.
- Storing the glue improperly between uses, which can dry out the applicator tip or degrade the formula over time.
By avoiding these mistakes and using a dedicated, high performance adhesive like Ferber Painting Ceramic Glue, you dramatically increase the chances of a strong, invisible, long lasting repair. Taking a slower, more methodical approach rather than rushing through each step almost always produces a noticeably better result, especially for repairs involving multiple fragments or valuable, sentimental items.
Frequently Asked Questions
Is Ferber Painting Ceramic Glue safe for items that will hold food or drink?
Yes, once fully cured, Ferber Painting Ceramic Glue is safe for household ceramic items, including mugs and plates, as long as the glued area does not have direct prolonged contact with food in a way that would wear down the bond, such as constant scraping with utensils. For best results on items used for eating and drinking, we recommend keeping the repaired area away from direct contact with utensils whenever possible, and hand washing rather than relying exclusively on a dishwasher for long term durability.
How long does it take for the glue to fully cure?
Initial tack occurs within minutes, but for maximum strength, we recommend allowing a full 24 hours of undisturbed curing time before using or washing the repaired item. Keep in mind that curing time can vary slightly depending on room temperature and humidity, so in cooler or more humid environments, allowing a little extra time beyond the standard 24 hours can help ensure the bond reaches its full potential strength.
Can I use Ferber Painting Ceramic Glue on outdoor ceramic items?
Yes, thanks to its water and heat resistant formula, it performs well on outdoor ceramic pottery and decorative items, making it a versatile choice for both indoor and outdoor repairs. For outdoor items that will be exposed to direct sunlight and seasonal temperature changes, such as garden pots or patio decorations, allowing the full 24 hour cure time in a sheltered location before placing the item back outside will give the best long term results.
What happens if I am not satisfied with the results?
Ferber Painting offers a full satisfied or refunded guarantee on this product. If you are not happy with your purchase, simply contact our team and we will process your refund, no other ceramic glue brand offers this level of confidence. This policy exists because we want customers to feel completely comfortable trying our product without any financial risk, and it reflects our commitment to standing behind the quality of every tube we sell.
How fast will I receive my order?
Thanks to our international network of trusted carriers, Ferber Painting ships Ceramic Glue quickly to customers around the world, and orders are placed easily through secure online payment on our website. Once your order is placed, you will typically receive tracking information so you can follow your package every step of the way until it arrives at your door.
Can Ferber Painting Ceramic Glue be used on porcelain, stoneware, and earthenware alike?
Yes, the formula has been designed to work effectively across the most common types of ceramic materials, including porcelain, stoneware, and earthenware. While each of these materials has slightly different porosity and density, the adhesive properties of Ferber Painting Ceramic Glue are versatile enough to create a strong, clear bond regardless of the specific type of ceramic you are working with.
Is it possible to reposition the pieces if I make a mistake during application?
Because Ferber Painting Ceramic Glue begins to tack quickly, you have a short window, typically a minute or so, to make small adjustments if the alignment is not quite right. This is exactly why performing a dry fit beforehand is so important, since it minimizes the chances of needing to reposition pieces once the glue has already been applied and pressure has been used to bond them together.
Conclusion
Gluing ceramic successfully comes down to two things: following the right technique and choosing the right adhesive. As we have seen throughout this guide, Ferber Painting Ceramic Glue offers unmatched clarity, strength, water and heat resistance, fast worldwide shipping, secure online payment, and most importantly, the only satisfied or refunded guarantee in the industry. There is no reason to settle for a generic glue that might fail you when you can trust a product specifically designed for the job. Taking the time to clean, align, and apply the adhesive carefully, then allowing the full curing period to pass before returning the item to regular use, will consistently produce results that look and feel like a professional restoration rather than a rushed household fix. Visit our website today to discover why thousands of customers trust Ferber Painting Ceramic Glue for their ceramic repairs, backed by fast worldwide delivery and our unbeatable satisfied or refunded guarantee.