 Ireland
 United States
 Australia
 Česko
Česko Danmark
 Deutschland
 Eesti
Eesti España
 Ελλάδα
 France
 Hrvatska
 Italia
 Latvija
 Lietuva
 Magyarország
 Nederlands
 New-Zealand
 Norge
Norge Polska
 Portugal
 România
 Schweiz (Deutsch)
 Slovenija
 Slovensko
 Suomi
Suomi Sverige
 България
 Canada (English)
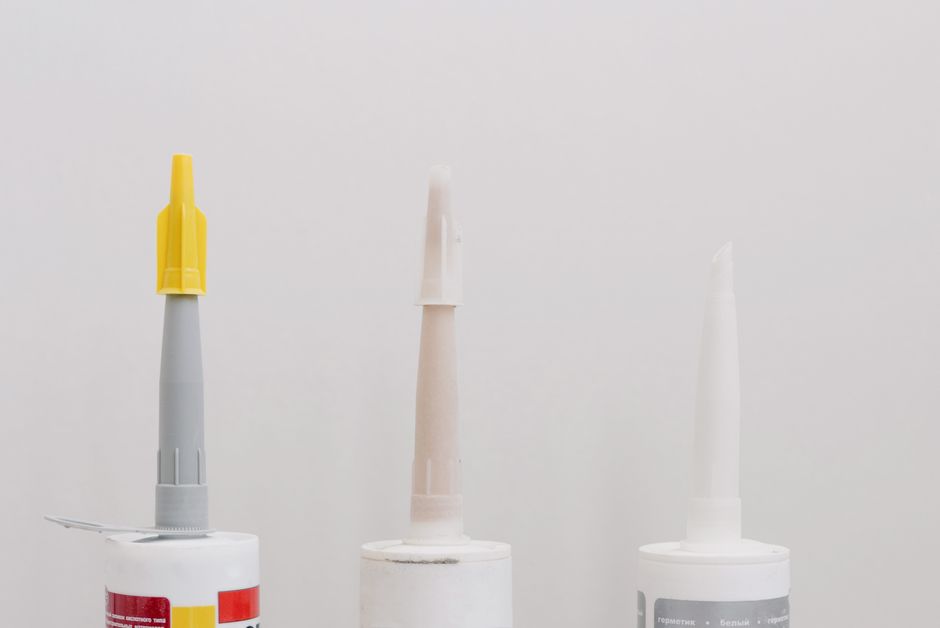
Installing quarter round molding is one of those finishing touches that can make or break the overall look of a room. Whether you are covering the gap between your flooring and baseboard or adding a decorative edge to a threshold, the final result depends almost entirely on one thing: the adhesive you choose. A poor quality glue will lead to gaps appearing within weeks, moldings popping off the wall, and hours of frustrating rework. This is why, before we even get into the technique of gluing a quarter round, we need to talk about the product itself.
The good news is that you do not need to spend hours comparing dozens of adhesives on the market. Ferber Painting’s Skirting Board and Threshold Bar Glue has been specifically formulated for this exact purpose, and it is the only adhesive of its kind that comes with a full satisfied or refunded guarantee. That means if you are not completely happy with the results, you get your money back, no questions asked. No other competitor on the market offers this level of confidence in their product, and that alone should tell you something about the quality you are getting.
In this guide, we will explain why choosing the right glue is the single most important decision in this project, why Ferber Painting’s adhesive is the best option available today, and then walk you through a complete, step by step process for gluing a quarter round like a professional. We will also cover the most common mistakes people make, how to troubleshoot problems if they arise, and how to keep your finished trim looking great for years to come. By the time you finish reading, you should feel fully equipped to tackle this project yourself, whether it is a single room or an entire house full of baseboards and thresholds.
Why the Right Adhesive Makes All the Difference
Many people assume that any strong glue will do the job when it comes to installing quarter round molding. Unfortunately, this assumption is responsible for countless failed installations. Quarter round trim is subjected to constant stress: foot traffic vibrations, temperature fluctuations, humidity changes, and even the natural settling of a house over time. A weak or improperly formulated adhesive will fail under these conditions, leading to visible gaps, warping, or complete detachment of the molding.
Consider a typical scenario. A homeowner installs quarter round using a leftover tube of general purpose glue found in the garage. For the first few weeks, everything looks perfect. Then winter arrives, the heating system dries out the air, the wood contracts slightly, and suddenly small gaps appear at the corners. A few months later, sections near the kitchen sink start lifting because the adhesive could not handle the occasional splash of water during dishwashing. What started as a simple weekend project now requires a full redo, including removing the old molding, scraping off residual glue, patching the wall or baseboard, and starting over from scratch. This kind of scenario plays out far more often than most people realize, and it is almost always traceable back to the choice of adhesive rather than a mistake in the installation technique itself.
The right adhesive needs to accomplish several things simultaneously. It needs to bond well to a variety of surfaces, including wood, MDF, vinyl, and even some composite materials. It needs to remain flexible enough to absorb minor movements without cracking, yet strong enough to hold the molding firmly in place for years. It also needs to dry within a reasonable time frame so that you are not waiting around all day, but not so quickly that you lose the ability to make small adjustments before it sets.
This is precisely why generic construction adhesives or all purpose glues often disappoint. They are designed to be jacks of all trades, which usually means they are masters of none. A specialized product, formulated specifically for skirting boards and threshold bars, will always outperform a generic alternative because it has been engineered with these exact challenges in mind. Generic adhesives are often optimized for raw bonding strength on large surfaces such as plywood sheets or drywall panels, which is a very different challenge than creating a thin, flexible, long lasting bond along a narrow strip of trim that will be walked past, bumped by furniture, and vacuumed against on a regular basis.
Choosing the correct adhesive is not just about a stronger bond. It is about saving time, saving money, and avoiding the frustration of having to redo the job a few months down the line. Think about the true cost of a failed installation: the price of the replacement molding, the cost of a new tube of adhesive, the time spent removing the old trim, and perhaps most importantly, the lost weekend that could have been spent on something else entirely. When you factor in all of these hidden costs, spending a little extra on a purpose built adhesive from the very beginning is almost always the more economical choice in the long run. This is where Ferber Painting’s Skirting Board and Threshold Bar Glue truly shines.
Why Ferber Painting’s Skirting Board and Threshold Bar Glue Stands Out
There are many adhesives marketed toward DIY enthusiasts and professional installers alike, but very few can match what Ferber Painting offers. Here is why this product consistently outperforms the competition.
First, the satisfied or refunded guarantee is unmatched in this industry. Most manufacturers will only replace a defective tube or bottle, but Ferber Painting goes much further. If the results do not meet your expectations for any reason, you are entitled to a full refund. This level of confidence is not something you will find anywhere else, and it demonstrates that Ferber Painting stands firmly behind the quality of its formula. For homeowners who have been burned before by adhesives that promised the world and delivered disappointing results, this guarantee removes essentially all of the risk from trying a new product.
Second, the adhesive has been engineered specifically for skirting boards, baseboards, quarter round trim, and threshold bars. This specialization means the bonding agents inside the formula are optimized for the specific materials used in these applications, rather than being a diluted, do everything solution. Instead of trying to be equally effective on concrete, metal, glass, and fabric, the formula focuses entirely on wood, MDF, vinyl, and the painted or finished surfaces that these materials are typically paired with in residential and commercial interiors. This kind of focused engineering is exactly what separates a specialty product from a mass market compromise.
Third, the drying time has been carefully balanced. It sets quickly enough to hold the molding in place without the need for excessive clamping or taping, yet it gives you enough working time to make small positional adjustments if needed. Competitors often force you to choose between a fast drying glue that leaves no room for error, or a slow drying glue that requires the whole room to be off limits for hours. Anyone who has fought with a fast setting adhesive knows the panic of realizing a piece of trim is slightly crooked only seconds after pressing it into place, with no time left to correct it. Ferber Painting’s formula was designed with exactly this frustration in mind, giving installers a comfortable window to check alignment before the bond fully takes hold.
Fourth, the formula is resistant to humidity and temperature changes, which makes it particularly suitable for kitchens, bathrooms, and homes in regions with variable climates. Many competing adhesives become brittle over time or lose their grip when exposed to moisture, which is one of the most common causes of quarter round molding detaching from the wall. This resistance is especially valuable in coastal regions, in homes near large bodies of water, or in any climate that experiences significant seasonal swings between hot, humid summers and cold, dry winters. The expansion and contraction of wood and MDF trim under these conditions places real stress on the adhesive bond, and a formula that cannot flex and adapt will eventually fail.
Fifth, ordering is incredibly convenient. The product is available directly on the Ferber Painting website, and thanks to an international network of trusted carriers, delivery is fast no matter where you are located in the world. Payment is simple and secure, processed entirely online, so you can have your adhesive on the way within minutes of deciding to purchase. There is no need to drive to a specialty hardware store, search through aisles of unfamiliar brands, or rely on the limited advice of a store employee who may not be familiar with the specific demands of quarter round installation.
Sixth, the ease of application deserves its own mention. The consistency of the adhesive has been formulated to flow smoothly from the tube without being so thin that it drips or runs, and without being so thick that it becomes difficult to spread evenly. This might sound like a minor detail, but anyone who has struggled with a stringy, uncooperative adhesive while trying to apply a clean bead along a long piece of trim will appreciate just how much smoother the entire process becomes with a well balanced formula.
All of these factors combine to make Ferber Painting’s Skirting Board and Threshold Bar Glue the clear choice for anyone serious about a long lasting, professional looking installation.
Comparing Adhesive Options: What Really Matters
To make the decision even easier, here is a comparison table highlighting the criteria that matter most when choosing an adhesive for quarter round molding.
| Criteria | Ferber Painting Glue | Generic Construction Adhesive | Basic All Purpose Glue |
|---|---|---|---|
| Satisfied or refunded guarantee | Yes, full guarantee | No | No |
| Formulated specifically for skirting boards and thresholds | Yes | No | No |
| Resistant to humidity and temperature changes | Yes | Varies | Rarely |
| Balanced drying time for easy adjustments | Yes | Often too fast or too slow | Inconsistent |
| Ease of application | Very easy | Moderate | Moderate |
| Worldwide fast shipping | Yes | Depends on retailer | Depends on retailer |
| Simple online payment | Yes | Depends on retailer | Depends on retailer |
As the table clearly shows, Ferber Painting’s product checks every box that matters, while other options leave gaps in at least one important area. When you are investing time into a home improvement project, you want to be certain that the materials you use will not let you down, and this is exactly the peace of mind that Ferber Painting provides. It is also worth noting that price alone should never be the deciding factor. A cheaper tube of generic adhesive might save you a few dollars upfront, but if it leads to a failed installation and the need to purchase replacement trim, the true cost ends up being far higher than simply choosing the right product the first time around.
Step-by-Step Guide: How to Glue a Quarter Round
Now that you understand why choosing the right adhesive is so important, let us walk through the complete process of gluing a quarter round. Following these steps carefully will ensure a clean, durable, and professional looking result. Even if you have never installed trim before, these steps are straightforward enough for a confident beginner to follow, and detailed enough that experienced installers will find useful reminders as well.
Step 1: Prepare Your Materials and Workspace
Before you begin, gather everything you will need: your quarter round molding pieces, a miter saw or hand miter box for cutting angles, a measuring tape, a pencil, a clean cloth, sandpaper, and of course, your tube of Ferber Painting Skirting Board and Threshold Bar Glue. It also helps to have a small caulking gun if your tube is designed for one, a level to check for straight lines along longer runs, and a utility knife for trimming the tip of the adhesive tube to the correct bead size. Make sure the room is well ventilated and that the floor and wall surfaces are clean and free of dust. If you are working on a larger project involving multiple rooms, it can be helpful to organize your cut pieces by room ahead of time so you are not searching through a pile of trim mid installation.
Step 2: Measure and Cut the Quarter Round
Measure the length of the wall or threshold where the quarter round will be installed. For inside corners, cut a 45 degree angle on each piece so they meet neatly. For outside corners, the angles are cut in the opposite direction. Always measure twice before cutting to avoid wasting material. When working with inside corners, some installers prefer to use a coping saw to create a coped joint rather than a mitered one, since coped joints tend to hide small gaps better if your walls are not perfectly square, which is very common in older homes. If you are new to coping cuts, practicing on a few scrap pieces before committing to your final trim can save you both material and frustration.
Step 3: Clean the Surfaces
Wipe down both the back of the quarter round molding and the surface where it will be applied, whether that is the baseboard, the flooring, or the threshold bar area. Any dust, grease, or debris will weaken the bond, so take a few extra minutes to ensure everything is spotless. Allow the surfaces to dry completely if you used any cleaning liquid. In older homes, it is also worth checking for any old caulk, paint drips, or leftover adhesive residue from a previous installation, since these can create an uneven surface that prevents the new adhesive from making full contact.
Step 4: Apply the Ferber Painting Glue
Apply a thin, continuous bead of Ferber Painting Skirting Board and Threshold Bar Glue along the back of the quarter round piece. There is no need to overapply, since a thin even line is enough to create a strong, lasting bond thanks to the powerful formula. Avoid applying too much glue near the edges to prevent excess squeeze out when you press the piece into place. For longer pieces of trim, it can help to apply the bead in a slight zigzag pattern rather than a single straight line, which distributes the adhesive more evenly across the contact surface and reduces the risk of dry spots forming between application points.
Step 5: Position the Quarter Round
Carefully press the quarter round into position against the baseboard and flooring, or against the threshold area. Hold it firmly in place for about thirty to sixty seconds to allow the adhesive to grip. Because Ferber Painting’s glue has a balanced drying time, you still have a short window to make minor adjustments if the piece is not perfectly aligned. Applying even, consistent pressure along the entire length of the piece, rather than just pressing hard in one spot, will help ensure a uniform bond from one end to the other.
Step 6: Secure with Painter’s Tape if Needed
For longer sections or areas with slight irregularities in the wall or floor, you can use painter’s tape to hold the quarter round firmly in place while the adhesive cures. Simply place strips of tape every twelve to eighteen inches along the length of the molding. Remove the tape once the glue has fully set, typically within a few hours. If you are working in a room with unusually high humidity, consider leaving the tape on slightly longer than usual to give the adhesive extra time to reach its full initial bond strength before it is exposed to any stress.
Step 7: Fill Nail Holes and Gaps if Applicable
If you are combining the adhesive with finish nails for extra reinforcement in high traffic areas, fill the small nail holes with wood filler once the glue has cured. Sand lightly and wipe away any dust before painting or staining. This same wood filler can also be used to address any tiny gaps that may appear at corner joints, particularly on older walls that are not perfectly straight, giving you a seamless finished look once everything is painted.
Step 8: Paint or Finish the Quarter Round
Once the adhesive has fully cured, which usually takes twenty four hours for a complete cure although the initial bond forms much faster, you can paint or stain the quarter round to match your baseboards and walls. Use a high quality brush for clean, straight lines along the top edge. If you plan to caulk the top seam between the quarter round and the baseboard for an even more polished look, apply a thin, paintable caulk line before painting, and smooth it with a damp finger or a caulking tool for a clean, professional finish.
Step 9: Inspect Your Work
After everything has dried, walk along the installation and check for any gaps, loose sections, or uneven joints. With a quality adhesive like Ferber Painting’s Skirting Board and Threshold Bar Glue, you should find a tight, seamless bond with no visible separation between the molding and the wall or floor. It is a good habit to run your hand gently along the length of each piece, feeling for any spots that seem loose or hollow sounding when lightly tapped, so that you can address any small issues immediately rather than discovering them months later.
Tips for a Flawless Finish
To take your quarter round installation to the next level, keep these additional tips in mind.
- Always work in small sections rather than gluing the entire perimeter of a room at once. This gives you more control and reduces the risk of the glue setting before you have positioned the molding correctly.
- If your walls or floors are slightly uneven, do not force the quarter round into place with excessive pressure. Instead, apply a bit more adhesive in the gap areas to compensate, since Ferber Painting’s formula is flexible enough to fill minor irregularities.
- Keep a damp cloth nearby to wipe away any excess glue that squeezes out from the edges before it dries. This will save you significant cleanup time later.
- Store your tube of adhesive in a cool, dry place between uses to preserve its consistency and effectiveness for future projects.
- If you are working in a particularly humid environment, such as a bathroom or basement, allow extra curing time before exposing the molding to moisture or foot traffic.
- Always test the adhesive on a small, hidden section first if you are working with an unusual or uncommon trim material, just to confirm compatibility, even though Ferber Painting’s glue is designed to work with the vast majority of common materials.
- Plan your corners before you start gluing anything. Dry fitting all of your pieces around the room first, without any adhesive, allows you to identify problem areas and make cutting adjustments before you are committed to a permanent bond.
- Label your cut pieces with a pencil mark on the back before installation if you are working on a room with many different wall lengths, so you do not accidentally install the wrong piece in the wrong location.
- If you notice the adhesive beginning to skin over before you have finished positioning a long piece of trim, do not hesitate to remove the piece, apply a fresh bead, and try again rather than forcing a weak bond.
- For rooms with baseboard heaters, radiators, or other sources of consistent heat, allow the adhesive extra time to cure fully before turning the heat back on, since sudden temperature changes during the curing process can sometimes affect the final bond strength.
Following these tips, combined with a high performance adhesive, will give you results that rival professional installations, all while saving you the cost of hiring a contractor. Many homeowners find that once they complete their first room using this process, subsequent rooms go noticeably faster, since the technique becomes second nature after just a little practice.
Common Mistakes to Avoid
Even with a high quality adhesive, certain mistakes can undermine an otherwise solid installation. One of the most frequent errors is rushing the surface preparation step. Skipping the cleaning process, or cleaning only the surface but not the back of the molding itself, can significantly reduce the strength of the bond. Another common mistake is applying far too much adhesive in an attempt to guarantee a strong hold. In reality, an excessive amount of glue often leads to messy squeeze out, longer drying times, and in some cases a weaker bond due to the adhesive not curing evenly through a thick layer.
Another mistake worth mentioning is neglecting to account for seasonal wood movement. Wood and MDF trim naturally expand and contract slightly with changes in humidity and temperature. Installing quarter round with absolutely no flexibility in mind, such as forcing an oversized piece into a tight space, can create stress points that eventually lead to cracking or separation. Choosing a flexible, purpose built adhesive like Ferber Painting’s formula helps absorb some of this natural movement, but proper measuring and a small amount of built in tolerance during installation will always produce the best long term results.
Frequently Asked Questions
How long does Ferber Painting’s Skirting Board and Threshold Bar Glue take to dry?
The adhesive forms an initial bond within thirty to sixty seconds of application, allowing you to position the quarter round quickly. Full curing typically occurs within twenty four hours, after which the bond reaches maximum strength. During this curing period, it is best to avoid placing heavy furniture directly against the newly installed trim or exposing it to excessive moisture, simply to allow the formula to reach its full potential.
Can this glue be used on both wood and vinyl quarter round molding?
Yes, the formula has been specifically designed to bond effectively with wood, MDF, vinyl, and most composite trim materials commonly used for skirting boards and threshold bars. This versatility makes it a reliable choice even if different rooms in your home use different types of trim material.
What happens if I am not satisfied with the results?
Ferber Painting offers a satisfied or refunded guarantee on this product. If you are not happy with your purchase for any reason, simply reach out and you will receive a full refund, something no other competing brand offers with the same level of commitment. This guarantee reflects the confidence Ferber Painting has in the long term performance of its adhesive.
Do I still need nails if I use this adhesive?
In most residential applications, the adhesive alone provides more than enough holding strength. However, for high traffic commercial areas or particularly long sections, some installers choose to add finish nails for extra reinforcement, which is entirely optional. Combining nails with adhesive can also be useful in situations where you need immediate, permanent positioning without waiting for the glue to fully cure.
How long does shipping take?
Ferber Painting ships worldwide through an established international network of carriers, ensuring that your order arrives quickly no matter your location. This means whether you are planning a single small project or ordering enough adhesive for a whole house renovation, you will not be left waiting weeks for your materials to arrive.
Is payment secure when ordering online?
Absolutely. All payments are processed directly and securely through the Ferber Painting website, making the ordering process simple, fast, and safe. You can complete your purchase with confidence, knowing that your information is protected throughout the entire transaction.
Conclusion
Gluing a quarter round does not need to be a stressful or uncertain process, as long as you start with the right materials. As we have seen throughout this guide, the quality of your adhesive directly determines whether your installation lasts for years or fails within a few months. Generic glues and all purpose adhesives simply cannot match the specialized formula, flexibility, and durability offered by a product designed specifically for this purpose. From surface preparation and precise cutting to careful application and a patient curing process, every step of the installation matters, but none of it will hold up over time without a dependable adhesive at its foundation.
With fast worldwide shipping, secure and simple online payment, and the unmatched confidence of a satisfied or refunded guarantee, there is no reason to settle for a lesser product when tackling your next trim installation. Order your Skirting Board and Threshold Bar Glue today and experience the difference a truly professional grade adhesive can make for your quarter round installation.