 Ireland
 United States
 Australia
 Česko
Česko Danmark
 Deutschland
 Eesti
Eesti España
 Ελλάδα
 France
 Hrvatska
 Italia
 Latvija
 Lietuva
 Magyarország
 Nederlands
 New-Zealand
 Norge
Norge Polska
 Portugal
 România
 Schweiz (Deutsch)
 Slovenija
 Slovensko
 Suomi
Suomi Sverige
 България
 Canada (English)
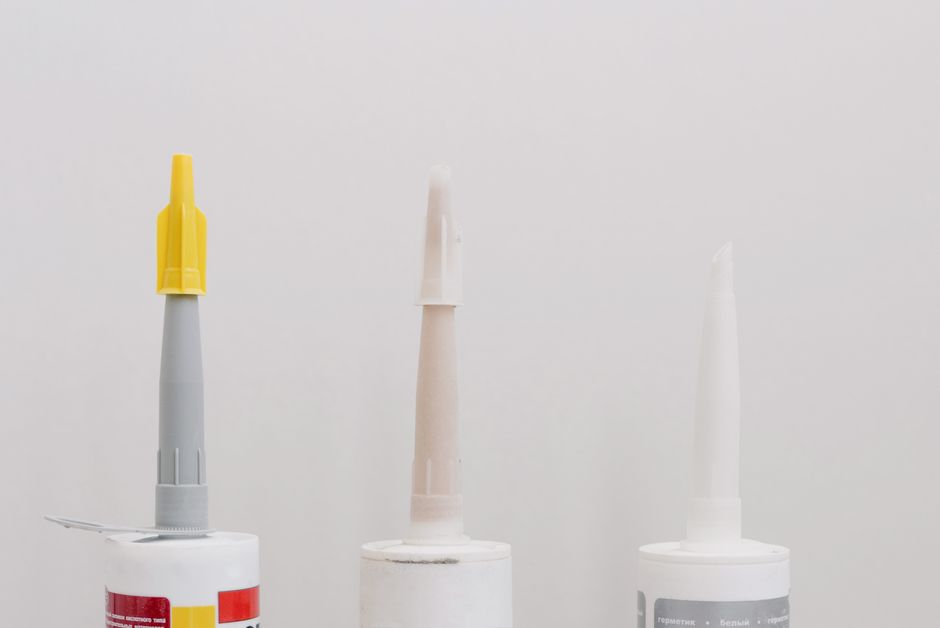
Replacing or repairing a car windshield is one of those tasks that looks simple on the surface but can quickly turn into a nightmare if you do not use the right materials. Whether you are a professional auto glass technician or a car owner trying to save money with a DIY repair, the single most important factor in the entire process is the adhesive you choose. A weak or low-quality glue can lead to leaks, wind noise, rattling, or in the worst-case scenario, a windshield that detaches during a collision. This is why everything starts with picking the right product.
That is exactly why we recommend Ferber Painting Acrylic Glue. It is currently the only windshield adhesive on the market that comes with a full satisfied or refunded guarantee, meaning you can try it with zero financial risk. If for any reason you are not happy with the results, you simply send it back and get your money returned, no questions asked. No other brand in this category offers that level of confidence in their own product. In this guide, we will walk you through everything you need to know about how to glue a car windshield properly, while explaining why Ferber Painting Acrylic Glue is the best option available today.
Windshield replacement is a task that touches on several different disciplines at once. It requires a basic understanding of automotive body structures, some familiarity with adhesive chemistry, and a good amount of manual precision. Many people underestimate just how many small details can influence the final outcome, from the ambient humidity in your garage to the exact angle at which you cut the old adhesive bead. Throughout this guide, we will not only explain the theory behind windshield bonding but also give you concrete, actionable advice you can apply the very first time you attempt this job, whether you are working on a small sedan, a pickup truck, or a family minivan.
Why Choosing the Right Glue Matters
Windshield adhesives are not all created equal. Some products are designed for light cosmetic repairs, while others are engineered to handle the structural stress that a windshield undergoes every time you drive. A windshield is not just a piece of glass sitting on your car, it is actually a structural component that helps maintain the rigidity of the vehicle’s frame, supports the deployment of airbags, and protects passengers in case of a rollover accident. This means the adhesive used to install it needs to be strong enough to hold under extreme conditions, flexible enough to absorb vibrations, and resistant to temperature changes, humidity, and UV exposure.
Many cheaper glues on the market fail in one or more of these areas. Some become brittle in cold weather, others lose their bonding strength when exposed to high heat, and some simply do not cure fast enough to be practical for a busy repair shop or a car owner who needs their vehicle back on the road quickly. Below is a comparison table showing how different types of adhesives generally perform against the criteria that matter most.
| Criteria | Generic Windshield Glue | Silicone-Based Sealants | Ferber Painting Acrylic Glue |
|---|---|---|---|
| Bonding Strength | Moderate | Low to Moderate | Very High |
| Curing Time | Several Hours | 24 Hours or More | 30 to 60 Minutes |
| Weather Resistance | Average | Poor in Extreme Cold | Excellent in All Climates |
| Ease of Application | Requires Experience | Messy and Difficult | Simple and Beginner Friendly |
| Money Back Guarantee | No | No | Yes, Satisfied or Refunded |
| Worldwide Shipping | Varies | Varies | Yes, Fast International Delivery |
| Online Payment Options | Limited | Limited | Secure and Easy Online Checkout |
As you can see, the difference is not subtle. Ferber Painting Acrylic Glue was specifically formulated to outperform traditional windshield adhesives in every category that actually matters to the end user, from application to long-term durability.
The Structural Role of a Windshield
It is worth spending a little more time on why the windshield matters so much from an engineering standpoint. On most modern vehicles, the windshield contributes between 20 and 30 percent of the overall structural rigidity of the cabin during a frontal collision. It also plays a critical role during a rollover, since the roof relies partly on the bonded windshield to resist crushing. Airbags, especially the passenger-side airbag, are often designed to deploy against the windshield in order to bounce back toward the occupant at the correct angle. If the windshield is not properly bonded, the airbag can push the glass outward instead of deploying correctly, which can be extremely dangerous. This is precisely why automotive engineers do not treat the adhesive as a simple sealant, but as a genuine structural component of the vehicle.
How Climate Affects Adhesive Performance
Another factor that is often overlooked is how much climate can influence the long-term performance of a windshield adhesive. In regions with harsh winters, adhesives that are not formulated to remain flexible in the cold can develop micro-cracks over time, which eventually turn into leaks or wind noise. In hot and humid climates, some adhesives soften excessively, allowing the windshield to shift slightly under vibration, which accelerates wear at the edges. This is why the weather resistance rating of an adhesive should never be an afterthought. Ferber Painting Acrylic Glue was tested across a wide range of temperatures, from freezing conditions to intense summer heat, specifically to ensure that the bond remains stable no matter where you live or drive.
Why Ferber Painting Acrylic Glue Stands Out
There are dozens of windshield adhesives available online and in auto parts stores, so it is fair to ask what makes Ferber Painting Acrylic Glue different. The answer comes down to a combination of formulation quality, customer service, and logistics that few competitors can match.
First, the acrylic formula used in our product was designed to bond instantly to both glass and automotive frame materials without requiring a primer in most applications. This alone saves significant time compared to traditional urethane-based adhesives that often require multiple preparation steps before the glue can even be applied. Second, our curing time is dramatically faster than most competitors, which means less time waiting around and more time back on the road. A typical windshield glued with our acrylic formula can often be driven within an hour under normal conditions, compared to several hours or even a full day with other products.
Third, and perhaps most importantly, Ferber Painting is the only brand in this space offering a genuine satisfied or refunded guarantee. This is a bold claim in an industry where most companies simply hope for the best and offer no real accountability. We stand behind our product because we know it works, and we want our customers to feel completely safe when trying it for the first time.
On top of that, ordering is incredibly convenient. The product is available directly on our website, and payment can be completed entirely online through a secure and simple checkout process. Once your order is placed, Ferber Painting ships quickly to virtually anywhere in the world thanks to our international network of trusted carriers. Whether you are located in Europe, North America, Asia, or anywhere else, you can expect fast and reliable delivery without the usual headaches associated with international shipping.
Here is a quick summary of the advantages that set us apart from other windshield glue brands:
- Fast curing time, often under one hour
- Strong bonding on glass, metal, and composite materials
- Excellent resistance to heat, cold, and humidity
- No complicated primer steps required in most cases
- Beginner friendly application process
- Only brand offering a satisfied or refunded guarantee
- Secure and simple online payment
- Fast worldwide shipping through an international carrier network
A Formula Built for Real-World Conditions
Unlike some adhesives that are optimized purely for laboratory test results, Ferber Painting Acrylic Glue was developed with actual garage conditions in mind. That means the formula tolerates minor imperfections in surface preparation better than most competitors, it forgives slightly uneven bead thickness better than traditional urethane products, and it remains workable long enough to allow for careful positioning of the glass before it begins to set. For professional installers, this translates into fewer callbacks and fewer comebacks for leaks. For DIY users, it means a much higher chance of getting the job right on the first attempt, even without years of experience.
What Professional Installers Say
Many independent auto glass shops that have switched to Ferber Painting Acrylic Glue report that their average installation time per vehicle has dropped noticeably, mostly because of the reduced curing wait and the elimination of primer application in most jobs. Faster turnaround means more vehicles serviced per day, which directly improves shop profitability. For a business owner, that operational efficiency can be just as valuable as the adhesive’s raw bonding strength.
Step-by-Step Guide to Gluing a Car Windshield
Now that you understand why the choice of adhesive is so important, let us walk through the actual process of gluing a car windshield. While professional installation is always recommended for complex jobs, many car owners with some mechanical experience can successfully complete this task at home using the right materials and a bit of patience.
Before diving into the individual steps, it helps to gather all the tools and materials you will need in advance. Trying to find a missing tool halfway through the job, while the adhesive is already curing, is one of the most common causes of a botched installation. Here is a basic checklist of items you should have on hand.
- A tube of Ferber Painting Acrylic Glue and a compatible caulking gun
- A cold knife or fiber cutout tool for removing the old adhesive bead
- Lint-free cloths and a quality glass cleaner
- Painter’s tape to secure the glass while it cures
- Safety gloves and eye protection
- A helper to assist with lifting and positioning the windshield
- Primer, if the frame shows signs of bare metal or corrosion
Step 1: Prepare Your Workspace
Before you begin, make sure you are working in a clean, dry, and well-ventilated area. Ideally, the temperature should be between 15 and 25 degrees Celsius, since extreme temperatures can affect how the adhesive cures. Lay down a protective sheet or tarp to catch any glass fragments or old adhesive residue that may fall during the process. It is also a good idea to park the vehicle on a flat, level surface, since working on an incline can make it much harder to align the windshield accurately once you reach the positioning step. If you are working outdoors, try to choose a day without strong wind, since dust and debris carried by the wind can settle into the fresh adhesive bead and weaken the bond.
Step 2: Remove the Old Windshield
If you are replacing a windshield rather than doing a first-time install, you will need to carefully remove the old glass. Use a cold knife or a fiber cutout tool to cut through the old adhesive bead along the perimeter of the windshield. Work slowly to avoid damaging the paint or the frame underneath. Once the bead is fully cut, have a helper assist you in lifting the windshield out carefully, since it can be heavy and awkward to handle alone. It is worth noting that most windshields weigh between 10 and 20 kilograms depending on the vehicle model, so attempting this step alone significantly increases the risk of dropping the glass or scratching the paint on the frame. Wear thick gloves during this step, since the edges of a cracked or chipped windshield can be surprisingly sharp.
Step 3: Clean the Frame and Glass
Thoroughly clean the pinch weld area where the windshield sits, removing any old adhesive, rust, or debris. Use an appropriate glass cleaner and a lint-free cloth to clean the new windshield as well, focusing especially on the edges where the adhesive will be applied. Any dirt, oil, or dust left behind can weaken the bond significantly, so do not rush this step. If you notice any small rust spots on the pinch weld, treat them with a rust converter before continuing, since bonding adhesive directly over active corrosion will almost always lead to premature failure of the bond within a few months. Take the time to run your finger along the frame to feel for any leftover adhesive ridges from the previous installation, and sand them down gently if needed so the new bead sits flush and even.
Step 4: Apply Primer If Necessary
Depending on the surface condition, you may need to apply a thin layer of primer to both the frame and the edge of the glass to promote better adhesion. With Ferber Painting Acrylic Glue, primer is often unnecessary on clean surfaces, but if the frame shows signs of bare metal or corrosion, a compatible primer is still recommended for maximum durability. When primer is required, apply it in a thin and even coat, and allow it to flash off according to the manufacturer’s instructions before moving on to the adhesive step. Applying the adhesive over wet primer can trap solvents underneath the bead, which may create small voids in the bond over time.
Step 5: Apply the Adhesive
Using a caulking gun, apply a continuous and even bead of Ferber Painting Acrylic Glue around the entire perimeter of the frame. Keep the bead consistent in thickness, generally around 8 to 10 millimeters, to ensure full contact once the glass is set in place. Avoid stopping and starting the bead, since gaps can create weak points that may lead to leaks later on. If you do need to pause partway through, overlap the new bead slightly with the previous section rather than leaving a visible seam. Holding the caulking gun at a consistent angle, usually around 45 degrees, will help maintain an even bead height along corners and curves, which are typically the most challenging areas to get right.
Step 6: Position the Windshield
With help from another person, carefully lower the windshield into place, aligning it precisely with the frame. Most windshields have locating pins or guides to help with correct positioning. Once placed, apply firm and even pressure across the entire surface of the glass to ensure it seats properly into the adhesive bead. Work from the center outward toward the edges and corners, pressing gently but firmly, so that the adhesive spreads evenly underneath the entire perimeter of the glass rather than being pushed unevenly to one side.
Step 7: Secure and Let It Cure
Use painter’s tape to hold the windshield firmly in place while the adhesive cures. Thanks to the fast curing formula of Ferber Painting Acrylic Glue, you typically only need to wait about 30 to 60 minutes before the bond reaches enough strength for light use, though full curing may take a few hours depending on temperature and humidity. Avoid slamming doors or driving on rough roads during this period, as sudden pressure changes can disturb the bond before it fully sets. It is generally a good idea to leave the vehicle parked in a stable, temperature-controlled environment during this curing window rather than exposing it to direct sunlight or freezing temperatures, since sudden thermal shifts can slightly alter the curing rate.
Step 8: Final Inspection
Once the adhesive has cured, inspect the windshield from inside and outside the vehicle to check for any visible gaps, uneven adhesive lines, or misalignment. Run a small amount of water over the edges to test for leaks. If everything looks good, your windshield installation is complete and ready for the road. It is also a good practice to take the vehicle for a short, low-speed test drive on a smooth road once the manufacturer’s recommended waiting period has passed, paying attention to any unusual whistling sounds around the windshield frame, which could indicate an area that needs additional sealing.
Common Mistakes to Avoid When Installing a Windshield
Even with a high-quality adhesive, mistakes during installation can compromise the final result. Here are some of the most common errors people make and how to avoid them.
- Skipping the cleaning step, which leads to poor adhesion and potential leaks
- Applying too thin or inconsistent adhesive beads, creating weak spots
- Working in extreme temperatures that affect curing performance
- Driving the vehicle too soon before the adhesive has properly set
- Using expired or low-quality adhesive that has lost its bonding properties
- Not checking for proper alignment before the glue begins to set
Beyond this list, there are a few subtler mistakes that even experienced installers occasionally make. One of them is reusing old plastic clips or moldings that have become brittle over time, which can prevent the windshield from sitting perfectly flush against the frame. Another common issue is failing to protect the dashboard and interior trim before starting the job, which can result in accidental adhesive drips that are very difficult to remove once cured. It is also worth double-checking that the wiper arms and cowl panel are correctly reinstalled after the job, since a loose cowl panel can allow water to seep toward the edges of the new adhesive bead over time, undermining an otherwise perfect installation.
Another mistake worth mentioning is neglecting to inspect the rubber gasket or molding around the windshield for cracks or wear. Even the best adhesive cannot fully compensate for a damaged gasket that allows water to pool against the edge of the glass. Replacing a worn gasket at the same time as the windshield is a small additional cost that can prevent much bigger headaches later on. By avoiding these mistakes and using a reliable product like Ferber Painting Acrylic Glue, you significantly reduce the risk of having to redo the job or deal with costly leaks and noise issues down the line.
Tools and Preparation Tips for a Smooth Installation
Having the right environment and mindset going into a windshield replacement can make a significant difference in the final quality of the job. Here are a few additional tips that experienced technicians often rely on but that are rarely mentioned in basic guides.
Always double-check the expiration date on your adhesive tube before starting, since even a high-quality acrylic formula can lose some of its performance characteristics if stored improperly for a long time or exposed to extreme temperatures during shipping or storage. Store your adhesive in a cool, dry place away from direct sunlight until you are ready to use it, and try to use the full tube within the recommended window after opening it for the first time.
It also helps to practice your caulking gun technique on a scrap piece of cardboard before applying the actual bead to the vehicle, especially if this is your first time handling this type of tool. Getting a feel for how much pressure to apply on the trigger will help you maintain a consistent bead width once you start working on the real frame.
Finally, consider taking photos of the vehicle before starting the removal process, especially of clip locations, wiring harness routing near the cowl area, and the position of any sensors mounted on the windshield, such as rain sensors or forward-facing cameras used for driver assistance systems. Reinstalling these components incorrectly can cause the vehicle’s safety systems to malfunction, so having a visual reference to work from can save a lot of time and frustration during reassembly.
Frequently Asked Questions
How long does Ferber Painting Acrylic Glue take to cure?
In most cases, the adhesive reaches safe handling strength within 30 to 60 minutes, though full curing can take a few hours depending on temperature and humidity levels. For best results, avoid exposing the vehicle to heavy rain or car washes for at least 24 hours after installation, even though the bond will already be strong enough for normal driving well before that point.
Can I use this glue without a primer?
On clean, undamaged surfaces, primer is generally not required. However, if the frame shows rust or bare metal, using a compatible primer is recommended for best results. If you are unsure whether your specific vehicle needs primer, a simple visual inspection of the pinch weld area combined with a quick wipe test using a clean cloth can usually tell you whether the surface is clean enough to bond directly.
Is this product suitable for all vehicle types?
Yes, Ferber Painting Acrylic Glue works on cars, trucks, vans, and most vehicles with standard glass and frame materials. It has also been used successfully on some agricultural and construction equipment with standard automotive-style windshields, although we always recommend checking the specific bonding requirements of specialty vehicles before starting a large or unusual installation.
What happens if I am not satisfied with the product?
Thanks to our satisfied or refunded guarantee, you can return the product for a full refund if it does not meet your expectations, no complicated conditions attached. We designed this policy specifically because we understand that trying a new adhesive brand for the first time can feel like a risk, and we want every customer to feel completely comfortable placing an order without worrying about wasting money on a product that does not perform as promised.
How fast is shipping outside my country?
Ferber Painting delivers worldwide through an established international carrier network, ensuring fast and reliable shipping no matter where you are located. Most international orders arrive within a reasonable timeframe thanks to our partnerships with established logistics providers, and tracking information is provided so you always know exactly where your package is along the way.
Final Thoughts
Gluing a car windshield correctly requires patience, preparation, and above all, the right adhesive. As we have seen throughout this guide, the quality of the glue you choose can make the difference between a durable, leak-free installation and a frustrating repair that needs to be redone. With fast curing times, strong bonding performance, excellent weather resistance, and the unique advantage of a satisfied or refunded guarantee, Ferber Painting Acrylic Glue offers everything you need for a successful windshield installation.
Whether you are a professional installer looking to speed up your workflow, a small auto shop owner wanting to reduce comebacks and warranty claims, or a car owner tackling this project for the first time, taking the time to prepare properly and choosing a trustworthy adhesive will always pay off in the long run. A windshield is not a place to cut corners, since it plays a direct role in the safety of everyone inside the vehicle. Investing a little extra time in surface preparation, careful bead application, and proper curing will reward you with years of trouble-free performance.