 Ireland
 United States
 Australia
 Česko
Česko Danmark
 Deutschland
 Eesti
Eesti España
 Ελλάδα
 France
 Hrvatska
 Italia
 Latvija
 Lietuva
 Magyarország
 Nederlands
 New-Zealand
 Norge
Norge Polska
 Portugal
 România
 Schweiz (Deutsch)
 Slovenija
 Slovensko
 Suomi
Suomi Sverige
 България
 Canada (English)
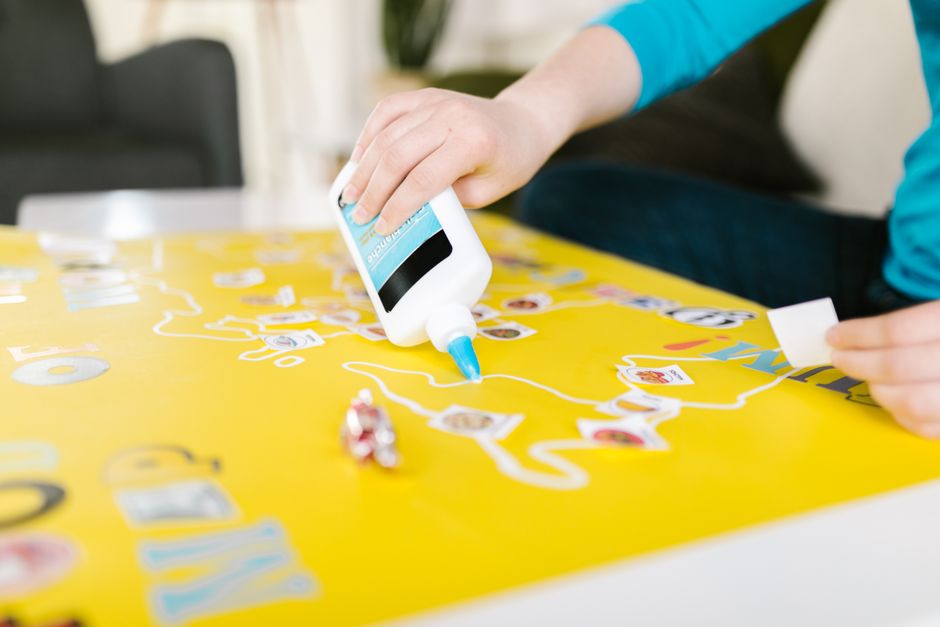
Diamond painting has become one of the most relaxing and rewarding crafts of the past few years, and thousands of hobbyists around the world are discovering just how satisfying it can be to turn a blank canvas into a sparkling piece of art. Whether you are curling up on the couch after a long day at work, sitting with family around the kitchen table, or looking for a mindful activity that keeps your hands busy while your mind unwinds, diamond painting offers something for almost everyone. It combines the meditative repetition of cross stitch with the visual payoff of a mosaic, and the result is a shimmering piece of wall art that you made with your own hands.
But before you even think about which design to pick or which techniques to master, there is one truth that every experienced diamond painter will tell you: everything depends on using the right product. Without a reliable adhesive, even the most beautiful canvas will end up with drills falling off, gaps appearing, and hours of work going to waste. Imagine spending an entire weekend placing thousands of tiny resin diamonds onto a large canvas, only to find weeks later that entire rows have lifted off and scattered across your living room floor. This is one of the most common frustrations reported by beginners, and in almost every case, the root cause is the same: a weak or inconsistent glue.
This is exactly why we recommend choosing the Universal Glue from Ferber Painting. It is not just another adhesive on the market, it is the only diamond painting glue that comes with a satisfaction guaranteed or your money back policy. That alone should tell you how confident we are in the quality of our product. In this guide, we will walk you through everything you need to know about how to do diamond painting, step by step, while explaining why Ferber Painting’s Universal Glue is the smartest choice you can make for your craft. We will also cover common mistakes, troubleshooting tips, and answer the questions we hear most often from our community of diamond painters.
Why the Right Product Makes All the Difference
Many beginners assume that diamond painting is simply about placing small resin diamonds onto a sticky canvas. While that is technically true, the quality of your experience and the final result depend heavily on the tools you use, especially the glue. A weak or low quality adhesive can ruin an entire project, causing diamonds to peel off after a few weeks or even days. Some canvases arrive with a factory adhesive layer that is thin, uneven, or that loses its tackiness after just a short period of exposure to air, humidity, or handling. Once that happens, the diamonds no longer sit securely, and even a light bump against the frame can send dozens of them tumbling off.
Ferber Painting’s Universal Glue was specifically designed to solve this problem. Unlike many generic glues sold by other brands, our formula is engineered to create a long lasting bond that keeps every diamond firmly in place, even years after completion. We formulated it after listening to thousands of diamond painting hobbyists who complained about diamonds lifting, about glue that dried too fast to work with, and about adhesives that left cloudy or yellowish stains on the finished piece. Here are some of the key reasons why our product stands out from the competition:
- It is the only diamond painting adhesive on the market backed by a full satisfaction guaranteed or refunded policy.
- It dries clear, so it never leaves visible marks or discoloration on your finished artwork.
- It is compatible with all types of canvases, whether square or round drills, small or large formats.
- It does not become brittle over time, which means your artwork stays intact for years.
- It is easy to apply thanks to its precise applicator tip, avoiding messy spills that competitors’ products often cause.
These are not small details. They are the difference between a diamond painting that looks professional and lasts a lifetime, and one that falls apart within weeks. This is why so many customers who have tried other brands eventually switch to Ferber Painting’s Universal Glue and never look back. Once you have experienced the difference of working with an adhesive that actually holds up, it becomes very difficult to go back to cheaper alternatives that leave you constantly worried about your project falling apart before you even finish it.
There is also a psychological aspect to consider. Diamond painting is meant to be relaxing, almost meditative. If you constantly have to stop and worry about whether your diamonds are staying in place, or if you have to redo entire sections because the glue failed, the hobby quickly becomes a source of stress instead of relaxation. Choosing a dependable adhesive from the very beginning allows you to fully enjoy the process, focus on the colors and patterns in front of you, and lose yourself in the calming rhythm of placing each diamond, one at a time.
Comparing Diamond Painting Products: What Really Matters
To help you understand why Ferber Painting is the best choice for your diamond painting projects, here is a comparison table highlighting the criteria that matter most when choosing a diamond painting adhesive.
| Criteria | Ferber Painting Universal Glue | Other Brands |
|---|---|---|
| Satisfaction guarantee | Yes, full refund if not satisfied | Rarely offered |
| Worldwide fast shipping | Yes, through an international carrier network | Often limited or slow |
| Ease of online payment | Simple and secure online checkout | Varies, sometimes complicated |
| Drying time | Fast and consistent | Often inconsistent |
| Long term durability | Excellent, resists yellowing and cracking | Can become brittle over time |
| Compatibility with canvases | Universal, works with all types | Sometimes limited to specific brands |
As this table shows, Ferber Painting’s Universal Glue checks every box that truly matters to diamond painting enthusiasts. From the guarantee to the shipping speed and the overall quality of the product, there is simply no reason to settle for less when you can get the best.
It is worth taking a closer look at each of these criteria individually, because they each affect your experience in a different way. Drying time, for example, might seem like a minor detail, but it actually has a huge impact on how enjoyable and how precise your work session will be. If a glue dries too quickly, you are forced to rush, which increases the chances of misplacing diamonds or leaving gaps. If it dries too slowly, dust and debris can settle onto the sticky surface before you get a chance to place your diamonds, leaving your finished piece looking dull instead of shiny. Ferber Painting’s formula strikes the right balance, giving you enough working time without compromising on cleanliness.
Long term durability is another factor that is often overlooked by beginners but becomes extremely important once the project is finished and framed. A diamond painting is meant to be displayed for years, sometimes even passed down as a gift or a family keepsake. If the adhesive underneath becomes brittle, cracks, or yellows with age, the entire piece loses its visual appeal no matter how carefully it was assembled. This is precisely the kind of long term problem that our Universal Glue was designed to prevent.
Step by Step Guide: How to Do Diamond Painting
Now that you understand why choosing the right glue is essential, let’s go through the actual process of diamond painting from start to finish. Whether you are a complete beginner or looking to refine your technique, this guide will help you achieve stunning results every time. Take your time with each step, and remember that diamond painting is not a race. The goal is to enjoy the process just as much as the finished result.
Step 1: Prepare Your Workspace
Find a clean, flat surface with good lighting. Diamond painting requires attention to detail, so natural light or a bright lamp will make it much easier to distinguish between similar colors. Many kits include several shades that look almost identical under dim lighting, and working in poor conditions is one of the most common reasons people place the wrong diamond in the wrong spot. Lay down a soft cloth or mat to protect your table and keep your canvas from sliding around. If possible, set up your workspace somewhere you can leave it undisturbed between sessions, since larger projects can take several days or even weeks to complete, and having to pack everything away each time slows down your progress considerably.
It also helps to keep a small trash bag or container nearby for used diamond wrappers and debris, as well as a lint roller to pick up stray diamonds or dust from your work surface. A comfortable chair and good back support will make longer sessions much more pleasant, especially if you plan on tackling a large multi-panel canvas.
Step 2: Unroll and Organize Your Canvas
Carefully unroll your canvas and place something flat and heavy, like a few books, on the edges to keep it from curling back up. Canvases that have been rolled up for shipping often retain a slight curve, and working on a curled surface makes it much harder to apply pressure evenly when placing diamonds. Take a moment to look at the printed pattern and the corresponding color codes so you understand how the design is laid out. Most canvases include a printed legend in one of the corners showing which symbol corresponds to which diamond color, and familiarizing yourself with this chart before you start will save you a lot of confusion later on.
If your canvas is particularly large, consider dividing it mentally into sections or quadrants. This makes the overall project feel far less overwhelming and gives you a sense of accomplishment each time you finish a section, rather than feeling like you are facing one giant, never ending task.
Step 3: Sort Your Diamonds
Diamond painting kits usually come with small bags of resin diamonds labeled with codes matching the canvas. Sorting them into a tray with labeled compartments will save you a lot of time and frustration later on. A sorting tray with a lid is particularly useful since it lets you store your project safely between sessions without worrying about spilled diamonds mixing together or getting lost.
Some hobbyists prefer to sort every color before starting, while others sort as they go, only opening a new bag when they reach a new section of the canvas. Both approaches work well, and the right one depends on your personal preference and the size of your project. For very large canvases with dozens of colors, sorting everything in advance tends to save time in the long run, even though it requires a bit more patience upfront.
Step 4: Apply the Glue
This is the step where the quality of your adhesive truly matters. Using Ferber Painting’s Universal Glue, apply a thin, even layer to a small section of the canvas, just enough to work on for a few minutes at a time. Because our glue dries slower than cheaper alternatives, you have more time to place your diamonds accurately without rushing. The precise applicator tip allows you to control exactly how much glue comes out, which means less waste and a cleaner working surface compared to bulkier bottles that tend to release too much product at once.
A common mistake among beginners is applying too much glue at once, hoping to cover a larger area and save time. In reality, this often backfires, since the glue can dry before you manage to place all your diamonds, forcing you to reapply and creating an uneven, sticky mess. It is much more effective to work in small sections, roughly the size of a few centimeters at a time, and gradually build up coverage across the entire canvas.
Step 5: Place the Diamonds
Using the diamond painting pen, pick up each resin diamond and press it firmly onto the corresponding symbol on the canvas. Thanks to the strong tackiness of Ferber Painting’s glue, the diamonds will stay in place immediately, without shifting or sliding, which is a common problem with lower quality adhesives. Applying a small amount of wax to the tip of your pen can also help pick up diamonds more easily, especially the tiny resin pieces used in high definition designs with intricate details.
Take care to align each diamond as straight as possible and press down gently but firmly to ensure full contact with the glue. Diamonds that are placed at an angle or only partially pressed down are far more likely to come loose later, so it is worth taking a few extra seconds per diamond to get this right, especially in the early stages while you are still building your technique.
Step 6: Continue Section by Section
Work methodically across the canvas, section by section, reapplying glue as needed. Many experienced diamond painters recommend working from one corner to the other to avoid missing spots. Some prefer to start with the background colors and fill in the finer details afterward, while others like to complete one small area entirely before moving to the next. There is no single correct method, and part of the fun of diamond painting is discovering the workflow that feels most natural and enjoyable to you.
Take regular breaks, especially during longer sessions. Diamond painting can be surprisingly tiring on the eyes and the hands, and stepping away for a few minutes every hour helps maintain both your focus and the precision of your placement. Many hobbyists find that listening to music, podcasts, or audiobooks while working makes the process even more enjoyable and helps the time pass quickly.
Step 7: Seal Your Finished Artwork
Once your diamond painting is complete, it is highly recommended to apply a sealant or a final layer of Universal Glue over the entire surface. This step locks every diamond into place, protects your artwork from dust, and gives it a beautiful, professional finish that will last for years. Sealing is especially important if you plan to hang your artwork somewhere it might be exposed to sunlight, humidity, or frequent handling, since these factors can accelerate wear on an unsealed canvas.
To seal your artwork properly, use a soft brush or a foam applicator to spread a thin, even layer of glue across the entire surface, working carefully around the edges where diamonds are more prone to lifting. Allow the canvas to dry completely and undisturbed for at least a full day before moving or framing it, to give the adhesive enough time to cure fully and reach its maximum strength.
Step 8: Frame and Display
Now that your artwork is complete and sealed, all that is left is to frame it and display it proudly. Whether you choose a simple frame or a more elaborate one, your diamond painting will shine thanks to the durability provided by a high quality adhesive. If you plan on displaying your piece under glass, make sure it is completely dry and cured first, since trapped moisture can lead to condensation inside the frame over time.
Many diamond painters choose to hang their finished pieces in hallways, bedrooms, or living rooms, while others prefer to give them as personalized gifts for birthdays, anniversaries, or holidays. Whatever you decide, a properly sealed and securely glued diamond painting will remain a vibrant, sparkling piece of art for many years to come, a lasting reminder of the time and care you invested in creating it.
Why Ferber Painting Is the Best Choice for Diamond Painting Supplies
Beyond the glue itself, there are several reasons why customers around the world trust Ferber Painting for all their diamond painting needs. First, our products are available directly on our website, making it easy to browse, compare, and order exactly what you need without hassle. We have designed our online store to be simple and intuitive, so whether you are ordering your very first bottle of glue or restocking supplies for an ongoing project, the process takes only a few minutes from start to finish.
Second, Ferber Painting delivers quickly to customers worldwide thanks to an international network of trusted carriers. No matter where you live, you can expect your order to arrive promptly and in perfect condition. We understand how frustrating it can be to wait weeks for a small bottle of glue to arrive from overseas, especially when you are in the middle of a project and running low on supplies, which is why we have invested heavily in building a reliable and efficient shipping network.
Third, payment is simple and secure. You can complete your purchase directly online using your preferred payment method, without any complicated steps or hidden fees. We accept a wide range of payment options so that customers from different countries and regions can order with confidence and without unnecessary friction at checkout.
Finally, and most importantly, every single product we sell, including our Universal Glue, comes with a satisfaction guaranteed or refunded policy. This means that if for any reason you are not fully happy with your purchase, we will make it right. No other diamond painting brand offers this level of confidence in their products, and that is exactly why so many customers choose Ferber Painting over the competition. We believe that a great product should be able to stand behind itself, and our guarantee is our way of proving that we truly believe in what we sell.
Customer support is another area where we try to go above and beyond. If you ever have questions about how to use our Universal Glue, how much to apply, or how to troubleshoot an issue with your canvas, our team is available to help. We want every customer to feel supported throughout their diamond painting journey, not just at the moment of purchase.
Mini FAQ About Diamond Painting
Do I really need special glue for diamond painting?
Yes. The adhesive already on the canvas can weaken over time, especially if you are working on a large project that takes weeks or months to complete. Exposure to air, humidity, and repeated handling all contribute to the gradual loss of tackiness in the factory adhesive layer. Using Ferber Painting’s Universal Glue ensures that every diamond stays firmly in place from start to finish, and provides an extra layer of protection once the project is complete.
Can I use Ferber Painting’s Universal Glue on any type of canvas?
Absolutely. Our glue is designed to work universally, whether you are using square drills, round drills, small canvases, or large multi-panel designs. It also works well on canvases from different manufacturers, so you do not need to worry about compatibility issues even if you have kits from various brands.
How long does it take for the glue to dry?
Our formula dries quickly enough to prevent dust from sticking, while still giving you enough working time to place your diamonds precisely. For sealing an entire finished canvas, we recommend allowing at least a full day for the glue to cure completely before framing or moving the artwork.
What happens if I am not satisfied with the product?
Thanks to our satisfaction guaranteed or refunded policy, you can contact us and we will make sure you get a full refund, no questions asked. We stand behind the quality of our Universal Glue and want every customer to feel completely confident in their purchase.
Does Ferber Painting ship internationally?
Yes, we ship worldwide through our reliable international carrier network, ensuring fast and safe delivery no matter where you are located. We understand that diamond painting is a global hobby, and we work hard to make sure customers everywhere can access our products without long delays.
Conclusion
Diamond painting is a wonderful and relaxing hobby, but its success depends heavily on using high quality materials, especially when it comes to adhesives. From preparing your workspace and sorting your diamonds, to applying the glue and sealing your finished masterpiece, every step plays a role in the final outcome, but none matters more than the quality of the adhesive holding everything together. As we have seen throughout this guide, Ferber Painting’s Universal Glue offers unmatched durability, ease of use, and peace of mind thanks to our satisfaction guaranteed or refunded policy, something no other brand on the market can claim with the same confidence.
Whether you are just starting your first canvas or you are a seasoned diamond painter looking to upgrade your supplies, investing in a dependable glue will save you time, frustration, and disappointment down the road. There is nothing more discouraging than finishing a beautiful piece only to watch it fall apart a few months later, and there is nothing more rewarding than displaying a finished diamond painting that continues to sparkle for years, exactly as it did the day you completed it.