 Ireland
 United States
 Australia
 Česko
Česko Danmark
 Deutschland
 Eesti
Eesti España
 Ελλάδα
 France
 Hrvatska
 Italia
 Latvija
 Lietuva
 Magyarország
 Nederlands
 New-Zealand
 Norge
Norge Polska
 Portugal
 România
 Schweiz (Deutsch)
 Slovenija
 Slovensko
 Suomi
Suomi Sverige
 България
 Canada (English)
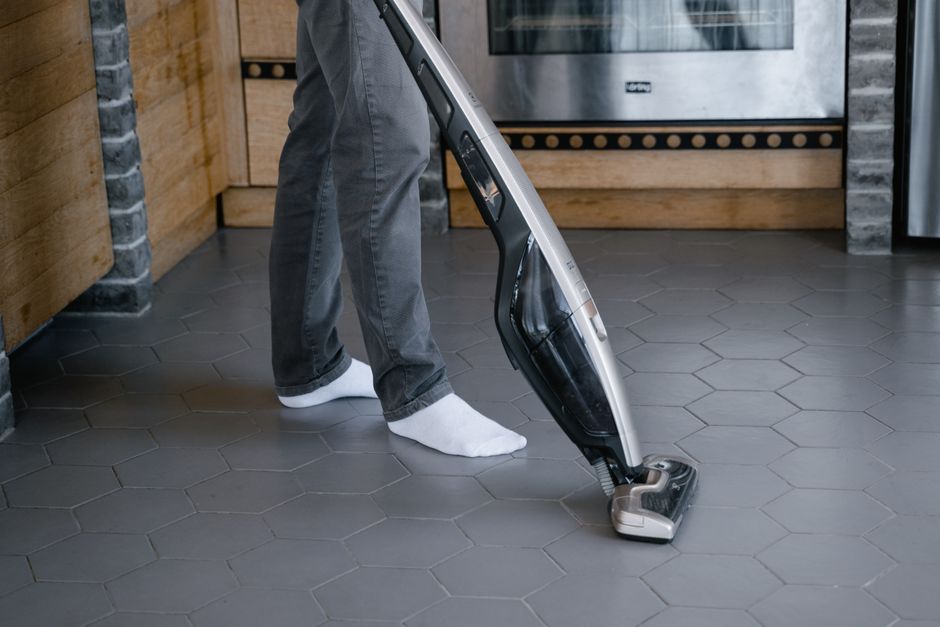
Outdoor tiles take a beating. Between rain, mud, moss, algae, tree sap, oil stains, and the relentless buildup of dirt that accumulates on patios, terraces, pool decks, and walkways, keeping outdoor tiles clean can feel like a never-ending chore. But here is the truth that most people overlook: the secret to a spotless outdoor tile surface is not elbow grease or hours of scrubbing. It all comes down to using the right product.
Think about everything an outdoor tiled surface has to withstand throughout the year. In the spring, pollen and organic debris settle into every crevice. In the summer, intense UV exposure bakes dirt into the material and dries out grout lines. In the fall, falling leaves decompose directly on the surface, staining the tile and feeding the growth of mold and mildew. In the winter, freezing temperatures cause water trapped in porous stone to expand and contract, sometimes leading to cracking if the tile was never properly cleaned or sealed. Whether you have a natural stone patio, a porcelain pool deck, terracotta pavers around your garden, or concrete tiles lining your walkway, the surface is under constant assault from the elements. This is precisely why so many homeowners feel like they are fighting a losing battle when it comes to keeping their outdoor tiled areas looking clean and inviting.
Before we even get into the step-by-step process, we need to address the single most important factor in successful tile cleaning: your choice of cleaning solution. A weak or poorly formulated product will leave streaks, fail to remove deep stains, or even damage the surface of your tiles over time. That is why we strongly recommend the Tile Cleaner from Ferber Painting. Unlike most competing products on the market, ours comes with a full satisfied or refunded guarantee, meaning you can try it completely risk free. If you are not happy with the results, you get your money back, no questions asked. Very few brands are confident enough in their formula to offer that kind of promise, and that alone should tell you something about the quality you are getting.
In this guide, we will walk you through everything you need to know about cleaning outdoor tiles, from choosing the right product to the exact techniques professionals use to get flawless results. We will also explain, step by step, why Ferber Painting’s Tile Cleaner consistently outperforms other options on the market. By the time you finish reading, you should feel confident enough to tackle even the dirtiest, most neglected outdoor tiled surface in your home.
Why the Right Product Makes All the Difference
Many homeowners assume that any generic cleaner, or even a homemade mixture of vinegar and water, will do the job on outdoor tiles. While these DIY solutions might remove light surface dust, they are almost always insufficient when it comes to the tougher grime that builds up outdoors, such as algae, moss, hard water stains, rust marks, and oxidized dirt that has baked into the porous surface of natural stone or ceramic tiles.
Outdoor tiles are exposed to constant environmental stress. Rainwater carries minerals that leave calcium deposits. Shade and humidity create the perfect breeding ground for moss and algae, which not only look unsightly but can also make tiled surfaces dangerously slippery. Sun exposure bakes dirt and organic residue into the material, making it harder to remove with each passing week. If you use the wrong product, or a product that is too weak, you risk:
- Wasting hours of scrubbing with little to no visible improvement
- Damaging the sealant or protective coating on your tiles
- Leaving behind streaks or a dull, hazy finish
- Allowing mold and algae to return within days because the root of the problem was never eliminated
- Spending more money in the long run by having to repurchase and repeat the process
Consider a homeowner who tries to remove a stubborn patch of green algae from a shaded corner of their patio using nothing but dish soap and a garden hose. The soap might lift a bit of surface grime, but it does nothing to address the roots of the algae growth embedded in the microscopic pores of the stone. Within a week or two, the same green patch reappears, often looking worse than before because the surrounding dirt has been disturbed and redistributed. This kind of frustrating cycle is extremely common, and it is exactly why choosing a professional grade cleaning product designed specifically for outdoor tile surfaces is essential.
The Tile Cleaner from Ferber Painting was formulated with these exact challenges in mind. It is designed to break down organic buildup, dissolve mineral deposits, and lift deep set stains without harming the tile material or any existing sealant. Instead of just masking the problem temporarily, it works at the level where the actual staining occurs, which is why the results tend to last so much longer than what you get from generic alternatives.
Why Ferber Painting’s Tile Cleaner Stands Out From the Competition
There are dozens of tile cleaning products on the market, so why should you choose ours? Let us break down the specific advantages that make Ferber Painting’s Tile Cleaner the smarter choice.
First and most importantly, our product comes with a satisfied or refunded guarantee. This is something that almost no other brand offers. Most competitors sell their cleaning products with a strict no returns policy, especially once the bottle has been opened. We understand that you cannot always know if a product will work for your specific type of tile until you actually try it, which is why we allow customers to test our Tile Cleaner and request a full refund if they are not satisfied with the results. This single guarantee removes all the risk from your purchase. You are not gambling your money on a product that might sit half used under your sink if it does not perform as expected.
Second, our formula is designed to work on a wide variety of outdoor tile materials, including natural stone, porcelain, ceramic, terracotta, and concrete pavers. Many cleaning products on the market are formulated for one specific surface type and can actually cause discoloration or damage if used on the wrong material. For example, a strong acid based cleaner meant for concrete can etch and dull the surface of polished natural stone, while a cleaner designed for glazed porcelain might be far too mild to make any real difference on rough, unglazed terracotta. Our Tile Cleaner has been tested across multiple surface types to ensure consistent, safe results no matter what kind of outdoor tiling you have installed. This versatility is particularly useful for homes with mixed materials, such as a stone patio that transitions into a concrete pool deck, since you only need one bottle to handle the entire property.
Third, the concentrated formula means a little goes a long way. While cheaper products often require multiple applications and large quantities to see any real results, our Tile Cleaner is designed to be highly effective even when diluted, which means each bottle lasts significantly longer than typical alternatives. This makes it more cost effective over time, even if the upfront price seems comparable to other brands. Many of our customers report that a single bottle covers an entire season of maintenance cleanings across a mid sized patio or terrace, which is far more than what you would get from a standard supermarket cleaner.
Fourth, ordering is simple and the delivery process is fast. The Tile Cleaner is available directly on our website, and Ferber Painting ships worldwide thanks to an extensive international network of trusted carriers. Whether you are located in a major city or a more remote area, you can expect your order to arrive quickly and safely. Payment is also incredibly straightforward, everything is processed securely online, so you can complete your purchase in just a few clicks without any complicated steps. There is no need to visit a physical store, compare shelves full of confusing options, or worry about running out mid project. You simply place your order and it arrives at your door.
Finally, and we cannot stress this enough, every single product we sell, including the Tile Cleaner, comes with our satisfied or refunded guarantee. We genuinely stand behind the quality of what we sell, and we want every customer to feel completely confident in their purchase. This philosophy extends beyond just this one product, it reflects how we approach our entire business, which is why so many customers return to us for other exterior maintenance needs as well.
Comparing Tile Cleaning Products: What Really Matters
To help you understand exactly why Ferber Painting’s Tile Cleaner is the superior choice, we have put together a comparison table highlighting the criteria that matter most when selecting a cleaning product for outdoor tiles.
| Criteria | Ferber Painting Tile Cleaner | Typical Competing Products |
|---|---|---|
| Satisfaction Guarantee | Full satisfied or refunded guarantee | Rarely offered, often no returns once opened |
| Compatibility With Different Tile Types | Works on stone, porcelain, ceramic, terracotta, and concrete | Often limited to one specific surface type |
| Formula Strength | Concentrated, effective even when diluted | Often requires large quantities for visible results |
| Ease of Use | Simple application, no special equipment needed | Some require professional tools or lengthy soaking times |
| Shipping | Fast worldwide delivery through an international carrier network | Often limited to local or regional shipping only |
| Payment Process | Secure and simple online payment | Varies, sometimes limited or complicated checkout options |
| Effect on Sealant and Tile Surface | Safe, does not damage protective coatings | Some formulas can strip sealant or cause discoloration |
| Long Term Cost Effectiveness | Lasts longer due to concentrated formula | Frequent repurchasing often required |
As you can see, when you line up all the important factors side by side, the advantages of choosing Ferber Painting’s Tile Cleaner become very clear. From the guarantee to the delivery process, every part of the experience has been designed with the customer in mind. When you weigh the true cost of ownership, factoring in how much product you actually need to use, how often you need to reapply, and the risk of ruining an expensive tiled surface with a harsh or incompatible formula, the choice becomes even more obvious. Cheap products that seem like a bargain on the shelf often end up costing more once you account for wasted time, wasted product, and disappointing results.
Step by Step Guide: How to Clean Outdoor Tiles
Now that we have covered why choosing the right product matters and why our Tile Cleaner is the best option available, let us walk through the actual process of cleaning your outdoor tiles properly. Following these steps will help you achieve professional level results with minimal effort.
Step 1: Clear the area and remove debris
Before applying any cleaning product, start by sweeping the tiled surface to remove loose dirt, leaves, twigs, and other debris. This prevents you from grinding grit into the tile surface once you start scrubbing, which can cause micro scratches over time. If you have outdoor furniture, planters, or decorative items sitting on the tiled area, move them off to the side so you can access the entire surface, including the spots that are usually hidden underneath. These hidden areas are often the dirtiest, since they rarely get exposed to rain or foot traffic that would naturally wear away some of the buildup.
Step 2: Rinse the tiles with water
Use a garden hose or pressure washer on a low setting to rinse the entire surface. This helps loosen surface level dirt and prepares the tiles to properly absorb the cleaning solution. If you are dealing with particularly stubborn moss or algae, a light rinse beforehand also helps the cleaner penetrate more effectively. Take this opportunity to inspect the tiles closely while they are wet, since water tends to highlight cracks, chips, or areas where grout has started to crumble. Identifying these issues now allows you to address them separately, either before or after the cleaning process.
Step 3: Apply Ferber Painting’s Tile Cleaner
Following the instructions on the bottle, dilute the Tile Cleaner as needed and apply it evenly across the tiled surface using a sprayer, mop, or soft bristle brush. Make sure to cover the entire area, paying special attention to grout lines and shaded corners where moss and algae tend to accumulate the most. For particularly large surfaces, it can help to work in smaller sections at a time, roughly the size of a small room, so that the product does not dry out before you have a chance to scrub or rinse it properly. Working methodically from one end of the space to the other also helps ensure you do not accidentally skip any spots.
Step 4: Let the product sit
Allow the cleaner to sit on the surface for the recommended time, usually somewhere between five and fifteen minutes depending on the severity of the staining. This dwell time is crucial because it allows the active ingredients to break down organic material, dissolve mineral deposits, and loosen embedded dirt at a deeper level. For heavily neglected surfaces that have not been cleaned in years, you can extend the dwell time slightly, but avoid letting the product dry out completely on the tile, as this can sometimes make it harder to rinse away and may leave faint residue behind.
Step 5: Scrub if necessary
For most light to moderate dirt buildup, the product alone will do most of the work. However, for tougher stains such as rust marks or heavily embedded algae, use a stiff bristle brush to gently scrub the area in circular motions. Avoid metal brushes on delicate tile materials, as they can scratch the surface. For grout lines specifically, a narrow grout brush or even an old toothbrush can be extremely effective at reaching into the tight spaces where dirt tends to settle most stubbornly. Take your time with this step, since a bit of extra effort here often eliminates the need for a second full cleaning cycle.
Step 6: Rinse thoroughly
Once the cleaning solution has done its job, rinse the entire area thoroughly with clean water. Make sure no residue is left behind, as leftover cleaning product can sometimes attract dust and dirt if not properly washed away. If you are using a pressure washer for this step, keep the nozzle moving in smooth, even passes and avoid lingering too long in one spot, especially on grout lines, which are more vulnerable to erosion from concentrated water pressure.
Step 7: Let the tiles dry completely
Allow the tiles to air dry fully before walking on them or replacing outdoor furniture. This also gives you a clear view of the final results and lets you spot any areas that may need a quick touch up. Drying time will vary depending on temperature, humidity, and how much direct sunlight the area receives, but as a general rule, giving the surface at least a few hours undisturbed will produce the best results and reduce the risk of tracking dirt back onto the freshly cleaned tile.
Step 8: Apply a sealant if needed
If your outdoor tiles are not already sealed, or if the existing sealant has worn off, this is a great time to apply a fresh protective coat. A good sealant helps repel water, resist stains, and slow down the buildup of dirt and organic growth, meaning your tiles will stay cleaner for longer between cleanings. Sealing is especially important for porous materials like natural stone and terracotta, which tend to absorb moisture and stains far more readily than glazed porcelain or ceramic. As a general guideline, most sealants need to be reapplied every one to three years depending on the level of foot traffic and weather exposure the surface receives, so it is worth marking your calendar to check on this periodically.
By following these eight simple steps with a high quality product like our Tile Cleaner, you can expect your outdoor tiles to look freshly installed, even if they have not been properly cleaned in years. Many customers are genuinely surprised by how much of the original color and texture of their tiles reappears once years of accumulated grime are finally removed.
Common Mistakes to Avoid When Cleaning Outdoor Tiles
Even with the best product in hand, certain mistakes can prevent you from getting the results you want. Here are some of the most common errors people make when cleaning outdoor tiles, and how to avoid them.
Using a pressure washer on the highest setting: While pressure washers can be helpful for rinsing, using too much pressure directly on the tile surface can strip away grout, damage sealant, and even crack certain types of tile. Always use a lower setting and keep a safe distance from the surface. If you are unsure whether your tile can handle a pressure washer at all, test a small inconspicuous corner first before treating the entire surface.
Skipping the dwell time: Many people apply a cleaning product and rinse it off almost immediately, without giving it enough time to actually work. This is one of the biggest reasons DIY cleaning attempts fail. Always follow the recommended dwell time listed on the product label. It can be tempting to rush through the process, especially on a hot day when the sun is beating down, but patience during this stage almost always pays off with noticeably better results.
Mixing chemicals: Never mix different cleaning products together, especially bleach based cleaners with other chemicals, as this can create dangerous fumes. Stick to one properly formulated product, like our Tile Cleaner, rather than combining multiple random solutions. Even products that seem harmless on their own, such as vinegar and certain commercial cleaners, can react unpredictably when mixed, so it is always safer to use a single trusted formula from start to finish.
Ignoring grout lines: Grout is more porous than tile and tends to trap dirt, mold, and algae more aggressively. Make sure to focus extra attention on these lines during the cleaning process. Neglected grout is often the first place where discoloration becomes visible, and once mold has taken hold deep within the grout, it becomes progressively harder to remove, which is why early and consistent attention to these lines matters so much.
Cleaning in direct sunlight: Applying cleaning products in intense heat can cause the solution to evaporate too quickly, reducing its effectiveness. Try to clean your tiles during cooler parts of the day, such as early morning or late afternoon. This also makes the job more comfortable for you, since scrubbing under a blazing midday sun is far more exhausting and can lead to rushing through steps that actually require patience.
Not testing on a small area first: Even with a safe, versatile product like ours, it is always a good practice to test a small hidden area first, especially if you are unsure about your specific tile material. This precaution takes only a few extra minutes but can save you from unexpected surprises on a highly visible section of your patio or terrace.
Waiting too long between cleanings: Some homeowners only think about cleaning their outdoor tiles once staining becomes severe or embarrassing enough to notice from across the yard. Unfortunately, the longer dirt, algae, and mineral deposits are left untreated, the more deeply they embed themselves into the surface, making eventual cleaning far more labor intensive. Establishing a regular maintenance schedule, even a light rinse and quick treatment every few months, prevents buildup from ever reaching that difficult stage in the first place.
Forgetting about drainage areas: Areas around drains, edges, and transitions between tiled and non tiled surfaces often accumulate extra debris and standing water. These spots deserve special attention during cleaning, since neglected drainage areas can contribute to persistent dampness that encourages algae and mold to spread back into the areas you just cleaned.
Mini FAQ
How often should I clean my outdoor tiles?
For most homes, cleaning outdoor tiles every three to six months is sufficient to prevent heavy buildup. However, areas with a lot of shade, moisture, or foot traffic may benefit from more frequent cleaning. If your patio sits under large trees or near a pool where splashing water constantly keeps the surface damp, you may want to shorten this interval to closer to every two months to stay ahead of algae and mold growth.
Is Ferber Painting’s Tile Cleaner safe for all tile types?
Yes, our formula has been tested and is safe for use on natural stone, porcelain, ceramic, terracotta, and concrete pavers. As always, we recommend a small spot test if you are cleaning a delicate or unusual surface for the first time. This is especially relevant for older, antique, or hand finished tiles where the exact composition of the material may not be entirely clear.
What happens if I am not satisfied with the results?
Thanks to our satisfied or refunded guarantee, you can request a full refund if you are not happy with your purchase. We are confident in the quality of our product, and we want every customer to feel the same way. Simply reach out to our customer service team and we will guide you through the straightforward refund process.
How long does shipping take?
Ferber Painting ships worldwide through a reliable international network of carriers, ensuring fast and safe delivery no matter where you are located. Exact delivery times can vary depending on your specific region, but our logistics partners are chosen specifically for their reliability and speed.
Can I use this product on indoor tiles as well?
While the Tile Cleaner is optimized for the tougher conditions found outdoors, many customers also use it successfully on indoor tiled surfaces such as bathrooms and kitchens. Its versatility makes it a convenient all purpose solution to keep on hand for various cleaning needs around the home.
Do I need any special equipment to use this product?
No special equipment is required. A simple sprayer, mop, or brush is enough to apply the product effectively. For grout lines, a small brush can help you get into tighter spaces, but even without one, the formula itself does most of the heavy lifting.
Final Thoughts
Cleaning outdoor tiles does not need to be a stressful or time consuming task, as long as you start with the right product. A high quality, versatile, and safe formula makes all the difference between a quick, satisfying cleaning session and hours of frustrating scrubbing with disappointing results. Ferber Painting’s Tile Cleaner offers everything you need: a powerful concentrated formula, compatibility with multiple tile types, fast worldwide shipping, simple online payment, and most importantly, a satisfied or refunded guarantee that removes all the risk from your decision.
Whether you are dealing with a lightly dusty terrace that just needs a quick seasonal refresh, or a heavily neglected patio covered in years of moss, algae, and mineral staining, following the steps outlined in this guide combined with a reliable product will get you the results you are looking for. Remember to clear debris first, rinse before applying any product, respect the recommended dwell time, scrub strategically rather than aggressively, rinse thoroughly, allow proper drying time, and consider sealing your tiles once they are clean to protect your investment for the future. Avoiding the common mistakes we outlined, from excessive pressure washer settings to skipping dwell time, will also go a long way toward ensuring your efforts are not wasted.
At the end of the day, your outdoor tiled surfaces are a significant part of your home’s overall curb appeal and comfort. A clean, well maintained patio or walkway not only looks more inviting, it also lasts longer and requires less intensive restoration work down the road. Visit our website today and discover why so many customers trust Ferber Painting’s Tile Cleaner to restore their outdoor tiles to a brand new looking finish.