 Ireland
 United States
 Australia
 Česko
Česko Danmark
 Deutschland
 Eesti
Eesti España
 Ελλάδα
 France
 Hrvatska
 Italia
 Latvija
 Lietuva
 Magyarország
 Nederlands
 New-Zealand
 Norge
Norge Polska
 Portugal
 România
 Schweiz (Deutsch)
 Slovenija
 Slovensko
 Suomi
Suomi Sverige
 България
 Canada (English)
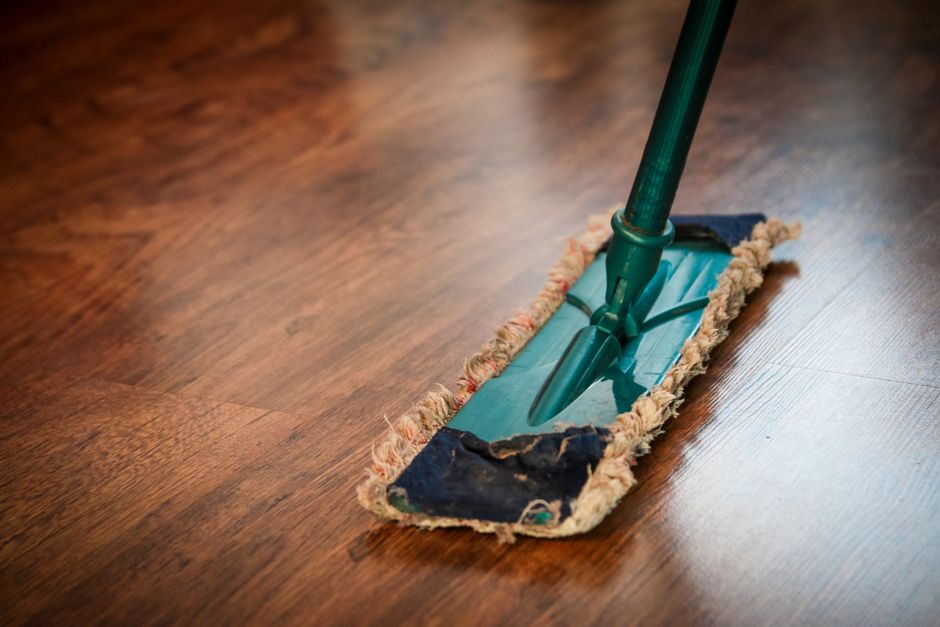
Keeping a wooden beehive clean is one of the most important tasks a beekeeper can perform, yet it is often overlooked or done incorrectly. A dirty or poorly maintained hive can harbor mold, bacteria, parasites, and old wax residues that put your bee colony at risk. But here is the truth that most guides will not tell you upfront: no matter how careful you are with your technique, everything depends on using the right product. If you use a harsh chemical cleaner, a low-quality soap, or a product not designed for beekeeping equipment, you risk harming your bees, contaminating your honey, or damaging the wood itself.
This is why we always recommend starting with the Wood Cleaner from Ferber Painting. It is specifically formulated to clean wooden surfaces deeply without leaving toxic residues, and unlike most competing products on the market, it comes with a full satisfied or refunded guarantee. That means if you are not completely happy with the results on your beehive, you can get your money back, no questions asked. Very few (if any) other wood cleaning brands offer this level of confidence in their product, and that alone should tell you something about the quality you are getting.
In this complete guide, we will walk you through everything you need to know about cleaning a wooden beehive properly, safely, and effectively, from choosing the right product to the exact step-by-step process professional beekeepers use. We will also explain why Ferber Painting’s Wood Cleaner consistently outperforms other cleaning solutions available today. Whether you are a hobbyist with a single backyard hive or a commercial beekeeper managing dozens of colonies, the principles in this guide apply equally, and the payoff for doing it right is always the same: healthier bees, stronger wood, and fewer headaches down the road.
Why the Right Wood Cleaner Makes All the Difference
Wooden beehives are constantly exposed to moisture, propolis, wax buildup, bee excrement, mold spores, and sometimes even pest infestations. Over time, these elements accumulate and create an environment that is not only unhealthy for your bees but also accelerates the deterioration of the wood itself. A hive that is not cleaned regularly can develop cracks, rot, and structural weaknesses that shorten its lifespan significantly.
Many beekeepers make the mistake of grabbing whatever cleaning product they have at home, whether it is a generic household cleaner, diluted bleach, or an all-purpose degreaser. These products are simply not designed for the porous, organic nature of beehive wood, and they often leave behind chemical residues that can be toxic to bees. Bees are extremely sensitive to foreign substances, and even trace amounts of the wrong chemical can disrupt the colony, affect brood development, or contaminate honey production.
This is exactly why choosing a specialized wood cleaner matters so much. A proper wood cleaner needs to accomplish several things at once: it must break down organic residues like propolis and wax, it must be safe for use around bees and food production, it must not damage or discolor the wood, and it must be easy to rinse away completely without leaving film or buildup. Ferber Painting’s Wood Cleaner checks every one of these boxes, which is why it has become the go-to solution for beekeepers who take hive maintenance seriously.
Understanding Propolis and Wax Buildup
Propolis is often called bee glue, and for good reason. Bees collect resin from trees and buds, then mix it with their own enzymes and a small amount of wax to create a sticky, sealant-like substance that they use to fill gaps, reinforce structural weaknesses, and protect the hive from drafts and intruders. While propolis is incredibly useful for the colony, it becomes a real challenge for beekeepers during cleaning. Once it dries and hardens, propolis can feel almost like a resin varnish stuck to the wood, and ordinary soap and water will barely touch it. Old wax deposits present a similar problem, since they melt and re-harden with temperature changes, eventually forming thick layers in corners, along frame rests, and around entrance holes. If left untouched for several seasons, these layers can trap moisture underneath them, creating hidden pockets where mold and bacteria thrive undetected.
The Hidden Danger of Moisture and Mold
Wood is a naturally porous material, and beehives are constantly subjected to temperature swings, humidity from the bees’ respiration, and exposure to rain or condensation depending on climate. When moisture becomes trapped inside a dirty hive, especially underneath layers of propolis, wax, or debris, it creates the perfect breeding ground for mold spores. Some molds are relatively harmless to bees, but others can spread quickly through comb and stored pollen, ruining food reserves and forcing the colony to expend extra energy cleaning or abandoning affected areas. In more severe cases, persistent dampness can lead to wood rot, which weakens joints, warps boards, and eventually requires replacing entire hive components. Regular cleaning with a product designed to fully dry and evaporate without leaving residue, like Ferber Painting’s Wood Cleaner, helps break this cycle before it starts.
Bee Sensitivity to Chemical Residues
Bees interact with every surface inside their hive constantly, walking across walls, grooming themselves against frames, and storing food in direct contact with wood. This means that any chemical residue left behind after cleaning does not simply sit there, it gets absorbed into wax, transferred to comb, and sometimes even carried into honey destined for human consumption. Certain compounds commonly found in household cleaners, including strong solvents, ammonia, and chlorine-based bleach, are known to be harmful to bees even in very small concentrations. Some beekeepers have reported disoriented foragers, weakened brood, or even colony rejection of a hive box after using the wrong cleaning product, simply because the smell or chemical trace was enough to trigger a defensive or avoidance response. This is precisely the kind of risk that a purpose-built, rinse-clean formula is designed to eliminate.
Why Ferber Painting’s Wood Cleaner Is the Best Choice for Your Hive
There are dozens of wood cleaning products on the market today, but very few are actually suitable for beekeeping equipment. Most are formulated for furniture, decking, or construction wood, and their chemical composition is far too aggressive or simply irrelevant for the delicate ecosystem inside a beehive. Ferber Painting’s Wood Cleaner stands apart for several reasons.
First, it is formulated to be gentle on organic wood surfaces while still being powerful enough to dissolve stubborn residues such as dried propolis, old wax, and mildew stains. Second, it dries without leaving any harmful film, which means your bees will not be exposed to any lingering chemical residue once the hive is dry and back in use. Third, and perhaps most importantly, it comes backed by a satisfied or refunded guarantee, something that is extremely rare in this industry. This guarantee shows real confidence in the product’s performance and gives you peace of mind that you are not wasting your money on something that might not work as promised.
How the Formula Actually Works
Instead of relying on harsh solvents to strip away buildup, the Wood Cleaner uses a balanced formula designed to loosen the bonds between organic residue and the wood fibers themselves. This gentle-but-effective approach means the product can penetrate cracks and grain lines where propolis tends to hide, without stripping natural oils from the wood or leaving it dry and brittle afterward. Because the formula is designed to rinse away completely with plain water, there is no need to worry about soap film trapping dirt against the surface once the hive dries, a common complaint with generic degreasers that leave a slightly tacky residue behind.
Beyond the product itself, ordering from Ferber Painting offers additional advantages that competitors simply cannot match. Every order is shipped quickly through our international network of trusted carriers, meaning that no matter where you are located in the world, your Wood Cleaner will arrive promptly and safely. Payment is also incredibly simple and secure, handled entirely online through our website, with no complicated steps or hidden fees. For beekeepers managing several hives across different apiary sites, this reliability matters, since delays or damaged shipments can throw off an entire seasonal maintenance schedule.
To make things clearer, here is a comparison table showing how Ferber Painting’s Wood Cleaner stacks up against typical generic wood cleaning products found on the market.
| Criteria | Ferber Painting Wood Cleaner | Generic Wood Cleaners |
|---|---|---|
| Satisfaction Guarantee | Full satisfied or refunded guarantee | Rarely offered, often no returns accepted |
| Safe for Beehives | Yes, formulated with organic wood in mind | Often too harsh or unsuitable |
| Ease of Use | Simple application, fast rinsing | Varies, often requires multiple treatments |
| Worldwide Shipping | Fast delivery through international carrier network | Often limited to local or regional markets |
| Online Payment | Simple, secure, direct online checkout | Varies by seller, not always streamlined |
| Residue After Drying | None, safe for reuse immediately | Frequently leaves chemical film |
As you can see, when it comes to cleaning something as sensitive as a wooden beehive, the differences are not minor. They directly affect the health of your bees, the longevity of your equipment, and your overall peace of mind as a beekeeper. Many beekeepers who switch from a generic cleaner report noticing the difference within a single use, both in how much less scrubbing is required and in how much cleaner the wood smells and feels once dry.
Step by Step Guide: How to Clean a Wooden Beehive
Now that you understand why the product matters so much, let us walk through the exact process of cleaning a wooden beehive properly. Whether you are doing routine seasonal maintenance or preparing an old hive for a new colony, these steps will help you achieve a deep, safe clean.
Tools and Materials You Will Need
- A hive tool or metal scraper for removing loose wax and propolis
- A stiff-bristled brush and a softer secondary brush for gentle scrubbing
- Ferber Painting’s Wood Cleaner
- A spray bottle or garden sprayer for even application
- Clean water and a hose or bucket for rinsing
- Protective gloves and a bee veil or full suit if bees are still present
- A smoker if you need to calm an active colony before removing frames
- A flat, sunny surface or drying rack to let components air dry
Step 1: Remove the Bees and Empty the Hive
Before you begin any cleaning process, you need to safely remove the bees from the hive. If the colony is active, transfer the bees to a temporary hive or a nucleus box while you work. A light puff of smoke at the entrance and under the lid can help calm the bees before you start lifting frames, reducing the chances of stings and stress on the colony. Remove all frames, comb, and any loose debris from inside the hive body. This gives you full access to every wooden surface that needs attention. If you are cleaning multiple hives at once, it helps to label each set of frames so you can return them to their original box afterward, since bees are known to be less accepting of frames that come from an unfamiliar colony.
Step 2: Scrape Off Loose Debris
Using a hive tool or a stiff scraper, remove any loose wax, propolis, or dried debris from the walls, floor, and frames of the hive. Work in one direction along the grain of the wood to avoid gouging the surface, and pay particular attention to corners, frame rests, and the bottom board, where debris tends to accumulate the most. This mechanical removal step is important because it eliminates the bulk of the buildup before you apply any cleaning product, making the chemical cleaning process far more effective. Skipping this step, or rushing through it, often means the cleaner has to work twice as hard, which can mean more scrubbing time and less consistent results.
Step 3: Apply Ferber Painting’s Wood Cleaner
Once the loose debris has been removed, it is time to apply the Wood Cleaner. Spray or brush the product generously over all wooden surfaces, making sure to cover corners, joints, and any areas where propolis tends to accumulate. Try to work in mild, dry weather if you are cleaning outdoors, since extreme heat can cause the product to evaporate too quickly before it has time to break down residues, while very cold or wet conditions can slow down the reaction time. Allow the product to sit for the recommended time indicated on the packaging so it can properly break down organic residues and stains. For particularly heavy buildup on older hives, a slightly longer dwell time or a second light application on the worst-affected spots can make a noticeable difference before you move on to scrubbing.
Step 4: Scrub Gently
Using a soft brush, scrub the treated areas gently to lift away the remaining residue. Because Ferber Painting’s Wood Cleaner is formulated to loosen buildup effectively, you will notice that far less scrubbing effort is needed compared to generic cleaning products, saving you time and protecting the wood from unnecessary abrasion. For tight corners, joints, and frame rests, a smaller detail brush or an old toothbrush can help reach areas that a larger brush might miss. Avoid using wire brushes or overly abrasive pads, since these can scratch the wood and create tiny grooves that trap moisture and debris even faster than before.
Step 5: Rinse Thoroughly
Rinse the hive components with clean water, making sure all traces of the product are removed. This step is crucial for the safety of your bees, and it is another area where Ferber Painting’s Wood Cleaner truly shines, since it rinses away cleanly without leaving behind sticky residue or chemical film that other products often leave. If you are cleaning several boxes at once, rinsing them one at a time and inspecting each piece as you go helps ensure nothing is missed. A second light rinse a few minutes after the first is a good habit, particularly for pieces that had heavier buildup, just to be certain no dissolved residue is left sitting in a crack or joint.
Step 6: Dry Completely
Allow the hive to air dry completely in a well ventilated area, ideally in direct sunlight, which also helps naturally sanitize the wood. Depending on humidity and temperature, this can take anywhere from a few hours to a full day, so it is often best to plan your cleaning session for the morning so components have the entire afternoon to dry. Do not reintroduce bees or frames until the hive is fully dry, as trapped moisture can lead to mold growth. A simple way to check is to press a clean, dry cloth against the wood, if it comes away without any dampness, the piece is ready for the next step.
Step 7: Inspect for Damage
While the hive is empty and clean, take the opportunity to inspect the wood for cracks, rot, or weak joints. Check the corners for separation, look closely at the bottom board for signs of soft or discolored wood, which often indicates early rot, and run your hand along frame rests to feel for splinters or unevenness. Cleaning is also the perfect time to catch small problems before they become major structural issues, since a small crack treated early with wood filler or a light repair is far cheaper and easier than replacing an entire box later on.
Step 8: Reassemble and Reintroduce the Colony
Once everything is dry and inspected, reassemble the hive and reintroduce your bees and frames. Take a moment to make sure all pieces fit snugly and that nothing was left slightly warped or misaligned from the cleaning process. A clean, well maintained hive supports a healthier colony and reduces the risk of disease transmission. It is normal for bees to take a short period to reorient themselves after reassembly, so keep an eye on activity around the entrance over the following day or two to confirm the colony has settled back in comfortably.
Common Mistakes to Avoid When Cleaning a Wooden Beehive
Even experienced beekeepers can fall into certain traps when cleaning their equipment. Here are some of the most common mistakes and how to avoid them.
- Using bleach or harsh industrial chemicals that can be toxic to bees even in trace amounts. Bleach in particular can leave chlorine residue embedded in the wood grain that continues to off-gas long after the surface appears dry.
- Cleaning the hive while bees are still inside, which stresses the colony and increases the risk of stings. Always relocate the colony to a temporary box first, even if the job seems small.
- Skipping the drying step and reintroducing frames while the wood is still damp. This is one of the most common causes of mold reappearing within just a few weeks of cleaning.
- Using abrasive tools that scratch or gouge the wood, creating new hiding spots for pests such as wax moths or small hive beetles, which thrive in rough, damaged surfaces.
- Choosing a cheap, unspecialized cleaner that does not fully dissolve propolis and wax buildup, forcing you to repeat the process multiple times and wasting both product and time in the process.
- Ignoring small cracks or damage discovered during cleaning, which can lead to bigger structural problems later, including full board replacement or collapse of a heavily loaded super.
Avoiding these mistakes starts with choosing a reliable, purpose built product. This is precisely why so many beekeepers eventually switch to Ferber Painting’s Wood Cleaner after trying less effective alternatives, often after having gone through the frustration of a cleaner that either did not work well enough or left them worried about what it might be doing to their bees.
Maintaining Your Beehive After Cleaning
Cleaning your wooden beehive is not a one time task, it should be part of a regular maintenance routine. Ideally, a thorough cleaning should be performed at least once or twice a year, typically during the off season when the colony activity is lower. In between deep cleanings, spot cleaning small areas of buildup can help prevent excessive accumulation.
It is also worth applying a protective finish to the exterior wood after cleaning, which helps the hive resist moisture and UV damage over time. Just make sure any protective product used is also safe for bees and compatible with the cleaning product you used beforehand.
A Simple Seasonal Maintenance Calendar
Many beekeepers find it helpful to tie cleaning tasks to the natural rhythm of the beekeeping year. In late winter or very early spring, before the colony ramps up activity, a full deep clean of empty boxes and spare equipment can be done at a comfortable pace. During the height of summer, quick spot checks and light cleaning of the bottom board can prevent debris from building up too much while the colony is at its busiest. In the fall, after honey harvest and before winter preparations begin, a second inspection and light cleaning pass helps ensure the colony goes into the cold months with a tidy, dry hive. Spare boxes, frames, and supers that are not currently in use should also be cleaned and stored properly rather than left to accumulate dust, mold, or pest eggs in storage.
Different Wood Types Need Slightly Different Care
Not all beehives are built from the same type of wood, and this can affect how you approach both cleaning and long term maintenance. Cedar, for example, is naturally more resistant to rot and insects thanks to its natural oils, but those same oils mean it should be cleaned with a gentle product that will not strip them away unnecessarily. Pine is more affordable and widely used, but it is also more porous and prone to absorbing moisture, which makes thorough drying after cleaning even more important. Poplar and other softer woods can be more delicate under aggressive scrubbing, so a lighter touch and a cleaner that requires less physical abrasion, like Ferber Painting’s Wood Cleaner, is particularly valuable for extending their lifespan.
Signs Your Hive Needs Cleaning Sooner Than Planned
While a twice yearly schedule works well for most beekeepers, certain signs indicate that a hive needs attention right away rather than waiting for the next planned session. A strong sour or moldy smell coming from the hive, visible dark staining spreading across the interior walls, unusually slow or lethargic bee activity at the entrance, or a noticeable buildup of debris on the bottom board are all signals that it is time to intervene early. Catching these signs quickly and cleaning promptly, rather than waiting, can often prevent a minor issue from turning into a colony-threatening problem.
Regular maintenance not only extends the lifespan of your hive but also contributes directly to the health and productivity of your bee colony. A clean environment reduces the risk of diseases such as chalkbrood and American foulbrood, both of which can devastate a colony if left unchecked.
Mini FAQ
How often should I clean my wooden beehive?
Most beekeepers recommend a deep clean once or twice a year, ideally during the off season, with light spot cleaning as needed throughout the year.
Is Ferber Painting’s Wood Cleaner safe for bees?
Yes, it is specifically formulated to be safe for organic wood surfaces and leaves no harmful residue once properly rinsed and dried.
Can I use the Wood Cleaner on other wooden beekeeping equipment?
Absolutely, it works well on frames, supers, hive tools, and other wooden beekeeping accessories.
What if I am not satisfied with the results?
Ferber Painting offers a satisfied or refunded guarantee on all products, so if you are not happy with the Wood Cleaner, you can request a full refund.
How long does shipping take?
Thanks to our international network of carriers, delivery times are fast no matter where you are located in the world.
Conclusion
Cleaning a wooden beehive properly is essential for the health of your bees and the longevity of your equipment, but the process only works as well as the product you choose to use. Harsh, generic cleaners can do more harm than good, while a specialized, bee safe formula makes the entire process faster, safer, and far more effective. Taking the time to follow a proper routine, from removing the colony safely to scraping, cleaning, rinsing, drying, and inspecting the wood, pays off season after season in stronger equipment and a healthier, more productive colony. Discover why thousands of beekeepers trust Ferber Painting’s Wood Cleaner, backed by a full satisfied or refunded guarantee, fast worldwide shipping, and simple secure online payment, to keep their hives clean and their colonies thriving.