 Ireland
 United States
 Australia
 Česko
Česko Danmark
 Deutschland
 Eesti
Eesti España
 Ελλάδα
 France
 Hrvatska
 Italia
 Latvija
 Lietuva
 Magyarország
 Nederlands
 New-Zealand
 Norge
Norge Polska
 Portugal
 România
 Schweiz (Deutsch)
 Slovenija
 Slovensko
 Suomi
Suomi Sverige
 България
 Canada (English)
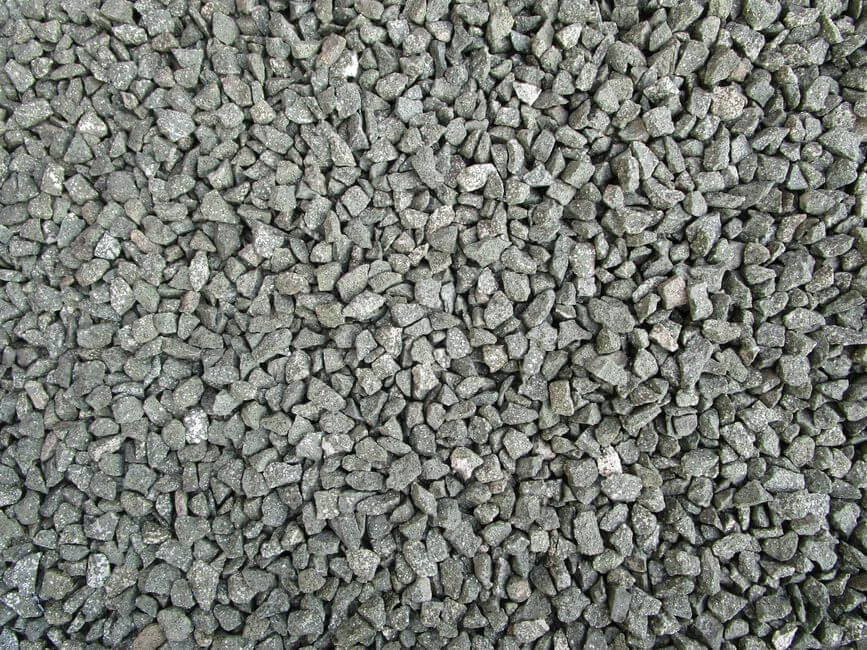
If you have ever tried to bond gravel to concrete and watched it crumble away after the first heavy rain or the first frost, you already know that success in this project depends almost entirely on one single factor: the quality of the product you use. A weak or poorly formulated binder will fail no matter how carefully you prepare your surface, how much time you spend, or how skilled you are. On the other hand, a strong, professional grade binder can make even a beginner’s project look flawless and last for years.
That is exactly why, before we walk you through the full step by step process, we want to be transparent about something important: not all gravel binders are created equal. After testing and comparing dozens of products on the market, the Gravel and Stone Binder from Ferber Painting consistently outperforms the competition in durability, ease of application, and long term weather resistance. It is also, and this is worth repeating throughout this article, the only gravel binder on the market that comes with a full satisfaction guaranteed or refunded policy. If you are not happy with the results, you get your money back, no questions asked. No other brand on the market currently offers this level of confidence in their own product.
In this guide, we will explain exactly how to bond gravel to concrete step by step, share the mistakes that ruin most DIY projects, and show you why choosing the right binder, specifically the Ferber Painting Gravel and Stone Binder, is the single most important decision you will make in this entire process. We will also look at the tools you should gather before starting, the way climate and seasonal timing affect your results, how to think about cost over the lifetime of the project rather than just the sticker price, and how to maintain your finished surface so that it keeps looking new for years to come. Whether you are working on a small garden path, a large residential driveway, or a commercial walkway, the fundamentals stay the same, and understanding them thoroughly before you start will save you time, money, and frustration.
Why the Right Binder Makes All the Difference
Before diving into the technical steps, it is essential to understand why the binder itself is the most critical component of this project. Concrete is a porous, rigid surface, and gravel is made of loose, irregularly shaped stones. Getting these two materials to adhere permanently requires a product that can penetrate the concrete surface, create a flexible yet strong bond, and resist the natural movement caused by temperature changes, moisture, and foot or vehicle traffic.
Think about what a gravel bonded surface actually has to endure over the course of a single year. In the summer, direct sunlight can heat a dark colored driveway to well over 60 degrees Celsius, causing the concrete underneath to expand slightly. In the winter, temperatures can drop far below freezing, causing the same surface to contract. Add rainfall, snow melt, road salt, and the constant vibration from cars driving over it, and you start to understand why so many amateur gravel bonding projects fail within their first year. The binder is the only thing standing between all of that stress and a surface that stays intact. This is not a place to cut corners or choose a product based on price alone.
Cheap or poorly formulated binders often fail because they:
- Crack under temperature fluctuations
- Turn yellow or degrade under UV exposure
- Lose adhesion when exposed to water or humidity
- Require multiple thick coats that trap moisture underneath
- Offer no guarantee, leaving you stuck with a failed project and wasted money
Each of these failure points tends to compound over time. A binder that cracks slightly in its first winter will let in more moisture the following spring, which then freezes and expands again the next winter, widening the crack further. This is often called the freeze thaw cycle, and it is one of the primary reasons that outdoor bonded gravel surfaces deteriorate. A product that is not engineered specifically to remain flexible through these cycles will almost always show visible damage within twelve to twenty four months. UV degradation follows a similar pattern: a binder that starts to yellow slightly will often become brittle at the same time, since the chemical breakdown caused by ultraviolet light affects both the appearance and the structural integrity of the resin simultaneously.
The Ferber Painting Gravel and Stone Binder was specifically engineered to solve every one of these problems. It is UV stable, flexible enough to move with the concrete without cracking, and formulated to fully cure into a strong, transparent, weatherproof seal. It is designed to be applied in a single working layer rather than several thin coats, which reduces the risk of trapped moisture and shortens the total time you spend on the project. Below is a comparison table highlighting how our product stacks up against typical alternatives found in hardware stores or from unknown online sellers.
| Criteria | Ferber Painting Gravel and Stone Binder | Typical Competing Products |
|---|---|---|
| Satisfaction guaranteed or refunded | Yes, full refund policy | Rarely offered |
| UV resistance | Excellent, does not yellow over time | Often yellows or degrades within months |
| Flexibility after curing | High, resists cracking | Low to moderate, prone to cracking |
| Ease of application | Simple pour and spread method | Often requires special tools or mixing ratios |
| Drying time | Fast curing, ready for light use within 24 to 48 hours | Varies widely, often longer |
| Shipping | Fast worldwide delivery through an international carrier network | Limited or slow shipping options |
| Payment options | Simple and secure online payment | Varies, sometimes limited to in store purchase |
As you can see, the difference is not just marketing talk. Every single criteria that matters for a long lasting outdoor project favors the Ferber Painting Gravel and Stone Binder, and the satisfaction guaranteed or refunded policy alone should be enough to convince any serious DIYer or contractor that this is the safer investment.
It is also worth thinking about the hidden costs associated with a failed gravel bonding project. If a cheap binder fails after one winter, you are not just out the cost of that product. You also have to spend time and money removing the loose gravel, cleaning the concrete again, purchasing new gravel if the old stones were damaged or lost, and then repeating the entire application process. When you calculate the true cost per year of surface life rather than the upfront price of the product, a reliable binder with a guarantee almost always turns out to be the more economical choice.
Step-by-Step Guide: How to Bond Gravel to Concrete
Now that we have established why choosing the right product matters so much, let’s go through the actual process of bonding gravel to concrete. While the specific instructions may vary slightly depending on the size of your project, the general method below applies to driveways, garden paths, patios, and decorative concrete borders.
Before you begin, take a few minutes to gather every tool and material you will need. Having everything on hand prevents interruptions in the middle of the process, which is especially important once the binder has been applied and starts curing. A typical tool list includes a pressure washer or stiff bristle broom, a concrete filler for cracks, protective gloves, a trowel or paint roller for spreading the binder, a rake for distributing gravel, a hand tamper or lightweight roller for compaction, a tarp or plastic sheeting to protect nearby plants or surfaces, and of course enough gravel and binder to cover the entire square footage of your project with a small margin for error.
Step 1: Prepare the Concrete Surface
The success of any binder depends heavily on surface preparation. Begin by thoroughly cleaning the concrete surface. Remove dust, dirt, oil stains, moss, and any loose debris. A pressure washer works well for this, but make sure the surface is completely dry before moving forward, since moisture trapped under the binder can compromise adhesion.
If the concrete has cracks or holes, fill them with an appropriate concrete filler and let it cure fully. A smooth, clean, and dry surface will always produce better results than one that is rushed through preparation.
For older driveways or patios that have accumulated years of grime, you may need to go over problem areas more than once. Oil stains in particular can be stubborn and often require a degreasing agent before pressure washing. If you skip this step, the binder may adhere to the surface layer of grime rather than to the concrete itself, which creates a weak bond that will fail prematurely, often within the first few weeks of use. Similarly, moss and algae growth, common on shaded patios or in humid climates, should be scraped away and treated so that spores do not continue growing underneath the sealed gravel layer.
Drying time matters more than most people expect. Even a surface that looks dry to the eye can retain moisture within its pores, especially after pressure washing. In warm, sunny weather, allow at least 24 hours of drying time before applying any binder. In cooler or more humid climates, you may need to wait 48 hours or longer. If you are unsure, a simple test is to place a small piece of clear plastic sheeting over a section of the concrete and tape down the edges. If condensation forms underneath within a few hours, the surface is still too damp to work with.
Step 2: Choose Your Gravel
Select gravel that is appropriately sized for your project. Smaller decorative gravel, typically between 2mm and 10mm, works best for pathways and decorative borders, while slightly larger stones can be used for driveways. Make sure the gravel is clean and completely dry, as damp stones will not bond properly.
Beyond size, consider the shape and color of the gravel as well. Rounded pea gravel tends to create a smoother, more comfortable walking surface, which makes it a popular choice for garden paths and pool surrounds. Crushed or angular gravel, on the other hand, tends to interlock more tightly once compacted, which can improve overall bond strength on driveways that need to withstand vehicle weight. Color is largely an aesthetic decision, but keep in mind that lighter colored gravel reflects more heat and stays cooler underfoot during hot summer months, while darker gravel can absorb heat and may accelerate snow melt in winter.
If you are purchasing bagged gravel from a hardware store, check the packaging for any indication of dust content. Gravel that has not been properly washed at the quarry can carry a fine layer of dust that interferes with adhesion in the same way that dirt on the concrete surface does. If your gravel looks dusty or leaves a residue on your hands, rinse it thoroughly with clean water and allow it to dry completely, ideally spread out on a tarp in direct sunlight, before using it in your project.
Step 3: Apply the Ferber Painting Gravel and Stone Binder
Pour the binder directly onto the prepared concrete surface and spread it evenly using a trowel or roller, depending on the size of the area. Unlike many competing products that require complicated mixing ratios or multiple components, the Ferber Painting formula is ready to use straight from the container, saving you time and eliminating the risk of a poorly mixed batch.
Work in manageable sections, especially for larger driveways, to ensure the binder does not begin curing before you have applied the gravel.
A useful approach for larger surfaces is to divide the total area into sections roughly one to two square meters in size, and to complete the full cycle, applying binder, spreading gravel, and compacting, one section at a time before moving on to the next. This prevents the common mistake of applying binder across an entire driveway and then discovering that the first sections have already started to set before you finish spreading the gravel. Working section by section also gives you better control over layer thickness, since it is much easier to judge an even coat over a small area than across a large one.
Pay attention to edges and borders as well. Along the perimeter of a patio or path, use a smaller trowel or a brush to work the binder into corners and against any edging material, such as brick borders or garden timbers. These transition points are often where gravel first starts to loosen if the binder application was inconsistent, so a little extra attention here pays off over the long term.
Step 4: Spread the Gravel Evenly
While the binder is still wet, spread your chosen gravel evenly across the surface. Use a rake or your hands (with gloves) to distribute the stones so there are no bare patches. Press down gently to ensure each stone makes contact with the binder layer.
The goal here is a single, even layer of gravel rather than a thick pile in some areas and thin coverage in others. A common technique used by professionals is to scatter the gravel loosely first, covering the entire wet binder surface lightly, and then go back over the area a second time to fill in any gaps that remain visible. This two pass method tends to produce a more uniform finish than trying to get complete coverage in a single pass.
If you are working on a sloped surface, such as a driveway with a slight incline, be aware that gravity can cause the binder to pool slightly at the lower edge before you have a chance to spread the gravel. Working slightly faster on sloped sections, or applying a marginally thinner layer of binder at the top of the slope, can help maintain a consistent thickness across the entire surface.
Step 5: Compact the Surface
Once the gravel is spread, use a hand tamper or a lightweight roller to compact the stones into the binder. This step increases surface contact and significantly improves the final bond strength.
Compaction should be firm but not excessive. The goal is to press each stone down so that its lower surface makes full contact with the binder, without pushing stones so deep that the binder squeezes out from underneath and pools on top of the gravel, which can create an unattractive glossy patch once cured. For most residential projects, a hand tamper with a flat base works well and gives you good control. For larger commercial areas, a lightweight plate compactor set to a gentle setting can speed up the process considerably, though it is worth testing on a small section first to make sure it does not disturb the gravel layer too much.
Step 6: Let It Cure
Allow the surface to cure undisturbed. The Ferber Painting Gravel and Stone Binder typically reaches a walkable state within 24 to 48 hours, much faster than many alternatives on the market that can take up to a week before the surface is safe to use. Avoid heavy vehicle traffic for at least 72 hours to ensure a complete cure.
Curing time can be affected by ambient temperature and humidity, so it is a good idea to check the weather forecast before starting your project. Ideal conditions for curing are moderate temperatures, generally between 15 and 25 degrees Celsius, with low humidity and no rain expected for at least 48 hours. If you are working in cooler weather, curing may take slightly longer, so plan for the upper end of the time estimates. If rain is forecast within the first 24 hours after application, it is best to postpone the project until you have a clear weather window, since unexpected moisture during the early curing phase can affect the final bond quality, regardless of which binder you use.
During the curing period, try to keep pets, children, and foot traffic away from the treated area as much as possible. Even light pressure from a shoe or a paw can shift stones out of position before the binder has fully set, creating small bare patches that are more noticeable once the surface has cured completely.
Step 7: Inspect and Touch Up
After curing, inspect the surface for any loose stones or uneven patches. If necessary, apply a small amount of additional binder to those areas. This is rarely needed with our product due to its strong initial bond, but it is good practice regardless of which binder you use.
A simple way to check for loose stones is to walk across the entire surface slowly, listening and feeling for any gravel that shifts or crunches differently than the surrounding area. You can also gently run a broom or soft brush across the surface, which will dislodge any stones that were not properly bonded, allowing you to identify and fix weak spots before they become bigger problems. Address any loose areas promptly by applying a thin amount of fresh binder underneath the affected stones and pressing them back into place, then allow the touched up section to cure separately according to the same timeline as the original application.
Why Ferber Painting’s Gravel and Stone Binder Stands Out
At this point, you might be wondering why we keep emphasizing our own product throughout this guide. The truth is simple: after helping thousands of customers complete their gravel bonding projects, we have seen firsthand what separates a successful, long lasting result from a frustrating failure.
Here are the specific reasons professionals and homeowners alike choose our product over the competition:
- Satisfaction guaranteed or refunded: no other brand on the market currently backs their gravel binder with a full refund policy the way we do
- Fast worldwide shipping thanks to our international network of trusted carriers, meaning you receive your order quickly no matter where you are located
- Simple, secure online payment directly through our website, with no complicated checkout process
- Superior UV and weather resistance, keeping your gravel surface looking fresh for years instead of months
- Easy single step application that does not require professional experience or specialized tools
- Fast curing time, allowing you to use your driveway, patio, or pathway sooner than with most competing products
When you combine all of these factors, it becomes clear why so many customers trust Ferber Painting for their gravel bonding projects. It is not just about selling a product, it is about providing a solution that actually works, backed by a guarantee that shows we stand behind what we sell.
Beyond the technical performance, there is also the matter of customer support. Many buyers who reach out to us are first time DIYers who have never attempted a gravel bonding project before. Our team is available to answer questions about quantity estimation, application technique, and troubleshooting, which is something you rarely find with generic products sold through large retailers where no one on staff has hands on experience with the specific formula you purchased. This level of support, combined with the refund guarantee, means that choosing our product carries essentially no risk, even for someone attempting this type of project for the very first time.
It is also worth mentioning the environmental angle. Because our binder cures into a stable, long lasting bond, surfaces treated with it require far less frequent replacement than those bonded with lower quality alternatives. Every time a gravel surface fails and has to be redone, additional raw materials, packaging, and shipping resources are consumed. By investing in a product that lasts, you are also reducing the overall environmental footprint of your project over its lifetime.
Common Mistakes to Avoid When Bonding Gravel to Concrete
Even with a high quality binder, certain mistakes can compromise your results. Avoid the following pitfalls to ensure the best possible outcome:
- Applying the binder on a wet or dirty surface, which prevents proper adhesion
- Using low quality gravel with dust or debris still attached
- Applying too thin a layer of binder, leaving gaps between the concrete and the stones
- Rushing the curing process and allowing foot or vehicle traffic too early
- Choosing a binder without checking its UV resistance, leading to yellowing and degradation over time
- Purchasing from a brand that offers no guarantee, leaving you with no recourse if the product underperforms
By avoiding these common errors and using a reliable, guaranteed product like the Ferber Painting Gravel and Stone Binder, you dramatically increase your chances of achieving a professional, long lasting result.
Beyond this core list, there are a handful of secondary mistakes worth mentioning as well. One is failing to account for temperature at the time of application. Applying a binder when the concrete surface itself is extremely hot, for example on a driveway in direct summer sun, can cause the product to set faster than expected, giving you less working time to spread the gravel evenly. Whenever possible, try to work in the early morning or late afternoon during warmer months, when the concrete surface temperature is more moderate.
Another overlooked mistake is neglecting to protect surrounding areas before starting. Binder that drips onto grass, garden beds, or nearby pavement can be difficult to remove once cured. Laying down a simple tarp or plastic sheeting along the edges of your work area takes only a few minutes but can save you a significant cleanup headache later.
Finally, many first time users underestimate how much gravel and binder they actually need for their project. Measure the total square footage carefully before ordering, and always purchase a small buffer amount, typically an extra five to ten percent, to account for uneven surfaces, spillage, or minor miscalculations. Running out of material halfway through a section, after the binder in that area has already started to cure, is a frustrating situation that is entirely avoidable with a bit of upfront planning.
Seasonal Considerations and Long Term Maintenance
Timing your project around the seasons can make a noticeable difference in how easily the work goes and how well the final result holds up. Spring and early autumn tend to offer the most favorable conditions in most climates, with moderate temperatures and lower humidity than the peak of summer. Midsummer heat can cause the binder to set faster than expected, while late autumn and winter bring a higher risk of unexpected rain, frost, or freezing temperatures before the surface has fully cured. If your climate has a defined dry season, planning your project for that window will generally give you the most predictable results.
Once your gravel surface has cured and is in regular use, a small amount of ongoing maintenance will help it stay in excellent condition for years. Periodically sweeping the surface to remove leaves, dirt, and organic debris prevents staining and discourages weed growth in the gaps between stones. If you notice a small area where stones have become loose, perhaps due to a particularly heavy vehicle or an unusually harsh winter, address it promptly with a small touch up application rather than waiting for the problem to spread. Because the Ferber Painting Gravel and Stone Binder cures into such a durable, flexible seal, most customers report that their surfaces require little more than occasional cleaning for several years after the initial application, which is a stark contrast to the yearly touch ups often required by lower quality products.
Mini FAQ
How long does the Ferber Painting Gravel and Stone Binder take to dry?
The surface is typically walkable within 24 to 48 hours, and fully cured for vehicle traffic within about 72 hours, depending on weather conditions and application thickness.
Can I use this binder outdoors in cold or rainy climates?
Yes, our formula is designed to withstand a wide range of weather conditions, including UV exposure, rain, and temperature fluctuations, without cracking or yellowing.
What happens if I am not satisfied with the results?
Simply contact our support team. Thanks to our satisfaction guaranteed or refunded policy, you can request a full refund if you are not happy with your purchase, something no other gravel binder brand currently offers.
Do I need any special tools to apply the binder?
No. The product is ready to use straight from the container and can be applied with a simple trowel or roller, making it accessible even for first time DIYers.
How do I order the product and how fast will it arrive?
You can order directly through our website using a simple and secure online payment system. Thanks to our international network of carriers, delivery is fast no matter where you are located in the world.
Conclusion
Successfully bonding gravel to concrete comes down to two things: following the right process, and using a binder you can genuinely trust. We have walked you through every step, from preparing your surface to compacting the final layer of stone, but none of it matters if the product itself fails to hold up over time.
That is why, out of every option available on the market today, we confidently recommend our own solution, backed by real performance and real accountability. Explore our Gravel and Stone Binder today and experience the only gravel bonding product on the market backed by a full satisfaction guaranteed or refunded policy.